
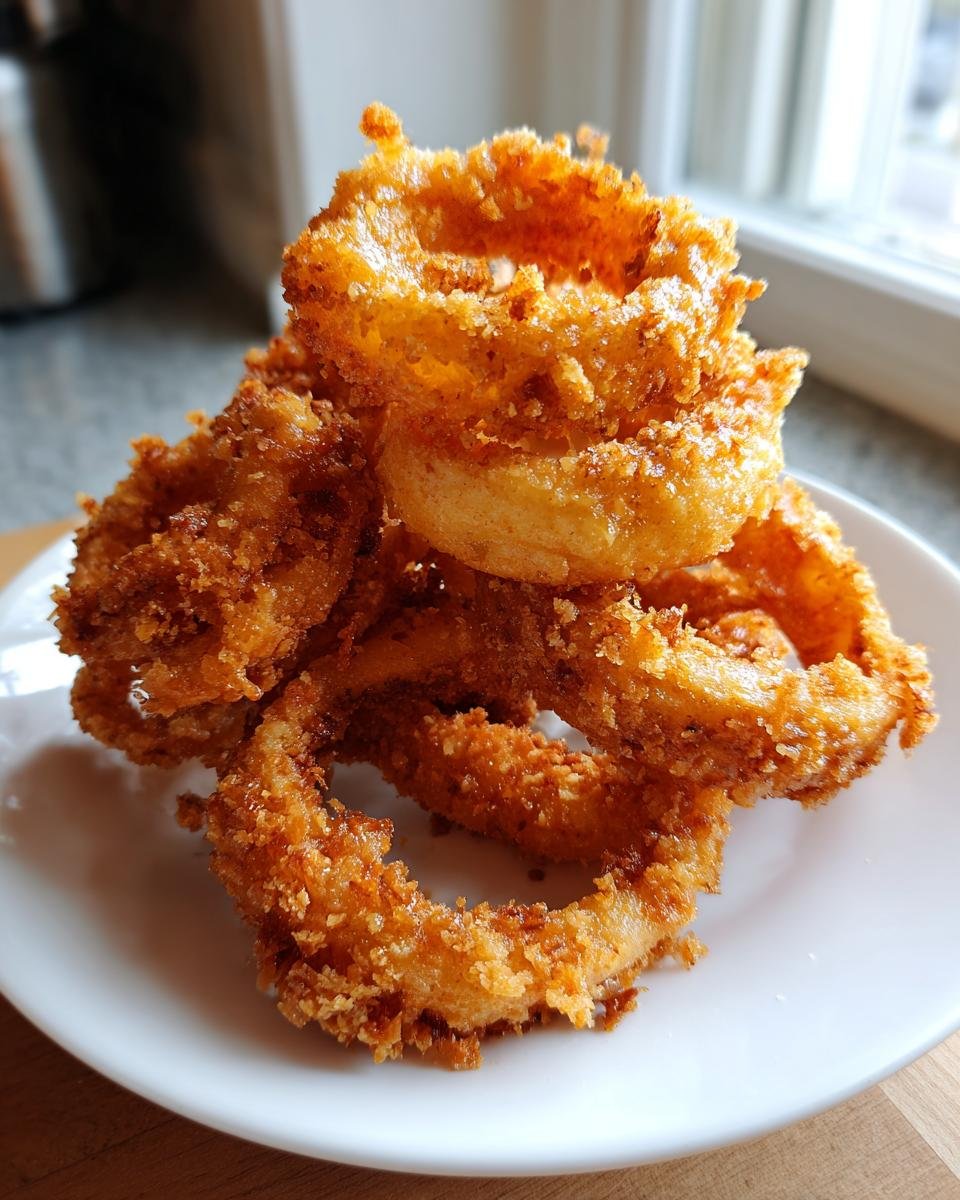
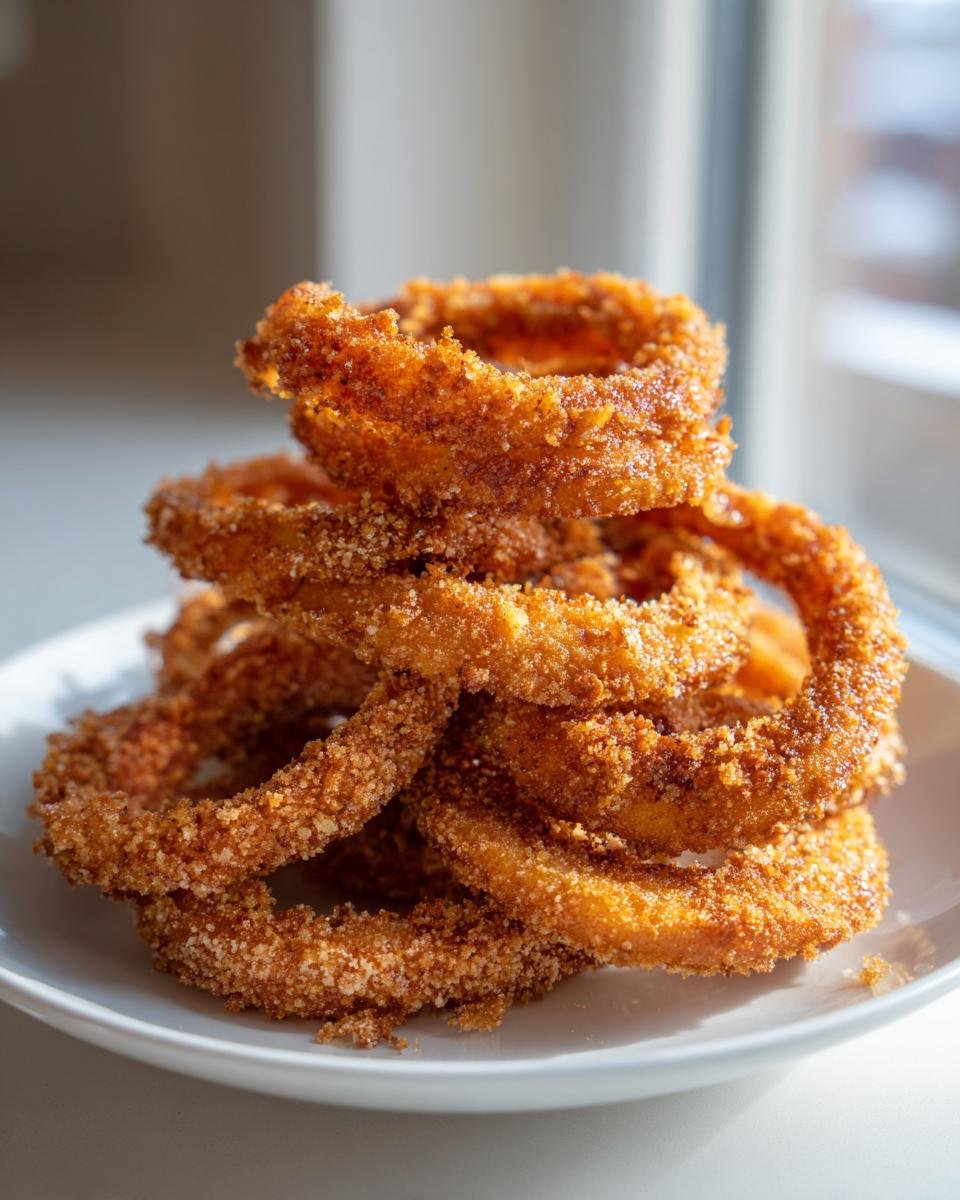
When I think about real comfort food, nothing beats that satisfying crunch of a perfectly fried onion ring. Forget those sad, soggy things you sometimes get out! We are talking about seriously crispy rings here. My secret? It’s actually way simpler than you think. I perfected this batter consistency after years of trying to beat diner crispiness, and I’m telling you, this recipe for Tennessee Onions rings is the one that stuck.
This recipe strips away all the confusing steps and gets you straight to that golden, salty crunch that we all crave. Seriously, you only need everyday pantry staples, and you’ll have the crispiest fried onions ready in under 30 minutes. Who needs complicated batters when you have a few simple rules?
Why You Will Love These Simple Tennessee Onions Rings
Honestly, what is not to love? When you need a snack fast, these hit the spot every single time. I’ve listed out why I keep this as my go-to recipe below:
- They are seriously fast! From slicing to snacking takes less than 30 minutes total—perfect for a weeknight craving.
- The texture is the star: that ideal crunch that doesn’t absorb a ton of oil, thanks to the breadcrumb finishing coat.
- The flavor is classic savory goodness—just enough salt, pepper, and paprika in the flour to make them addictive.
- You likely have every single ingredient in your kitchen right now, so no last-minute trips to the store needed! If you love these, be sure to check out my recipe for Amish Onion Fritters for a different kind of onion delight.
They’re just so much better than anything frozen, I promise you!

Essential Ingredients for Perfect Tennessee Onions Rings
Listen, the magic in this recipe isn’t a secret spice blend; it’s about treating your ingredients right, especially those onions. Since we’re aiming for that classic, simple crunch, precision matters when measuring the dredge. Don’t just eyeball the flour! Everything needs to be ready to go before the oil even heats up, trust me on that one. We set up three stations, just like you would for dredging chicken, to ensure every ring gets that perfect three-layer coating.
If you end up making a batch and need a classic dipping sauce, my recipe for Homemade Ketchup is surprisingly easy and tastes miles better than anything from the store.
For the Tennessee Onions Rings Batter
Here are the exact measurements I use. I always grab my cups and spoons and measure them **not leveled**—a tiny bit extra flour really helps set that first coat!
- 2 large yellow onions, peeled and sliced into 1/4-inch thick rings. This thickness is non-negotiable for that perfect bite!
- 1 cup all-purpose flour (make sure this is measured right!)
- 1 teaspoon salt
- 1/2 teaspoon black pepper
- 1/2 teaspoon paprika (smoked or sweet, depending on your mood that day)
- 1 cup milk
- 2 large eggs
- 1 cup breadcrumbs (plain, basic crumbs work best here)
Step-by-Step Instructions for Crispy Tennessee Onions Rings
Alright, this is where the action happens! Getting the steps right is the difference between a soggy mess and something you want to grab just one more of. We need three separate bowls set up, and we need to keep our hands moving quickly but cleanly. If you follow this process exactly, those rings are going to hold that coating perfectly tight.
Preparing the Onions and Dredging Station
Take those beautiful 1/4-inch slices you made and gently separate them into individual rings. You don’t want clumps; you want rings that can be individually coated. Now, get your three stations ready. In Bowl One, whisk together your flour, salt, pepper, and paprika until everything looks perfectly uniform—that’s your dry grip!
Bowl Two is your wet bath: whisk the milk and the two eggs until they are completely combined. No streaks of egg white allowed! And Bowl Three just gets dumped the plain breadcrumbs right into it. Make sure all three bowls are within easy reach of your frying station.
Achieving Maximum Crispiness with Tennessee Onions Rings
This is the layering sequence, and you can’t skip a step! First, take an onion ring and toss it completely in the flour mixture. Shake off any major excess—we want a light dusting to help the wet stuff stick. Next, dip that floured ring straight into the wet egg/milk bath, letting the extra drip off for just a second.
The final step makes all the difference for crispy Tennessee Onions Rings: coat it really well in the breadcrumbs. Press them on if you have to! Now, here’s my big secret: once they are fully coated, toss them onto a rack or plate and pop them in the freezer for about 15 minutes. Chilling that coating solidifies it before it hits the hot fat. An expert tip? Make sure your oil temperature is locked in. If it’s too cool, the coating absorbs oil like a sponge!
Deep Frying the Tennessee Onions Rings to Golden Perfection
We need a generous amount of neutral oil—about two inches deep in your pot—heated up precisely to 375°F (190°C). You absolutely must use a thermometer for this part; guesswork leads to burnt breading and raw onion centers. Once it’s hot, drop your rings in, but only a few at a time. Don’t crowd the pot! Crowding drops the oil temperature instantly, and that means soggy rings. Fry them for about 2 to 3 minutes per side until they are a deep, gorgeous golden brown color. Scoop them out carefully with a slotted spoon and let them drain on paper towels immediately. Get ready, because they need to be served hot!
If you’re ever craving more dipping sauce inspiration, you have to check out this recipe for Blooming Onion Sauce!
Tips for the Best Tennessee Onions Rings Every Time
Even with a recipe this simple, a few little tricks mean the difference between a good onion ring and truly championship-level crispy fried onions. These are the things I learned over trial and error—don’t repeat my mistakes!
- Oil Temperature is Non-Negotiable: Seriously, don’t even bother if you don’t have a thermometer. If the oil is below 350°F, the breadcrumbs soak up grease. If it’s too hot, the outside burns before the center of the Tennessee Onions ring softens up. Aim for that sweet spot: 375°F.
- The Double Chill Pro Tip: I mentioned chilling them for 15 minutes right after breading, but if you have time, try chilling them *twice*. Coat them, chill for 15 minutes, then give them a quick brush of egg wash, and toss them back into the breadcrumbs for a second coat. Then chill them for another 15 minutes. Wow! They come out almost impervious to sogginess.
- Use the Right Oil: Since we are adding a little spice to our dredge, we want a neutral oil flavor to shine through. I always grab canola oil or peanut oil. Olive oil has too much flavor and usually smokes at these high frying temperatures. For more classic, hearty sides, check out my secrets for that Old Fashioned Recipe collection!
- Don’t Overfry: That 2 to 3 minute window is about right for 1/4-inch slices. They should be done when they look deeply golden brown. If you leave them in longer trying to get them darker, they start burning the spices in the coating, and trust me, nobody likes bitter onion rings.
Serving Suggestions for Your Tennessee Onions Rings
Okay, so these rings are amazing all by themselves, lightly salted right out of the fryer, but honestly, they’re just begging for a good dip! You can’t serve incredible homemade onion rings without some killer sauce on the side, right? I like to keep things spicy and tangy to cut through that rich fried flavor.
My absolute favorite thing to pair these with, especially if I’m serving them as a snack when friends drop by, is a creamy, slightly spicy dip. I usually whip up a batch of my homemade dipping sauce. If you’re feeling adventurous, you can try that simple recipe for Homemade Chili Garlic Sauce—it’s got a little kick that makes the savory onions sing!
If you’re making these as a side dish instead of just a snack, they go perfectly alongside a big, juicy classic cheeseburger, or honestly, they’re a fantastic companion to a pulled pork sandwich. But the key takeaway here is the dip: don’t just settle for ketchup! A creamy ranch or a bright comeback sauce makes all the difference when you’re enjoying your crispy Tennessee Onions Rings.
Storage and Reheating Tennessee Onions Rings
Look, I know these Tennessee Onions Rings are meant to be devoured the second they come out of the hot oil, but let’s be real—sometimes you just can’t eat the whole batch! If you have any leftovers, you have to treat them right, otherwise, they turn into sad, floppy circles overnight. Nobody wants that. We need to treat crispy fried things with respect.
First things first: storage. Make sure the onion rings are completely cooled down before you put them away. If you seal them up while they are still warm, the trapped steam is going to make that beautiful breadcrumb coating go soggy instantly. Once they are totally cool, put them in an airtight container or a zip-top bag. You can keep them on the counter for just a few hours, but honestly, if you want them to last longer than that, pop them straight into the fridge. They’ll be good for about two days this way, tops.
Now, the reheating part is crucial. You absolutely cannot—I repeat, **cannot**—put these in the microwave. The microwave heats the moisture inside the onion, turning the outside instantly gummy. We need to bring back that beautiful crunch!
Here are the two methods I swear by for reviving leftover onion rings:
- The Oven Method: This is my favorite if I have a decent batch. Preheat your oven to about 400°F (200°C). Lay the rings out in a single layer on a baking sheet. You can put a little wire rack on the sheet if you have one—that helps the air circulate underneath. Bake them for about 8 to 10 minutes. Keep an eye on them, but they should crisp right back up and taste almost homemade again.
- The Air Fryer Method: If you have an air fryer, this is faster! Set it to about 375°F (190°C) and toss the rings in for maybe 5 minutes. Give them a little shake halfway through. This method works wonders for getting that deep-fried texture back without adding more oil.

The goal is just to dry out the crust again without overcooking the onion inside. If you manage to save any, they are totally worth the 10-minute revival effort!
Frequently Asked Questions About Making Tennessee Onions Rings
I always get so many questions after people try these rings for the first time—usually because they can’t believe how easily they came together! Dealing with frying can be tricky, so I’m happy to clear up anything that’s still fuzzy for you. If you’re looking for even more expert advice on getting that perfect crunch, I wrote a whole piece on two secrets for crispy homemade deep-fried onion rings!
Can I use sweet onions instead of yellow onions for these Tennessee Onions Rings?
You certainly can! Yellow onions are my preference because they have a great balance—they aren’t too sweet and they hold their shape really well when fried, which is key for those perfect, intact rings. If you use sweet onions, like Vidalia, they will be much sweeter and might brown a little faster because of the higher sugar content. Just watch your oil temperature extra closely if you go that route. They are delicious, just slightly different!
What is the secret to making the fried onions extra crispy?
It’s a two-part combination, honestly. Everyone focuses on the batter, but I think the most important step for truly crispy fried onions is the chilling time! You need that 15 minutes in the freezer after you’ve done the final breadcrumb coating. It sets the breading so it adheres right to the onion when it hits the hot oil, instead of just sloughing off when it sizzles. Pair that with maintaining that 375°F oil temperature, and you’ve got success!
Estimated Nutritional Data for Simple Tennessee Onions Rings
Okay, let’s talk just a tiny bit about the nutrition—because let’s be honest, these are a treat, not a daily wellness staple! Fried food requires a little bit of respect when it comes to what we put into our bodies, but since these Tennessee Onions Rings are made in small batches with simple, fresh ingredients, they aren’t nearly as heavy as that frozen stuff.
I pulled these numbers based on my standard ingredient list, but I always like to give you a heads-up: frying oil will affect these numbers dramatically depending on how long you keep it hot and if the rings absorb more or less fat. These estimates are based on a serving size of about 6 rings.
Here is the basic breakdown of what you can expect:
- Serving Size: 6 rings
- Calories: 280
- Fat: 15g (Remember, this includes the oil absorbed during frying!)
- Saturated Fat: 3g
- Trans Fat: 0g (Huge win here—no funky stuff!)
- Sodium: 350mg (This is why you have to taste before you reach for the salt shaker!)
- Carbohydrates: 30g
- Sugar: 5g (Mostly from the onion itself!)
- Protein: 6g
I always say the best way to keep the nutrition profile in check is to make sure your oil is hot enough (so they cook fast and absorb less fat!) and to skip soaking them in sauce all day. Enjoy them right away for the best results!
Share Your Crispy Tennessee Onions Rings Experience
Okay, friends, that’s the whole process! You’ve got the recipe, you’ve got the temperature checks, and you know the trick about chilling the coated rings before they hit the oil. Now it’s your turn to get into the kitchen and make some crispy magic happen!
I’m so excited for you to try these simple Tennessee Onions Rings. Once you pull that first batch out—golden brown and sizzling!—I really, really want to hear all about it. Did you stick to the classic salt and pepper, or did you sneak in some cayenne pepper to the flour mix?
Please don’t be shy! Leave a rating right below this section—let me know from 1 star (oof, maybe rookie mistake somewhere?) up to 5 stars (pure, golden perfection!). Tell me how they tasted, how quickly you devoured them, and what classic Southern dipping sauce you paired them with. Did you use the ketchup recipe I mentioned earlier, or did you go rogue?
If you snap a picture of your beautifully crispy batch, tag me on social media! Seeing your results truly makes my day, and it helps other home cooks feel confident trying out this simple recipe. Happy frying, everyone!
Print
Simple Tennessee Onion Rings
- Total Time: 25 min
- Yield: 4 servings 1x
- Diet: Vegetarian
Description
A straightforward recipe for crispy, savory onion rings using fresh onions.
Ingredients
- 2 large yellow onions
- 1 cup all-purpose flour
- 1 teaspoon salt
- 1/2 teaspoon black pepper
- 1/2 teaspoon paprika
- 1 cup milk
- 2 large eggs
- 1 cup breadcrumbs
- Vegetable oil for frying
Instructions
- Slice onions into 1/4-inch thick rings and separate them.
- In one bowl, mix flour, salt, pepper, and paprika.
- In a second bowl, whisk together milk and eggs.
- In a third bowl, place breadcrumbs.
- Dip each onion ring first into the flour mixture, shaking off excess.
- Dip the floured ring into the milk and egg mixture.
- Coat the ring thoroughly with breadcrumbs.
- Heat about 2 inches of vegetable oil in a deep pot to 375°F (190°C).
- Fry the rings in batches until golden brown, about 2-3 minutes per side.
- Remove rings with a slotted spoon and drain on paper towels.
- Serve immediately.
Notes
- For extra crispiness, chill the coated rings for 15 minutes before frying.
- Use a neutral oil like canola or peanut oil for frying.
- Prep Time: 15 min
- Cook Time: 10 min
- Category: Side Dish
- Method: Deep Frying
- Cuisine: American
Nutrition
- Serving Size: 6 rings
- Calories: 280
- Sugar: 5
- Sodium: 350
- Fat: 15
- Saturated Fat: 3
- Unsaturated Fat: 12
- Trans Fat: 0
- Carbohydrates: 30
- Fiber: 2
- Protein: 6
- Cholesterol: 50
Keywords: onion rings, fried onions, southern side dish, crispy rings, snack