
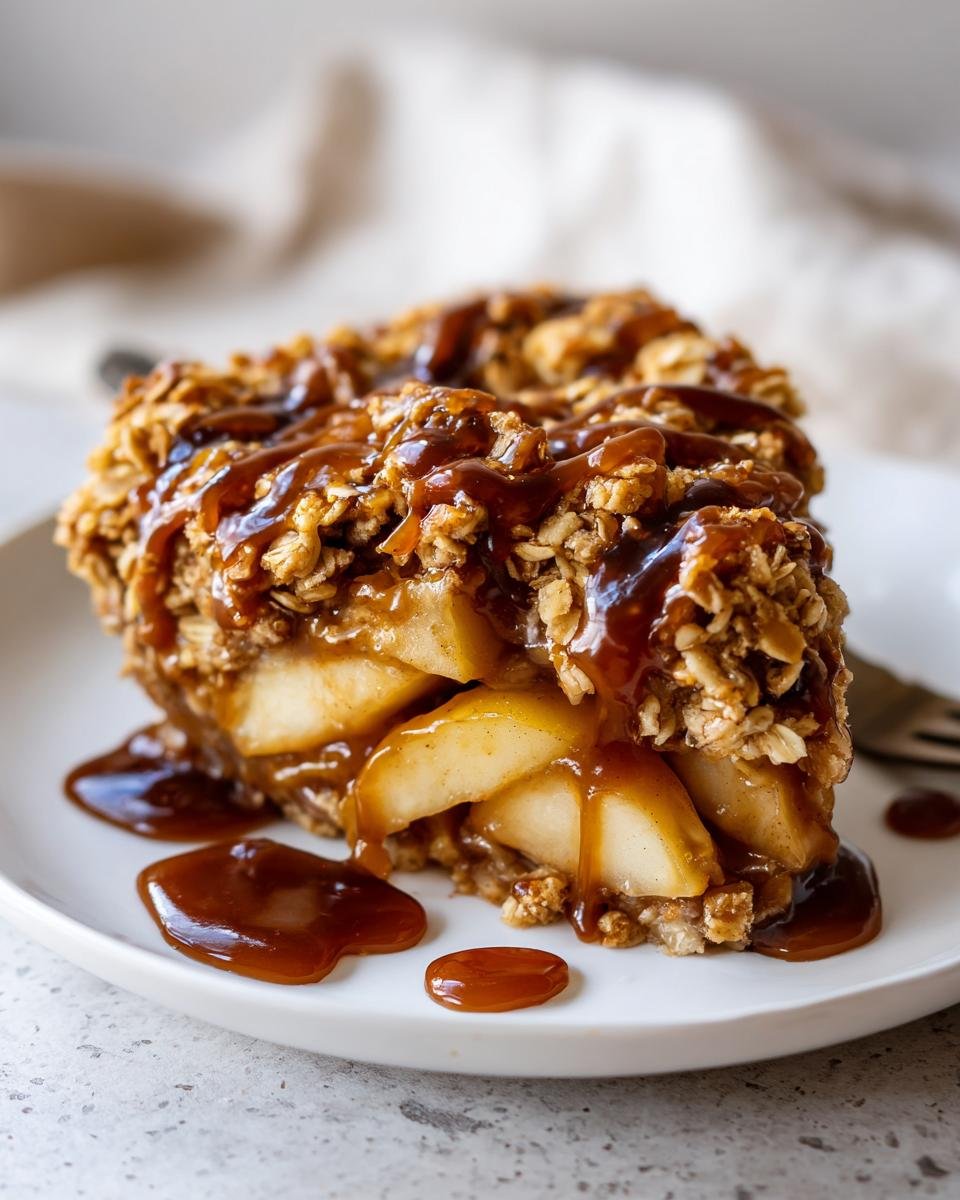
Listen, the moment the air starts turning crisp outside, my oven starts smelling like heaven. Forget pie—we are going straight for the crunchiest, coziest dessert there is! I have tried frankly too many apple desserts in my life, but this recipe, this gorgeous **Salted Caramel Apple Crisp**, is the absolute winner. It’s not complicated, but it hits that perfect sweet spot. You get the brightness of tart apples fighting just right against a thick, gooey river of salted caramel, all crowned with a topping that shatters perfectly when you poke it.
This particular combination became legendary at our cabin trips up north. It’s the kind of dish where everyone gathers around the table, armed with spoons, waiting for that first scoop. Trust me when I say that once you try this version, you won’t look back at plain crumble recipes. If you’re looking for something foolproof and absolutely delicious, check out my favorite basic recipe for inspiration on basic crumbles here: my favorite apple crumble. But stick with this one if you want that salted caramel magic!
Gathering Ingredients for Your Salted Caramel Apple Crisp
Okay, listen up, because the quality of our ingredients really dictates how amazing this crisp turns out. Since the apples are the star, you want something that holds its shape and gives you that necessary tartness to slice through the richness of the caramel. I live and die by Granny Smith apples here, or maybe Honeycrisp if I’m feeling fancy. We aren’t messing around with the topping either; cold butter is the absolute secret handshake for that crumbly texture you want!
Don’t forget that we are using two different kinds of sugar—one for the apples and one for the topping—and that makes a big difference in texture and moisture retention. If you want to peek at how different fruits compare, check out this article on fruit sugar content! The Surprising Sugar Content of Fruits
For the Apple Filling (The Heart of the Salted Caramel Apple Crisp)
- 6 medium apples (like Granny Smith or Honeycrisp), peeled, cored, and sliced
- 1/4 cup granulated sugar
- 1 tablespoon all-purpose flour
- 1 teaspoon ground cinnamon
- 1/4 cup salted caramel sauce (use the good stuff!)
See how little sugar we use on the apples? That’s intentional. We want the tartness to shine through before the caramel hits. The tablespoon of flour helps thicken up those apple juices so you get a nice, thick sauce instead of watery soup at the bottom of the dish.
For the Salted Caramel Crumble Topping
- 1 cup all-purpose flour
- 1/2 cup packed light brown sugar
- 1/2 cup rolled oats (use the old-fashioned kind, not instant!)
- 1/2 cup (1 stick) cold unsalted butter, cut into small pieces
- 1/4 teaspoon salt
The brown sugar here adds that deep, molasses note that just sings next to the cinnamon. And I can’t stress enough: the butter for the topping *must* be cold and cut into little chunks. That’s what keeps the topping from becoming heavy dough and ensures you get those beautiful, crunchy peaks when it bakes up.
Step-by-Step Instructions for the Best Salted Caramel Apple Crisp
This is where the magic happens! It’s really straightforward, but paying attention to a few small details means you skip the soggy bottom and get that ultimate crisp texture everyone swoons over. Remember, we want layers of flavor and texture here, not just mush. You can see how simple this is compared to fooling around with pastry dough—it’s almost a dump cake, but definitely way more exciting! These dump cakes are fun, but this crisp just feels more seasonally appropriate.
Preparing the Apples and Oven for the Salted Caramel Apple Crisp
First things first, get that oven warming up to 375 degrees Fahrenheit (190 Celsius). While it heats, lightly grease your 8×8 baking dish. Don’t skip this part, or you’ll be scraping caramelized sugar off the bottom later! Now, grab a big bowl. Toss those sliced apples—make sure they are sliced okay, not chunky—with the small amount of granulated sugar, that tablespoon of flour, and all that cinnamon. Mix it gently until everything looks nicely coated. Spread those spiced apples out evenly across the bottom of your prepared dish. This layer needs to look inviting!

Making the Salted Caramel Crumble Topping
Time for the crunchy stuff! In a separate bowl, we mix up the dry topping ingredients: the main cup of flour, the brown sugar, the oats, and that little pinch of salt. Now, here comes the essential part: cutting in the butter. Make sure your butter pieces are cold! Use a pastry blender if you have one, but honestly, my fingers work just as well. You just sort of squash and rub the cold butter right into the dry ingredients. Stop when the mixture looks like coarse, uneven crumbs. Don’t overdo it until it looks like wet sand; we want distinct little clumps!
Assembly and Baking Your Salted Caramel Apple Crisp
Okay, nearly done! Take that beautiful salted caramel sauce and drizzle it right over the top of your apples. Don’t worry about perfect coverage; a little randomness is good for flavor distribution. Then, take your coarse crumble topping and sprinkle it generously and evenly over everything. Don’t press it down! Bake this beauty for about 35 to 45 minutes. You’re looking for two things: the topping should be deep golden brown, and if you pierce the apples near the center with a fork, they should feel tender. Crucially, let it rest on the counter for a good 15 minutes when it comes out. Seriously, don’t skip the rest; it lets the juices settle.
Expert Tips for a Perfect Salted Caramel Apple Crisp
I love that this recipe is naturally forgiving, but a couple of tricks I picked up over the years really guarantee a show-stopper every time. If you notice halfway through baking that the topping is getting almost too dark—maybe your oven runs hot, or you’ve got a lot of sugar in your caramel—don’t panic! Just grab a loose sheet of aluminum foil and tent it over the dish. This protects the crunch without trapping all the steam, letting the apples finish cooking underneath.
Another thing I always tell people is about the caramel itself. While store-bought works in a pinch, if you use a caramel sauce that you made yourself and used a flakier sea salt, the flavor payoff is huge. The flakes give you tiny bursts of saltiness that plain table salt in the topping just can’t replicate!
If you want to talk apples again, always err on the side of tartness. A crisp needs that sharp bite to balance the two layers of sugar. If you only have sweet apples on hand, I toss them with an extra tiny squeeze of fresh lemon juice—it wakes everything up. Honestly, after making this about a hundred times, the crisp topping is the real MVP, so treat those cold butter chunks right!
If you want to read more about general crumble techniques, you can check out some crossover tips in my other post on making a great crumble. It’s all about that texture!
Variations on the Classic Salted Caramel Apple Crisp
You know I usually stick close to the recipe—Grandma always said if it ain’t broke, don’t fix it, right? But since this is a bit more modern than a traditional slump, I get it if you want to switch things up a bit!
The apple filling section is honestly a little blank canvas waiting for you. Cinnamon is fantastic, of course, but if you want to get really cozy, try throwing in just a tiny pinch of nutmeg or maybe even some cardamom. Cardamom is amazing with apples; it gives it this tiny floral, warm note that just smells like autumn perfection.
When it comes to the topping, this is where you can really customize things without any risk of ruining the bake. If you happen to have pecans or walnuts hanging around, chop them up roughly and mix them into your oat crumble mixture. They toast up so beautifully and add this extra layer of buttery crunch that is just divine.
And here is a cool thought: if you’re feeling adventurous, swap out half the oats for chopped dried cranberries before baking. When they get warm and gooey underneath that topping, they look gorgeous and give you little pockets of tart chewiness.
If you’re looking for another interesting way to use apples in a baked good, you really should check out this recipe for Amish Applesauce Cake. It’s totally different, obviously, but it highlights how versatile apples are when you bake them down!
Serving Suggestions for Your Salted Caramel Apple Crisp
Now that you’ve perfected this masterpiece, the only real question left is: what are you serving it with? Don’t just stand there looking at it! Obviously, the traditional choice is a giant scoop of good vanilla ice cream. When that cold, creamy sweetness hits that warm, salty caramel, I swear my knees go weak every single time. If you prefer something lighter, a big dollop of homemade whipped cream, maybe just lightly sweetened, works wonders because it just melts right down the sides.
But I want to let you in on a little secret that my neighbors always insist on whenever I bring this crisp over. They serve it with a slice of sharp cheddar cheese! I know, I know, cheese and apples sound like an appetizer thing, not a dessert thing, but trust me on this one. That salty, tangy cheddar melts just slightly against the warm crisp and cuts right through the sweetness of the caramel topping. It’s an explosion of flavor, really!
If you’re looking for a dairy-free alternative that is just as satisfyingly cold and creamy, I’ve tested out a few options. You might want to look into making your own version of a chocolatey frozen treat to serve alongside it, like this copycat frosty recipe. It adds a fun chocolate element that hasn’t crossed my mind before, but it’s surprisingly good with cinnamon and apple!
Honestly, though, even if you just eat it straight out of the dish while standing over the sink (don’t judge, we’ve all been there), it’s a winner. But I really encourage you to try the cheddar!
Storage and Reheating Instructions for Salted Caramel Apple Crisp
So, this is the tough part: you made an entire 8×8 pan of pure joy, and now you have leftovers. Good problem to have, right? Luckily, this crisp keeps really well, provided you treat it right. If you have any leftovers—and I mean *any*—you need to cover that dish tightly. I usually use plastic wrap first, pressing it gently right against the topping so it doesn’t get gummy, and then I might slap a layer of foil over the whole thing just to be safe.
If you plan on eating it within a day or two, leaving it on the counter is totally fine, especially if your kitchen stays cool. But honestly, because of that yummy caramel sauce, I prefer popping the leftovers into the fridge after it cools down completely. It keeps beautifully in the fridge for about four or five days. That caramel just firms up a bit, which isn’t bad at all!
Now, reheating is key. If you try to nuke this in the microwave, the topping will instantly turn into sad, soggy mush. We can’t have that! The only way to bring this crisp back to life is back in the oven. Believe me, a quick trip back to dry heat restores that glorious crunch factor.
Just scoop out the portion you want into a small, oven-safe ramekin. Set your oven to about 325 degrees Fahrenheit. You don’t need to cover it this time! Let it bake for about 10 to 12 minutes. You just want it heated through and the topping sizzling slightly. If you accidentally leave it in a little longer, the apples get extra jammy, which isn’t a failure by any means!
If you absolutely have to use the microwave (maybe you only have two minutes before you have to leave), just zap your portion for about 20 seconds, then immediately pop it under the broiler for one minute. Watch it like a hawk, though—broilers are fast and sneaky! Trust me, the oven method gives you the best chance of reliving that perfect first bite.
Frequently Asked Questions About Salted Caramel Apple Crisp
Can I use frozen apples instead of fresh ones?
That’s a common shortcut, but I really advise against it for this crisp. Frozen apples already hold a ton of extra water from the freezing process. If you try to bake them straight from the freezer, you’re almost guaranteed to end up with a soupy mess at the bottom of your dish, even with that tablespoon of flour trying its best to help!
If you absolutely *must* use them because that’s all you have, you need to thaw them first. Spread them out on paper towels on a plate and let them drain for at least an hour. Press down on them gently to squeeze out as much excess water as you can before you toss them with the sugar and cinnamon. It won’t be quite as perfect as fresh, but it helps! If you are worried about fruit crisp textures in general, you can look at some other general tips here: my general apple crumble guide.
What kind of salted caramel sauce works best?
This is where you can really elevate this dessert! Store-bought salted caramel sauce is perfectly fine—grab the thickest one you can find. But, oh my goodness, if you make your own, you will thank me later. Homemade sauce lets you control the salt quality. I love using a nice flaky sea salt when I make my caramel. It gives you those little pops of saltiness that contrast beautifully with the brown sugar in the topping.
If you are buying it, check the ingredients. The richer the caramel tastes, the better the drizzle will be. Since the ingredients are simple, the quality really shouts through!
Is it possible to make this recipe gluten-free?
Yes, absolutely! The apples are naturally fine, of course, but we need to swap out the flour in the topping. It’s easy! You can substitute the 1 cup of all-purpose flour with a good quality 1-to-1 gluten-free baking blend that contains xanthan gum. The oats are usually safe, but if you are dealing with celiac concerns, just make totally sure your oats bag says ‘certified gluten-free,’ because cross-contamination is common in milling!
Make the substitution exactly 1:1 in the topping—no need to change the butter or sugar ratios. The texture should hold up really well with the GF blend in there.
My topping always burns before the apples are done! What am I doing wrong?
This is probably the most common issue with any baked fruit crisp! It means your topping is browning beautifully, but the apples underneath still need that full 40 minutes to soften up. I covered this briefly before, but it bears repeating: when the topping starts looking too dark, grab some aluminum foil and loosely drape it over the dish. You don’t want to seal it tight like a container; you just want to diffuse the direct heat hitting the crumbs, letting the heat penetrate the apples slowly without scorching the top layer.
It usually happens right around the 25-minute mark. Check it then, and if it looks worriedly brown, tent it!
Estimated Nutritional Snapshot of Salted Caramel Apple Crisp
Listen, I am a baker, not a nutritionist! I’m just focused on flavor and hugging Grandma’s old recipe book, so take these numbers with a giant grain of salt—maybe the flaky kind we talked about for the caramel! These figures are just ballpark estimates based on the ingredients I listed, and they are meant to give you a *general* idea of what you’re diving into. If you’re counting macros, you’ll want to plug your specific brands and serving sizes into one of those fancy apps.
But just so you know, this is definitely a dessert that packs a satisfying punch, mixing fruits, fats, and sweet caramel. If you slice the 8×8 pan a little too generously, those numbers will creep up fast, so be mindful when you’re scooping!
Here’s the snapshot based on carving the crisp into 6 generous servings:
- Serving Size: 1 serving
- Calories: 350
- Sugar: 35g (That’s the apple sweetness plus the caramel working hard!)
- Sodium: 180mg (Thank you, salted caramel!)
- Fat: 18g
- Saturated Fat: 11g (That’s all that lovely butter doing its job in the topping)
- Unsaturated Fat: 7g
- Trans Fat: 0.5g
- Carbohydrates: 48g
- Fiber: 4g (Thanks, oats and apples!)
- Protein: 4g
- Cholesterol: 45mg
Because we’re baking with real ingredients, your final count might shift a little based on the exact kind of apples you use or the brand of caramel sauce—some are much thicker than others. But this gives you a great starting point before you pile that vanilla ice cream on top!
Share Your Salted Caramel Apple Crisp Experience
Now that I’ve spilled all my secrets about getting that perfect crumbly top and gooey caramel layer, I desperately want to know how yours turned out! Seriously, baking is all about sharing the joy, and nothing makes me happier than hearing that my recipe worked wonders in someone else’s kitchen.
Did you stick to the Granny Smiths, or did you go rogue with a different apple? Did you use store-bought caramel, or did you make your own fancy homemade batch? Tell me everything! Did you try the cheddar cheese pairing? I need to know if anyone else is as crazy about that combination as I am!
Please, take a moment, scroll down, and leave me a rating—five stars if it made you do a happy little wiggle dance while eating it! If you made any modifications, like swapping out the oats or adding some nuts to the topping, drop those tips in the comments below so we can all learn from your creativity. Your feedback helps me keep these recipes as helpful and delicious as possible for everyone else coming to visit.
If you run into any weird snags or have a burning question that wasn’t covered in the FAQ, please don’t hesitate to reach out directly through my contact page—you can find that link here: Contact Me! But honestly, I’d prefer to see the discussion happen right here in the comments where we can all chat about the best fall dessert ever made!
Happy baking, and I can’t wait to read all about your fantastic crisps!
Print
Salted Caramel Apple Crisp
- Total Time: 60 min
- Yield: 6 servings 1x
- Diet: Vegetarian
Description
A simple recipe for a baked apple crisp topped with a salted caramel crumble.
Ingredients
- 6 medium apples (like Granny Smith or Honeycrisp), peeled, cored, and sliced
- 1/4 cup granulated sugar
- 1 tablespoon all-purpose flour
- 1 teaspoon ground cinnamon
- 1/4 cup salted caramel sauce
- 1 cup all-purpose flour
- 1/2 cup packed light brown sugar
- 1/2 cup rolled oats
- 1/2 cup (1 stick) cold unsalted butter, cut into small pieces
- 1/4 teaspoon salt
Instructions
- Preheat your oven to 375 degrees Fahrenheit (190 degrees Celsius). Lightly grease an 8×8 inch baking dish.
- In a large bowl, toss the apple slices with the 1/4 cup granulated sugar, 1 tablespoon flour, and cinnamon. Spread the apples evenly in the prepared baking dish.
- Drizzle the salted caramel sauce over the apples.
- In a separate medium bowl, combine the 1 cup flour, brown sugar, oats, and salt for the topping.
- Cut in the cold butter using a pastry blender or your fingers until the mixture resembles coarse crumbs.
- Sprinkle the topping evenly over the caramel-coated apples.
- Bake for 35 to 45 minutes, or until the topping is golden brown and the apples are tender when pierced with a fork.
- Let the crisp cool for at least 15 minutes before serving.
Notes
- For a richer flavor, use a homemade salted caramel sauce.
- Serve warm with vanilla ice cream or whipped cream.
- If the topping browns too quickly, loosely cover the dish with aluminum foil for the remaining baking time.
- Prep Time: 20 min
- Cook Time: 40 min
- Category: Dessert
- Method: Baking
- Cuisine: American
Nutrition
- Serving Size: 1 serving
- Calories: 350
- Sugar: 35
- Sodium: 180
- Fat: 18
- Saturated Fat: 11
- Unsaturated Fat: 7
- Trans Fat: 0.5
- Carbohydrates: 48
- Fiber: 4
- Protein: 4
- Cholesterol: 45
Keywords: salted caramel, apple crisp, baked apples, oat topping, cinnamon dessert