
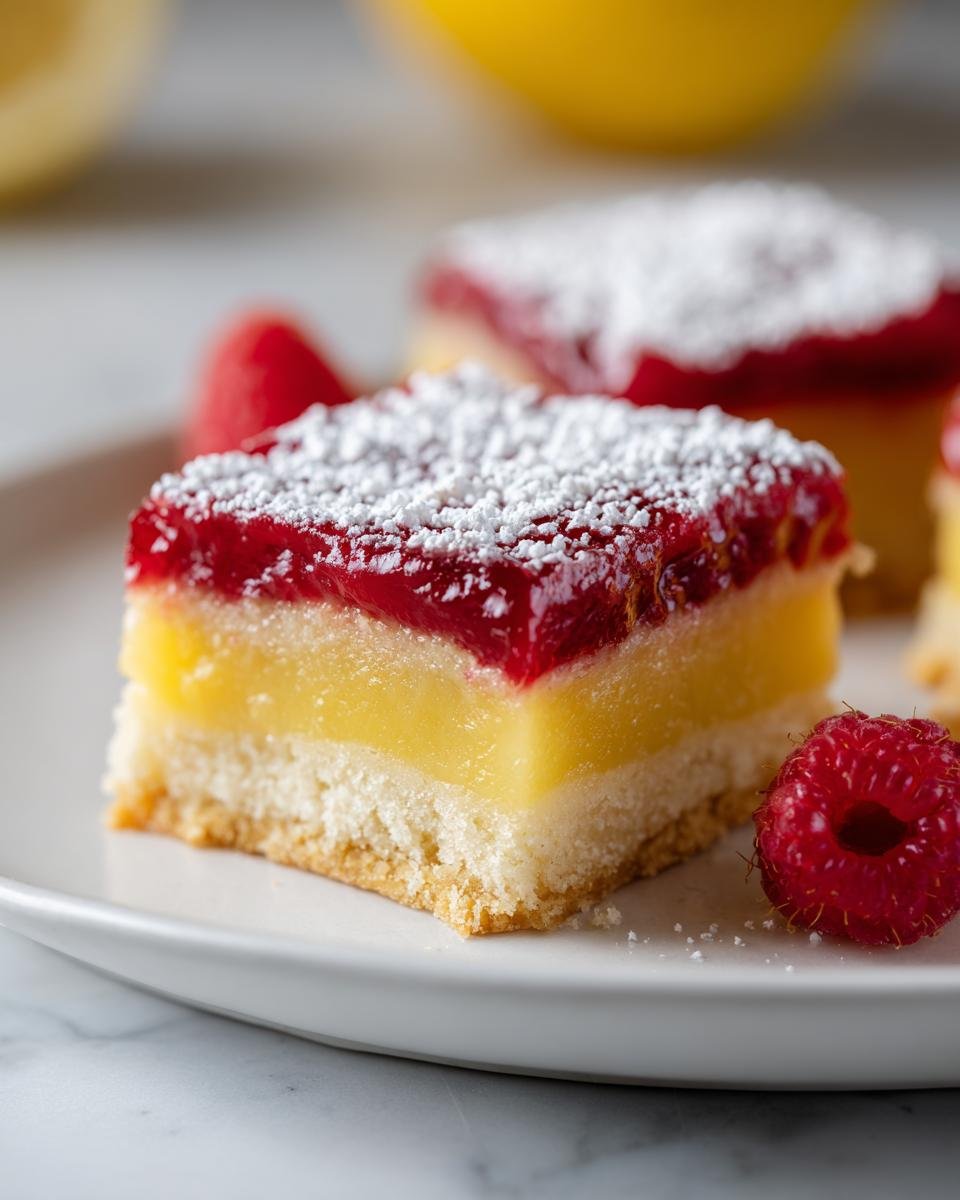
If you’re looking for that perfect bite that hits both the sweet and tart notes all at once, you’ve absolutely landed in the right spot! These Raspberry Lemon Bars are my absolute favorite for summer gatherings because they are just perfectly balanced. Forget those overly sweet versions; mine use a tangy, bright lemon curd layered right on top of a buttery shortbread crust. Honestly, I make a batch nearly every time I need a guaranteed crowd-pleaser. There’s something so satisfying about the crunch of that base giving way to that smooth, vibrant filling. Trust me, once you try this recipe, you’ll stop looking elsewhere for the best lemon bar ever made!

Why You Need This Raspberry Lemon Bars Recipe
I know there are a million lemon bar recipes out there, but I promise you, once you try this one, it’ll become your signature. Seriously, these are completely foolproof! They look super fancy, but I whip them up way faster than you’d think. You definitely need this recipe in your rotation; they are amazing for potlucks or just when you need a really bright dessert!
Perfect Balance of Tart and Sweet Raspberry Lemon Bars
This is what sets them apart! You get that big, sour punch from the lemon curd, but then the raspberry jam layer melts right in and cuts the tartness with just the right amount of sweetness. It’s a flavor fireworks show, honestly.
Buttery, Crumbly Shortbread Crust
The base isn’t just a vehicle for the filling; it’s part of the main attraction! I make sure mine is perfectly baked so it’s golden and tender, but still sturdy enough to stand up to all that juicy topping without getting soggy. It just crumbles beautifully in your mouth.
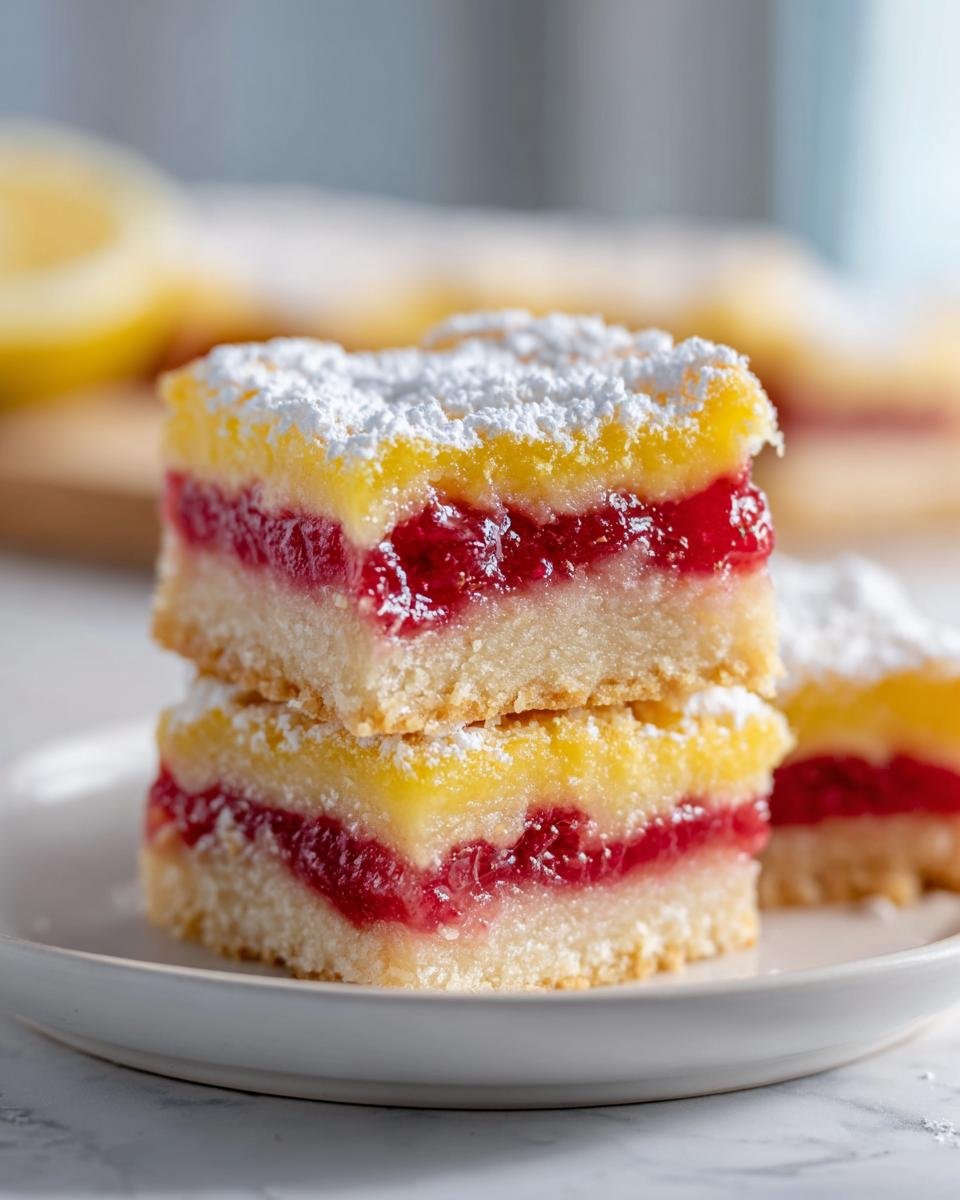
Simple Layering Technique for Raspberry Lemon Bars
Don’t let the three distinct layers scare you off. It’s actually super easy! You bake the crust, slap on some jam, pour the wet filling, and bake again. No complicated chilling or tempering needed. It’s practically a one-pan wonder, trust me on this one!
Gathering Ingredients for Your Raspberry Lemon Bars
When we make these raspberry lemon bars, I always pull out my measuring cups first. The secret to these phenomenal lemon squares really starts with having everything measured out perfectly before you even preheat the oven. You can check out some great tips on fillings right over here! My unique approach to sweet and tart fillings means we need precision, especially with the lemon stuff. Let’s look at what we need!
For the Shortbread Crust
The crust is where we build that buttery foundation. You need the butter to be cold, trust me on that! Cold butter equals flaky, tender crumbs, not a greasy mess.
- 1 cup all-purpose flour
- 1/2 cup cold unsalted butter, cubed (Keep this nice and chilly!)
- 1/4 cup granulated sugar
- 1/4 teaspoon salt
For the Lemon Filling Layer of Raspberry Lemon Bars
This is the star of the show—the part that makes your mouth pucker in the best way possible! And please, use fresh lemons. The bottled stuff just doesn’t cut it here; it tastes flat.
- The other 1/2 cup granulated sugar
- 2 large eggs (whisked well!)
- 1/4 cup fresh lemon juice (The fresher the better, seriously!)
- 1 tablespoon lemon zest (Get all that fragrant yellow stuff!)
- 1 tablespoon all-purpose flour
For the Raspberry Jam Layer and Dusting
These final additions bring in that lovely berry complement. Make sure your jam is smooth and spreadable so it doesn’t rip up your crust when you try to cover it.
- 1/4 cup raspberry jam (Just a thin, even layer is all we need.)
- Powdered sugar for dusting (You’ll want that sweet snowfall right at the end.)
Essential Equipment for Making Raspberry Lemon Bars
You don’t need a huge arsenal of fancy gadgets for these raspberry lemon bars, which is great news! But there are a few basic tools that make the job much, much easier, especially when dealing with that buttery crust and the liquid lemon layer. Thinking ahead about your equipment means less scrambling later on!
I always lay everything out right before I start mixing; it’s my secret to stress-free baking. Here’s what you absolutely need on the counter for these perfect lemon squares:
- An 8×8 inch baking pan. This size is crucial for getting that perfect thickness!
- Parchment paper. Don’t skip this! It’s your best friend for easy cleanup and lifting those bars out cleanly.
- A sturdy mixing bowl, preferably glass or stainless steel, for the crust mixture.
- A separate smaller bowl for whipping up that heavenly lemon filling.
- A whisk for the lemon mixture—you want smooth, not lumpy!
- A small offset spatula or butter knife for smoothing the jam layer.
Step-by-Step Instructions for Perfect Raspberry Lemon Bars
Alright, let’s get baking! This is the fun part where everything comes together. I always tell people that the layering is what makes these raspberry lemon bars so incredible, but honestly, it’s easy peasy. Just follow the sequence, and you’ll have stunning lemon squares ready to chill in no time. Remember, we’re working with 350 degrees Fahrenheit for the whole process, so preheat that oven right now!
Preparing and Baking the Shortbread Crust for Raspberry Lemon Bars
First things first: get your 8×8 pan lined with parchment paper—make sure you leave some overhang so we can lift these bad boys out later! Now, for the crust, you just combine the flour, cold butter cubes, 1/4 cup of sugar, and salt. Use your fingers or a pastry blender, and work it until it looks like coarse, buttery sand. Press that firmly and evenly into the bottom of your lined pan. Pop it into the 350°F oven for 15 minutes until it just barely starts to look set.
Assembling the Jam and Lemon Filling Layers
While that crust is getting happy in the oven, grab your smaller bowl and whisk together the remaining sugar, the two eggs, lemon zest, 1 tablespoon of flour, and that fresh lemon juice. Whisk it until it’s completely smooth—no streaks or lumps in that bright yellow mixture! As soon as you pull that hot crust out, quickly spread that 1/4 cup of raspberry jam evenly all over the surface. Then, very gently, pour that beautiful lemon mixture right over the top of the jam layer. Be careful not to stir it!
Final Bake and Cooling of Raspberry Lemon Bars
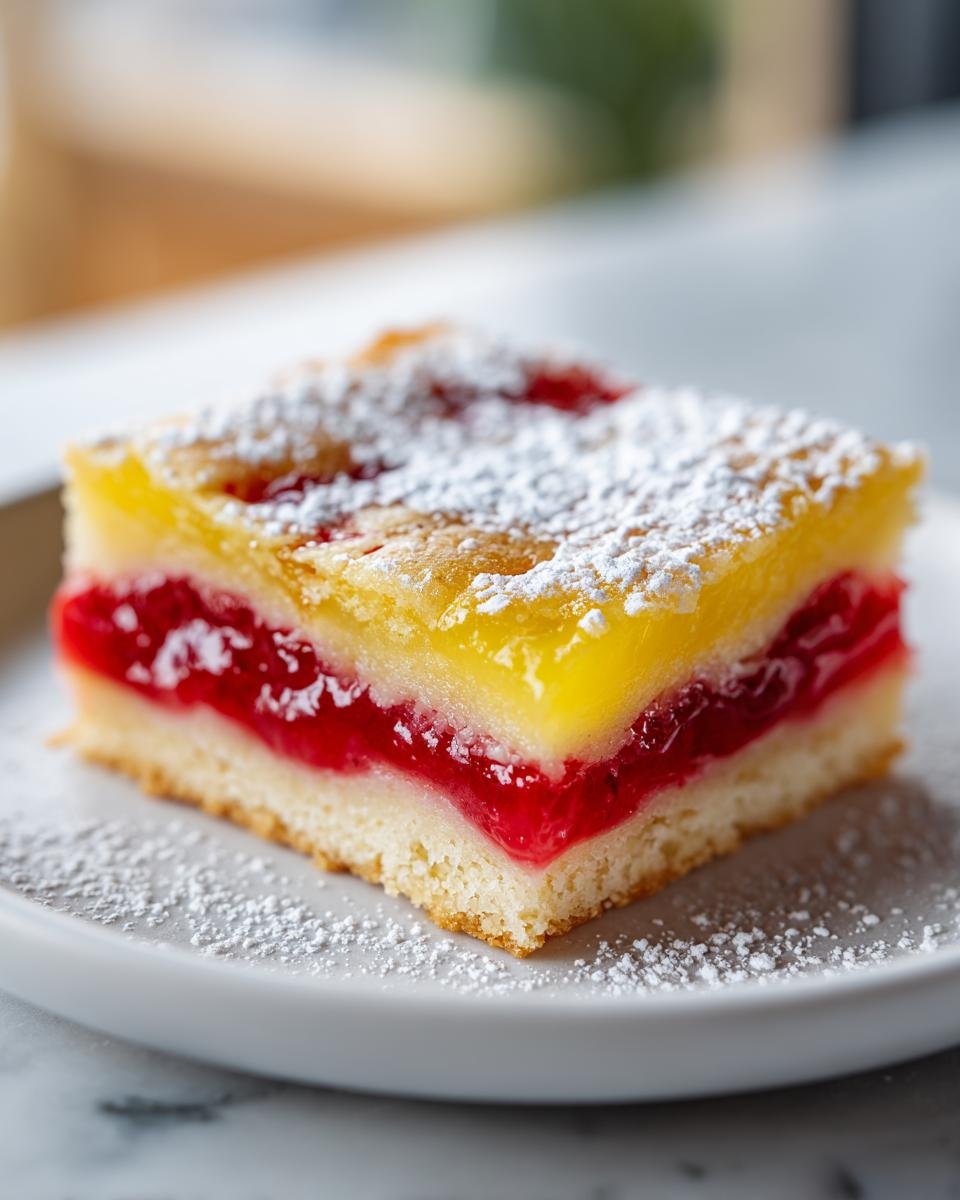
Back into the oven it goes! This second bake usually takes about 20 to 25 minutes. You’re looking for the lemon layer to look set, like firm gelatin, and maybe just a tiny bit golden around the very edges. The most important instruction I can give you? Let them cool COMPLETELY. I mean it! They need a good couple of hours on the rack, or even better, straight into the fridge. If you try to cut them too soon, you’ll end up with lemon soup everywhere, not clean squares!
Tips for Success: Achieving the Best Raspberry Lemon Bars
So, you’ve got your beautiful, layered lemon squares cooling, but before you slice into them, let me share a couple of tiny secrets that will take these raspberry lemon bars from good to truly show-stopping. Dealing with lemon bars can be tricky because they are so soft, but these couple of pointers always save my batches from becoming a gooey mess. Even the official notes mention these things because they are game-changers!
The Importance of Chilling Raspberry Lemon Bars
Listen closely, because this is where most people mess up the final presentation. You absolutely cannot cut these warm! I know, I know, the smell is intoxicating, and you want to dive right in, but you have to resist that sweet temptation for a while. The chilling process is vital because it allows that lemon filling to truly set up properly. If you try to cut them right out of the oven, they’ll ooze everywhere, and nobody wants a sad, slumped bar!
My rule is that they need a minimum of two hours in the refrigerator before I even think about lifting them out of the pan. If you can manage it, letting them chill overnight is even better. When they are ice-cold, that parchment paper overhang lets you lift the whole slab out onto a cutting board, and your knife glides right through for perfectly clean, beautiful squares. It makes all the difference!
Flavor Tip: Use Only Fresh Lemon Juice
I mentioned this briefly when we were talking ingredients, but I need to hammer this home again because the flavor payoff is huge. Please, please, please, don’t grab that big plastic jug of lemon juice from the back of your fridge! Bottled lemon juice is usually pasteurized, and it has this dull, almost metallic background flavor that ruins the brightness we are hunting for in these bars.
Fresh lemons—the ones that are heavy when you pick them up—have oils in the zest and real, vibrant acidity in the juice. When you combine that sharp, real lemon flavor with the intense burst of the raspberry jam, you get that pop we love so much in these lemon squares. It’s worth the three extra minutes it takes to squeeze them; I promise you won’t regret that superior tartness!
Storage and Reheating Instructions for Raspberry Lemon Bars
Okay, once you finally manage to cut these beautiful raspberry lemon bars, you need to know how to keep them perfect. Since we have that lovely lemon curd, these really like the cold! I always store leftovers in an airtight container in the fridge. They stay fantastic for about four days this way, and honestly, they taste even better the next day when they are super chilled.
If you have way too many—and trust me, that’s a good problem to have—you can freeze them! Lay the bars flat on a tray, freeze them for an hour until hard, then stack them with wax paper between layers in a freezer bag. Thaw them overnight in the fridge. They come out tasting almost just as bright!
Variations on Classic Raspberry Lemon Bars
While I absolutely adore this classic combination of raspberry jam and bright lemon, sometimes a cook just needs to tinker a little, right? The beauty of these lemon squares is that the structure—the shortbread base and the poured custard top—is so stable, you can swap things in and out without worrying about the whole bar collapsing. I’ve played around a ton whenever I have leftover ingredients, and I’ve found a few swaps that work perfectly without sacrificing that amazing texture we worked so hard to achieve!
If you’re looking for new ideas, definitely check out some wonderful chocolate raspberry crumb bar recipes for inspiration, though we are keeping ours layered here. Here are my go-to safe swaps when I switch up my raspberry lemon bars:
- Try Different Jams! Forget raspberry just for a minute. This recipe is incredible with sour cherry preserves or even a tart apricot jam. The technique stays identical; just swap out the 1/4 cup of raspberry jam for whatever fruit flavor you’re craving. Just ensure the jam isn’t too chunky, or it messes up the smooth level of the lemon curd underneath it.
- Spice Up That Crust: This is such an easy way to change the whole profile! Before you press the crust mixture into the pan, try mixing in about a half teaspoon of ground cardamom or even a tiny pinch of ground cloves with your flour and sugar. Cardamom works especially well if you happen to use orange marmalade instead of raspberry jam. That little warmth in the crust is lovely contrast to the sharp citrus.
- Zest It Up Further: If you want an even more intense flavor explosion, try adding one teaspoon of orange zest along with your lemon zest in the filling. Orange and lemon are best friends, and the orange just deepens the citrus flavor without making it taste like orange bars. It really complements the sweetness of the jam beautifully, too!
See? It’s so easy to keep things fresh in your kitchen just by swapping out a teaspoon of spice or choosing a different jar of jam. Enjoy experimenting with your perfect batch of lemon squares!
Frequently Asked Questions About Raspberry Lemon Bars
I figured you might have a couple of questions popping up, especially if this is your first time making these layered beauties! Dealing with custardy fillings and crumbly bases can sometimes be a little intimidating, but don’t worry; we’ve all been there. I’ve gathered the questions I hear most often about achieving those perfect lemon squares with that sturdy shortbread crust. Let’s clear those up so your next batch is flawless!
Can I use bottled lemon juice instead of fresh for these raspberry lemon bars?
Oh, please don’t! I really wouldn’t recommend it, and I need you to trust me on this one. Bottled lemon juice just doesn’t have the vibrant, sharp acidity that fresh juice brings. When you use bottled juice in these raspberry lemon bars, the whole flavor just falls flat, and you lose that wonderful, mouth-watering zing that makes the dessert so good. Fresh lemons have fragrant oils in the zest that you just can’t replicate!
Why is my shortbread crust soggy?
A soggy crust usually means one of two things happened, and both are fixable next time! First, you might have used softened or melted butter instead of the cold, cubed butter we specified. Cold fat creates pockets that steam open during the initial bake, leading to flakiness. Second, you might not have pre-baked it long enough! That 15 minutes matters—it needs to look set and slightly golden before you put any topping on it. If it’s still pale, give it five extra minutes!
How do I get a perfectly smooth lemon layer on my lemon squares?
This comes down to how you whisk that filling! You want it smooth, sure, but you absolutely do not want heaps of air bubbles whipped into it. Over-whisking the eggs and lemon juice causes too much air to incorporate, and when that air bakes, it creates holes, cracks, or just an uneven surface. Whisk gently but thoroughly until everything is just incorporated and smooth, and you’ll get that beautiful, glassy, smooth top on your lemon squares every single time!
Share Your Delicious Raspberry Lemon Bars Creations
Now that you have the blueprint for what I think is the absolute best recipe for these layered lemon delights, I really, really want to hear about them! Baking is always better when you can share the results, isn’t it? Whether you stuck perfectly to the plan or tried sneaking in some orange zest like I suggested earlier, your results are what matter most to me.
When you make your batch of raspberry lemon bars, please come back here and leave a quick star rating. It helps other home cooks know that this recipe is a winner! If you snap a picture of your perfectly chilled, powdered-sugar-dusted squares, don’t forget to tag me on social media! I can’t wait to see how your shortbread crust held up and how vibrant that lemon layer looks!
If you’ve got questions that still aren’t answered, or if you want to share a story about how these disappeared way too fast at your last gathering, drop a comment below! Happy baking, and I hope you love these as much as we do. Don’t forget to check out my guide on making cookies for a bake sale if you are planning on sharing these lemon squares with a crowd!
Print
Raspberry Lemon Bars
- Total Time: 60 min
- Yield: 16 bars 1x
- Diet: Vegetarian
Description
A recipe for tart lemon bars topped with a layer of sweet raspberry jam, set on a shortbread crust.
Ingredients
- 1 cup all-purpose flour
- 1/2 cup cold unsalted butter, cubed
- 1/4 cup granulated sugar
- 1/4 teaspoon salt
- 1/2 cup granulated sugar
- 2 large eggs
- 1/4 cup fresh lemon juice
- 1 tablespoon lemon zest
- 1 tablespoon all-purpose flour
- 1/4 cup raspberry jam
- Powdered sugar for dusting
Instructions
- Preheat your oven to 350 degrees F. Line an 8×8 inch baking pan with parchment paper, leaving an overhang on two sides.
- For the crust, combine 1 cup flour, 1/2 cup butter, 1/4 cup sugar, and salt in a medium bowl. Cut the butter into the dry ingredients until the mixture resembles coarse crumbs.
- Press the crust mixture evenly into the bottom of the prepared pan. Bake for 15 minutes.
- While the crust bakes, whisk together the remaining 1/2 cup sugar, eggs, lemon juice, 1 tablespoon flour, and lemon zest in a small bowl until smooth.
- Remove the crust from the oven. Spread the raspberry jam evenly over the hot crust.
- Carefully pour the lemon mixture over the jam layer.
- Return the pan to the oven and bake for 20 to 25 minutes, or until the lemon layer is set and lightly golden around the edges.
- Let the bars cool completely in the pan on a wire rack.
- Once cool, lift the bars out using the parchment overhang. Cut into squares.
- Dust with powdered sugar before serving.
Notes
- Chill the bars for at least 2 hours before cutting for cleaner slices.
- Use fresh lemon juice for the best flavor.
- Prep Time: 20 min
- Cook Time: 40 min
- Category: Dessert
- Method: Baking
- Cuisine: American
Nutrition
- Serving Size: 1 bar
- Calories: 180
- Sugar: 18
- Sodium: 45
- Fat: 10
- Saturated Fat: 6
- Unsaturated Fat: 4
- Trans Fat: 0
- Carbohydrates: 22
- Fiber: 1
- Protein: 3
- Cholesterol: 40
Keywords: raspberry lemon bars, lemon squares, shortbread crust, lemon dessert, raspberry topping