
Okay, I have to confess something right away: I’m completely obsessed with the flaky, creamy perfection that is a real, honest-to-goodness Portuguese Custard Tart. Seriously, walking into a bakery and smelling that caramelized sugar mixed with vanilla? It’s heaven! For years, I thought I’d only ever get the real deal when I visited Lisbon, but wow, was I wrong.
That quest to bring those amazing, blistered tops home led me down a rabbit hole of failed recipes, but trust me, I finally nailed it. Forget those bland, pale imitations you sometimes see. My method ensures you get pastry that shatters beautifully and a custard filling so luxurious it practically melts before it hits your tongue. I spent an entire rainy weekend testing syrup temperatures so you don’t have to! Making authentic Pastel de Nata at home is completely achievable, and honestly, it feels like winning a small prize every time you pull a tray out of the oven.

Why You Will Love This Portuguese Custard Tart Recipe
I know you’re going to obsess over these, just like I do. There’s a reason people line up around the block for the real thing, but now you get that magic right in your kitchen. These little bites are such a treat!
- The pastry is outrageously flaky! We use store-bought puff pastry, but the high heat makes it crisp up like nothing else.
- That filling? It’s impossibly creamy, rich with egg yolks, but still miraculously light. It holds its shape perfectly.
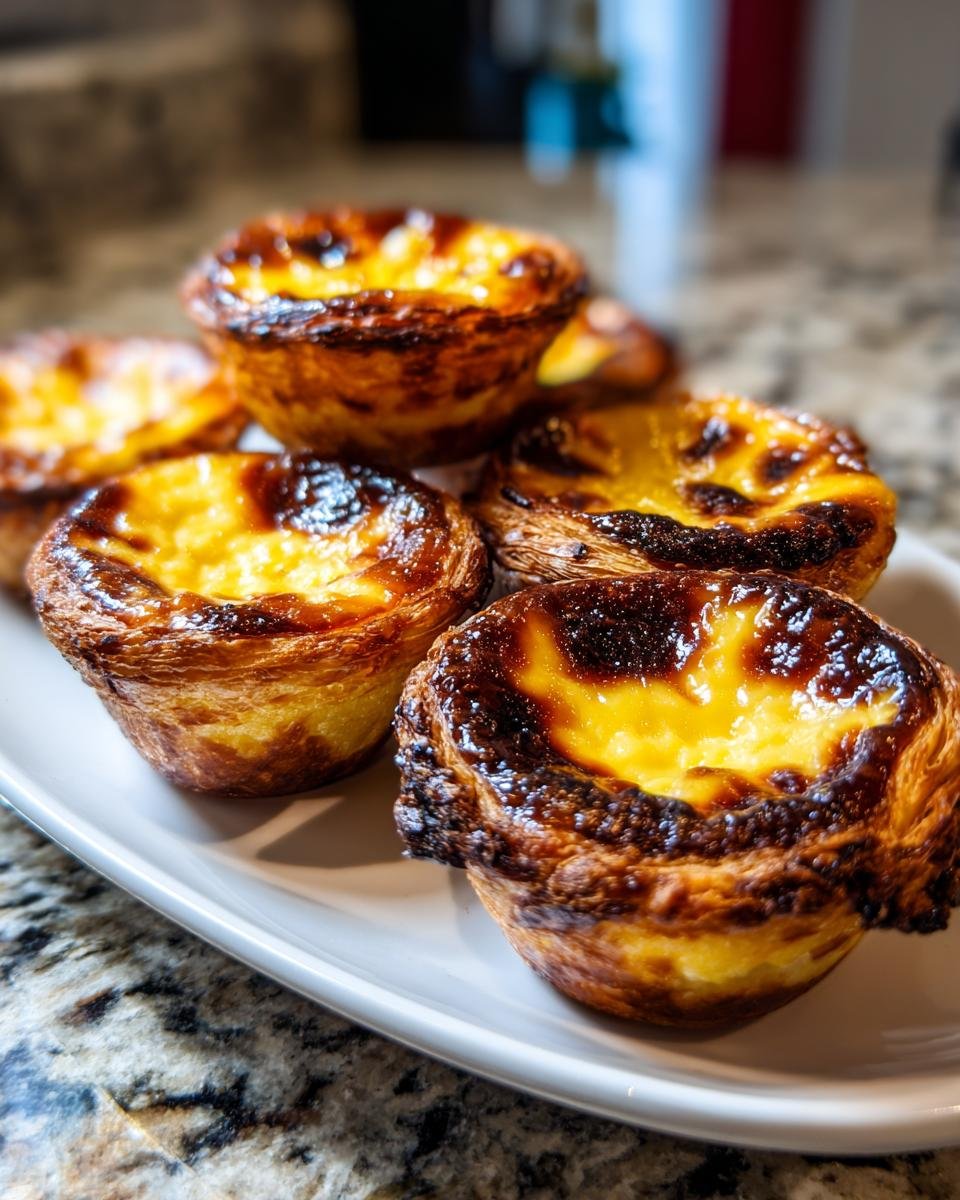
- Achieving those signature dark, caramelized spots on top is surprisingly easy—it’s all about that scorching hot oven!
If you’re looking for more quick, impressive desserts, you should definitely check out my thoughts on dessert in a cup, or maybe look through some of my favorite vintage recipes for inspiration!
Gathering Your Ingredients for Authentic Portuguese Custard Tart
Now we get down to business! Getting these ingredients together is honestly half the battle for a great Portuguese Custard Tart. The secret here isn’t too many fancy things, but making sure what we use is of good quality. Trust me, you can tell the difference between just *any* puff pastry and one that’s ready to flake up perfectly when it hits that high heat.
I always look for egg yolks that look vibrant—that’s where all the richness and color come from. If you’re curious about other amazing fillings, I’ve shared some deep dives on sweet fillings on the blog before, but for Nata, simplicity is key!
For the Pastry Shells
You need
- One package of ready-made puff pastry sheets. Make sure it’s cold when you start rolling it out!
For the Creamy Portuguese Custard Tart Filling
This is where the magic happens. We’re infusing this mixture with warmth before we even bake it, and those egg yolks are non-negotiable for the texture we want.
- 6 large egg yolks (don’t use the whites!)
- 1 cup heavy cream
- 1 cup granulated sugar
- 1/2 cup water
- 1 cinnamon stick (this is just for steeping, we toss it out!)
- 1 strip of fresh lemon peel (again, aromatic only, please remove it later)
Essential Equipment for Perfect Portuguese Custard Tart
You can’t make epic Portuguese Custard Tart without the right tools! Don’t worry, you probably have most of this hiding in your cabinets already. We are aiming for that beautiful high heat, so everything needs to be ready to go before we start mixing the filling. A good sturdy muffin tin makes all the difference for shaping those shells correctly.
I always make sure my muffin tin is lightly greased and ready—you don’t want to fumble with that after the hot syrup is ready! It’s like getting your mise en place together before a big event. Speaking of equipment, if you ever get adventurous with baking potatoes, I have a fun little guide on using the air fryer for baked potatoes that you might like!
Here’s what you’ll need on hand:
- One standard 12-cup muffin tin.
- A small to medium saucepan for making the syrup.
- A good heat-proof whisk for mixing the custard later on.
- A mixing bowl large enough for the yolks and cream.
- A pastry brush, just in case you want to give the tins an extra loving rub with butter or spray.
Step-by-Step Instructions to Bake a Flawless Portuguese Custard Tart
This is where the action is! Getting the timing right for these tarts is crucial since that super-high heat is what gives us those beautiful, blistered tops. Don’t stress about rushing; just make sure your equipment is ready to go before you start heating that syrup. If you ever want to try making the pastry from scratch, I have a wild guide on making puff pastry without refrigeration, but today we’re keeping it simple!
Preparing the Pastry Base for Your Portuguese Custard Tart
First things first: crank that oven up! We need it blazing hot, so preheat everything to a whopping 500 degrees Fahrenheit, or 260 Celsius if you’re using Celsius measurements. While that’s heating, lightly grease your 12-cup muffin tin—don’t skip this! Next, take your cold puff pastry sheets, roll them out, and slice them into 12 equal squares. Just gently press each square right into the muffin cups to form a little shell. They don’t have to be perfect right now; they’ll settle when the filling goes in.
Creating the Infused Sugar Syrup for the Portuguese Custard Tart Filling
This syrup is important because it’s what cooks the eggs gently and creates that sweet base. Grab a small saucepan and combine your sugar, water, the cinnamon stick, and that strip of lemon peel.
Bring it up to a boil, and this part is non-negotiable: you have to let it boil for exactly 3 minutes! Resist the urge to stir it while it’s bubbling away, or you might mess up the sugar structure. Once those three minutes are up, yank it off the heat immediately. Fish out the cinnamon stick and the lemon peel, because we only wanted their lovely scent, not their texture!
Tempering the Yolks and Baking the Perfect Portuguese Custard Tart
Time to temper! Get your egg yolks and heavy cream whisked together in a separate bowl—just mix them until they look combined, don’t whip them into a froth. Now, while you are whisking that yolk mixture constantly—and I mean *constantly*—slowly drizzle in that hot sugar syrup. This keeps the eggs from scrambling, which would be a total disaster!
Once it’s all combined smoothly, pour that luscious filling evenly into your pastry shells. They should only be about three-quarters full because they bubble up a bit. Pop them into that screaming hot oven and bake them for just 12 to 15 minutes. Keep a close eye on them! You’re looking for deeply caramelized, almost scorched spots on the top—that’s the money shot!

Expert Tips for the Best Portuguese Custard Tart Results
I’ve learned a few things the hard way making these famous Portuguese Custard Tarts, so let me save you the grief! The difference between a good tart and OMG-I-need-three-more is often just paying attention to these little details. They sound small, but they really make the final product shine.
First off, remember that puff pastry I mentioned? It absolutely needs to be very cold when you handle it. If it starts getting sticky and warm while you’re pressing it into the tins, just pop the whole tin into the freezer for five minutes! Cold pastry creates steam faster, which leads to those gorgeous, airy flakes we are craving. If you enjoy making crispy treats, you should check out my guide on delicious cookies for a bake sale; the concept of temperature shock is similar!
The second big thing is monitoring that high oven temperature. Since we preheated to 500°F—which is really high!—it’s super easy to go from perfect caramelization to burnt charcoal in about thirty seconds. Don’t walk away from the oven door during those last five minutes of baking. You want those dark, almost black spots; that’s authentic flavor from the sugar getting intensely cooked, but you don’t want the edges of the pastry to burn to a crisp.
And here’s a final tip that took me ages to figure out: don’t over-whisk the custard filling after you temper it. Once that hot syrup is in the yolks and cream, you just want it *combined*. If you beat it too much, you introduce too much air, and instead of that dense, silky texture we want, you end up with a fluffy, foamy filling that sinks strangely.
Serving and Storing Your Homemade Portuguese Custard Tart
The anticipation is the hardest part, isn’t it? Once those Portuguese Custard Tarts come out of the oven, you have to decide how you want to enjoy them! Honestly, there is no wrong answer here, but I have my personal favorites.
The absolute best way, in my humble opinion, is to let them cool down just slightly—maybe 10 minutes out of the tin. They should still be warm, where the pastry is crisp but the custard filling has settled enough that it won’t slide right off the plate. That slight warmth really brings out the vanilla and the slight citrus note from the lemon peel infusion. If you’re serving a big crowd, room temperature works perfectly fine too, especially if you’re planning on taking them somewhere special.
When it comes to the final touch—that classic dusting—go wild or keep it simple. A light sprinkle of cinnamon after they’ve cooled for a few minutes is traditional and beautiful. If you like them a little sweeter, a dusting of powdered sugar looks really elegant! If you happen to be pairing them with something lovely like what I shared in my guide to dessert in a cup, maybe skip the extra sugar dusting.
Now for storage, because you might have leftovers (though I doubt it!). These tarts really are best eaten the day you bake them, as the moisture from the custard can start softening the delicate pastry. If you absolutely must store them, keep them covered loosely at room temperature for up to a day. If it’s super hot or humid where you live, pop them in an airtight container in the fridge, but let them come back to room temperature before serving again so the pastry can try its best to crisp up!
Frequently Asked Questions About Portuguese Custard Tart
It’s normal to have questions when tackling something as iconic as the Pastel de Nata! They seem intimidating, I know, but trust me, once you understand the high-heat trick, they become your new favorite thing to bake. Here are some things people ask me all the time about making these incredible tarts.
If you are overwhelmed by pastry, don’t worry! If you are rushing, sometimes the easiest route is the best, and that’s why I love how simple these come together, even compared to some of the fussier recipes for things like easy-to-make dump cakes. Ask away!
Can I make the Portuguese Custard Tart filling ahead of time?
You absolutely can! The great thing about this custard filling is that it can be made ahead of time. Once you’ve whisked in the hot syrup and strained it (always strain it!), let it cool completely in the fridge. It should be nice and thick the next day. Just give it a gentle whisk before pouring it into your pastry shells. This is a great trick for busy weekends!
What causes the signature dark spots on a Portuguese Custard Tart?
Ah, the beautiful blisters! Those lovely, slightly burnt-looking spots are exactly what you want on an authentic Portuguese Custard Tart. They actually come from using that extremely high baking temperature—500°F! The sugar in the custard caramelizes very quickly on the surface before the rest of the custard fully sets. It’s not a mistake; it’s the sign of a perfect bake! If your tops aren’t getting dark spots, your oven probably isn’t quite hot enough, or maybe you didn’t quite hit the 3-minute boil mark on your syrup.
Can I skip infusing the syrup with lemon and cinnamon?
Oh, please don’t! I know it seems like two extra steps that you could skip, but this infusion is what gives the custard that subtle background warmth that separates a *good* egg tart from a truly *great* Pastéis de Nata. You don’t taste spice or lemon directly; you just taste magic. Take the extra five minutes to steep those aromatics!
What is the traditional serving temperature for these tarts?
Traditionally, they are best served warm, almost immediately after they’ve cooled enough so you don’t burn your mouth off! However, they are delicious at room temperature as well. Most bakeries serve them slightly warm or ambient. Just try to avoid serving them totally chilled from the fridge; the pastry loses its crackle when it’s too cold.

Estimated Nutritional Snapshot for One Portuguese Custard Tart
Listen, when you’re eating something this absolutely delicious, you really shouldn’t be worrying too much about numbers, right? These are treat food, pure and simple. But since I know some of you like to keep track of things, I pulled together the approximate nutritional info for a single Portuguese Custard Tart based on the recipe proportions we used.
Keep in mind that because we are using store-bought puff pastry (which is often higher in fat than homemade), these counts can shift a little bit depending on the brand you grab. This is just a guide, not a strict dietary mandate! So, just use this info as a rough idea, and don’t let it stop you from having a second one!
- Serving Size: 1 tart
- Calories: 250
- Sugar: 20g
- Sodium: 100mg
- Total Fat: 15g (with about 8g being saturated fat)
- Carbohydrates: 25g
- Protein: 4g
See? Not too bad for something that tastes like true European sunshine! And we are getting a little bit of protein from those lovely egg yolks. Enjoy!
Share Your Pastéis de Nata Creations
I’ve shared all my secrets now, from getting that syrup perfect to making sure your oven is hot enough to get those signature ‘blisters’ on your Portuguese Custard Tart tops. Honestly, I feel like we’ve gone on this amazing baking journey together!
Now, the best part of sharing recipes is seeing what *you* create in your own kitchens around the world. When you make these, please, please come back and let me know how they turned out! Did you manage to get those beautiful dark tops? Was the pastry shattering just the way you hoped?
Leave a comment right down below! Tell me everything—your whole experience making the Pastéis de Nata. I read every single one, and nothing makes me happier than hearing you succeeded!
If you snapped a gorgeous photo of your finished tarts—maybe dusted with cinnamon or shining on a cooling rack—I would absolutely love to see it! You can tag me on social media (look for my handle everywhere!). Use the hashtag #PastelDeNataJoy so I don’t miss it. If you ever have a burning question that the FAQ didn’t cover, or you’re looking to send over an idea for a future recipe, you can always reach out through the contact page!
Seriously, give this recipe a high rating if you loved it, because every rating helps other bakers find this little taste of Portugal. Happy baking, friends!
Print
Portuguese Custard Tarts (Pastéis de Nata)
- Total Time: 35 min
- Yield: 12 tarts 1x
- Diet: Vegetarian
Description
A recipe for making classic Portuguese custard tarts with flaky pastry and creamy filling.
Ingredients
- 1 package puff pastry sheets
- 6 large egg yolks
- 1 cup heavy cream
- 1 cup granulated sugar
- 1/2 cup water
- 1 cinnamon stick
- 1 strip lemon peel
Instructions
- Preheat your oven to 500 degrees Fahrenheit (260 degrees Celsius). Lightly grease a 12-cup muffin tin.
- Roll out the puff pastry and cut it into 12 equal squares. Press each square into the muffin tin cups, forming a shell.
- In a small saucepan, combine the sugar, water, cinnamon stick, and lemon peel. Bring to a boil and cook for 3 minutes without stirring. Remove from heat and discard the cinnamon stick and lemon peel.
- In a separate bowl, whisk the egg yolks and heavy cream together until just combined.
- Slowly pour the hot sugar syrup into the egg and cream mixture while whisking constantly. Do not overmix.
- Pour the custard mixture evenly into the pastry shells, filling them about three-quarters full.
- Bake for 12 to 15 minutes, or until the tops are deeply caramelized and the pastry is golden brown.
- Remove from the oven and let cool slightly before removing from the tin. Serve warm or at room temperature.
Notes
- For best results, use very cold puff pastry.
- You can dust the finished tarts with powdered sugar or cinnamon before serving.
- If your oven runs hot, monitor the tarts closely to prevent burning the tops.
- Prep Time: 20 min
- Cook Time: 15 min
- Category: Dessert
- Method: Baking
- Cuisine: Portuguese
Nutrition
- Serving Size: 1 tart
- Calories: 250
- Sugar: 20
- Sodium: 100
- Fat: 15
- Saturated Fat: 8
- Unsaturated Fat: 7
- Trans Fat: 0
- Carbohydrates: 25
- Fiber: 1
- Protein: 4
- Cholesterol: 150
Keywords: Portuguese custard tart, Pastéis de Nata, nata recipe, egg tart, pastry dessert