
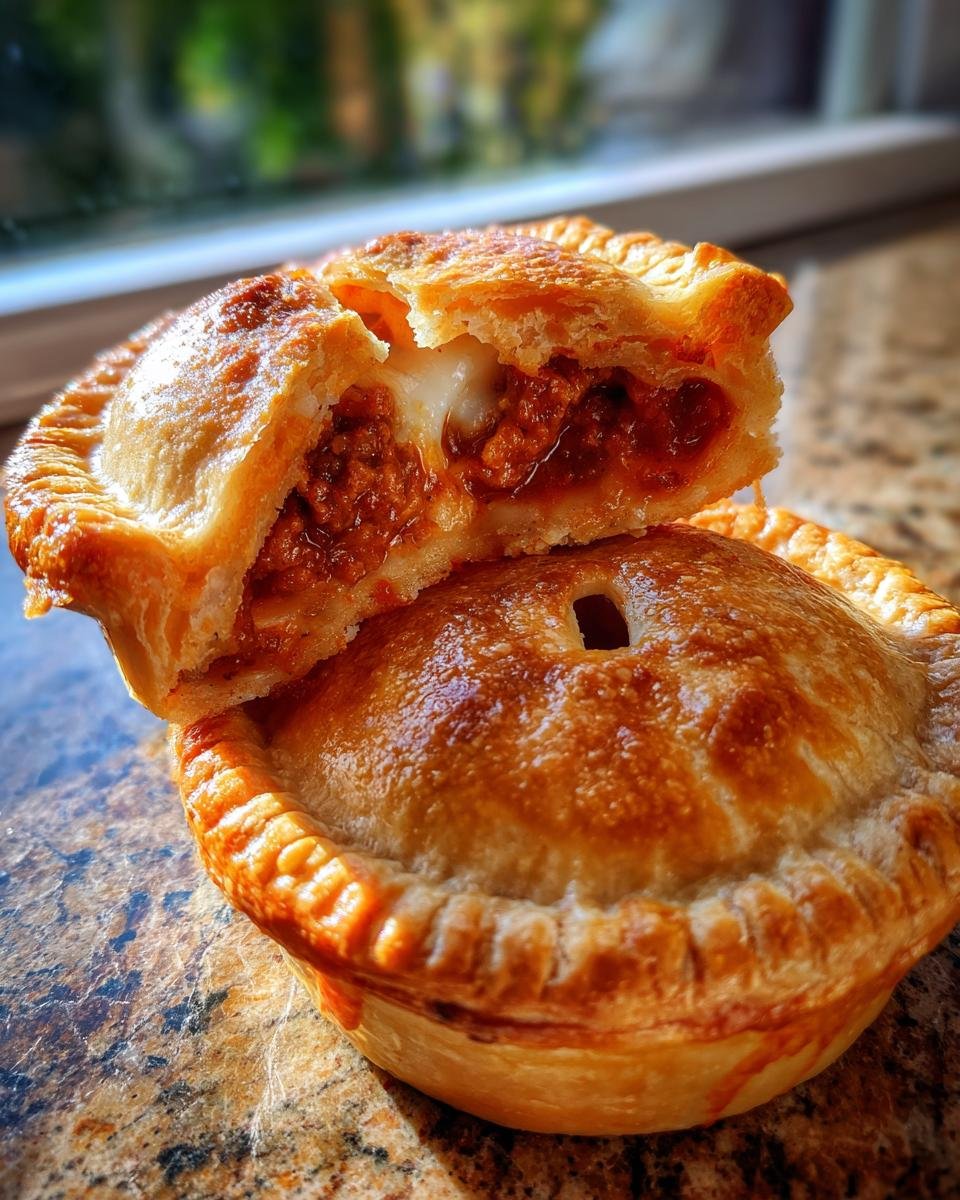
Okay, stop what you’re doing, because I have mashed up two of the best comfort foods known to humankind: pizza and a pot pie! You know I’m obsessed with anything I can make single-serving because it just feels special, right? Well, these little handheld wonders, what I affectionately call my Pizza Pot Pies, are the answer to every weeknight dinner dilemma.
Forget messy slices or fighting over the last big piece; these are perfectly portioned and baked in a muffin tin, meaning maximum crunch and perfectly melted cheese inside every single crust. Trust me, once you see how easy it is to get that flaky pastry wrapped around gooey pizza filling, you’ll be whipping these up all the time. I love knowing I’ve nailed the pastry and the filling flavor—that’s how you build reader confidence!
Why You Will Love These Pizza Pot Pies
Honestly, why wouldn’t you love these? They take everything great about Friday night pizza and wrap it up in a neat, portable package. They are total comfort food, but built for modern convenience. You absolutely need these in your life for quick dinners!
- They are the ultimate grab-and-go dinner! You don’t need plates or forks when everything is wrapped up neatly in that flaky crust.
- Perfect portion control! Since they bake in a muffin tin, everyone gets their own beautiful, golden-brown package. No crust drama allowed!
- The flavor payoff is huge. You get that satisfying mix of crispy, buttery pastry touching the hot, gooey, cheesy pizza filling all at once.
- They are incredibly forgiving. Seriously, you can swap out whatever toppings you have in the fridge for the filling and they still come out tasting fantastic.
- Cleanup is so simple! Once you pull them out, the muffin tin does most of the work. It’s the easiest dinner cleanup ever.
I really think the best part is tasting that soft, yielding interior filling surrounded by edges that shatter when you bite into them. It’s texture heaven, and I promise these are going to become a staple in your house, just like they are in mine.

Ingredients for Perfect Pizza Pot Pies
Gathering your ingredients is half the battle, and honestly, the beauty of these Pizza Pot Pies is how simple the list is. We’re making a quick, flaky homemade crust right here, but if you’re in a major rush, keep that store-bought option in mind—I’ll talk about that later!
For now, let’s get organized. I always lay out everything before I start mixing. It helps me make sure I don’t forget the salt in the dough! Here is exactly what you need to create six individual pizza pockets.
For the Homemade Pastry Crust
- 2 cups all-purpose flour
- 1 teaspoon salt
- 1/2 cup cold unsalted butter, cubed
- 1/2 cup ice water (and maybe an extra splash if needed)
For the Savory Pizza Pot Pies Filling
This is where the pizza magic happens! Don’t skimp on the cheese; we aren’t making a diet version, after all.
- 1 cup good quality pizza sauce
- 1 1/2 cups shredded mozzarella cheese (the good melting kind!)
- 1/2 cup cooked ground beef or pepperoni, roughly chopped
- 1/4 cup sliced black olives
- 1/4 cup sliced mushrooms
For the Egg Wash
This is just that little secret step that gives you that beautiful, shiny, golden top. You only need one!
- 1 egg, beaten
Making the Dough for Your Pizza Pot Pies
You absolutely have to start with the dough, and trust me, making the pastry from scratch is worth the five extra minutes of work. It gives you that shatteringly crisp texture that you just can’t get from relying on pre-made sheets.
First off, you need that cold butter! I always take mine straight out of the freezer and cube it immediately. Mix your flour and salt together, then throw in those cold butter cubes. This is where you get your hands dirty—literally! Use your fingertips or a pastry blender, but honestly, I feel like my hands work best. You’re aiming for coarse crumbs, maybe some pieces the size of little peas. If you want to see a fantastic visual guide on making dough basics, I really recommend checking out this Italian pizza dough recipe for reference on this technique!
Next comes the ice water. This is critical! You add it *very* slowly—just a tablespoon at a time—until the dough starts whispering to you that it’s ready to come together. Don’t overmix it into a smooth ball yet; just press it lightly until it holds its shape. Divide that shaggy mass right in half, flatten each piece into a nice neat disk, wrap them tight, and send them straight to the fridge for at least 30 minutes. That chilling time is non-negotiable, folks. It lets the gluten relax so you get tender crusts, not tough ones!
Assembling Your Individual Pizza Pot Pies
Now that your dough disks are perfectly chilled and relaxed, it’s assembly time! Before you even look at the dough, go ahead and preheat your oven to 400 degrees Fahrenheit because we want that heat ready and waiting. Make sure those muffin cups are lightly greased—I mean really greased, because we don’t want any sticky drama later!
Take one disk of dough and roll it out thinly. You need circles for the bottom crusts, so grab a cutter that’s just a tiny bit bigger than the openings of your muffin tins. Press those circles right into the cups. Here’s my little trick: after you place the dough circle in, use the back of a slightly oiled spoon to gently press it up the sides a bit. This helps create a nice little well for all that delicious filling. For more inspiration on shaping individual doughs, check out how they handle shaping in this guide for homemade mini-pizzas.
Lining and Filling the Muffin Tins for Pizza Pot Pies
In a separate bowl, mix up your filling ingredients! Get the sauce, the mozzarella, your chopped meat (or pepperoni!), the olives, and the mushrooms all combined. You want everything mixed just enough so the cheese starts clinging to the sauce, but don’t overdo it. Now carefully spoon this mixture evenly into those prepared pastry-lined muffin cups. Resist the urge to overfill, or you’ll have cheese eruptions everywhere!
Sealing and Finishing the Pizza Pot Pies
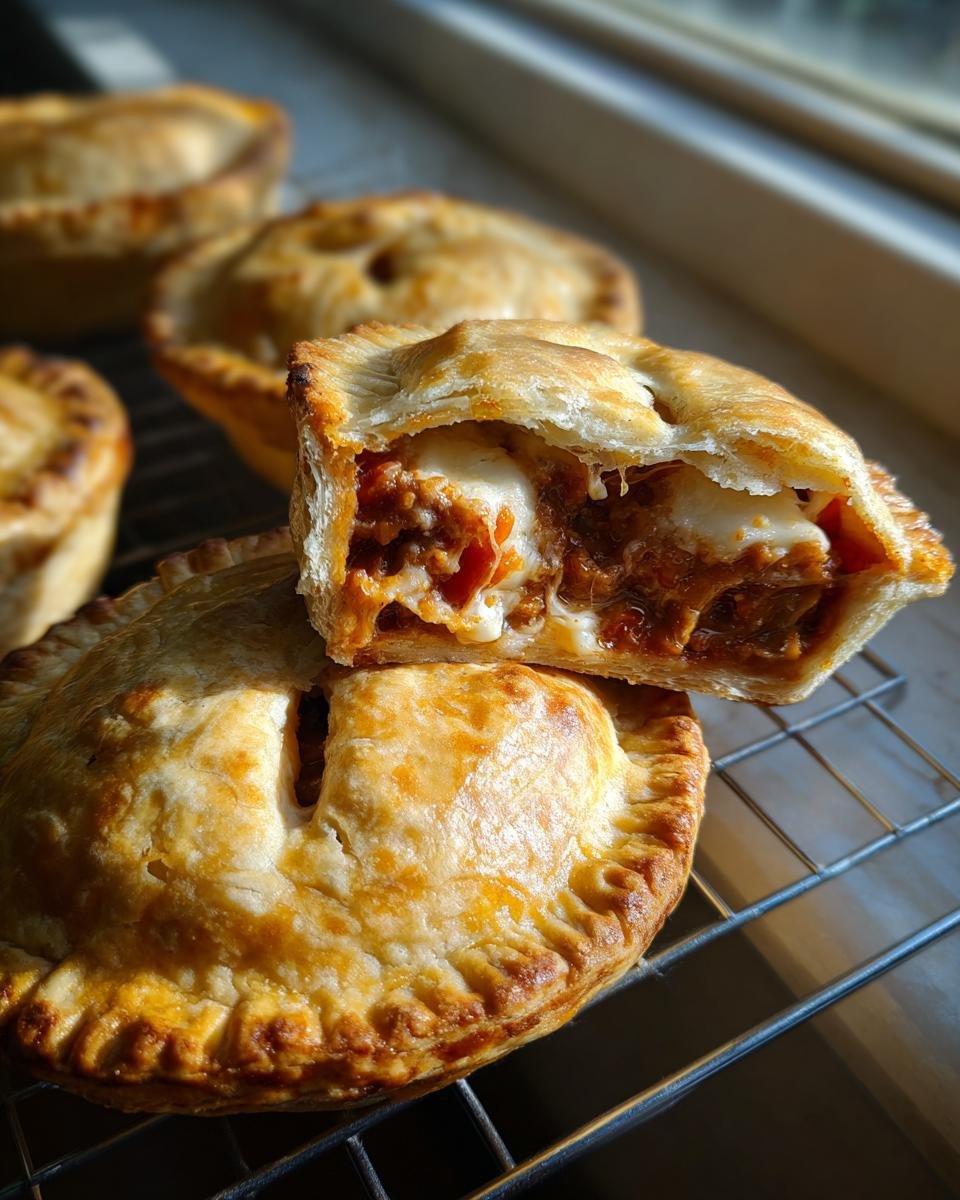
Time for the grand finale! Roll out your second dough disk and cut out six more circles for the tops. Lay one lovely circle right over the filling in each cup. Now, you have to seal this baby up! Press the edges of the top crust firmly against the bottom crust edges. You can crimp them with a fork if you want a fancy look, but just pressing until they stick well is all you need to keep that filling trapped inside where it belongs.
Don’t forget the vent! Cut a small little ‘X’ or a tiny slit right in the center of each top crust. This lets steam escape so your crust stays crisp. The final touch? Brush the tops with that beaten egg wash. It only takes a second, but that wash turns them into that magical golden brown color while they bake!
Baking Instructions for Golden Pizza Pot Pies
This is the moment of truth! After all that careful mixing and sealing, we send these little treasures into the heat. Preheat your oven to a nice, strong 400 degrees Fahrenheit. Remember, we need serious heat to set that pastry quickly and get those flaky layers working their magic.
Now, gently place your muffin tin right into the hot oven. The baking time is usually between 20 and 25 minutes. But don’t just set a timer and walk away! You need to watch them. You’re looking for two things: the crust should be gorgeously golden brown—I mean really nicely colored—and you need to see the filling bubbling slightly through that little vent hole you cut. That means the cheese is molten and everything inside is piping hot.
When they look perfect, pull the whole tin out! And here is a super important, non-negotiable step: you *must* let them rest for 5 minutes right there in the tin. If you try to yank them out immediately, you risk tearing the bottom crust because the cheese hasn’t settled one bit. Those five minutes allow the filling to firm up just enough so you can carefully lift those beautiful, perfectly baked Pizza Pot Pies out of the tin with a small offset spatula or even a butter knife around the edges. Trust me, patience here saves you from a melted mess!
Tips for Making the Best Pizza Pot Pies
Even though these Pizza Pot Pies are straightforward, I’ve learned a couple of little secrets over the years that really take them from good to totally unforgettable. You want that flaky crust to stay flaky, not turn into a soggy little swimming pool, right?
Here is what I always do to guarantee perfection:
- Go a Little Light on the Sauce: This is my top, number one tip for any filled pastry—whether it’s a sweet pie or a savory one like this. Pizza sauce is mostly water, and we don’t want wet bottoms! When you’re mixing up your filling, measure your sauce precisely, and if you’re using extra juicy mushrooms or veggies, maybe knock the sauce down by a tablespoon or two. A little less sauce means a much crispier bottom crust, and that’s what we are chasing here.
- The Cooling Trick for Removal: Remember how I stressed that 5-minute rest? That’s key for unmolding, but if you’re having stubborn pies, try this: after the 5 minutes cooling time, gently run a thin piece of dental floss or a very thin, sturdy piece of plastic (like a credit card edge gently used) around the *inside* edge of the muffin cup right where the crust meets the metal. It’s like a little clean break that releases the pie without tearing your beautiful crimp work.
- Brush It Twice: If you have the time, brush the egg wash on once right after crimping. Let that sit for about five minutes while the oven finishes preheating, and then brush it on a second time just before sliding them in. That double layer of egg gives you an almost lacquered, deep-brown shine that looks like they came from a fancy bakery.
Seriously, just controlling that sauce moisture makes these the best little pocket pizzas you’ll ever eat!
Ingredient Notes and Substitutions for Pizza Pot Pies
I want you gals and guys to feel totally comfortable making this recipe your own. Life is busy, and sometimes you just don’t have time for making pastry dough from scratch, even if I sing its praises constantly! That’s totally fine. If you’re short on time, please don’t hesitate to swap out my homemade crust for store-bought refrigerated pie crust dough. Just grab two sheets, roll them out, and proceed as if you made it yourself. It’s still going to be delicious!
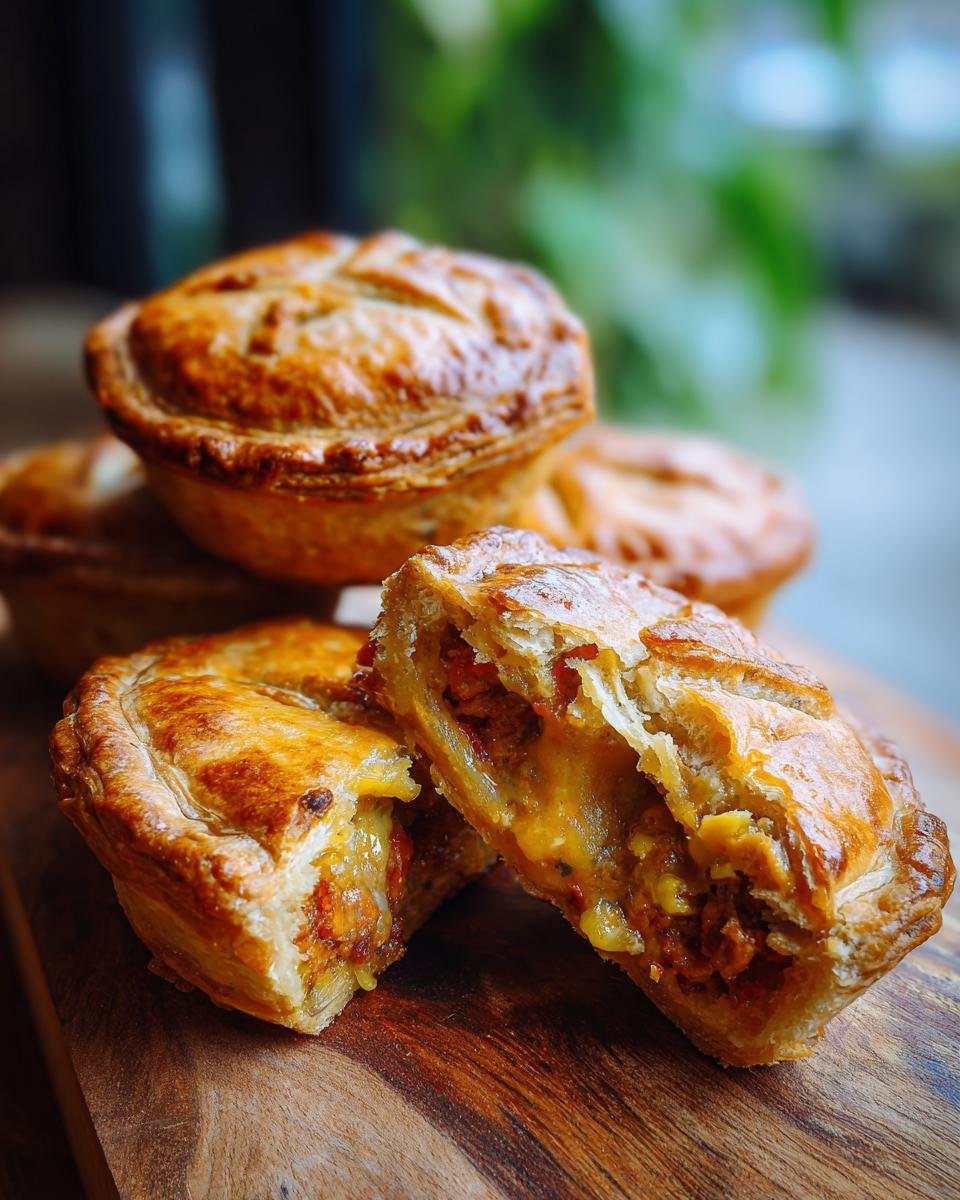
The fun part of these Pizza Pot Pies is truly the filling flexibility. Remember how I mentioned using whatever toppings you like? That’s my way of saying, don’t look at my list as the final law! If you don’t like mushrooms? Leave them out! Don’t eat beef? Toss in some cooked Italian sausage or maybe some pre-cooked chicken. I once made a completely vegetarian batch loaded with artichoke hearts and sun-dried tomatoes. If you’re interested in exploring some other super cheesy, savory bakes, this homemade cheese pie recipe is another showstopper!
When you are choosing your fillings, just stick to about 2 to 2.5 cups of *total* solid ingredients (cheese plus toppings). You want that volume, but you need enough room for the sauce to work its magic without ending up totally overloaded.
Also, while mozzarella is the star for that amazing stretch, don’t be afraid to mix in a little fontina or even some shredded provolone for a sharper bite. The cheese blend really personalizes the whole pie experience. It’s always about making the recipe work for you, not the other way around!
Storage and Reheating Your Leftover Pizza Pot Pies
Okay, let’s talk about the sad reality: sometimes you actually have leftovers! Which, honestly, is a bonus because these little Pizza Pot Pies taste phenomenal the next day, provided you treat them right when storing and reheating them. We want that crust to stay crisp, not get soggy and sad overnight, so pay attention to these steps!
First, make sure they are completely cooled down. Seriously, don’t rush this part. If you try to put warm pies into a container, you trap steam, and steam equals sogginess. Once they are totally cool to the touch, nestle them into an airtight container. They usually hold up great in the fridge for about three to four days. I’ve kept them that long, and they were still fantastic!
Now for the reheating—this is where most people make a terrible mistake. Please, please, please do not just pop these into the microwave if you care about the crust texture. The microwave heats the filling beautifully, but it turns that flaky pastry wrapper into chewy rubber. Yuck!
My recommendation is always the oven route. Preheat your oven—or even just a toaster oven if you’re only reheating one or two—to about 350 degrees Fahrenheit. Pop the pies right onto a baking sheet. Reheat them for about 10 to 15 minutes. You’ll know they are ready when the cheese inside is bubbly again and the pastry is warmed right through. That light toastiness returns!
If you are truly, absolutely starving and speed is the only thing that matters, the microwave will work in a pinch. Pop the pie on a paper towel—that helps absorb a little moisture—and heat it in 30-second increments until the cheese melts. Just know you’re sacrificing that lovely golden crunch for speed, but hey, it’s still pizza!
Frequently Asked Questions About Pizza Pot Pies
I knew you’d have questions! Anytime you mix two incredible things, like pizza and a lovely pastry crust, people get curious about the fine details. I’ve gathered the most common things readers ask me about these adorable **Pizza Pot Pies** and put the answers right here for you. Don’t worry, they are all pretty easy fixes!
Can I make these Pizza Pot Pies ahead of time?
Yes, you absolutely can! This is one of the best make-ahead dinners out there because the dough handles the pre-prep beautifully. You have two options. You can assemble the entire thing—bottom crust, filling, top crust, crimped—refrigerate them for up to 24 hours, and then bake them straight from the fridge, adding about 5 to 8 minutes to the total baking time. Or, you can freeze the assembled, unbaked pies. Wrap them tightly first! If baking from frozen, you’ll need to add about 15 minutes to the bake time and keep checking that crust color.
What is the best way to prevent the bottom crust from getting soggy?
Ah, the dreaded soggy bottom! We talked a little about sauce control, but for extra insurance, especially if you are making vegetarian versions loaded with wet vegetables like mushrooms, try this: before you spoon in your filling mixture, lightly press the bottom dough cup against the metal tin for a full minute, just like you’re really working it in there. You can even brush the bare bottom crust lightly with a beaten egg white only and bake just the bottoms for about 5 minutes before adding the filling. That partial bake creates a slight barrier against moisture! If you enjoy these bite-sized bakes, you might also love checking out my tips for zucchini pizza bites, which uses a similar technique!
Can I use different cheeses in these Pizza Pot Pies?
Of course! Mozzarella provides the stretch, which is essential for that classic pizza pull, but you can certainly mix it up to change the flavor profile! I sometimes mix in about a quarter cup of smoked Provolone for a little tanginess, or a sharp, aged Parmesan shaved right on top of the filling before sealing the crust. If you are making a vegetarian version, a sharp cheddar can also stand in nicely for some of the mozzarella. The main thing is to stick to drier, low-moisture cheeses so you aren’t introducing extra water into the filling!
Estimated Nutritional Information for One Pizza Pot Pie
Okay, let’s talk numbers for a second. I always believe in knowing what goes into our lovely comfort food, but please remember that when you are making these delicious **Pizza Pot Pies** at home, especially when we are swapping out pepperoni for sausage or using different cheeses, these numbers are just going to bounce around a bit!
This information below is based strictly on the ingredient amounts listed in the recipe above—using ground beef, standard mozzarella, and homemade crust. Think of this as a handy guideline rather than a guarantee. It’s just another piece of useful info about what you’re serving up for dinner!
- Serving Size: 1 pie
- Calories: 450 (That’s better than ordering takeout, I promise!)
- Fat: 25g
- Saturated Fat: 14g
- Trans Fat: 0.5g
- Cholesterol: 55mg
- Sodium: 650mg (A little salty, but that’s the pepperoni/seasoning combo!)
- Carbohydrates: 40g
- Fiber: 2g
- Protein: 18g
- Sugar: 6g
I always say, dishes made with love rarely need to be perfect down to the last calorie, but it’s good to have a general idea, right? These are rich, they have good protein because of the beef layer, and they are definitely satisfying! Enjoy them!
Share Your Pizza Pot Pies Creations
Well, that’s it folks! We’ve gone from simple flour and butter to perfectly sealed, golden-brown Pizza Pot Pies ready to be devoured. Seriously, I get so excited packing these away for leftovers, but even more thrilled seeing you all try them out at home!
I really, truly hope these bring a little bit of fun and convenience back into your dinner routine. Making these individual pies feels special, but honestly, tearing into that flaky crust to find all that cheesy, saucy filling—it’s just pure joy.
If you took the plunge and made a batch of these, I would absolutely *love* to hear all about it! Did you stick to the classic beef filling, or did you sneak in some surprise veggies? Drop me a comment below and let me know how they turned out. And if you really loved this unique take on pizza night, please consider clicking the little stars at the top of the recipe card to give it a rating! It genuinely helps other home cooks find the best comfort mashups out there. Happy baking, everyone!
Print
Pizza Pot Pies
- Total Time: 55 min
- Yield: 6 pies 1x
- Diet: Vegetarian
Description
Individual servings of pizza filling baked inside a pastry crust.
Ingredients
- 2 cups all-purpose flour
- 1 teaspoon salt
- 1/2 cup cold unsalted butter, cubed
- 1/2 cup ice water
- 1 cup pizza sauce
- 1 1/2 cups shredded mozzarella cheese
- 1/2 cup cooked ground beef or pepperoni, chopped
- 1/4 cup sliced black olives
- 1/4 cup sliced mushrooms
- 1 egg, beaten (for egg wash)
Instructions
- Prepare the pastry: Mix flour and salt. Cut in the cold butter until the mixture resembles coarse crumbs. Gradually add ice water until the dough just comes together. Divide the dough in half, form into disks, wrap, and chill for 30 minutes.
- Preheat your oven to 400 degrees Fahrenheit. Lightly grease six standard muffin cups.
- On a lightly floured surface, roll out one disk of dough thinly. Use a round cutter slightly larger than the muffin cup openings to cut out six circles for the bottom crusts. Press these circles into the prepared muffin cups.
- In a bowl, mix the pizza sauce, mozzarella cheese, ground meat/pepperoni, olives, and mushrooms.
- Spoon the filling evenly into the pastry-lined muffin cups.
- Roll out the second disk of dough. Cut out six circles for the top crusts, slightly larger than the muffin cup openings.
- Place a top crust over the filling in each cup. Crimp the edges to seal the top and bottom crusts together. Cut a small vent hole in the center of each top crust.
- Brush the tops of the pies with the beaten egg wash.
- Bake for 20 to 25 minutes, or until the crust is golden brown and the filling is hot.
- Let the pies cool in the muffin tin for 5 minutes before carefully removing them.
Notes
- You can substitute your favorite pizza toppings in the filling mixture.
- For a quicker crust, use store-bought refrigerated pie crust dough.
- Prep Time: 30 min
- Cook Time: 25 min
- Category: Main Course
- Method: Baking
- Cuisine: American
Nutrition
- Serving Size: 1 pie
- Calories: 450
- Sugar: 6
- Sodium: 650
- Fat: 25
- Saturated Fat: 14
- Unsaturated Fat: 11
- Trans Fat: 0.5
- Carbohydrates: 40
- Fiber: 2
- Protein: 18
- Cholesterol: 55
Keywords: pizza, pot pie, individual serving, pastry, quick dinner