
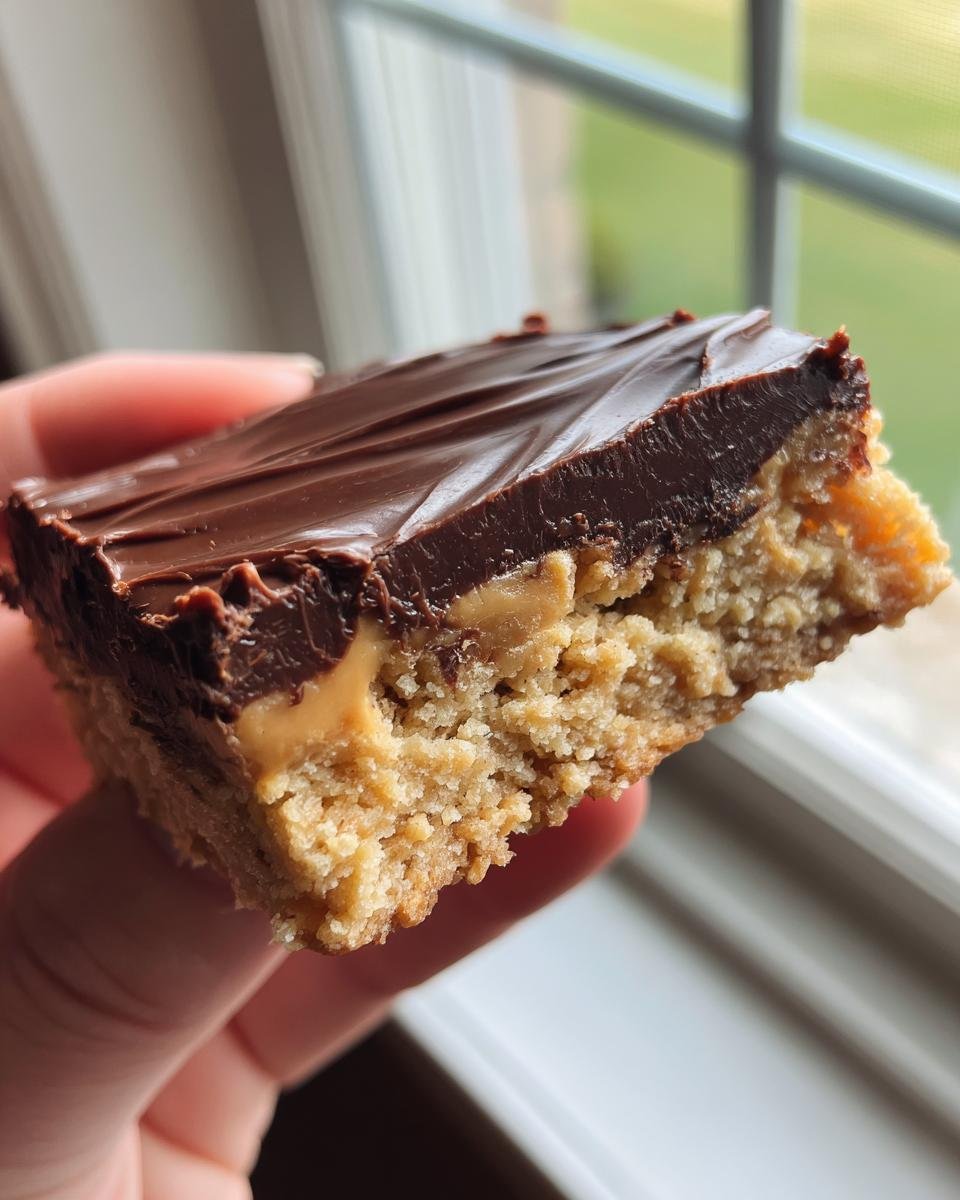
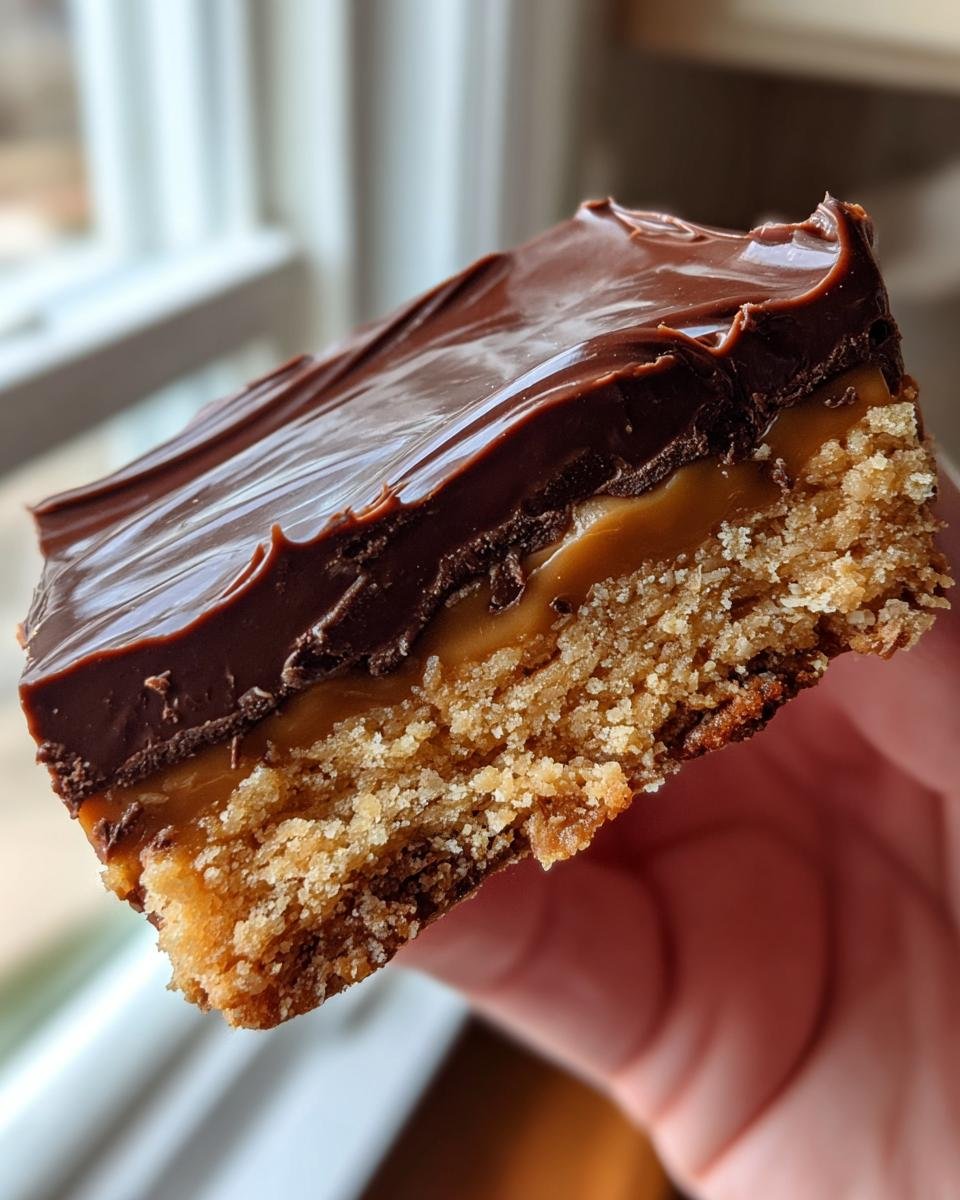
Oh my goodness, you guys, have I got a treat for you today! We’re diving headfirst into making the most incredible Peanut Butter Dream Bars. Seriously, these things are pure magic. Imagine a super chewy, perfectly sweet peanut butter base, and then, BAM! It’s topped with this luscious, dreamy chocolate ganache that just melts in your mouth. I remember the first time I made these for a family get-together; they disappeared so fast I barely got one myself! It’s that perfect combo of salty peanut butter and rich chocolate that just makes everything feel right in the world. Trust me, these are going to become your new go-to when you need a serious dessert fix.

Why You’ll Love These Peanut Butter Dream Bars
Seriously, these bars are a game-changer! Here’s why you’ll be making them again and again:
- So Easy! You won’t believe how simple they are to whip up. Perfect for when you need a quick but impressive dessert.
- Crowd Pleaser: Who doesn’t love peanut butter and chocolate? These Peanut Butter Dream Bars are always a hit with everyone, young and old.
- Perfectly Chewy & Rich: That chewy peanut butter base with the smooth chocolate topping? It’s just divine.
- Super Versatile: Great for bake sales, parties, or just because you deserve a treat!
Simple Ingredients for Peanut Butter Dream Bars
The beauty of these Peanut Butter Dream Bars is that they use pretty standard pantry staples. You probably have most of this stuff already! We need:
- 1 cup (that’s two sticks!) of unsalted butter, make sure it’s softened so it creams up nicely.
- 1 cup of granulated sugar.
- 1 cup of light brown sugar, packed down good and tight. This is key for that chewiness!
- 2 large eggs – just regular ones from the carton.
- 2 teaspoons of vanilla extract. Don’t skimp here, it adds so much flavor!
- 3 cups of all-purpose flour.
- 1 teaspoon of baking soda to give it a little lift.
- 1/2 teaspoon of salt to balance out all that sweetness.
- 2 cups of creamy peanut butter. Smooth is best here, no chunky stuff for this layer!
- 1 cup of semisweet chocolate chips. These are for that gorgeous ganache topping.
- And finally, 1/4 cup of heavy cream for our luscious chocolate topping.
Essential Equipment for Baking Peanut Butter Dream Bars
You don’t need anything fancy for these bars! Just grab a 9×13 inch baking pan, a couple of mixing bowls (one big, one medium), an electric mixer (handheld or stand mixer works great), a whisk, a spatula, and your trusty measuring cups and spoons. Oh, and don’t forget your oven!
Step-by-Step Guide to Making Peanut Butter Dream Bars
Alright, let’s get down to business! Making these Peanut Butter Dream Bars is honestly a piece of cake – well, a piece of bar, anyway! We’ll tackle this in a few easy stages, and before you know it, you’ll have a pan full of pure happiness.
Preparing the Peanut Butter Base
First things first, get that oven preheated to 350°F (175°C) and give your 9×13 inch pan a good grease and flour. Now, in a big bowl, we’re going to cream together that softened butter with both the granulated and brown sugars. Beat it until it’s nice and fluffy – this is where we build that amazing chewy texture! Then, crack in your eggs one at a time, mixing well after each, and stir in that lovely vanilla extract. In another bowl, give your flour, baking soda, and salt a quick whisk. Gradually add these dry bits to your wet ingredients, mixing just until everything comes together. Don’t overmix, or you’ll lose that chew! Then, press about two-thirds of this glorious dough into the bottom of your prepared pan to create the base. You want a nice, even layer!
Adding the Peanut Butter Layer and Crumble Topping
Okay, base is prepped! Now, take your creamy peanut butter and spread it nice and evenly all over that doughy foundation. Try to get it right to the edges so every bite has that peanut butter goodness. Once that’s done, grab the remaining one-third of your dough. This part is fun – just crumble it right over the peanut butter layer. Don’t worry about making it perfect; a rustic crumble is exactly what we want! It’ll bake up into these delicious little pockets of chewy goodness on top.
Baking and Finishing Your Peanut Butter Dream Bars
Now, pop that pan into your preheated oven. We’re looking at about 25 to 30 minutes, or until those edges turn a lovely golden brown. While those are baking, let’s whip up that dreamy chocolate topping! In a microwave-safe bowl, combine your chocolate chips and heavy cream. Microwave in short bursts, stirring in between, until it’s all smooth and melty. If you don’t have a microwave or prefer, you can totally do this in a double boiler. Once the bars are out of the oven and have cooled just a bit in the pan for about 10 minutes, pour that luscious chocolate mixture over the top. Spread it out evenly to cover everything. Let these beauties cool completely in the pan before you cut them into squares. This is the hardest part, waiting!
Tips for Perfect Peanut Butter Dream Bars
Alright, so you want to make the absolute best Peanut Butter Dream Bars? I’ve got a few little tricks up my sleeve that make all the difference! First off, when you’re creaming that butter and sugar, really take your time. You want it light and fluffy, almost like a cloud. This step is crucial for that perfect chewy texture, so don’t rush it! Also, when you’re mixing in the dry ingredients, stop as soon as you don’t see any more flour streaks. Overmixing can make the bars tough instead of wonderfully chewy, and nobody wants that. For the chocolate topping, if your chocolate chips are being stubborn and not melting smoothly, just add a tiny splash more cream. It’s all about getting that silky-smooth ganache that covers everything like a dream!
Ingredient Variations for Peanut Butter Dream Bars
These Peanut Butter Dream Bars are fantastic as is, but you know me, I love to play around! If you’re a dark chocolate fan, definitely swap out the semisweet chips for dark chocolate chips in the topping – it adds a lovely depth. Or, try milk chocolate if you prefer something sweeter! For a little extra crunch and flavor, you could totally stir some chopped peanuts or even some mini M&Ms into the base dough before you press it into the pan. It adds another layer of texture and fun to these already amazing bars!
Serving and Storing Your Peanut Butter Dream Bars
These Peanut Butter Dream Bars are perfect served just as they are, maybe with a cold glass of milk to wash down all that peanut butter and chocolate goodness! They’re really best when they’ve cooled completely so that chocolate topping sets up just right. If you happen to have any leftovers (which is rare in my house!), just pop them into an airtight container. They’ll stay yummy at room temperature for about 3 days. Honestly, they’re so good, I doubt they’ll last that long anyway!
Frequently Asked Questions About Peanut Butter Dream Bars
Got questions about these amazing Peanut Butter Dream Bars? I’ve got answers! People always ask if they can skip baking the base, and while I haven’t tried it myself, I bet you could probably make a no-bake version by chilling the base really well before adding the peanut butter and chocolate. You might need to adjust the ratios a bit, though! Another common question is about cutting them cleanly. The trick is to let them cool *completely* before slicing. Using a sharp knife and wiping it clean between cuts also helps a ton. If they’re still being stubborn, chilling the whole pan for about 15-20 minutes before slicing can firm up that chocolate topping and make for super neat squares. And yes, you can totally use chunky peanut butter if you love a little extra texture in your Peanut Butter Dream Bars!
Nutritional Information for Peanut Butter Dream Bars
Alright, let’s talk numbers for these glorious Peanut Butter Dream Bars! Keep in mind these are estimates, of course, since everyone’s ingredients can vary just a tiny bit. But generally, one bar comes in around 250 calories. You’re looking at about 15g of fat, with 7g of that being saturated fat. We’ve got roughly 28g of carbohydrates and a solid 5g of protein per serving. These are just a ballpark figure so you know what you’re working with, but trust me, they are SO worth it!
Share Your Peanut Butter Dream Bars Creations!
I absolutely LOVE seeing what you all whip up in your kitchens! If you make these incredible Peanut Butter Dream Bars, please, please, please come back here and leave a comment! Tell me how they turned out, if you added any fun twists, or just how much you loved them. And if you snap a photo, tag me on social media! I can’t wait to see your delicious creations – it totally makes my day!
Print
Peanut Butter Dream Bars: 1 Amazing Recipe
- Total Time: 50 minutes
- Yield: 24 servings 1x
- Diet: Vegetarian
Description
Peanut Butter Dream Bars are a delightful treat featuring a chewy peanut butter base topped with a rich chocolate ganache.
Ingredients
- 1 cup (2 sticks) unsalted butter, softened
- 1 cup granulated sugar
- 1 cup packed light brown sugar
- 2 large eggs
- 2 teaspoons vanilla extract
- 3 cups all-purpose flour
- 1 teaspoon baking soda
- 1/2 teaspoon salt
- 2 cups creamy peanut butter
- 1 cup semisweet chocolate chips
- 1/4 cup heavy cream
Instructions
- Preheat your oven to 350°F (175°C). Grease and flour a 9×13 inch baking pan.
- In a large bowl, cream together the softened butter, granulated sugar, and brown sugar until light and fluffy.
- Beat in the eggs one at a time, then stir in the vanilla extract.
- In a separate bowl, whisk together the flour, baking soda, and salt.
- Gradually add the dry ingredients to the wet ingredients, mixing until just combined.
- Press about two-thirds of the dough into the prepared baking pan to form the base layer.
- Spread the creamy peanut butter evenly over the base layer.
- Crumble the remaining one-third of the dough over the peanut butter layer.
- Bake for 25-30 minutes, or until the edges are golden brown.
- While the bars are baking, melt the chocolate chips and heavy cream together in a microwave-safe bowl, stirring until smooth. Alternatively, melt them in a double boiler.
- Once the bars are out of the oven, let them cool slightly in the pan for about 10 minutes.
- Pour the melted chocolate mixture over the warm bars and spread evenly.
- Allow the bars to cool completely in the pan before cutting into squares.
Notes
- For a richer chocolate flavor, use dark chocolate chips.
- If you prefer a firmer chocolate topping, let it set at room temperature. For a softer topping, refrigerate the bars.
- Store leftovers in an airtight container at room temperature for up to 3 days.
- Prep Time: 20 minutes
- Cook Time: 30 minutes
- Category: Dessert
- Method: Baking
- Cuisine: American
Nutrition
- Serving Size: 1 bar
- Calories: 250
- Sugar: 20g
- Sodium: 150mg
- Fat: 15g
- Saturated Fat: 7g
- Unsaturated Fat: 8g
- Trans Fat: 0g
- Carbohydrates: 28g
- Fiber: 2g
- Protein: 5g
- Cholesterol: 30mg
Keywords: Peanut Butter Dream Bars, peanut butter, chocolate, dessert bars, easy dessert, no-bake topping