
Oh, you know those nights—the ones where you just need food that feels like a warm hug from the past? For me, that flavor is absolutely the cheesy, savory goodness of that iconic boxed meal we all grew up on. But honestly, while the box was fast, it never *really* hit the spot, texture-wise. So, I spent ages tinkering in my kitchen to perfect **My Childhood Homemade Hamburger Helper**!
Forget the dry milk powder and mystery cheese dust; we’re making it right here on the stovetop, fast as you please. My goal was simple: capture that incredible creamy macaroni and beef nostalgia but make it taste fresh, rich, and deeply satisfying. Trust me, once you taste this from-scratch cheesiness, you won’t look back at the pantry aisle again. It’s true comfort food, done right.

Why This Homemade Version of My Childhood Homemade Hamburger Helper Shines
Look, the boxed stuff was fine when you were ten and starving after school. But now? No way! This version tastes like the real deal—way better, actually—because we use real milk and actual shredded cheddar that melts perfectly.
- It’s ridiculously fast; we’re talking total cook and cleanup time under 30 minutes.
- Everything happens in one skillet! Seriously, cleanup is just rinsing that one pan. I even have a soup version if you’re feeling adventurous!
- The flavor is just so much deeper and richer than anything that comes in a cardboard box. You won’t believe the difference real spices make.
Essential Ingredients for My Childhood Homemade Hamburger Helper
Okay, this is the part where people realize just how simple this recipe really is. You probably have ninety percent of this stuff sitting in your pantry right now! Seriously, no packet required. We are building that flavor from the ground up, which is honestly the best part.
For the foundation of your best **My Childhood Homemade Hamburger Helper**, you’ll need:
One pound of ground beef, drained really well after browning. That’s key for a clean sauce!
One cup of dry elbow macaroni. Make sure it’s dry because we are cooking it right in the sauce!
Two cups of water, which works with the milk to cook the pasta perfectly.
One cup of milk—I always use whole milk, but you can cheat if you need to.
The flavor magic comes from one teaspoon of onion powder, half a teaspoon of garlic powder, half a teaspoon of salt, and just a tiny quarter teaspoon of black pepper.
And finally, the crowning glory: one full cup of shredded cheddar cheese. Get the good stuff; the pre-shredded bags sometimes have anti-caking agents that refuse to melt nicely.
Ingredient Notes and Substitutions for My Childhood Homemade Hamburger Helper
Let’s talk substitutions, because life happens! If you aren’t into beef, ground turkey or ground chicken works beautifully here. You just need about the same amount, browned first. But for the cheese? Please, slice a block of good sharp cheddar yourself if you can! That smoother melt makes all the difference between a creamy sauce and a slightly gritty one.
For the dairy part, whole milk gives the creamiest texture, like the stuff I remember sneaking off the stove, but 2% works fine if you’re counting calories. If you want it *extra* rich, toss in two tablespoons of cream cheese when you melt the cheddar. Nobody will know, but you will taste the extra velvety goodness!
Step-by-Step Instructions for My Childhood Homemade Hamburger Helper
We are keeping this super streamlined, just like we did when we were kids trying to get to dessert faster. This should take you from zero to dinner in about 20 minutes total, which is a dinner miracle, if you ask me.
- First things first: brown that pound of ground beef in your biggest, comfiest skillet over medium heat. Once it’s totally cooked through and brown, drain off every bit of excess grease. I use a slotted spoon and lean the pan to catch the fat—no greasy noodles here!
- Now, pour in your two cups of water and one cup of milk. Toss in your spices: the onion powder, garlic powder, salt, and pepper. Give that a good stir and bring the whole thing up to a gentle simmer.
- Time for the pasta! Stir in one cup of dry elbow macaroni. This is where the stovetop magic starts happening.
- Turn that heat way down to low, cover your skillet tight, and let it just burble away for about 12 to 15 minutes. You want the macaroni soft and most of that liquid gone, soaked right up into the pasta.
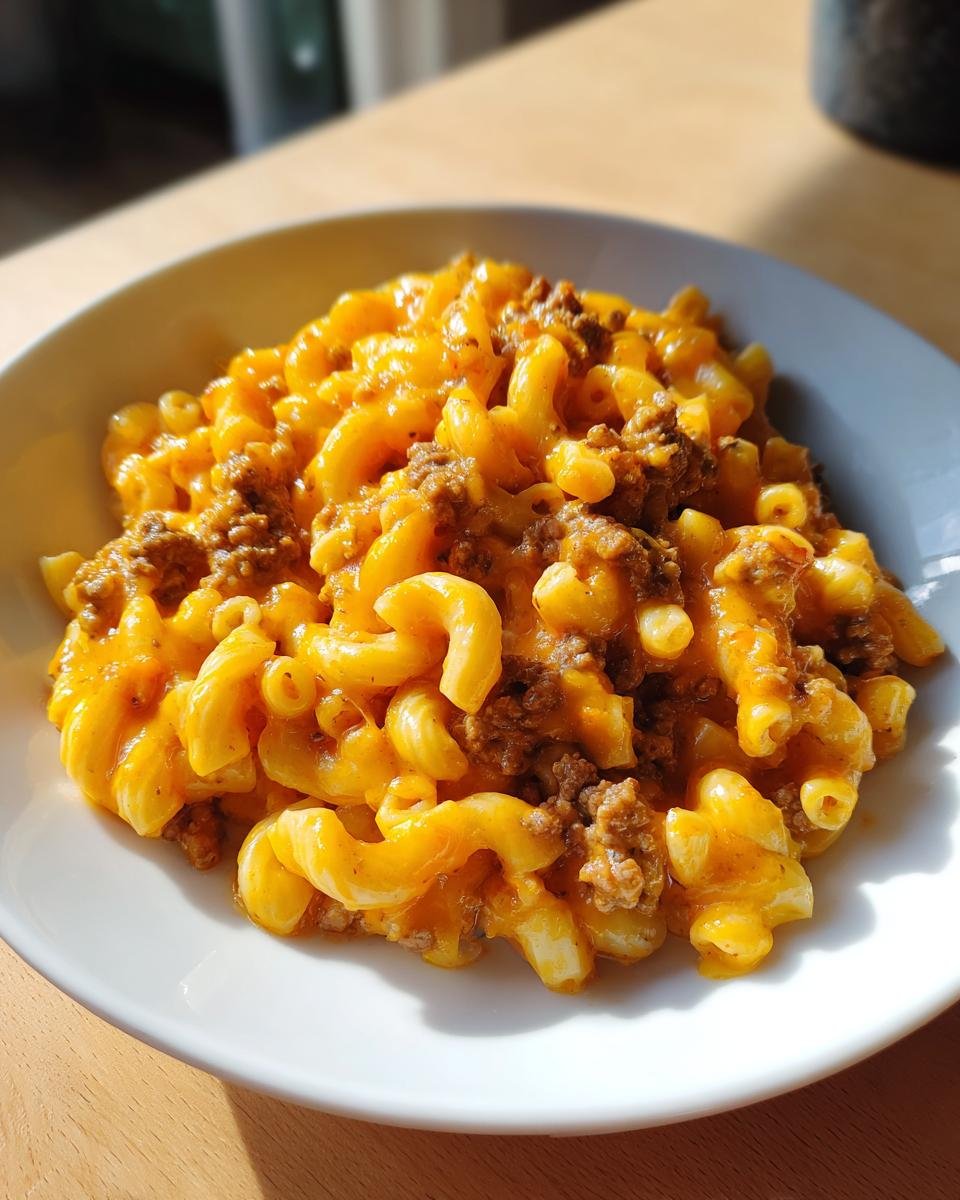
- When the pasta is tender—give one a taste test!—take the skillet completely off the heat. This step is non-negotiable! Stir in your cup of shredded cheddar cheese until it disappears into this incredible, rich, creamy sauce. Serve it right away while it’s piping hot! Sometimes I toss in taco seasoning, but for this classic version, keep it simple!
Achieving the Perfect Creamy Sauce in My Childhood Homemade Hamburger Helper
The absolute number one mistake people make with this stovetop method is trying to melt the cheese while the heat is too high or while the liquid is still boiling actively. When you drop that cheese in while it’s still roaring hot, it has a tendency to seize up and get clumpy or grain-y. No thank you!
So, step five is your secret weapon. Pull that pan entirely off the burner before you even *look* at the cheese. The residual heat of the beef, the liquid it just absorbed, and the warm pasta are more than enough to melt that cheddar into a smooth, velvety dream sauce. Don’t rush it; that brief cooling moment right before stirring the cheese in is what separates a good attempt from a perfect childhood flashback.
Tips for the Best My Childhood Homemade Hamburger Helper Experience
I have made this so many times that I’ve developed a few sneaky tricks to make sure every single batch tastes exactly like the best version of my childhood memory.
First, you absolutely must stir frequently during the last five minutes of the simmer. I know we covered draining the fat, but if you forget to stir, the delicate elbow macaroni will weld itself right to the bottom of the pan. It’s like cooking cement! Stir it every minute or so when the liquid gets low.
Second, for an ultra-comfort vibe, don’t skip the whole milk, but if you want to cheat and make it taste like you simmered it for an hour, try adding a tiny dollop of sour cream or cream cheese right when you add the shredded cheddar. It smooths everything out beautifully. If you like bacon in your mac and cheese, you could totally toss in some crumbled bacon here for a salty crunch!
Also, I always taste the sauce before adding the cheese. Sometimes the water I use tastes salty, or maybe my beef was naturally fatty; adjusting that salt and pepper *before* the cheese goes in ensures you don’t end up with a flat-tasting final product. It’s all about tasting as you go, even in quick meals!
Serving Suggestions for My Childhood Homemade Hamburger Helper
This dish is seriously built to be a main event. It’s hearty, beefy, and cheesy, so you don’t want to weigh it down with anything too heavy. When I was a kid, my mom would always serve it with something green, just to trick us into eating vegetables.
A simple side salad with a light vinaigrette works perfectly to cut through the richness. Or, keep it super easy: a side of lightly steamed green beans. If you want my favorite basic green bean recipe, you can grab those instructions right here! They take literally five minutes to steam and taste so fresh.
Honestly, though, the best thing you can serve it with is silence and a couch, because this is total relaxation food. Eat it straight from the skillet if you really want to lean into the nostalgia!
Storage and Reheating My Childhood Homemade Hamburger Helper
If you’re lucky enough to have leftovers—which, let’s be real, I rarely do—storage is easy peasy. Just let it cool down for about fifteen minutes, then scoop it into an airtight container. It lasts great in the fridge for about three days. Don’t leave it sitting on the counter too long! Food safety first, even with comfort food.
When you’re ready to reheat, the microwave is the fastest way, of course. But my absolute preference is using the stovetop again. Put your serving in a small, non-stick saucepan over medium-low heat. If it seems a little dry—and it almost always does because the macaroni keeps taking in moisture—add just a tablespoon or two of plain milk or even just water before stirring. Stir constantly until it’s heated through and creamy again. It tastes almost brand new that way!
Frequently Asked Questions About My Childhood Homemade Hamburger Helper
Can I make My Childhood Homemade Hamburger Helper vegetarian?
Absolutely! That’s a great question. You can easily make this vegetarian. Just leave out the ground beef and, instead, sauté about half an onion and one cup of sliced mushrooms or perhaps some lentils in the skillet first. Then, proceed with your milk, water, and spices. You get that same creamy sauce base without the meat!
How do I thicken the sauce for My Childhood Homemade Hamburger Helper?
If your sauce ends up too thin—maybe you added a little too much liquid or cooked it too fast—the thickest trick is to remove the lid for the last couple of minutes of cooking time. Let that extra steam escape. If it’s still thin after the cheese melts, take it off the heat and mix in about a teaspoon of cornstarch that you’ve pre-whisked into two teaspoons of cold water. Stir that slurry in quickly, put it back on very low heat for 30 seconds, and watch it tighten up beautifully. If you’re looking for vegetarian patties, I have a great lentil recipe!
What is the best pasta shape for My Childhood Homemade Hamburger Helper?
Elbow macaroni is the gold standard here because it holds the sauce perfectly inside those little tubes, delivering that nostalgic burst of cheese and beef in every mouthful. However, if you’re desperate, small shells or even ditalini work okay, but honestly, stick to the elbows if you can find them. They just *feel* right for this dish.
Nutritional Estimates for My Childhood Homemade Hamburger Helper
I pulled up some general estimates for a standard serving, just so you have a ballpark idea of what’s in this hearty meal. Since we are using real ingredients, the values change depending on what brand of cheese or cut of beef you use, so treat these as guidelines, okay?
For one serving, you’re looking at approximately:
- Calories: 450
- Fat: 22g (with 10g saturated fat)
- Carbohydrates: 35g
- Protein: 30g
- Sodium: Around 550mg (this varies wildly based on your salt addition!)
It’s certainly a filling dinner, packing a solid punch of protein!

Share Your My Childhood Homemade Hamburger Helper Success
I put my heart into recreating this classic, so when you try it out, please come back and tell me how it stacked up against your own childhood memories! Did it hit the spot? Did you sneak in any extra cheese? I want to hear it all.
Leave a rating below so I know how much you loved it. If you snapped a picture of that beautifully cheesy stovetop creation, tag me on social media—I love seeing your kitchen triumphs! If you want to send me a note directly, my contact page is always open. Happy cooking, friends!
Step-by-Step Instructions for My Childhood Homemade Hamburger Helper
We are keeping this super streamlined, just like we did when we were kids trying to get to dessert faster. This should take you from zero to dinner in about 20 minutes total, which is a dinner miracle, if you ask me.
- First things first: brown that pound of ground beef in your biggest, comfiest skillet over medium heat. Once it’s totally cooked through and brown, drain off every bit of excess grease. I use a slotted spoon and lean the pan to catch the fat—no greasy noodles here!
- Now, pour in your two cups of water and one cup of milk. Toss in your spices: the onion powder, garlic powder, salt, and pepper. Give that a good stir and bring the whole thing up to a gentle simmer.
- Time for the pasta! Stir in one cup of dry elbow macaroni. This is where the stovetop magic starts happening.
- Turn that heat way down to low, cover your skillet tight, and let it just burble away for about 12 to 15 minutes. You want the macaroni soft and most of that liquid gone, soaked right up into the pasta.
- When the pasta is tender—give one a taste test!—take the skillet completely off the heat. This step is non-negotiable! Stir in your cup of shredded cheddar cheese until it disappears into this incredible, rich, creamy sauce. Serve it right away while it’s piping hot! Sometimes I toss in taco seasoning, but for this classic version, keep it simple!
Achieving the Perfect Creamy Sauce in My Childhood Homemade Hamburger Helper
The absolute number one mistake people make with this stovetop method is trying to melt the cheese while the heat is too high or while the liquid is still boiling actively. When you drop that cheese in while it’s still roaring hot, it has a tendency to seize up and get clumpy or grain-y. No thank you!
So, step five is your secret weapon. Pull that pan entirely off the burner before you even *look* at the cheese. The residual heat of the beef, the liquid it just absorbed, and the warm pasta are more than enough to melt that cheddar into a smooth, velvety dream sauce. Don’t rush it; that brief cooling moment right before stirring the cheese in is what separates a good attempt from a perfect childhood flashback.
Tips for the Best My Childhood Homemade Hamburger Helper Experience
I have made this so many times that I’ve developed a few sneaky tricks to make sure every single batch tastes exactly like the best version of my childhood memory.
First, you absolutely must stir frequently during the last five minutes of the simmer. I know we covered draining the fat, but if you forget to stir, the delicate elbow macaroni will weld itself right to the bottom of the pan. It’s like cooking cement! Stir it every minute or so when the liquid gets low.
Second, for an ultra-comfort vibe, don’t skip the whole milk, but if you want to cheat and make it taste like you simmered it for an hour, try adding a tiny dollop of sour cream or cream cheese right when you add the shredded cheddar. It smooths everything out beautifully. If you like bacon in your mac and cheese, you could totally toss in some crumbled bacon here for a salty crunch!
Also, I always taste the sauce before adding the cheese. Sometimes the water I use tastes salty, or maybe my beef was naturally fatty; adjusting that salt and pepper *before* the cheese goes in ensures you don’t end up with a flat-tasting final product. It’s all about tasting as you go, even in quick meals!
Serving Suggestions for My Childhood Homemade Hamburger Helper
I put so much effort into getting that beef and cheese flavor just right, so serving it up needs to be simple. This dish is seriously built to be a main event. It’s hearty, beefy, and cheesy, so you don’t want to weigh it down with anything too heavy. That always threw off the balance when I was a kid!
When I was little, my Mom knew the flavor bomb of the main dish meant we needed something bright and acidic on the side. We always had a simple side salad with a light vinaigrette. That little bit of sharpness cuts right through all that creamy cheddar goodness, and it just cleans your palate between bites. Trust me, you need that contrast!
Or, if you want to go the super easy route, just toss some green beans in a steamer basket. I have my absolute favorite way to make them taste fantastic—just a little butter and garlic powder—but honestly, even plain steamed ones work so well here. It’s that needed vegetable component without being fussy.
The truth is, though, the best thing you can serve it with is just a big, comfy bowl and maybe a spoon because sometimes you just need to scoop every last bit of sauce out. Eat it warm and enjoy the moment!

Storage and Reheating My Childhood Homemade Hamburger Helper
If you’re lucky enough to have leftovers—which, let’s be real, I rarely do!—storage is easy peasy. This casserole doesn’t keep badly at all, but you want to make sure you seal in that cheesy flavor.
Let whatever is left cool down on the counter for about twenty minutes first. Seriously, don’t put a blazing hot skillet into the fridge; it’s not good for your fridge’s internal temperature. Once it’s just warm, scoop the rest into an airtight container. It keeps perfectly well in the refrigerator for about three days. Any longer than that and the macaroni starts getting a little too soft for my liking.
Now, when you’re ready for round two, you have options, but I strongly prefer the stovetop. Pop your portion into a small, non-stick saucepan over medium-low heat. The pasta absorbs the moisture as it sits, so it’s almost guaranteed to look a little dry at first glance. That’s where the trick comes in!
Before you even turn the heat on, stir in just a single tablespoon of plain milk or water. You can always add more, but you can’t take it out! Stir constantly while heating until everything is warm and that sauce blends back into that creamy dream texture we love. The microwave works in a pinch, but it tends to heat unevenly and can make the cheese get a little weird if you don’t cover it well. Stovetop is just superior for bringing **My Childhood Homemade Hamburger Helper** back to life!
Frequently Asked Questions About My Childhood Homemade Hamburger Helper
We all have those little sticking points when we try a new recipe or recreate an old favorite. Don’t worry about those hiccups—I’ve probably already made that small mistake myself while perfecting **My Childhood Homemade Hamburger Helper**! Here are the things folks ask me most often.
Can I make My Childhood Homemade Hamburger Helper vegetarian?
Yes, you absolutely can! It’s surprisingly easy to pivot this recipe away from beef if you need to. Forget the ground meat entirely. What I suggest is sautéing some diced onions and maybe a cup of sliced mushrooms in the skillet first until they get nice and soft. You get a great depth of savory flavor! Then, proceed exactly as written with the milk, water, and spices. It works like a charm and still gives you that beautiful cheesy sauce.
How do I thicken the sauce for My Childhood Homemade Hamburger Helper?
If you find your sauce is too loose, maybe you added a little too much milk or didn’t simmer long enough, don’t panic or add more cheese right away! The quickest fix is to take the lid off during that last few minutes of cooking before you turn off the heat—just let some of that steam boil off. If it’s still runny after that, try my little cheat: whisk one teaspoon of cornstarch into two teaspoons of cold water until it’s totally smooth. Then, stir that slurry into the sauce off the heat, put it back on low for just 30 seconds, and watch it thicken up nicely! I wish I had thought of that trick when I was a kid!
What is the best pasta shape for My Childhood Homemade Hamburger Helper?
For the true, textbook experience of **My Childhood Homemade Hamburger Helper**, you simply must use elbow macaroni. They are the perfect little vehicles for delivering that thick cheddar sauce and ground beef up into your mouth. They just *feel* right, you know?
If you open the pantry and only have something else, don’t stress out! Small pasta shapes like ditalini or maybe those little tiny shells work okay in a pinch. Just know that the texture won’t be quite as satisfying as that classic elbow tube shape. If you’re trying to go vegetarian and want to try lentils instead, I have a solid recipe for lentil items you might check out!
Nutritional Estimates for My Childhood Homemade Hamburger Helper
You know, as a kid, I never paid attention to this stuff. It was just fuel for Saturday morning cartoons! But now that I’m cooking for the family, I like to have a general idea of what we’re eating. Since we’re using real ingredients—not mystery powder—the numbers will shift based on your exact brand of cheese or the leanness of your beef, so please take these as a good starting point rather than gospel truth.
I ran the numbers through a calculator based on my standard recipe proportions and portion size. For one generous serving of this amazing, homemade goodness, expect roughly:
- Calories: 450
- Fat: 22g (Watch that saturated fat; it comes mostly from the tasty cheese!)
- Sugar: Just 5g—mostly coming naturally from the dairy, which is great!
- Sodium: Around 550mg (You control this! Use low-sodium salt if you are sensitive.)
- Carbohydrates: 35g
- Protein: A whopping 30g! This dish is so filling because of all that real beef and macaroni.
It’s hearty fuel, for sure, but it’s real food, and that’s what matters most to me when bringing back those nostalgic flavors!
Share Your My Childhood Homemade Hamburger Helper Success
I put so much love into tracking down the perfect balance of spices and cheese to make this taste just like I remembered it. Now that you’ve made this batch of **My Childhood Homemade Hamburger Helper**, I absolutely need to know what you think!
My favorite part of posting recipes is hearing your stories. Did this take you right back to your own childhood kitchen? Did you sneak a bite right off the spoon while stirring in the cheese? Tell me everything in the comments below—I read every single one!
Don’t keep this cheesy magic to yourself! If you made it and it turned out fantastic (which I know it did!), please go ahead and give the recipe a star rating right above the comments section. That helps other busy folks like us find the real winners.
And please, if you shared a photo on Instagram or Facebook, tag me! I love seeing my recipes out in the wild, especially when they are plated up comfort-food style. If you have feedback or just want to send a quick note without commenting publicly, my contact form is always open for messages. Let’s keep sharing these amazing, simple comfort meals together!
Print
Homemade Hamburger Helper Style Casserole
- Total Time: 25 min
- Yield: 4 servings 1x
- Diet: Vegetarian
Description
A simple, comforting casserole mimicking the classic boxed meal, made with ground beef and macaroni in a cheesy sauce.
Ingredients
- 1 pound ground beef
- 1 cup dry elbow macaroni
- 2 cups water
- 1 cup milk
- 1 teaspoon onion powder
- 1/2 teaspoon garlic powder
- 1/2 teaspoon salt
- 1/4 teaspoon black pepper
- 1 cup shredded cheddar cheese
Instructions
- Brown the ground beef in a large skillet over medium heat. Drain off any excess fat.
- Add the water, milk, onion powder, garlic powder, salt, and pepper to the skillet with the beef. Bring the mixture to a simmer.
- Stir in the dry macaroni.
- Reduce the heat to low, cover the skillet, and cook for 12 to 15 minutes, stirring occasionally, until the macaroni is tender and most of the liquid is absorbed.
- Remove the skillet from the heat. Stir in the shredded cheddar cheese until completely melted and the sauce is creamy.
- Serve immediately.
Notes
- For a richer flavor, use whole milk instead of lower-fat milk.
- You can substitute ground turkey or ground chicken for the beef.
- Stir well during the last few minutes of cooking to prevent the pasta from sticking to the bottom of the pan.
- Prep Time: 5 min
- Cook Time: 20 min
- Category: Dinner
- Method: Stovetop
- Cuisine: American
Nutrition
- Serving Size: 1 serving
- Calories: 450
- Sugar: 5
- Sodium: 550
- Fat: 22
- Saturated Fat: 10
- Unsaturated Fat: 12
- Trans Fat: 0
- Carbohydrates: 35
- Fiber: 2
- Protein: 30
- Cholesterol: 75
Keywords: hamburger helper, homemade, beef, macaroni, cheese casserole, quick dinner