
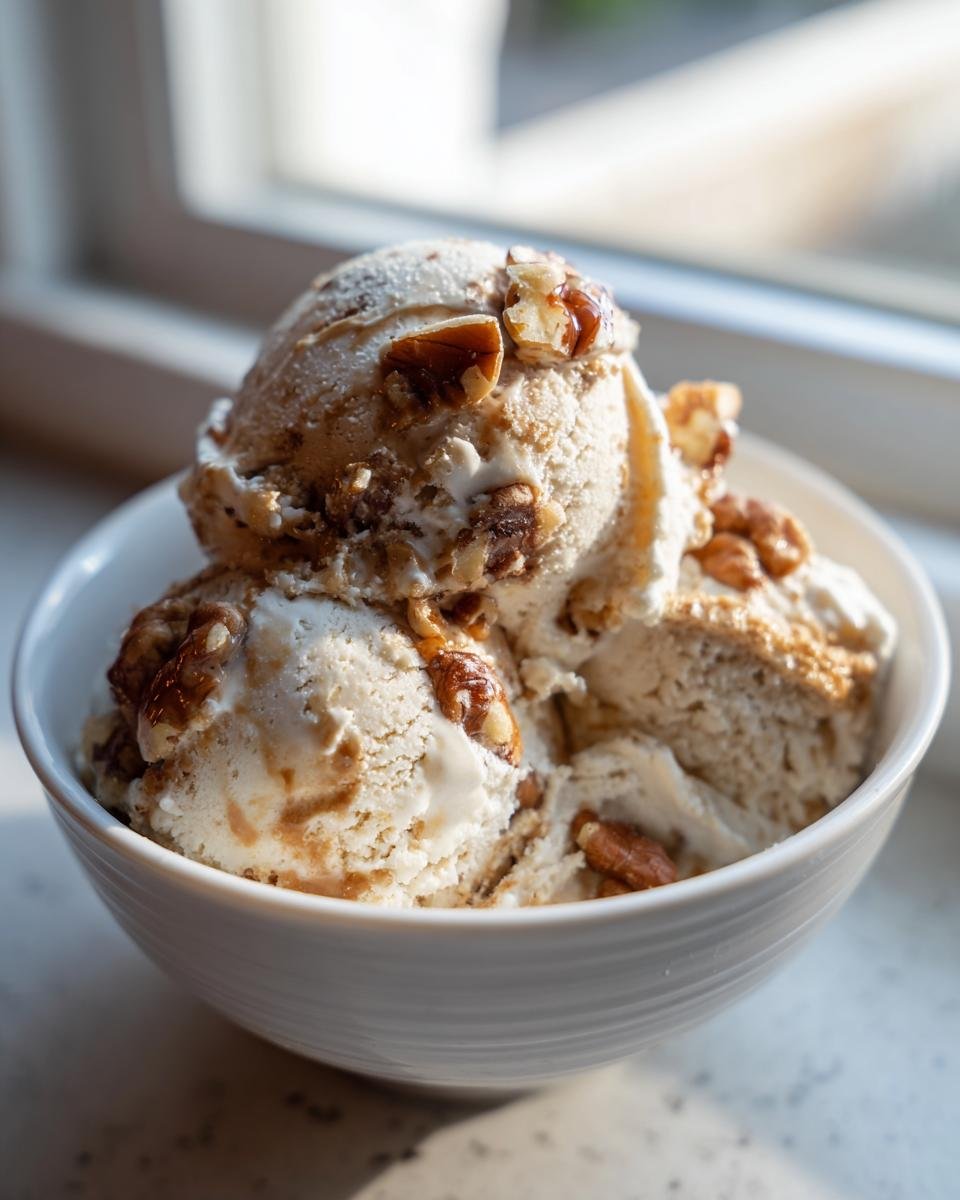
Forget everything you know about store-bought tubs, because when you taste this, your freezer door is staying shut for good. We’re making the richest, creamiest dessert imaginable: Maple Brown Butter Walnut Ice Cream. This isn’t just a scoop; it’s an experience built around the gorgeous depth of brown butter, soaked right into a homemade custard base.
I remember the first time I nailed the brown butter stage—that nutty, toffee smell filled my entire kitchen! That moment is when I knew this recipe was something special. The combination of earthy brown butter, sweet maple syrup, and those crunchy walnuts creates layers of flavor you just can’t buy pre-packaged. Trust me, once you nail this custard base, you’re going to be making ice cream all year long.
Gathering Ingredients for Maple Brown Butter Walnut Ice Cream
Okay, let’s talk about what you need before we even turn on the stove. This isn’t a dump-and-stir situation; we need quality components for that intense flavor profile. You must use unsalted butter because we control the salt level ourselves in the final base! Also, please grab pure maple syrup—none of that fake pancake stuff allowed here, we need that deep woods flavor.
Here’s the rundown. You’ll need one cup of heavy cream and one cup of whole milk to keep things rich. Don’t skimp! We need four large egg yolks for that beautiful custard structure. And the stars of the show, of course, are the walnuts. Remember, they need to be toasted first—that brings out such a wonderful depth that pairs perfectly with the brown butter. For that extra walnut crunch later, make sure they are chopped up nicely after toasting. We’ll also grab some granulated sugar and one teaspoon of vanilla to round everything out.
If you’re interested in more recipes featuring lots of nuts, check out this great banana and walnut pudding recipe!
Expert Steps for Perfecting Your Maple Brown Butter Walnut Ice Cream Base
This section is where we earn our bragging rights! Making a great ice cream means focusing intensely on the custard base, and for this recipe, that all starts with the butter. If you rush this part, you won’t get that incredible nutty depth that defines our Maple Brown Butter Walnut Ice Cream. Patience here pays off tenfold later when you’re digging into that creamy texture!
Once the base is cooked, you absolutely have to chill it. Don’t even think about putting warm custard into your ice cream maker; you’ll just end up with sweet soup, not real ice cream! We need that base super cold—like refrigerator cold—so the churning can actually freeze it properly.
If you’re looking for more amazing, rich treats, you have to explore this decadent dessert guide!
Browning the Butter: The Key to Maple Brown Butter Walnut Ice Cream Flavor
Melt that half cup of butter over medium heat, but don’t walk away! First, it’ll foam up—that’s normal. Keep watching. You’ll see little brown specks form at the bottom, and immediately, your kitchen will smell like toasted hazelnuts. That’s perfection! The second you smell that rich, nutty aroma, yank that pan off the heat. Pour that gorgeous liquid treasure, brown bits and all, into a separate bowl and set it aside. If you wait even five seconds too long, those lovely brown bits will turn black, and we’ll have to start over!
Creating and Tempering the Custard Base
While the butter cools slightly, grab your egg yolks and sugar and whisk them like crazy until they look pale yellow and are nice and thick. This is crucial! Now for tempering—this keeps your yolks from scrambling. Whisk just a little bit of that hot cream mixture slowly, slowly, into the yolks. I mean a tiny drizzle at first. Once those yolks are warmed up gently, you can pour that whole mixture back into the saucepan with the rest of the warm cream. Keep stirring constantly over low heat until it thickens and coats the back of your wooden spoon. Once it hits about 170°F—or when you drag your finger across the spoon and the line holds—you’re done cooking! Take it off the heat right away.
Chilling and Churning the Maple Brown Butter Walnut Ice Cream
We’ve successfully built the flavor cathedral, but now we have to let the masterpiece settle. You’ve stirred in the vanilla and that glorious brown butter? Fantastic! Now, cover that bowl tightly and put it in the fridge. That minimum four-hour chill time isn’t optional, folks; it’s the secret ingredient for super-smooth ice cream. If you can leave it overnight, do it! The longer the custard base gets acquainted in the cold, the better it churns.
Once that base is properly frigid, it’s time for the magic box—your ice cream maker! Pour that chilled base in according to the directions. This is where the actual freezing happens, turning liquid into that beautiful, creamy structure. You’ll see it start to thicken up beautifully as it spins. Do NOT add your walnuts yet! We want them crunchy, not pulverized into dust.
When the ice cream is just about done churning—usually when it’s the consistency of soft-serve or thick pudding—that’s your cue. Toss in those lovely toasted walnuts during the very last minute of churning. They need just enough time to get incorporated before you shut the machine off. If you’re looking for other amazing churned desserts, take a peek at this Ninja Creami vanilla ice cream recipe!
Tips for Achieving the Best Maple Brown Butter Walnut Ice Cream Texture
We made it past the cooking part, so now we just have to guarantee that velvety, shop-quality texture. Listen, homemade ice cream sometimes gets those annoying little ice crystals, but we can fight those off pretty easily with teamwork and technique.
First things first: straining! After you mix in that gorgeous brown butter and vanilla, I highly recommend pouring the entire cold base through a fine-mesh sieve before it hits the maker. This catches any tiny bits of cooked egg or undissolved sugar. It’s my quick trick for ultra-smooth results every single time. You can see this strainer trick works beautifully for many old-fashioned recipes!

Also, remember how I told you to toast those walnuts? Don’t skip that step! Toasting them deeply enhances their natural oils and crunch, which is essential because that crunch has to stand up to the freezing process. Finally, when you move the soft ice cream to the storage container, press a piece of plastic wrap directly onto the surface of the ice cream before sealing the lid. This keeps air—the enemy of smoothness—from causing those pesky ice crystals on top. That’s how you keep that brown butter flavor locked in perfectly!
Storage Instructions for Your Homemade Maple Brown Butter Walnut Ice Cream
Now for the hardest part: waiting! Once you’ve churned that beautiful mixture and stirred in the walnuts, transfer every bit of it to a freezer-safe, airtight container. I use a shallow container rather than a deep one because flat ice cream seems to freeze more evenly, which means fewer icy spots. Make sure you press some plastic wrap right onto the surface before you seal that lid tight. Give it at least four hours in the absolute coldest part of your freezer to set up properly. It’s going to be firm, but when you dig in, that beautiful maple brown butter flavor will shine through!
Why This Maple Brown Butter Walnut Ice Cream Recipe Stands Out
There are a lot of ice cream recipes out there, but this one is special, and honestly, it’s worth every single step you take. You’ll want to make this batch after batch!
- The deep, toasty notes from the brown butter elevate the sweetness of the pure maple syrup magnificently.
- We use a traditional custard base with egg yolks, which guarantees that incredibly rich and dense final texture.
- The walnuts are toasted separately, meaning they stay perfectly crunchy right down to the last bite.
- It tastes like something you’d pay twenty dollars a scoop for at a fancy parlor!
If you happen to need a beautiful topping for this rich dessert, you might want to check out this easy whipped cream recipe!
Frequently Asked Questions About Maple Brown Butter Walnut Ice Cream
I get so many questions when people try this for the first time, which is great because it means you’re eager to get started! Don’t worry if you’re missing one small thing; sometimes we have to adapt in the kitchen. Here are the most common things folks ask me when they are ready to make this amazing dessert.
Can I skip the egg yolks needed for the custard base?
Oh, I really, really wouldn’t recommend it. The yolks are what transform our liquid mix into a proper, thick custard. If you skip them, you’ll end up with a thin, icy base, not true ice cream. It won’t have that signature dense but creamy mouthfeel. If you’re out of yolks, you might want to look for a Philadelphia-style (egg-free) recipe, but for this specific maple brown butter version, stick to the yolks!
What if I don’t have an ice cream maker handy?
Don’t let an appliance stop you! You can still churn this delicious homemade ice cream. Once your base is chilled solid, pour it into a shallow metal pan and stick it in the freezer. Every 30 minutes for the first two hours, you need to take it out and aggressively whisk it with a fork or hand mixer. You’re trying to break up those ice crystals. It takes more elbow grease, but the result is still fantastic! While you’re browsing other great recipes, check out this homemade wonton soup—it’s surprisingly easy!
Can I use pecans instead of walnuts?
Yes, absolutely! Pecans are a wonderful substitute here. They have a slightly softer texture and a distinct buttery flavor that pairs beautifully with the brown butter and maple too. The important thing, just like with the walnuts, is that you toast them first! Toasting dramatically improves the flavor of any nut when it’s going into something rich like this ice cream.
Why does the butter need to be brown, not just melted?
That browning process is pure alchemy! When you cook the milk solids in the butter until they reach that deep amber color, you get this incredible, complex, nutty flavor profile. It’s way deeper than plain butter. That toasted note is what perfectly balances the sweetness of the maple syrup. If you use melted butter, you just end up with a flat, overly sweet dessert. We want sophisticated flavor here!
Serving Suggestions for Maple Brown Butter Walnut Ice Cream
This ice cream is pretty much perfect all by itself, but if you want to dress it up just a little, keep it simple. Drizzle a tiny bit more pure maple syrup right over the top before serving—it really pulls that flavor forward! It’s also amazing served alongside an apple crisp or a slice of warm gingerbread. Those warm spices and that crumbly texture are the perfect foil for this rich, cold treat. For a really decadent moment, try serving a scoop next to a slice of homemade banana pudding!
Next Steps After Enjoying Your Maple Brown Butter Walnut Ice Cream
Wow, I hope you loved every single spoonful of that homemade goodness! Now that you’ve had a taste of pure frozen heaven, I really want to hear what you thought. Did the brown butter hit just right? Let me know down in the comments below how it turned out for you. If you snapped a picture of your beautiful scoops, please tag me so I can see your work!
If you have any quick questions or just want to chat about more delicious desserts, don’t hesitate to reach out on my contact page. Happy scooping!
Print
Maple Brown Butter Walnut Ice Cream
- Total Time: 4 hr 35 min
- Yield: About 1 quart 1x
- Diet: Vegetarian
Description
A recipe for homemade ice cream featuring the rich flavor of brown butter, sweet maple syrup, and crunchy walnuts.
Ingredients
- 1 cup heavy cream
- 1 cup whole milk
- 3/4 cup granulated sugar
- 1/2 cup unsalted butter
- 1/2 cup pure maple syrup
- 1/4 teaspoon salt
- 4 large egg yolks
- 1 teaspoon vanilla extract
- 1 cup walnuts, toasted and chopped
Instructions
- Melt the butter in a saucepan over medium heat. Continue cooking, stirring occasionally, until the butter foams, then brown bits form at the bottom and it smells nutty. Remove from heat immediately and pour the brown butter (including the browned bits) into a bowl. Set aside.
- In a medium saucepan, combine the heavy cream, milk, and salt. Heat over medium heat until steaming, but do not boil. Remove from heat.
- In a separate bowl, whisk the egg yolks and sugar until pale and thick.
- Slowly temper the egg mixture by whisking about 1 cup of the hot cream mixture into the yolks. Then, pour the tempered egg mixture back into the saucepan with the remaining cream mixture.
- Cook over medium-low heat, stirring constantly with a wooden spoon, until the custard thickens enough to coat the back of the spoon (reaching 170°F). Do not let it boil.
- Remove the custard from the heat. Stir in the vanilla extract and the reserved brown butter.
- Chill the custard base completely in the refrigerator, covered, for at least 4 hours, or preferably overnight.
- Churn the chilled custard base in an ice cream maker according to the manufacturer’s instructions.
- During the last minute of churning, add the toasted, chopped walnuts.
- Transfer the soft ice cream to an airtight container and freeze for at least 4 hours to firm up before serving.
Notes
- To toast walnuts, spread them on a baking sheet and bake at 350°F for 5-8 minutes, watching carefully to prevent burning.
- For a smoother texture, strain the custard base through a fine-mesh sieve after adding the brown butter, before chilling.
- Prep Time: 20 min
- Cook Time: 15 min
- Category: Dessert
- Method: Churning
- Cuisine: American
Nutrition
- Serving Size: 1/2 cup
- Calories: 350
- Sugar: 25
- Sodium: 45
- Fat: 25
- Saturated Fat: 14
- Unsaturated Fat: 11
- Trans Fat: 0.5
- Carbohydrates: 28
- Fiber: 1
- Protein: 5
- Cholesterol: 90
Keywords: maple, brown butter, walnut, ice cream, homemade, custard base, dessert