
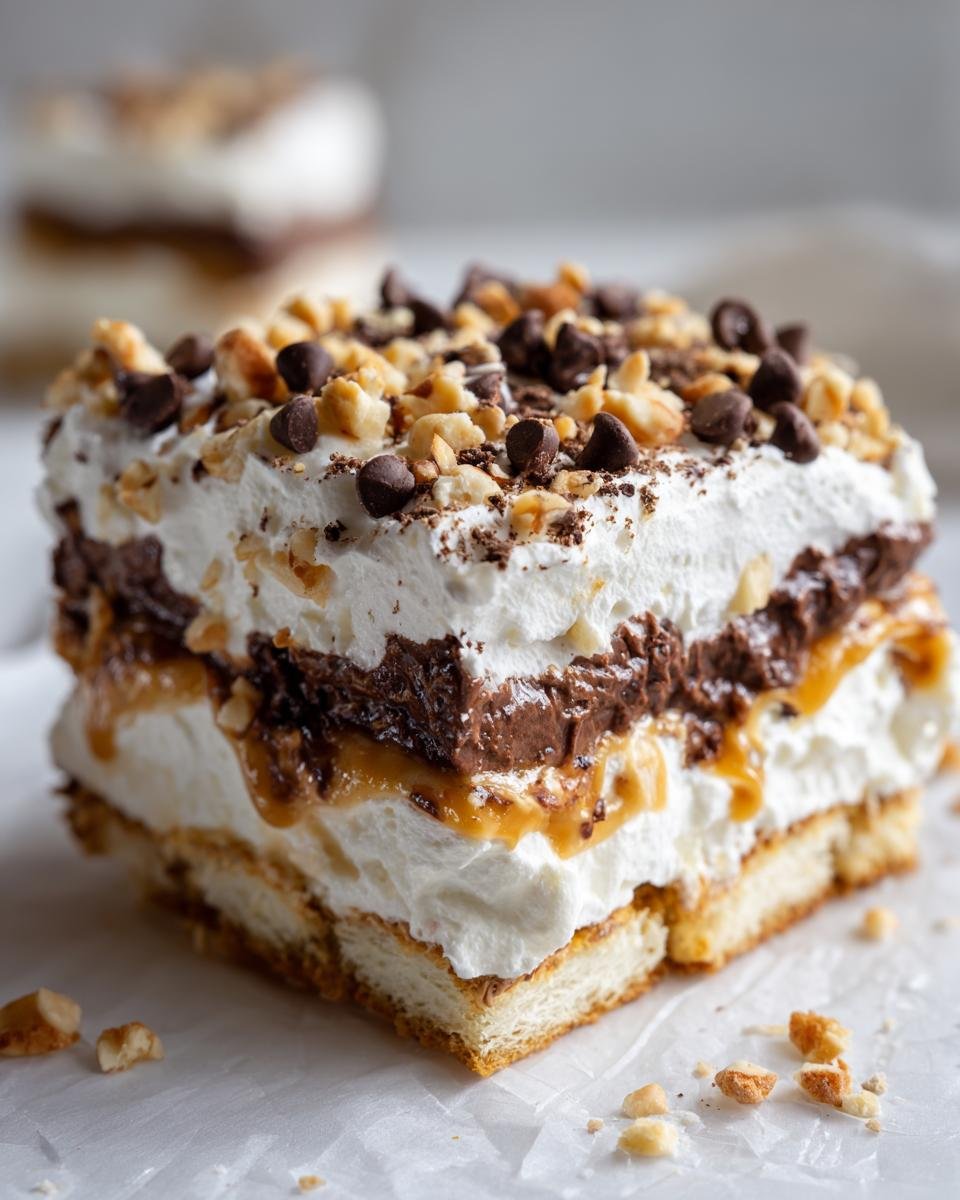
When the leaves start turning orange and black, you know it’s time for the big dessert showdown! Forget fussy baking; I always turn to easy, show-stopping layered treats that impress without stressing me out. This Halloween Lush Recipe hits all the right spooky notes. It’s got that amazing combination of rich chocolate, sweet butterscotch, and creamy topping, all stacked up perfectly. Trust me, this is the easiest yet most fabulous layered dessert centerpiece you’ll make this season. I whip up a batch every year because clean-up is simple, and everyone devours it faster than the candy bowl disappears!
If you’re looking for more quick assembly magic, you have to check out my guide on easy-to-make dump cakes—similar vibes, same minimal effort!
Why This Halloween Lush Recipe is Your Holiday Dessert Hero
Honestly, this recipe saves my life during the busy Halloween rush! It’s not truly *no-bake* because the crust needs a quick trip to the oven, but after that, it’s all chilling and assembling. That’s why it’s my ultimate dessert hero.
- The layers stay perfectly defined—no messy color bleeding!
- It feeds a crowd easily in that standard 9×13 pan.
- The chocolate and butterscotch combo is pure nostalgia.
For more unbelievably easy layered treats, you absolutely must peek at my no-bake eclair cake guide! It’s got that same satisfying structure.
EEAT Tip: Building Trust with Layered Dessert Success
Look, the magic of any great lush—especially this one—is in separating your temperatures when building. You **must** let that thin crust cool completely, I mean totally room temperature, before you even think about spreading that luscious cream cheese layer on top. If the crust is even a little warm, it melts the layer above it, and poof! You lose those distinct stripes that make the Halloween Lush Recipe look so impressive.
Gathering Ingredients for Your Halloween Lush Recipe
Okay, let’s get organized because the secret to a smooth assembly experience is having everything measured out *before* you start beating things!
For the sturdy little base, you’ll need the crust ingredients. Grab:
- 1 cup all-purpose flour
- 1/2 cup cold butter, cubed (don’t forget it has to be cold!)
- 1/4 cup powdered sugar
Next up is the dreamy middle layer—the cream cheese component. You already have some sugar left over, but you’ll need:
- 1 package (8 ounces) cream cheese, softened (make sure this is truly soft!)
- 1 cup powdered sugar
- 1 teaspoon vanilla extract
For the airy topping, we’re whipping up cream:
- 1 cup heavy whipping cream
- 1/2 cup powdered sugar
Then for the flavor punch, you’ll need both pudding mixes—it’s a double header!
- 1 package (3.9 ounces) instant chocolate pudding mix
- 2 cups cold milk (you’ll need this for the chocolate)
- 1 package (3.9 ounces) instant butterscotch pudding mix
- 2 cups cold milk (for the butterscotch!)
Finally, for the crunch on top of your Halloween Lush Recipe:
- 1 cup chopped pecans or walnuts
- 1/2 cup chocolate chips
If you’re looking for ways to spice up all those creams you’re whipping up, you absolutely have to check out my favorite resource on four cream recipes ideal for fillings—it might inspire a swap next time!
Essential Equipment for Making the Halloween Lush Recipe
You don’t need a whole bakery setup for this dessert, which is part of why I love it so much! Just grab a few basics from the cupboard. Having these things ready means you can go from mixing to chilling much faster.
First off, you absolutely need a good sturdy baking dish. I always use a 9×13 inch pan for this kind of layered dream. If you try to use a smaller pan, the layers get way too thick, and it takes forever to set up, which defeats the purpose!
You’ll need:
- A 9×13 inch baking pan (glass is nice so you can see the layers!)
- At least three mixing bowls—one big one for combining the crust, and two medium ones for mixing up your pudding layers.
- An electric hand mixer or a stand mixer. Trying to whip cream by hand takes forever and I always end up giving up halfway through.
- A reliable rubber spatula. This is crucial for scraping down the sides of the bowl and spreading those smooth layers evenly over the top of the last one.
That’s honestly it! No fancy layering tools required, just good old baking standbys.
Step-by-Step Instructions for the Halloween Lush Recipe
Putting this dessert together is so satisfying because you see the layers build up right before your eyes! The key here is patience—seriously, *patience*. Don’t rush the cooling, or you’ll have a chocolatey mess on your hands instead of beautiful stripes for your Halloween Lush Recipe.
If you want to see more amazing assembly techniques, jump over to my guide on how I teach you 4 exquisite no-bake cake recipes—some of these principles apply there too!
Preparing the Crust for Your Halloween Lush Recipe
First things first, we build the base! In a bowl, mix that flour and powdered sugar together. Then, use your fingers or a pastry blender to cut in that cold, cubed butter. You’re looking for a mixture that looks like coarse, sandy crumbs. Don’t overwork it; we want it crumbly!
Press that crumb mixture firmly and evenly into your 9×13 pan. Make sure you get the corners packed nicely. Pop it into a preheated 350-degree oven and bake it for exactly 15 minutes. When it comes out, you have to let it completely cool down. I usually pop mine in the fridge for 20 minutes after it sits on the counter to speed things up!
Assembling the Cream Cheese and Whipped Cream Layers of the Halloween Lush Recipe
While the crust is chilling out, make the cream cheese layer, which is super simple! Beat your softened cream cheese with the cup of powdered sugar and vanilla extract until it’s perfectly smooth—no lumps allowed! Gently spread this rich layer right over that cool crust. Make sure it’s even, because this layer is the foundation for the next one.
Next, whip your heavy cream and the half-cup of powdered sugar. Beat it until you get stiff peaks. You know it’s ready when you lift the beater out and the peaks stand straight up! Carefully spoon and spread this whipped cream over the cream cheese layer. Again, take your time here to keep the edges clean.
Finishing the Pudding Layers and Topping for the Halloween Lush Recipe
Now for the main flavors! In separate bowls, whisk the chocolate pudding mix with 2 cups of cold milk until it starts to thicken up—it usually takes a few minutes of steady whisking. Spread that smooth chocolate layer right over the whipped cream. Don’t worry about making it perfect; the next layer smooths it out!
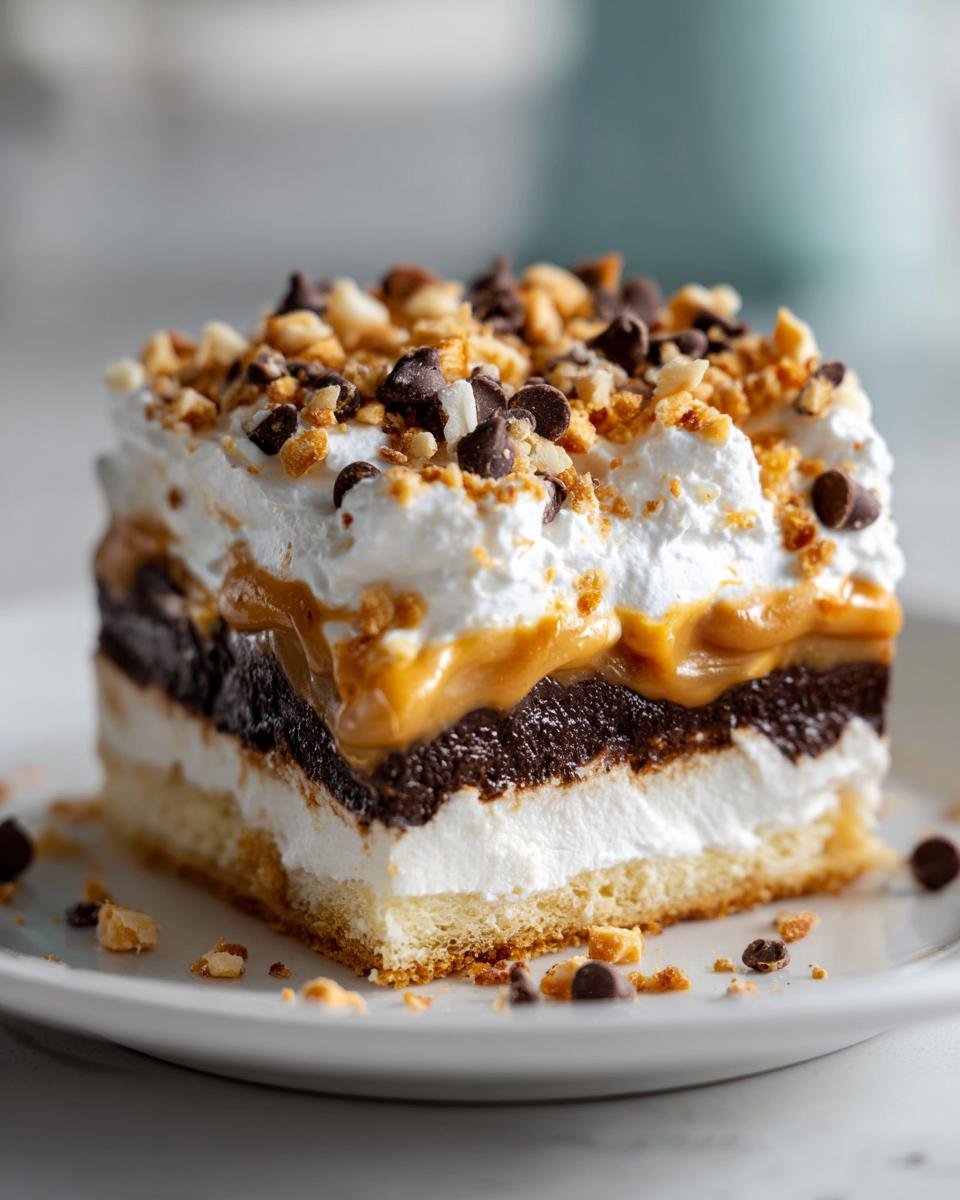
Repeat the exact process for the butterscotch pudding using its 2 cups of milk. Spread that butterscotch right on top of the chocolate. Finally, sprinkle your chopped nuts and chocolate chips all over the top layer for the best crunch! Remember the most important final step: cover it tightly and chill it for at least four hours. Overnight is even better for perfect slicing.

Tips for Perfecting Your Halloween Lush Recipe Presentation
This layered dessert is already a showstopper just based on the chocolate and butterscotch colors, but since we are making it for Halloween, we absolutely have to lean into the spooky fun! You don’t need complicated piping or frosting to make it look festive, honestly. A couple of quick tricks make all the difference when this pan hits the party table.
My favorite trick for an easy Halloween vibe is playing up the topping. If you didn’t use chocolate chips, you can always take some black sprinkles, the little jimmies, and sprinkle them in a messy circle right in the center. If you used the nuts and the chips, you can sometimes arrange the chips to look like little spider legs radiating out from the center—it’s subtle, but when people look closer, it’s really fun!

For a deeper commitment to the theme, consider an optional color boost! The butterscotch layer is naturally a warm yellow-tan, which is great. But if you want it to scream orange, grab a tiny drop of orange food coloring—just one single drop—and whisk it into the milk *before* you add the butterscotch mix. It brightens the color just enough. If you’re going to go that route, you might want to try piping some simple black lines of royal icing over the top, which you can learn how to whip up easily with my guide on royal icing easy recipe, just to draw some spooky ghost shapes or spiderwebs!
Remember, slicing this dessert neatly happens best when it’s ice-cold. Run your sharp knife under hot water, wipe it dry between every cut, and you’ll get those gorgeous, clean squares that show off every single layer of your hard work!
Ingredient Notes and Substitutions for the Halloween Lush Recipe
I always want you to feel like you can make this Halloween Lush Recipe no matter what’s hiding on your pantry shelf! The biggest flexible swap is dealing with that crust. If you’re not feeling like mixing flour and cold butter, ditch it! You can totally use graham cracker crumbs instead—usually, one sleeve of graham crackers finely crushed mixed with a little melted butter works perfectly as a base. It’s a shortcut I take myself sometimes!
Another great swap is on top. While I love whipping heavy cream for that fluffy texture, sometimes I’m just too tired, or maybe I don’t have enough whipping cream on hand. In that case, you can substitute 2 cups of frozen whipped topping (like Cool Whip) for the heavy cream and powdered sugar. Just let it thaw in the fridge first, and gently fold it over the cream cheese layer. It gives you a slightly different texture, a little lighter perhaps, but equally delicious! You can find tips on getting the best results from whipping cream on my easy whipped cream recipe page, just in case you decide to stick with the real stuff!
Storing and Serving Your Halloween Lush Recipe
I cannot stress this enough: this delightful dessert needs time to settle down. Think of it like a quiet night to let all those layers firm up and get to know each other! You absolutely must refrigerate the finished Halloween Lush Recipe for a minimum of four hours. If you’re making it for a party the next day—and I highly recommend you do—make it the night before! When it chills overnight, those pudding layers become delightfully dense, and the knife slices cleanly through every stacked component.
When it’s time to serve, just pull that chilled pan right out of the fridge. Because of all that sugar and cream, it needs to stay cold for safety and texture. If you’ve set it out on a buffet and it’s been sitting in a warm room for an hour or two, I’d feel much better about putting it away. Cover the entire pan tightly. I use plastic wrap pushed right down onto the topping, and then I foil over that just to prevent any fridge smells from seeping in.
It will keep beautifully in the refrigerator for about three to four days once fully set. Honestly, the leftovers are my favorite part of the party cleanup—just grab a fork and enjoy those perfectly chilled, firm layers the next morning!
Frequently Asked Questions About the Halloween Lush Recipe
I know you might have a few little snags pop up when you’re building layers this high. It’s totally normal! Here are the questions I get asked most often about making sure this Halloween Lush Recipe turns out perfect every single time.
Can I make the Halloween Lush Recipe ahead of time?
Oh, absolutely! I just mentioned it, but I’m saying it again because it’s that important: making this ahead of time is honestly the best strategy. You need that minimum of four hours of chilling time for those pudding layers to really set up firm. If you make it the night before, you just pull it out, slice it, and you’re done! Plus, I think the flavors actually meld better overnight, which just makes the whole dessert that much richer.
Can I use different pudding flavors in the Halloween Lush Recipe?
You certainly can play around here, but you have to be smart about it! The classic combination that makes this dessert work so well is the chocolate and the butterscotch because they offer a nice contrast. If you swap one out, stick with another flavor that complements the cream cheese layer well. Vanilla works fine, but avoid anything really sharp like lemon, or you’ll change the whole profile. If you’re curious about mixing things up flavor-wise, you might like taking a look at my other layered recipe inspiration, like the one for cherries in the snow—it shows how you can play with different fruit and pudding combos!
How do I cut clean squares of the Halloween Lush Recipe?
This is where the hot water trick comes in handy, my friend! If you try to cut this cold lush with a room-temperature knife, it’s going to drag through the creamy layers and just squish everything together. To get those beautiful, sharp lines you see in pictures, heat a long, sharp knife under very hot water for about 20 seconds. Wipe it completely dry with a paper towel—warm and dry, not wet!—and make your first cut. Clean the knife again, reheat, and repeat for every single slice. It makes a huge difference!
Why is my chocolate pudding layer runny?
This almost always happens for one of two reasons, sweetie. First, did you use *instant* pudding mix? Regular pudding needs to be cooked heavily on the stove, but instant just needs time to absorb the cold milk. Second, you must use cold milk! If your milk is even slightly warm, the pudding won’t thicken properly. Whisk steadily for about two minutes, and then just let it sit on the counter for 5 minutes to thicken before you spread it. If it still won’t set up, pop the whole bowl (the pudding mixture, not on the lush yet!) in the freezer for 10 minutes to kickstart the thickening process.
Estimated Nutritional Snapshot of This Halloween Lush Recipe
So, let’s talk real talk for a minute. While this Halloween Lush Recipe is undeniably delicious and feeds the whole ghoul gang, we know it’s a treat and not an everyday salad! I always like to give a rough idea of what we’re diving into when we cut those big, satisfying squares of layered goodness.
Please remember, these numbers are just educated guesses based on what a standard serving size usually ends up being—about 1/12th of the pan. If you eat two slices (and I won’t judge you if you do!), you are doubling it! Also, if you swap out butter for oil or use light whipped topping instead of heavy cream, these numbers are definitely going to shift!
Here’s the general breakdown for one slice:
- Serving Size: 1 slice
- Calories: 450
- Sugar: 40g (That’s the good stuff!)
- Fat: 28g (Hello, butter and cream cheese!)
- Saturated Fat: 15g
- Carbohydrates: 45g
- Protein: 5g
That’s a solid, decadent slice of holiday heaven right there! Enjoy it, because you earned it after all that careful chilling!
Print
Halloween Lush Dessert
- Total Time: 45 min
- Yield: 12 servings 1x
- Diet: Vegetarian
Description
A layered dessert perfect for Halloween gatherings.
Ingredients
- 1 cup all-purpose flour
- 1/2 cup cold butter, cubed
- 1/4 cup powdered sugar
- 1 package (8 ounces) cream cheese, softened
- 1 cup powdered sugar
- 1 teaspoon vanilla extract
- 1 cup heavy whipping cream
- 1/2 cup powdered sugar
- 1 package (3.9 ounces) instant chocolate pudding mix
- 2 cups cold milk
- 1 package (3.9 ounces) instant butterscotch pudding mix
- 2 cups cold milk
- 1 cup chopped pecans or walnuts
- 1/2 cup chocolate chips
Instructions
- Make the crust: Combine flour, cold butter, and 1/4 cup powdered sugar. Press mixture into a 9×13 inch pan. Bake at 350 degrees F for 15 minutes. Cool completely.
- Make the cream cheese layer: Beat cream cheese, 1 cup powdered sugar, and vanilla extract until smooth. Spread evenly over the cooled crust.
- Make the whipped cream layer: Beat heavy cream and 1/2 cup powdered sugar until stiff peaks form. Spread over the cream cheese layer.
- Make the chocolate pudding layer: Whisk chocolate pudding mix and 2 cups cold milk until thickened. Spread over the whipped cream layer.
- Make the butterscotch pudding layer: Whisk butterscotch pudding mix and 2 cups cold milk until thickened. Spread over the chocolate layer.
- Sprinkle chopped nuts and chocolate chips over the top layer.
- Chill for at least 4 hours before serving.
Notes
- You can substitute graham cracker crumbs for the flour crust if you prefer.
- For a richer chocolate flavor, use dark chocolate chips.
- Keep the dessert refrigerated until ready to serve.
- Prep Time: 30 min
- Cook Time: 15 min
- Category: Dessert
- Method: No Bake (Partial Bake)
- Cuisine: American
Nutrition
- Serving Size: 1 slice
- Calories: 450
- Sugar: 40g
- Sodium: 250mg
- Fat: 28g
- Saturated Fat: 15g
- Unsaturated Fat: 13g
- Trans Fat: 0g
- Carbohydrates: 45g
- Fiber: 2g
- Protein: 5g
- Cholesterol: 60mg
Keywords: Halloween, lush, layered dessert, pudding dessert, no bake, chocolate, butterscotch