
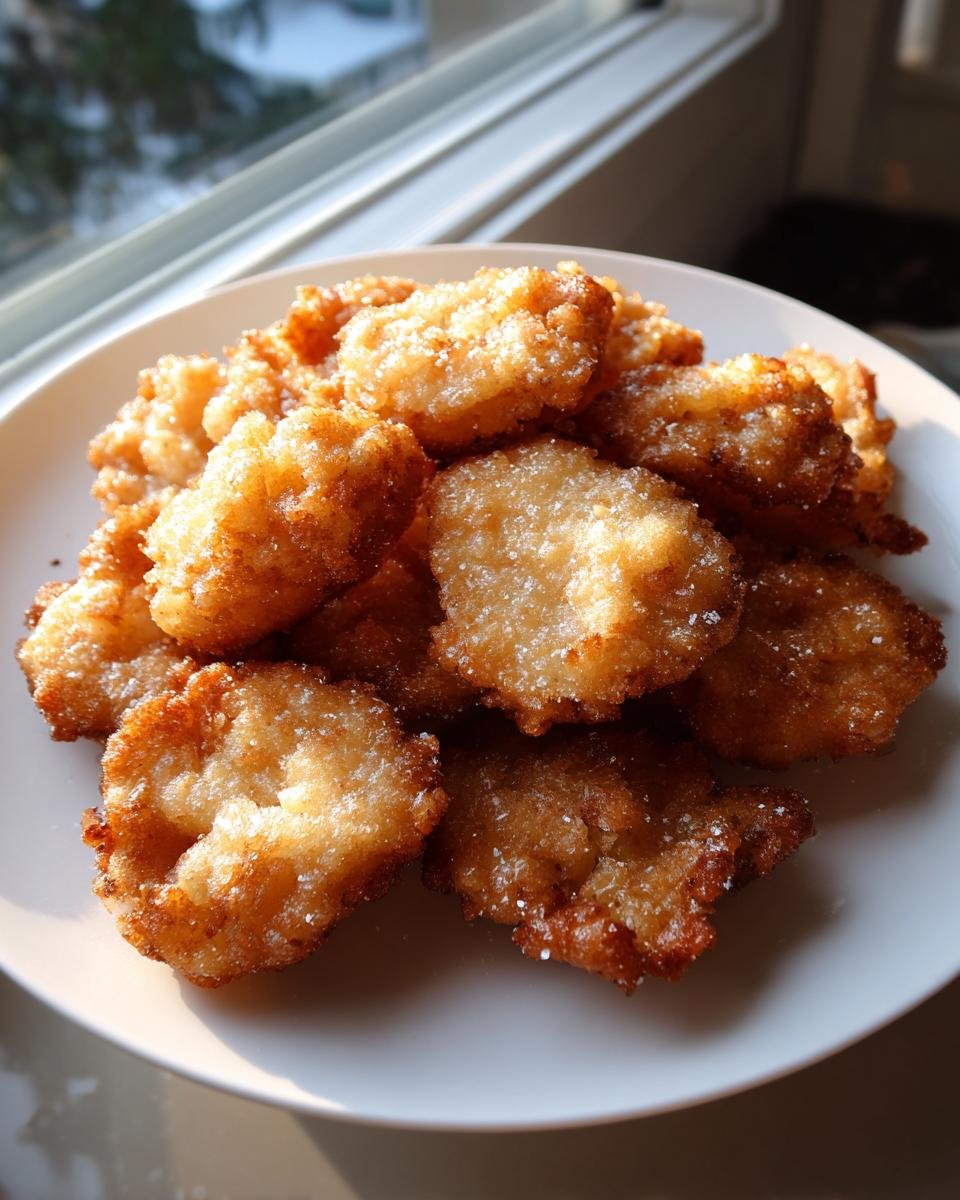
Oh, you know that sound? That *CRUNCH* when you bite into something perfectly fried? Nothing beats it, especially when it comes to mushrooms! I swear, these simple Fried Mushrooms are my secret weapon when I need a quick side dish that tastes like pure comfort food.
I spent way too long trying to get the coating right—you know, that thin, crispy shell that doesn’t just fall off in the oil. After a few slightly sad, soggy batches (don’t worry, we’ve all been there!), I finally nailed the flour toss technique. It’s all about not over-stuffing the pan, trust me!

This recipe is honestly the most straightforward way to get that beautiful, golden brown exterior and tender interior that defines truly fantastic crispy mushrooms. Forget the complicated batters; we’re keeping it ridiculously easy here. Stick with me, and by the end of this, you’ll be whipping up these amazing pan-fried bites anytime the cravings hit!
Why You Will Love These Simple Fried Mushrooms
Seriously, these aren’t just good; they solve weeknight dinner problems! I keep coming back to this method because it just *works*. Here are the big reasons why these crispy mushrooms should be in your regular rotation:
- Speed Demon! We’re talking under 15 minutes of actual cooking time. If you need a side dish fast, these are your heroes. Plus, they’re quicker than trying out those air fryer mushrooms if you don’t want to wait for preheating cycles.
- Perfect Crunch, Zero Hassle. We’re pan-frying here, not deep-frying! That means you get that amazing, golden, crunchy texture without dealing with gallons of oil or messy cleanup. It’s that sweet spot of indulgent and easy.
- So Much Flavor for So Little Work. The simple seasoning combo—salt, pepper, garlic—makes the earthy mushroom flavor really sing. It’s satisfying without being heavy or overpowering.
- They Go With Absolutely Everything. Toss these over a steak, sprinkle them on salads, use them to top a burger, or—let’s be honest—eat them straight out of the bowl while they’re still hot. They’re universally loved!
Essential Ingredients for Perfect Fried Mushrooms
Okay, this is where we build trust! You can’t have great fried mushrooms with mediocre ingredients, but luckily, this recipe keeps the ingredient list short and sweet. No fancy supplies needed, just good, basic pantry staples and fresh produce. Seriously, the magic here is in the simplicity!
Here’s exactly what you need to grab before you start tossing and frying. Pay attention to how I tell you to prep the mushrooms—that part is non-negotiable for crispiness!
- 1 pound white button mushrooms: My number one choice! You’ve got to wipe these incredibly clean—no soaking, just a quick wipe. Slice them about 1/4 inch thick. If they are too thin, they shrivel; too thick, and they steam instead of fry.
- 1/2 cup all-purpose flour: This is our coating base. It holds the seasoning and creates that gorgeous crust.
- 1 teaspoon salt: Don’t skimp on this! Flavor disappears if you don’t season the dredge properly.
- 1/2 teaspoon black pepper: Freshly ground is always best if you have it. It gives a little bite.
- 1/4 teaspoon garlic powder: Just enough to add that aromatic savory note without burning on the pan like fresh garlic chips would.
- 1/2 cup vegetable oil for frying: You need about a quarter-inch layer in the skillet. Vegetable or canola oil works perfectly because they have a high smoke point, which is what we need for that medium-high heat.
Also, a quick note on mushroom types: While white buttons are my go-to for their classic flavor, if you want something a little earthier or richer, feel free to swap them out. Cremini mushrooms are a fantastic substitute here. Just treat them exactly the same way!
Equipment Needed for Making Fried Mushrooms
You know, sometimes the prep is the hardest part, but with this recipe, the equipment is minimal, which is another win for me! Since these are pan-fried, we skip the deep fryer drama. Honestly, if you have a decent kitchen setup, you already have everything you need to whip these up right now.
I always like to lay everything out before I start mixing the coating. It helps me keep my rhythm going when the pan gets hot. Here’s the short list of tools I rely on:
- A large, sturdy skillet: You need surface area! If you crowd the pan, the oil temperature dips, and you get soggy fried mushrooms instead of crispy ones. A 10-inch or 12-inch skillet is perfect for frying this amount in two batches.
- A medium mixing bowl: This is just for tossing your floured mushrooms. Nothing fancy!
- A slotted spoon or spider strainer: This is crucial for getting the mushrooms out of the oil without dragging too much grease back with them.
- A plate lined with paper towels: Gotta drain that excess oil off! I always use a triple layer of paper towels just to be safe—I hate the smell of residual oil lingering.
That’s it! Seriously, ten minutes of setup, fifteen minutes of cooking, and you’re done. Prep work done right means zero stress when the oil starts shimmering!
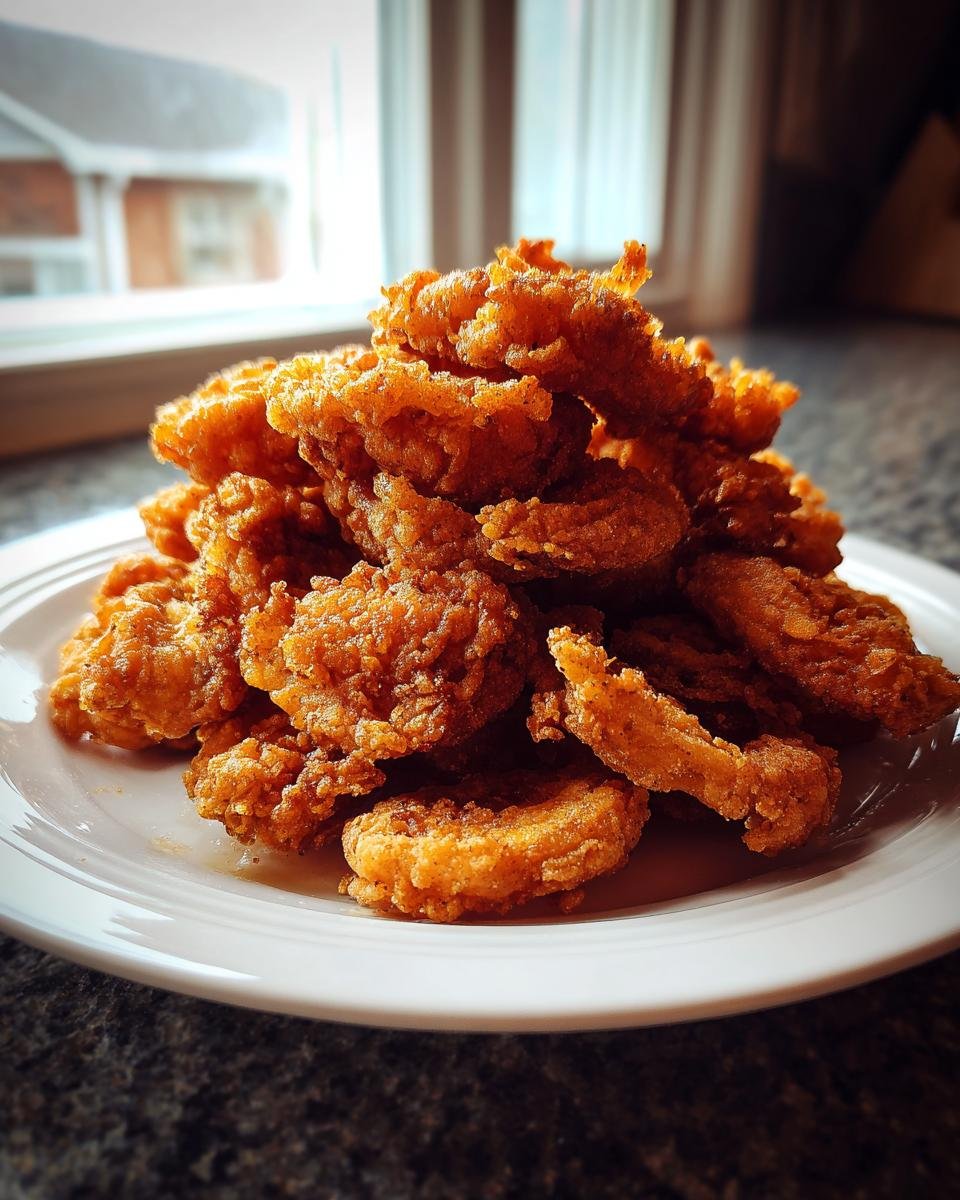
Step-by-Step Instructions for Crispy Fried Mushrooms
Alright, here it is—the moment of truth! Getting these Fried Mushrooms right is all about managing heat and not rushing the process. I learned the hard way that if you try to cook them all at once to save time, you end up with a giant, greasy, sad pile instead of light, crispy coins. Don’t do that!
We are working in the sweet spot: medium-high heat. You want that oil to be hot enough to immediately crisp up that flour coating, but not so hot that your spices burn before the mushroom inside cooks. Follow these steps exactly, and you’ll get that golden crunch every single time.
Preparing the Mushrooms and Coating Mixture
First things first, we prep! Remember, mushrooms hold a lot of water. If the surface is wet, your flour coating just turns into mushy paste. So, take your pound of white button mushrooms and give them a good, gentle wipe-down with a damp cloth or paper towel. Absolutely no dunking them in the sink, okay?
Next, slice them up consistently—about 1/4 inch thick is the sweet spot. Consistency is key here so they all cook in the same amount of time. Pop these slices into that medium bowl.
Now for the dry mix! Whisk together your flour (1/2 cup), salt, pepper, and garlic powder right in a separate dish. It needs to be fully combined so you don’t bite into a clump of salt later on. Toss those mushroom slices into the flour mixture. Use your hands or a spoon to gently coat every piece. Here’s the absolute most important part for crispy Fried Mushrooms: pick up a handful of coated mushrooms and shake off the excess flour back into the bowl *before* they hit the pan. We want a light dusting, not a heavy jacket!
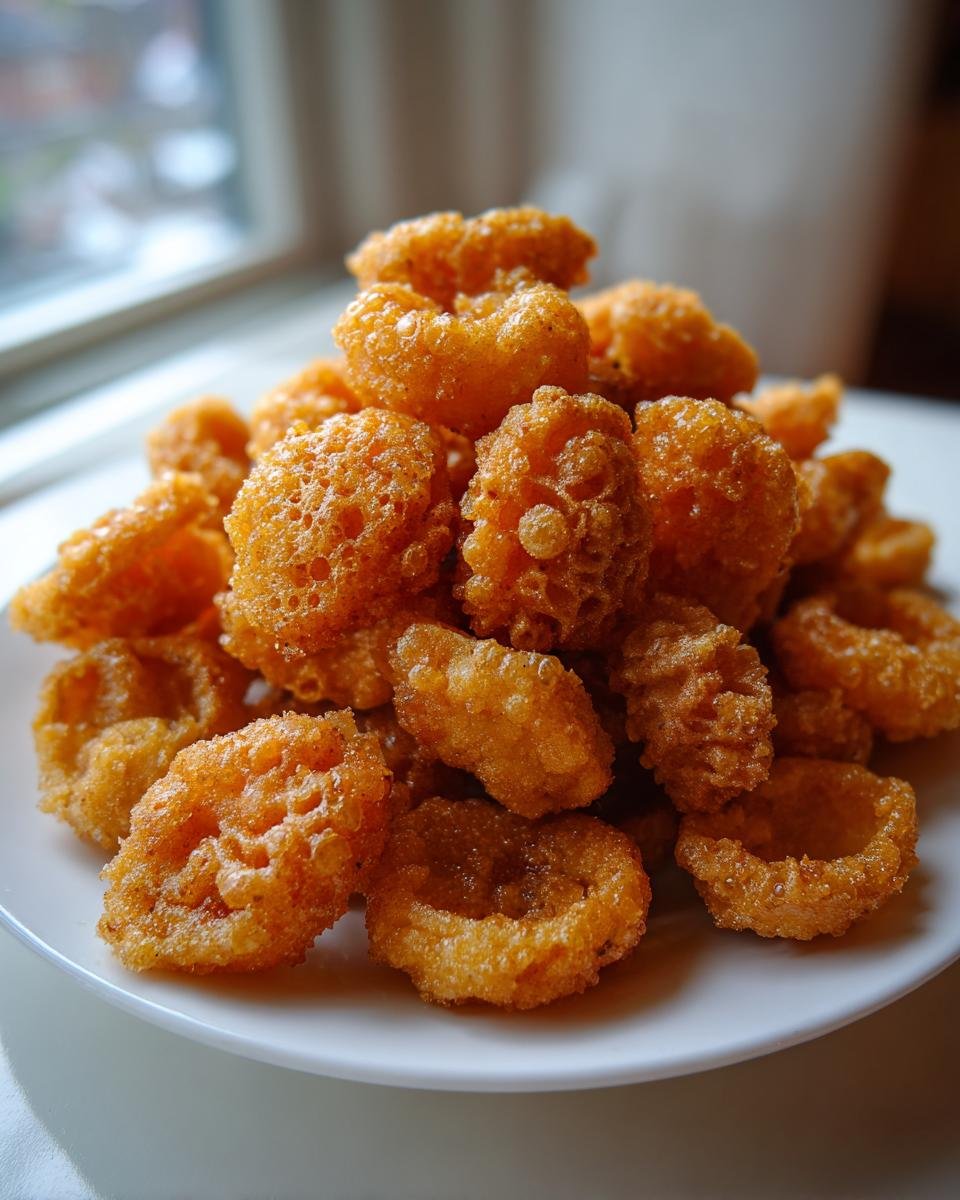
The Frying Process for Golden Fried Mushrooms
Time to turn up the heat! Pour your vegetable oil into that large skillet—remember, we need about a quarter-inch layer. Set the heat to medium-high and let it get hot. How do you know when it’s ready? Pay attention to the oil; it should look shimmery, and if you drop just a tiny speck of flour in, you should hear a satisfying sizzle right away. If it smokes, drop the heat! If it barely bubbles, turn it up.
Carefully place your lightly floured mushrooms into the pan. I can’t stress this enough: work in small batches! Leave space between every single mushroom slice. If they are touching, they steam. We are frying, not steaming!
Let them cook, undisturbed, for about 3 to 4 minutes on that first side. You’ll start to see the edges turn a gorgeous, deep golden brown. That’s your cue to flip them over gently with your slotted spoon. Cook the second side for another 3 to 4 minutes until they match that first side—beautifully golden and unmistakably crisp.
Once they look perfect, remove them immediately! Use your slotted spoon or spider to lift them right out of the oil, letting the excess drip off before placing them on top of those paper towel-lined plates. Serve them right away! These fried mushrooms are always best piping hot.
Expert Tips for Achieving the Best Fried Mushrooms
Look, the basic instructions will give you a totally fine, good-enough fried mushroom. But if you want to brag about them later—and I know you do—there are a few little tricks I picked up over the years that take these from “good” to “OMG, what’s your secret?” These little details are what separate a regular side dish from the fried mushrooms everyone asks you to bring to the party.
I learned these little insights while trying to make a perfect mushroom topping for my husband’s favorite Beef Wellington Wellington—yes, the mushroom part needs to be impeccable! Over time, these tips slipped into my side dish routine too. Check these out; they really boost the crunch factor!
- The Paper Towel Drying Trick: Even though I told you to wipe them clean, I always give the sliced mushrooms a little extra TLC before they even look at the flour bowl. Take your sliced mushrooms and spread them out on a clean, dry paper towel. Let them sit there for five minutes while you get your oil heating. Seriously, let them sweat out any residual moisture. Fewer water molecules hitting the hot oil equals way more crunch!
- The Seasoning Adjustment: While my base recipe uses the standard salt, pepper, and garlic powder, if you want a little depth—especially if you’re serving these with something rich—try adding a tiny pinch of onion powder into the flour dredge. Oh, and if you’re a spice lover like me, a scant 1/8 teaspoon of paprika (smoked or sweet) gives them the most beautiful golden hue and just a hint of warmth. It makes them look professional, I’m telling you!
- Don’t Let Them Sit! This isn’t about the cooking; it’s about the serving. As soon as these Fried Mushrooms come out of the oil and onto the draining plate, they need to go straight to the table. If you let them sit stacked up for even five minutes, that built-up steam softens the crust. They have to be served immediately, maybe kept warm near the oven, but definitely not left cooling on the counter. Crispness is fleeting, my friends!
Variations on Your Fried Mushrooms Recipe
This recipe for crispy fried mushrooms is fantastic as-is, but honestly, the coating is such a great blank canvas! I love tweaking the seasoning, especially if I’m serving them alongside something different. Think of the basic flour mix as Tune 1 on the radio, and then you get to remix it!
I’ve experimented a ton here, often because I run out of one spice and have to improvise. Making substitutions shows you really know your way around the kitchen, right? Don’t be afraid to swap out ingredients based on what you have on hand or what flavor profile you’re chasing this week. These simple pan-fried snacks are really flexible.
Here are a few ways I’ve shaken up the coating for fun. Sometimes the simplest changes make the biggest difference when you’re looking for that next level of savory goodness!
- The Cornmeal Crunch: If you want an even more rustic, pronounced crunch than just flour alone, swap out about a quarter of the flour for fine cornmeal. Don’t use the coarse polenta grind, though—that gets too heavy! The cornmeal gives the coating a slightly rougher exterior and a beautiful golden color. It’s fantastic, though you might need just a tiny sprinkle more salt since cornmeal is bland.
- Herb Garden Touch: Dried herbs work beautifully here because they don’t burn as quickly as fresh ones would in the hot oil. Before you toss the mushrooms, stir in a half teaspoon of dried thyme or dried oregano into your flour mix. It pulls the flavor in a totally different, almost Italian direction. They somehow taste lighter when you add dried herbs, which is wild!
- Smoky Kick: My absolute favorite savory addition is smoked paprika. I usually add about 1/2 teaspoon to the flour mix. It gives the fried mushrooms this deep, earthy, almost barbecue-like undertone that is surprisingly addictive. It also gives them a gorgeous reddish-brown color, making them look even more impressive on the plate.
Remember, you can always mix and match! Try a bit of cornmeal and some smoked paprika—that’s a totally new take on crispy mushrooms right there. Just make sure whatever you add is fully incorporated into the flour so you get even coverage across all your slices!
Serving Suggestions for Your Fried Mushrooms
When these golden little nuggets come out of the pan, you have to decide how to serve them, and that’s half the fun! I usually make a batch as a starter appetizer for family dinners, but honestly, they’re so good they often become a main event side dish. I rarely let them sit around for leftovers because they are just pure magic right out of the skillet, sizzling hot!
The best thing about these simple fried mushrooms is that they play nicely with almost everything savory. They have that perfect salty, garlicky crust that complements heavier mains or stands up well on its own with a good dip. Think crispy texture meeting a rich, smooth sauce—it’s the ultimate contrast!
Here are a few ways I use up every single bite when I make a batch:
- The Dipping Essential: You absolutely have to have a dipping sauce ready when these are done. Ketchup works, of course, especially if you make your own—it’s so much brighter than the stuff in the bottle! But honestly, a creamy horseradish sauce or a spicy aioli (just mayo, garlic, and a squirt of hot sauce) is incredible for cutting through the richness of the frying oil.
- Topping for Comfort Foods: Forget boring toppings! Heap these crispy mushrooms right on top of mashed potatoes. They add an amazing textural element you just don’t get from sautéed mushrooms. They’re also phenomenal piled high over burgers or a simple meatloaf. It takes a standard plate and instantly elevates it to something fancy.
- Side Dish Superstar: They are a phenomenal side for steaks or pork chops. They act as a fantastic replacement for French fries, giving you that salty crunch factor but with way more earthy flavor. I sometimes serve them alongside a creamy pasta dish where I want a very crunchy component to balance the sauce.
Sometimes, I just serve them in a big basket next to a bowl of salt. Watching people grab one after another is my absolute favorite part of the cooking process. When they’re that good, you don’t need much else!
Storage and Reheating Fried Mushrooms
Okay, let’s talk about leftovers, because sometimes I make a double batch just hoping for lunch the next day. But here’s the honest truth about anything fried: it never tastes quite the same cold, right? That beautiful, delicate crust loses its magic once moisture creeps back in.
With these Fried Mushrooms, the goal when storing or reheating is always to bring back that initial crispness, even if it takes a little strategy. If you try to microwave them, I guarantee you’ll end up with soft, sad little sponges, and nobody wants that. Save your beautiful work and treat them right!
Here are my tried-and-true methods for keeping any leftovers tasting almost as good as fresh:
- Storage Setup: Once the mushrooms are totally cooled down from their draining papers (give them 20 minutes so any residual steam escapes), you need an airtight container. But you can’t just pack them in there! The trick is placing a dry paper towel on the bottom of the container, layering the mushrooms carefully (don’t pile them too high if you can help it), and placing another dry paper towel on top before sealing it up. Keep this in the fridge for up to three days, maximum.
- The Oven Reheat (My Favorite): If you have 10 minutes, the oven is your best friend. Preheat your oven to about 375°F (190°C). Spread the cold mushrooms out in a single layer on a baking sheet. You absolutely must use a baking sheet and not crowd them, or they’ll steam again! Pop them in for about 5 to 7 minutes. Keep an eye on them. They should crisp right up, and you’ll hear that nice crackle when you stir them slightly halfway through.
- Air Fryer Lifesaver: If you have an air fryer, this is the quickest way to revive them. Set the temperature to about 350°F (175°C) and give them a quick blast—usually just 3 to 4 minutes is plenty. It circulates the heat so well that they come out surprisingly close to being freshly fried. Don’t stack them high in the air fryer basket either; a single layer works best for maximum crispiness!
Avoid the microwave at all costs if you want happy, crispy mushrooms! Trust me on this one; oven or air fryer rescue is the only way to go.
Frequently Asked Questions About Making Fried Mushrooms
I totally get that perfect fried mushrooms can be tricky! When I first started this recipe, I had about a million questions swirling around my head, mostly about temperature and sogginess. I’ve pulled together the ones I hear most often from folks trying this for the first time. Don’t worry if your first batch isn’t 100% perfect; keep practicing that shaking-off-the-flour technique, and you’ll be rolling!
Can I use pre-sliced mushrooms for these Fried Mushrooms?
You absolutely can, and sometimes that’s the only way to go when you’re rushing! But here’s the catch: pre-sliced mushrooms are often sitting in moisture, and that moisture is the sworn enemy of crispness. If you use them, you MUST pat them down really well with paper towels before they even think about touching that flour dredge. Seriously, blot them until the paper towel comes away almost dry. They might not get quite as fluffy as the fresh ones, but a good solid pat-down makes a huge difference.
What is the best oil temperature for Fried Mushrooms?
This is the make-or-break point for any good fried coating! You want your oil set to medium-high heat. We need it hot enough to instantly start cooking and crisping that flour shell the second the mushroom slice hits the pan. If it’s too cool, the flour soaks up the oil before it sets, and you get greasy pan fried mushrooms. I always look for that slight shimmer on the oil surface, and if I drop a tiny pinch of flour in, it should immediately sizzle vigorously. That’s the sweet spot we’re aiming for!
How can I make these Fried Mushrooms healthier?
I know, I know, they are fried, and that’s what makes them delicious! But if you’re trying to cut down on frying oil, the air fryer is your new best friend. You can absolutely take this same flour mixture and toss your mushrooms in it, but instead of frying them in the skillet, arrange them in a single layer in your air fryer basket. They won’t be quite as rich, but you still get fantastic golden color and crunch with maybe a tablespoon of oil coating them, instead of a half-cup coating the pan!
Print
Simple Fried Mushrooms
- Total Time: 25 min
- Yield: 4 servings 1x
- Diet: Vegetarian
Description
A straightforward recipe for cooking sliced mushrooms until golden brown and crisp.
Ingredients
- 1 pound white button mushrooms
- 1/2 cup all-purpose flour
- 1 teaspoon salt
- 1/2 teaspoon black pepper
- 1/4 teaspoon garlic powder
- 1/2 cup vegetable oil for frying
Instructions
- Wipe the mushrooms clean and slice them about 1/4 inch thick.
- In a medium bowl, mix the flour, salt, pepper, and garlic powder.
- Toss the mushroom slices in the flour mixture until they are lightly coated. Shake off any excess flour.
- Heat the vegetable oil in a large skillet over medium-high heat until shimmering.
- Carefully place the coated mushrooms in the hot oil in a single layer, avoiding overcrowding the pan.
- Fry for 3 to 4 minutes per side, until golden brown and crisp.
- Remove the mushrooms with a slotted spoon and place them on a plate lined with paper towels to drain excess oil.
- Serve immediately.
Notes
- For best results, fry the mushrooms in small batches.
- You can substitute white button mushrooms with cremini mushrooms.
- Prep Time: 10 min
- Cook Time: 15 min
- Category: Side Dish
- Method: Pan Frying
- Cuisine: American
Nutrition
- Serving Size: 1/4 of recipe
- Calories: 250
- Sugar: 2
- Sodium: 450
- Fat: 18
- Saturated Fat: 2
- Unsaturated Fat: 16
- Trans Fat: 0
- Carbohydrates: 20
- Fiber: 3
- Protein: 4
- Cholesterol: 0
Keywords: fried mushrooms, crispy mushrooms, pan fried, side dish, simple mushroom recipe