
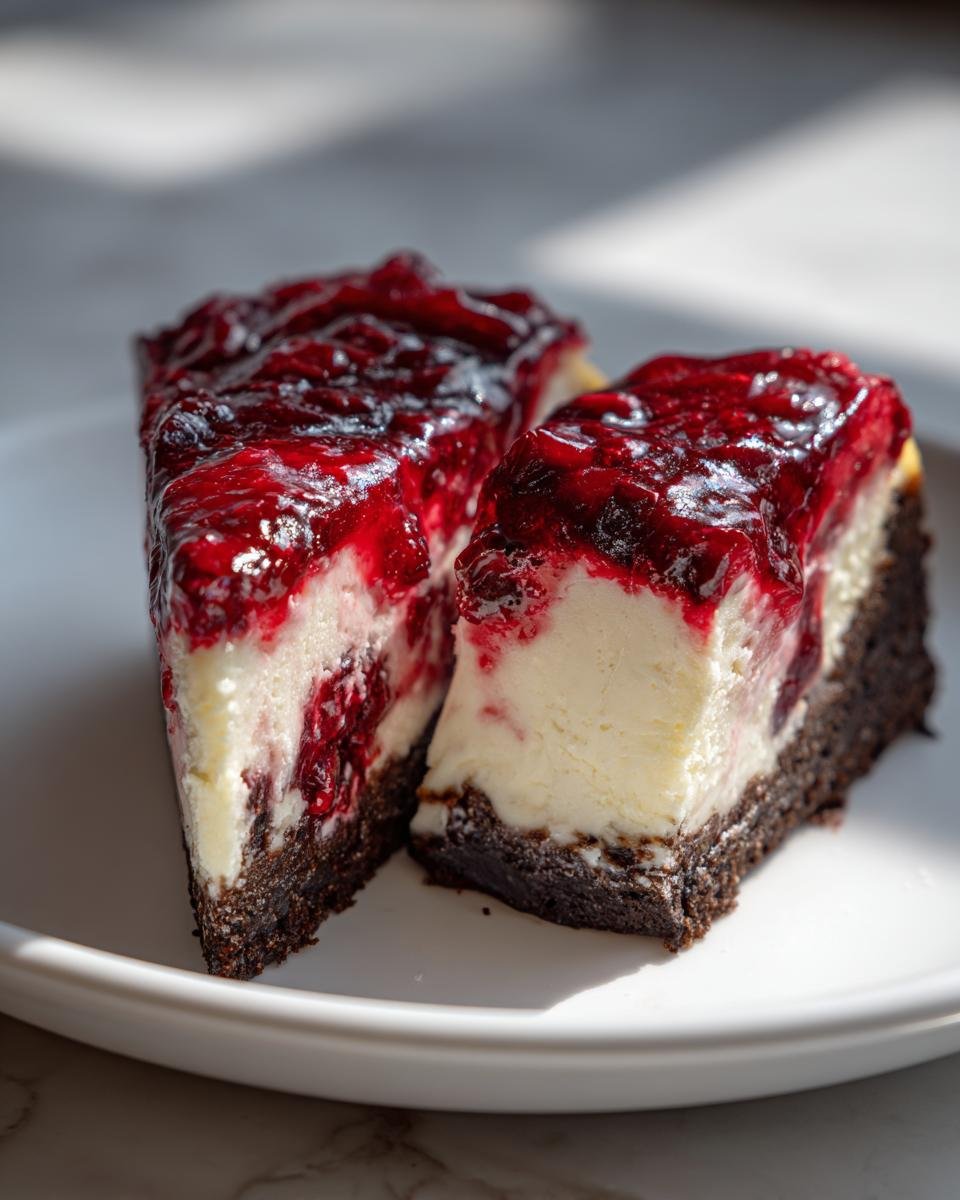
Oh my goodness, if you need a showstopper dessert for any gathering—especially Thanksgiving or Christmas—stop looking right now! I am totally obsessed with baked cheesecakes, but they often feel too heavy or too plain. That’s why this recipe changed everything for me. We’re talking about the absolute dream combination: rich, velvety vanilla cheesecake loaded up with a tart, jewel-toned cranberry topping, all sitting on the most unbelievably spicy base you can imagine. Trust me when I say that the Cranberry Cheesecake Gingersnap Crust is the literal game-changer here. I first made this on a whim when I realized I was out of graham crackers, and I used those spicy cookies my neighbor always brings over. Wow! The warm ginger flavor cuts through the richness of the cream cheese perfectly. It’s surprisingly simple, too! If you’re looking for a stunning dessert, you absolutely must try this layered beauty. You can find techniques for keeping your cheesecake smooth over at this guide, but the crust here is what sets this apart.
Why This Cranberry Cheesecake Gingersnap Crust Recipe Works So Well
People ask me all the time why I swap out the standard graham cracker crust. Honestly, the secret lies in that warm, intense spice that only gingersnaps provide! It elevates the entire dessert experience. We’re going for balance here, not just sweet on sweet. You definitely want to check out more ideas for decadent desserts after you master this recipe, but I promise this one is worth the fuss.
- The spiced warmth perfectly cuts through the heavy richness of that baked cream cheese filling. It’s a flavor hug!
- Those little bursts of tart cranberry on top provide necessary acidity, making the whole bite feel lighter than it actually is.
- The texture contrast is just everything. Smooth filling, soft topping, and that satisfying, firm crunch from the base.
The Perfect Balance of Spice and Tang
When you bite into this, you get that immediate zing from the ginger and molasses in the crust. Then, the creamy filling mellows it out, and finally, the cranberry cuts through everything with its bright tang. It keeps your palate engaged bite after bite!
Building the Ideal Cranberry Cheesecake Gingersnap Crust
The goal for the Cranberry Cheesecake Gingersnap Crust is structure. Because cheesecakes are heavy, you need a sturdy base that won’t crack or get soggy when chilled for hours. Baking the crust for that initial 10 minutes locks in all that melted butter, giving us that perfect foundation.
Gathering Ingredients for Cranberry Cheesecake Gingersnap Crust
Okay, getting ready for a cheesecake like this is almost half the fun. You need three distinct sets of things, and I always like to pull them all out before I even touch the mixer. This helps me make sure everything is perfectly set up, especially the cream cheese!
We want this recipe to turn out beautifully, so quality counts, especially for that unique base. If you’re diving deep into cream cheese recipes, make sure you visit this link for some inspiration.
For the Cranberry Cheesecake Gingersnap Crust
This is where the magic starts! Don’t skimp on the cookie crumbs here; they are the backbone of the whole dessert. The flavor of this Cranberry Cheesecake Gingersnap Crust is non-negotiable!
- Gingersnap cookie crumbs: You’ll need 1 and a half cups of those spicy little guys, finely crushed, of course.
- Granulated sugar: Just 1/4 cup to help bind everything together nicely.
- Unsalted butter: 6 tablespoons, and this definitely needs to be melted until it’s smooth and glossy.
For the Cheesecake Filling
Here’s a big tip: all your dairy items—the cream cheese and the evaporated milk—should be allowed to sit out for at least an hour! Room temperature is crucial for avoiding those annoying lumps in your filling.
- Cream cheese: You need three full 8-ounce packages, and they absolutely must be softened.
- Granulated sugar: 1 and a half cups total for the smooth filling mixture.
- Vanilla extract: Just 1 teaspoon to boost that amazing dairy flavor.
- Large eggs: Four of them, which we add slowly later on.
- Evaporated milk: One 12-ounce can to give the filling that signature baked texture.
For the Tart Cranberry Topping
This topping is so easy, you’ll wonder why you ever bought the stuff in a can. It really pops against the dark spice of the crust.
- Cranberries: 1 cup; don’t even worry if they’re fresh or frozen—they cook down the same way!
- Water: Just 1/4 cup to get things simmering gently.
- Light brown sugar: 1/4 cup, packed firmly, for that deep molasses sweetness to balance the fruit.
Preparing the Cranberry Cheesecake Gingersnap Crust
We are starting with the foundation of this amazing dessert! Getting the crust right ahead of time just makes the rest of the assembly so much smoother. This is where we lock in that gorgeous spice flavor. If you need quick tips on handling other simple bases, I wrote about easy dump cakes, but nothing beats this sturdy cookie base.
Mixing and Pressing the Cranberry Cheesecake Gingersnap Crust Base
First things first, get your oven preheated to 350 degrees F. It needs to be ready when our base is mixed. In a bowl—it doesn’t need to be fancy, just big enough to stir—you’ll combine your 1 and a half cups of gingersnap crumbs, that 1/4 cup of regular sugar, and the 6 tablespoons of melted butter. Stir it around until it looks like wet sand; you should be able to squeeze a little bit in your hand and have it hold its shape. Now, take your 9-inch springform pan. That pan is key because cheesecakes need to come out whole! You absolutely must pack this mixture down firmly across the bottom. I use the bottom of a flat measuring cup to really compact it. You want that Cranberry Cheesecake Gingersnap Crust to be dense and solid so it supports all that creamy filling we are putting on top.
Baking the Cranberry Cheesecake Gingersnap Crust
Once you’ve pressed that crust firmly in place, slide that pan right into your preheated oven. We only bake this base for about 10 minutes. This little trip to the heat sets the melted butter and makes the crust super aromatic! Don’t walk away, though—10 minutes goes fast. When they come out, you’ll notice the smell of ginger filling your whole kitchen, which is the best notification that you’re doing it right! Let the crust cool down just a bit on a wire rack while you start your cream cheese batter. You don’t want it piping hot when the filling goes on, or you risk melting the butter again and making it soft, so give it at least 15 minutes to cool off.
Creating the Rich Cheesecake Filling
Now that our spicy base is cooling down, it’s time to focus on the star of the show—that creamy, dreamy filling! This is where most people mess up cheesecakes, ending up with a lumpy, dense block instead of a perfectly smooth dessert. I learned early on that the order you add things matters so much. If you’re looking at making other creamy desserts, check out some ideas linked here, but for this technique, listen up!
Achieving Smooth Cream Cheese Texture
The absolute number one rule for any great cheesecake is this: your cream cheese must be truly soft. And I don’t mean ‘it sits on the counter for five minutes’ soft. I mean, you can press your finger right into it and leave a deep dent. If it’s even slightly cool, you’re asking for lumps! So, take your three softened blocks and beat them with your mixer until they look fluffy and completely smooth—no chunks—this usually takes a solid minute or two on medium speed. Once it looks like perfect frosting, *then* you start adding the 1 and a half cups of sugar. Don’t dump it all in at once; add it gradually while mixing. After that, we carefully stir in the vanilla extract.
Next up are the four large eggs. This is crucial: add them one at a time. Mix just until the yolk disappears into the batter before introducing the next egg. If you whip them too hard or add them all at once, you risk scrambling the eggs slightly or incorporating too much air, which causes cracking later! Finally, gently stir in that 12-ounce can of evaporated milk. You are mixing this just barely until it’s incorporated. Remember, we prepped the crust, now we’re just gently folding everything together before baking!
Baking and Cooling the Cranberry Cheesecake
Now that we have that gorgeous, slightly warm Cranberry Cheesecake Gingersnap Crust underneath, it’s time to get this thing into the oven! Cheesecakes are fussy, I won’t lie to you, but 90% of cheesecake disasters come from pulling them out of the oven too fast. We need patience here, and this cooling method I use is the difference between a professional-looking dessert and a cracked mess. For more troubleshooting tips on keeping your bake perfect, check out this guide to light and velvety cheesecake success.
Pour that rich filling right over your cooled crust gently. We’re baking this at 350 degrees F, and the time is usually right around 50 to 60 minutes. How do you tell when it’s done? You’re not looking for a solid center! You want the edges to look set and just slightly puffed, but when you gently nudge the pan, the very center—like a two-inch circle in the absolute middle—should still wobble a tiny bit. That means it’s ready!
The Slow Cooling Method for the Cranberry Cheesecake Gingersnap Crust
Here is the trick that I swear by to avoid cracks happening right over that beautiful Cranberry Cheesecake Gingersnap Crust: Don’t pull it out! When the timer goes off and the center is wobbly, turn the oven off completely. That’s right, turn it off! Now, crack the oven door open just a tiny bit—I usually prop mine open with a wooden spoon—and just let the cheesecake sit inside that environment for a full hour. This slow reduction in temperature keeps the cheesecake from seizing up and cracking as it cools.
After that glorious hour of patient waiting, carefully remove the cheesecake and let it finish cooling down on the counter for another hour or so before it even thinks about going into the fridge. Seriously, stick to this timeline! It needs a minimum of four hours chilling time, but honestly, overnight is what I always aim for. That long chill time lets the texture firm up perfectly and makes sure everything sets beautifully on top of our sturdy base.
Making the Bright Cranberry Topping
This topping is so simple, and it screams holidays! While the cheesecake is chilling, you can whip this up in about ten minutes flat on the stove. We are cooking down the cranberries with a little liquid and sugar until they burst open and get thick. If you love quick fruit sauces, you should check out these quick salsa ideas for inspiration, though this is much sweeter!
You just toss your cup of cranberries—and don’t worry about thawing them first, just throw them in frozen!—with a quarter cup of water and that light brown sugar into a small saucepan. Heat it over medium heat. You’ll need to stir it every so often just to make sure nothing sticks to the bottom. Keep cooking until you see those little berries popping and the sauce coats the back of your spoon nicely. This usually takes about ten minutes total. Once it’s done, you absolutely must let it cool completely before you try putting it on that chilled cheesecake. Nobody wants a warm topping melting their beautiful cream cheese layer!
Tips for the Perfect Cranberry Topping Consistency
If you like a really rustic look with bits of berry skin and pulp, just let it cool and use it as is! That’s my favorite way because it looks authentic. But, if you want that super smooth, almost jelly-like topping that looks really professional, here’s a trick. Once the sauce has cooled down for a bit, spoon it through a fine-mesh sieve right over a bowl. You’ll need to push it through with the back of a wet spoon. It takes a minute, but it leaves you with the smoothest, brightest red topping possible—perfect for presentation!

Assembling Your Final Cranberry Cheesecake Gingersnap Crust Dessert
Alright, we’ve baked, we’ve cooled slowly, and we’ve chilled until Christmas morning seems too soon! The best part is just minutes away. You finally have that perfectly set, divinely spiced cheesecake base that we lovingly created: the Cranberry Cheesecake Gingersnap Crust.
First things first, remove your cheesecake from the refrigerator. If you used a springform pan, you can carefully remove the outer ring now. Doing this gently is important so you don’t bump the edges and mess up that beautiful texture we worked so hard for. If the knife edges stick at all when you release the ring, running a thin, clean knife around the edge can help, but be super gentle!
Now, take your cooled cranberry topping. Remember, if it’s still warm or even room temperature, it could melt the top layer of your cheesecake, so ensure it has absolutely cooled down completely. Spoon the thick, jewel-toned cranberry sauce right over the top surface of the cheesecake. Spread it gently and evenly across the top. You don’t want to push too hard or dig into the cream cheese layer underneath, so use a light hand.
Once the topping is spread, that’s it! You’re done! This dessert is truly finished only when it’s completely chilled. If you’ve made little cheesecake bites, you might want to add a sprinkle of extra gingersnap dust on top of the cranberry layer, but for the full cake, the topping alone looks stunning. If you’re looking for other fun ways to serve cheesecake later on, maybe check out these cheesecake bite ideas!
Slice it up, serve it cold, and watch everyone rave about that incredible Cranberry Cheesecake Gingersnap Crust. It really is the perfect marriage of spice, cream, and tart fruit!
Tips for Success with Your Cranberry Cheesecake Gingersnap Crust
Making a restaurant-quality cheesecake at home can sometimes feel like walking on eggshells—pun intended! But once you understand a few key areas where things usually go wrong, you can nail this every single time, especially when dealing with our unique base. Listen, this cheesecake is worth taking your time over, and mastering these small details guarantees that spectacular moment when you slice through the chilled filling and hit that perfect Cranberry Cheesecake Gingersnap Crust.
If you find yourself struggling with cracking or uneven baking on your next creamy dessert adventure, you might want to review some tips over at this guide, but here are my must-know rules for this specific recipe:
- Don’t Skip the Pan Prep: Since cheesecakes are dense and have high sugar content, they are prone to sticking. While we established that baking off the crust helps, you MUST ensure the sides of your springform pan are lightly greased or rubbed with a little extra butter before pressing the crumb mixture in. A stuck cheesecake is a sad cheesecake!
- Room Temp is Non-Negotiable: I have mentioned this before, but I’m saying it again, okay? If your cream cheese is cold, your filling *will not* be smooth. Take those three blocks out hours ahead of time. If you’re in a rush, cut them into small cubes—this increases the surface area so they warm up quicker. Lumpy batter ruins the texture contrast against the crunchy crust.
- The Oven Door Trick is Sacred: Seriously, do not try to speed up the cooling process by ripping the cheesecake out of a hot oven and setting it on the counter. That sudden temperature change guarantees cracks. Trust the one-hour cool-down period inside the turned-off oven with the door propped open. This gentle transition is what keeps the top looking flawless over that lovely spiced Cranberry Cheesecake Gingersnap Crust.
- Don’t Over-Mix Once Eggs Go In: Once you add those four eggs, you are only mixing until they vanish. Over-beating incorporates tons of air. That air tries to escape during baking, causing the cake to rise too high, then deflate and crack on the way down. A gentle hand protects the smooth filling resting on your firm base!
Frequently Asked Questions About This Cheesecake
I always get questions whenever I post this recipe because it seems so fancy! People wonder about the details, especially when dealing with a thick, baked cheesecake. I’ve gathered the most common ones here just to make sure your baking experience is as smooth as the filling itself. If you are planning on making individual portions, you might want to check out some fun ideas for dessert in a cup recipes later on!
Can I skip baking the gingersnap crust?
Oh, please don’t! I know it seems like an extra step when you’re eager to get the filling in there, but believe me, skipping that initial 10-minute bake is asking for a soggy bottom. Pre-baking the crust is super important because it toasts the crumbs slightly and, most importantly, it sets the melted butter. This hardens the base so it won’t turn into mush when the cold, heavy cream cheese mixture sits on top of it for that long chill time. It locks everything in place!
How far in advance can I make the cranberry topping?
You have some flexibility here, which is great for holiday stress management! The topping is really stable since it’s been cooked down with sugar. You can absolutely cook the cranberry sauce a day or two ahead of time. Just make sure you store it in an airtight container in the fridge. The key thing is storage temperature: make sure the topping is completely cooled down—room temperature or chilled is fine—before you spread it over the set cheesecake. You definitely don’t want to put a warm sauce on your cold dessert!
What is the best way to cut a clean slice?
This is a classic cheesecake problem, and it all comes down to the knife! Cheescake is dense, and if the knife is room temperature, it pulls and drags the filling, making a mess of the clean lines of the crust and filling. Here’s my trick: grab a tall glass of very hot water right before you slice. Dip the blade of a long, thin knife into that hot water for about 10 seconds, wipe the blade super dry with a clean kitchen towel, and then make your cut. Pull the knife straight up and out, and wipe it clean again before you dip it back in for the next cut. It makes the butter and cream cheese practically melt away, leaving perfect wedges every time!

Nutritional Estimates for Cranberry Cheesecake
Okay, let’s talk numbers for a second. We all know this is a rich dessert, right? We’re dealing with a full block of cream cheese and a nice buttery crust, so it’s not exactly diet food! However, for those of you who like to plan ahead or track things for your gatherings, I’ve estimated the nutrition information based on the ingredients list. Just remember, this is baking, not science lab work, so these are ballparks, not gospel.
This estimation assumes you get 12 perfect slices out of the whole cake. If you end up cutting generous wedges like my uncle always does, those numbers will certainly climb!
Here is a snapshot of what you can expect per slice:
- Serving Size: 1 slice
- Calories Estimate: 450
- Total Fat: 28g (Be mindful of that 17g of saturated fat—that’s where the glorious butter and cream cheese hang out!)
- Sugar Content: 40g (This comes mostly from the filling and the sugary topping, of course.)
- Carbohydrates: 45g
- Protein: 8g
- Cholesterol: 120mg
When you are planning your holiday menu, keep in mind that the cranberry topping adds a nice bit of natural fruit tartness, which helps everything feel a little less heavy than, say, a pure chocolate cake might. Enjoy it! You’ve totally earned this decadent slice!
Share Your Cranberry Cheesecake Gingersnap Crust Creation
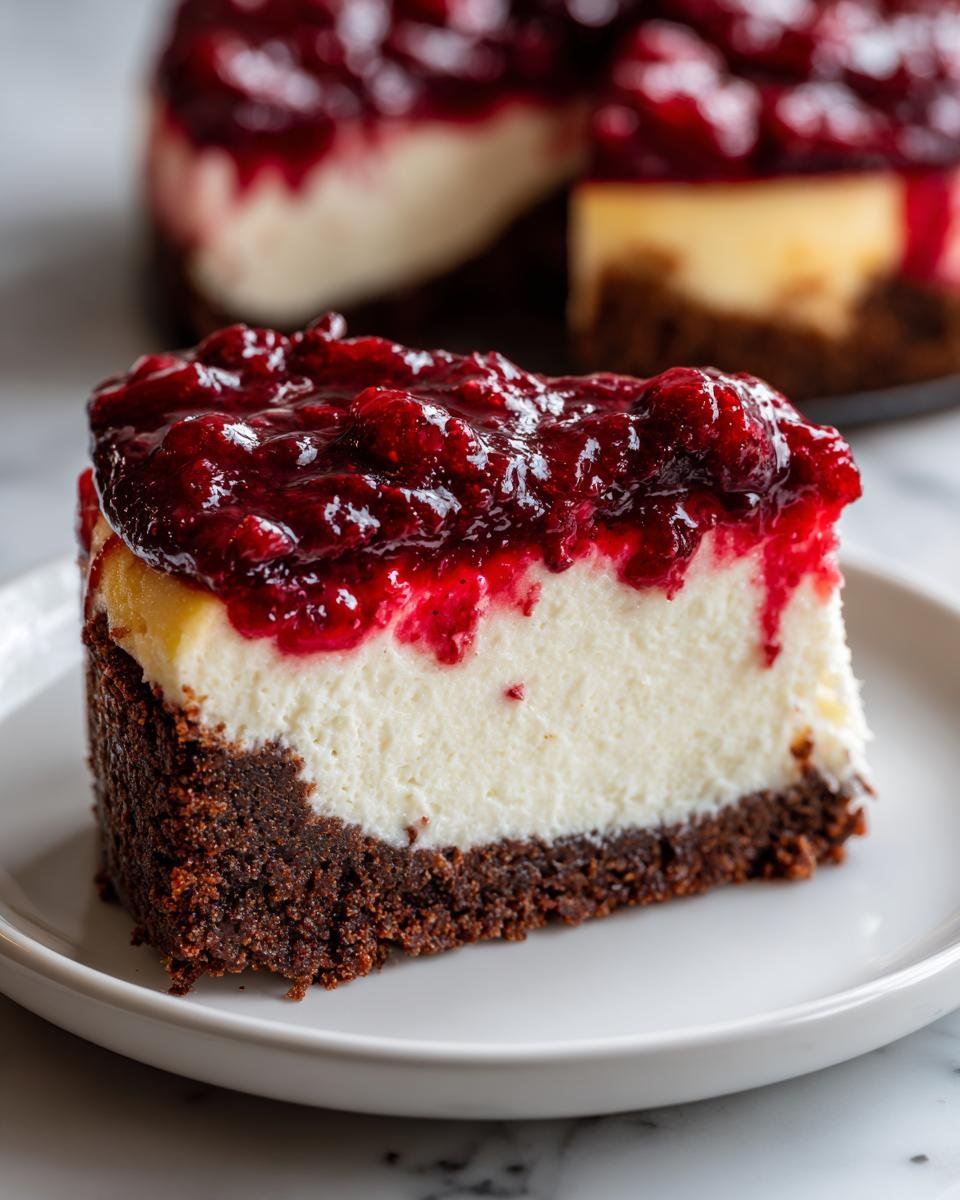
Whew! You made it! You navigated the world of slow cooling and perfectly spiced bases, and now you have this magnificent, vibrant dessert sitting in your fridge. I truly hope you are stepping back and admiring your handiwork, especially that beautiful contrast between the dark, spicy crust and the bright cranberry swirl on top.
Now comes the fun part—telling me all about it! I absolutely live for seeing your kitchen triumphs. Did it turn out exactly as planned? Did anyone try to sneak a slice before the mandatory chilling time was up? (We all know that happens!)
Please, please, please leave your thoughts down in the comments below. I want to know if you loved the depth of flavor the Cranberry Cheesecake Gingersnap Crust brought to the party, and if you stuck with the traditional cranberry topping or tried something wild! It helps me keep improving these older family treasures.
If you snapped a picture of your glorious final product—especially a cross-section showing off those layers—I would be thrilled if you shared it! Tag me on social media or just send a little note through my contact page. Seriously, seeing your creamy, spiced, cranberry-topped creations makes all the careful baking worth it. Happy eating, and thank you for trying out this recipe!
Print
Cranberry Cheesecake with Gingersnap Crust
- Total Time: 7 hours 25 min
- Yield: 12 servings 1x
- Diet: Vegetarian
Description
A rich cheesecake featuring a spiced gingersnap cookie crust and a tart cranberry topping.
Ingredients
- 1 1/2 cups gingersnap cookie crumbs
- 1/4 cup granulated sugar
- 6 tablespoons unsalted butter, melted
- 3 (8 ounce) packages cream cheese, softened
- 1 1/2 cups granulated sugar
- 1 teaspoon vanilla extract
- 4 large eggs
- 1 (12 ounce) can evaporated milk
- 1 cup fresh or frozen cranberries
- 1/4 cup water
- 1/4 cup packed light brown sugar
Instructions
- Preheat your oven to 350 degrees F (175 degrees C).
- Combine cookie crumbs, 1/4 cup sugar, and melted butter. Press the mixture firmly into the bottom of a 9-inch springform pan.
- Bake the crust for 10 minutes. Remove from oven and let cool slightly.
- Beat the softened cream cheese until smooth. Gradually add 1 1/2 cups sugar, beating until combined. Mix in vanilla extract.
- Add eggs one at a time, mixing well after each addition. Stir in evaporated milk.
- Pour the cream cheese mixture over the cooled crust.
- Bake for 50 to 60 minutes, or until the center is almost set. Turn off the oven, crack the door open, and let the cheesecake cool in the oven for 1 hour.
- Remove the cheesecake from the oven and cool completely on a wire rack. Refrigerate for at least 4 hours or overnight.
- For the topping, combine cranberries, water, and brown sugar in a small saucepan. Cook over medium heat, stirring occasionally, until the cranberries burst and the sauce thickens, about 10 minutes. Cool the topping before serving.
- Spread the cooled cranberry topping over the chilled cheesecake before serving.
Notes
- Use frozen cranberries without thawing for the topping; they will cook down fine.
- For a smoother topping, press the cooked cranberries through a sieve after cooling.
- Prep Time: 25 min
- Cook Time: 60 min
- Category: Dessert
- Method: Baking
- Cuisine: American
Nutrition
- Serving Size: 1 slice
- Calories: 450
- Sugar: 40g
- Sodium: 350mg
- Fat: 28g
- Saturated Fat: 17g
- Unsaturated Fat: 11g
- Trans Fat: 0.5g
- Carbohydrates: 45g
- Fiber: 1g
- Protein: 8g
- Cholesterol: 120mg
Keywords: cranberry cheesecake, gingersnap crust, baked cheesecake, holiday dessert, cream cheese