
Oh, man, I get it. Sometimes you absolutely need that spicy, greasy, tangy hit of Buffalo wings, but the thought of deep-frying indoors just sends you straight to the panic room. Trust me, I’ve been there—my kitchen still carries the scent of smoke from my early deep-frying disasters! But listen, I finally cracked the code, and now I make the absolute best Classic Oven Baked Buffalo Wings you will ever try. Seriously, they rival the deep-fried version, and the clean-up is non-existent!
The little secret I learned that changed everything? It’s aluminum-free baking powder. It might sound weird, but when you coat the wings with it, it dries out the skin just enough so they get shatteringly crisp in the oven. I perfected this system during a massive Super Bowl party when my fryer decided to give up the ghost thirty minutes before kickoff. Now, this is the only way I ever make them!

Why You Will Make These Classic Oven Baked Buffalo Wings
I know what you’re thinking: “Oven-baked wings are always soggy!” That used to be true for me too, but this recipe absolutely crushes that myth. Once you see how easy this is, you’ll probably retire your deep fryer for wings forever—or at least until next summer!
- You get that signature crackle and shatter of crispy skin everyone loves, all thanks to that little bit of baking powder magic.
- Zero messy oil cleanup! We are using foil and a rack, so cleanup takes literally two minutes.
- The classic Buffalo flavor is spot-on because we are using the holy trinity: good butter, quality hot sauce, and that hint of vinegar.
- They are much healthier than the fried version, so you can definitely eat more than four! (Don’t pretend you won’t.)
- The technique is ridiculously simple. Even if you’re not a huge baker, you can nail this on the first try.
- Perfect for game days or weeknight cravings because they are ready in about an hour total.
Essential Ingredients for Perfect Classic Oven Baked Buffalo Wings
Okay, here is the treasure map. These ingredients aren’t fancy, but every single one plays a huge role in making sure you get that legendary crispy skin and perfect sauce coating. Don’t try to cheat on the baking powder quality—it matters more than you think!
First up, you need about two pounds of chicken wings. I always buy them whole and then separate them into the flats and the drumettes myself. It just feels right, you know? Having them separated ensures they cook evenly on the rack.
Now for the crisp factor. You absolutely must grab about one tablespoon of baking powder. This is the secret weapon for oven wings, but listen closely: you need the aluminum-free kind. I’m not sure why, but the regular stuff can sometimes leave a weird little metallic taste, and we aren’t here for weird tastes around here!
For seasoning the wings before they even hit the oven, keep it simple: one teaspoon of salt and half a teaspoon of black pepper. That’s all we want on the skin itself because the sauce carries all the heavy lifting later.
When it comes to the sauce, we need half a cup of lovely unsalted butter. Unsalted is important because the spice sauce we are mixing in has tons of salt already. And of course, the star of the show: half a cup of Frank’s RedHot Original Cayenne Pepper Sauce. Don’t substitute that specific one unless you absolutely have to—that flavor is iconic!
Finally, just one tiny teaspoon of white vinegar. This brightens up the sauce so it doesn’t taste too flat. It might seem like a tiny amount, but it’s the perfect little zing that ties the butter and the hot sauce together.
Equipment Needed for Your Classic Oven Baked Buffalo Wings
I love this recipe because it doesn’t ask you to buy some fancy gadget. We are working with basics here, which makes getting started way less intimidating. You probably have everything needed sitting right in your drawers!
First things first, for the actual baking, efficiency is key. You need a standard baking sheet. But here’s the second crucial piece: you need a wire rack that fits inside that sheet. The rack is non-negotiable! That space underneath is what allows the air to circulate and crisp up the underside of the wings. If you don’t have a rack that fits, just use two sheet pans stacked slightly offset, but a rack is definitely better.
For assembling everything, grab a large mixing bowl for tossing the wings with the baking powder mixture. You’ll also need a decent-sized saucepan for melting the butter and mixing the Buffalo sauce later.
Oh, and don’t forget the basics: a few paper towels because we have to pat those wings dry, and maybe a silicone spatula or a whisk for stirring the sauce together. See? Easy peasy!
Step-by-Step Instructions for Classic Oven Baked Buffalo Wings
Alright, now that we have our ingredients lined up and our gear ready, let’s get these wings cooking! This process is broken down into three smooth phases. If you follow these steps exactly, especially prepping the dry skin, you’ll get that perfect crunch every time without the hassle of deep frying. Now, preheat that oven right away because time is your enemy when Buffalo wing hunger strikes!
Keep an eye on your oven temperature; we’re hitting a high heat here to cook them fast and crisp them up. Also, while your wings are baking, we’ll whip up that beautiful sauce. It’s really smart to multitask here, trust me!
Preparing the Wings for Maximum Crispiness
First thing’s first: crank your oven up to 425 degrees Fahrenheit, that’s 220 Celsius if you roll that way. Line a baking sheet with aluminum foil—this saves you from scrubbing baked-on crust later—and then place your wire rack right on top of that foil. This gap beneath the wings is crucial for getting air circulation all around them!
Next, grab those wings and pat them completely dry using paper towels. I mean bone-dry! If they’re wet at all, they steam instead of crisp. Once they’re dry, dump them into your big mixing bowl. Now, add the baking powder, salt, and pepper. Toss them around like crazy until every single piece looks lightly dusted, almost dusty white. This coating is what locks in the crispiness!
Baking the Classic Oven Baked Buffalo Wings
Lay those coated wings out on the wire rack, making sure they are in a single layer. Do not overcrowd the rack! If they are touching, they will steam each other and get rubbery. You might need two racks, which is totally fine. We want space for that golden-brown perfection to happen.
Pop them into the hot oven for a total of 40 to 45 minutes. You need to flip them halfway through, around the 20-minute mark, so both sides get nicely browned. When they are done, they should look gorgeous—golden brown and looking deliciously crisp. Don’t pull them out until they look right!
Making and Tossing with the Buffalo Sauce
While the wings are bathing in heat, let’s make the sauce. In a small saucepan on very low heat, melt your butter. Once it’s all liquid and happy, pull it right off the heat. Stir in your hot sauce and that little bit of white vinegar until everything is perfectly blended into that familiar orange shimmer.
Now, transfer those hot, crispy wings into a large bowl—the same one you used for the coating works fine, no need to wash it! Pour that lovely sauce right over the top. Toss them gently but quickly until every wing is slicked and coated. If you want that extra unbelievable crispiness, try this trick from my kitchen notebook: put the sauced wings back on the rack and pop them under the broiler for just 2-3 minutes. Watch them like a hawk, though, because that sauce can burn fast! Once they’re tacky and shiny, they are ready to go. You can check out how I make crispy baked potatoes to serve alongside them!
Tips for Making the Best Classic Oven Baked Buffalo Wings
We covered the basic steps, but if you want to take these Classic Oven Baked Buffalo Wings from ‘great’ to ‘famous at every party,’ you need to know a few little secrets I picked up over the years. These little tweaks guarantee success, especially if you mess up on the drying step!
The first big pro-tip is about the rack setup. I mentioned using a wire rack, but let me emphasize how important it is to lift those wings high! If you are using a really big batch, sometimes the heat in the middle of the pan isn’t quite as effective. If you see a few struggling to crisp up, grab a second, smaller rack and stack it over the first one so you maximize that hot air flow. It’s all about surface area!
My second must-do tip involves the clean-up again, but specifically the foil. Always use heavy-duty foil if you have it, and if you want to make sure absolutely nothing sticks, you can spray the foil underneath the rack very lightly with a non-stick spray. Now, I know we are trying to avoid grease, but a tiny bit on the foil itself keeps any drippings from baking onto the foil and making cleanup a nightmare. It’s worth it, honestly. You can check out how I make homemade ketchup for the burger you might want to serve alongside these!
The third tip is about the sauce application—this is vital for keeping them crispy after they come out of the oven. If you are making these ahead of time, keep the wings and the sauce separate! Never toss them until about five minutes before you plan to serve them. Once they sit in that hot sauce bath, they start to steam themselves soft again. If you absolutely MUST sauce early, serve them immediately after that quick broil mentioned in the instructions to set that sauce as much as possible before serving.
Finally, really commit to flipping them halfway through. It sounds obvious, but sometimes when you’re distracted by the game, you skip it. If you don’t flip them, the bottom side, which sits on the metal rack, gets cooked by direct contact beautifully, but the top side ends up looking pale and slightly soft. A quick flip guarantees that gorgeous, even, golden color all the way around!
Variations for Your Buffalo Wings
Part of the fun of loving Buffalo wings is being able to change things up without having to reinvent the wheel. The base of dry wings coated in baking powder is so solid that you can swap out that sauce for almost anything and still get a winner! I love having options ready for when my friends get tired of the classic Frank’s heat.
If you’re looking to dial down the heat but keep the tang, try replacing half the hot sauce with honey. You’ll get an amazing, beautiful glaze—a real crowd-pleaser! This honey Buffalo sauce is amazing, and you can even add a little fresh ginger when you melt the butter for an extra layer of sweetness.
For a completely different vibe, you can ditch the Buffalo sauce entirely and go for a savory BBQ dry rub! Before you bake them, sprinkle on your favorite BBQ spice blend—I often use a mix heavy on smoked paprika, a little garlic powder, and brown sugar right into the baking powder mixture. You’ll get smokier, juicier wings, and you won’t even have to bother with the saucepan step afterward. Pair that with my recipe for homemade chili garlic sauce on the side for dipping, and you’ve got a flavor explosion!
If you want to kick the heat up past traditional Buffalo, try substituting the Frank’s with something hotter—maybe a habanero-based sauce, or mix in some pure cayenne pepper right into the wet butter mixture. Just be warned, those habanero wings pack a punch! I usually make a smaller batch of those for just the spice-fiends in the family.
Remember, you can also change up your dipping sauce, which completely alters the experience! If you’re out of blue cheese, a simple sour cream and chive dip cuts the heat beautifully. Experimentation is encouraged here; these wings are just the incredible, crispy foundation!
Serving Suggestions for Classic Oven Baked Buffalo Wings
You’ve got your perfectly crisp, gloriously sauced Buffalo wings—huzzah! But let’s be honest, a wing platter isn’t complete without the proper cooling and crunch companions. Dipping sauces and fresh veggies are non-negotiable sidekicks. They balance out the heat and make that second wing taste just as amazing as the first!
The number one essential pairing, and I mean non-negotiable, is celery sticks and carrot sticks. They are mandatory! They provide the necessary clean, watery crunch that cuts right through the richness of the butter sauce. Plus, they make you feel slightly less guilty about scarfing down twenty wings in one sitting. It’s about balance, people!
Now, about the dips—you need two types on hand. Even if you only serve one, having options is key. First, a good, tangy Blue Cheese dressing. Nothing beats that sharp, funky flavor cutting through the cayenne heat. It’s the classic pairing for a reason. If blue cheese isn’t your jam, or if you have friends who turn their noses up at it (crazy, I know), you absolutely need a creamy Ranch dressing. A really good homemade Ranch is my preference, but any thick, good-quality store-bought one works in a pinch when hosting a game night.
If you’re looking for something a little more exciting than just dipping raw veggies, you could serve these wings alongside almost anything carb-heavy to soak up the extra sauce. I sometimes make a massive batch of creamy ranch pasta salad when I make wings because the cool, herby notes are a perfect contrast to the heat. Just make sure to keep the wings warm and the rest of the spread cool!
Honestly, though, just pile some celery high on a platter, put small bowls of ranch and blue cheese right in the middle, and watch them disappear. That’s all you need for a perfect wing night!
Storage and Reheating Instructions for Classic Oven Baked Buffalo Wings
Okay, so you did *too* good a job, and now you have leftover Classic Oven Baked Buffalo Wings staring at you from the fridge. Congratulations, you lucky thing! But here’s the critical part: if you just reheat them the wrong way, you end up with sad, soggy sadness, and we absolutely cannot let that happen to food this good.
My number one rule for leftovers is this: never, ever microwave them first. I know it’s fast, but microwaving is like sending your beautiful crispiness to an early grave. The steam trapped in the microwave turns that glorious crunchy skin into rubber. If you must reheat them quickly, use an air fryer, but the oven is still the champion here for maximum recovery.
Storing Your Leftover Buffalo Wings Safely
First, you need to separate the sauce from the wings immediately if you didn’t eat them all right away. If you left them soaking in that buttery sauce, they will get soft fast. If you managed to save any naked, crispy wings, just pop those bad boys into an airtight container. I use tempered glass containers because they stack nicely and don’t absorb odors.
If you have sauced leftovers, you can still store them in an airtight container, but just know that they will be softer when you reheat them. That sticky sauce sets up almost like a marinade when it cools down. For best results, try to get them into the cold storage within two hours of serving. They usually stay perfectly fine in the fridge for about three days.
Reheating to Restore That Oven-Baked Crunch
If you want them to taste almost exactly like they did fresh out of the oven, you have to use dry heat. Get your oven preheated to about 375 degrees Fahrenheit (190 Celsius). You don’t need to line a pan with foil this time, but you do need that wire rack again! Seriously, the rack is a gift from the cooking gods for reheating anything you want to stay crisp.
Lay the wings out on the rack in a single layer—don’t overcrowd them, or they steam! Bake for about 10 to 12 minutes. You’ll notice the sauce starts to bubble slightly and the exterior gets that lovely, firm texture back. They should be piping hot all the way through when you pull them out.
Now, if you are in a real rush—like, the game is starting in five minutes rush—the air fryer is your friend. Set it to about 360 degrees Fahrenheit for only 5 to 7 minutes. Since the air fryer is basically a miniature, high-powered convection oven, it does a fantastic job of blasting away residual moisture and crisping the skin fast. Just make sure you check on them frequently!
If you happen to have a batch of wings that got really soggy because they sat in the sauce too long, try reheating them *without* sauce first for about 8 minutes, then quickly toss them in a freshly made, tiny batch of warm sauce right before serving. It makes a huge difference! For more tips on quick cooking methods, check out my guide on air fryer baked potatoes; the convection principles are the same!
Frequently Asked Questions About Classic Oven Baked Buffalo Wings
I get so many messages after people try this recipe, which just proves how much everyone loves crispy wings without the deep-fry mess! Here are some of the questions I hear most often about getting these Classic Oven Baked Buffalo Wings just perfect.
Does the baking powder make the wings taste metallic?
This is the number one question I get, and I promise you, if you follow my advice, the answer is a resounding NO! The secret is using aluminum-free baking powder. Regular baking powder sometimes has aluminum additives that can leave a faint, slightly metallic, or soapy aftertaste when baked at high heat. When you use the aluminum-free version—which is usually labeled clearly—the baking powder’s job is just to raise the pH level slightly, which helps dry out and crisp up the skin proteins. It vanishes during baking, leaving zero trace!
Can I skip using the wire rack for these crispy oven wings?
Oh, please don’t skip the rack! If you line the wings directly onto foil or a sheet pan, the bottom part of the wing will sit in its own juices and steam. You’ll end up with a crispy top layer and a sad, rubbery bottom layer. The rack is precisely what lets the hot air circulate underneath, drying out the entire surface so you get that beautiful, even crispiness we are aiming for. It’s the key to making actual crispy oven wings!
How long do these wings stay crispy after saucing them?
That’s the tricky part about *any* sauced wing, baked or fried! Once that wet Buffalo sauce hits the crispy skin, the clock starts ticking. If you sauce them right before serving, they stay incredibly crisp for a good 10 to 15 minutes. If you are planning a party, wait until the very last moment to toss them. If you absolutely must sauce them early, that quick 2-minute broil I mentioned in the instructions will help set the sauce and keep them tacky rather than runny, giving you an extra 5 minutes of crunch time!
What kind of hot sauce do you recommend besides Frank’s?
Frank’s is the classic, and I really stick to it because it has that perfect vinegar tang that balances out the butter. But if you’re looking to explore, switch to a Louisiana-style hot sauce. Stay away from thick, savory sauces like Sriracha for this recipe since those break down differently when mixed with butter. If you want to keep it mild, try using half Frank’s and half a mild pepper sauce—it works great! For more ideas on quick meals, peep my list of easy dinner recipes for inspiration!
Nutritional Estimates for Your Classic Oven Baked Buffalo Wings
Now, I know when we’re talking about wings drowned in butter and hot sauce, we aren’t exactly aiming for a kale smoothie. These Classic Oven Baked Buffalo Wings are way better for you than the deep-fried versions, thanks to skipping all that extra cooking oil, but they still deserve a little nutritional reality check!
The numbers below are just my best guess based on the ingredients I use—specifically, the amount of butter and the heat level of the Frank’s sauce. Every single brand of butter or hot sauce you use can tweak these numbers just a bit, so take this as a friendly guideline rather than the absolute gospel truth!
When calculating this, I used the serving size listed as four decent-sized wings. If you’re like me and your idea of a serving size is closer to eight, well, you’ll just double these figures! Don’t worry about it too much; just enjoy the crispiness you worked for!
- Serving Size: 4 wings
- Calories: Around 350 calories
- Fat: About 25 grams (It’s the butter, baby!)
- Protein: A hefty 28 grams—great for keeping you full!
- Carbohydrates: Very low, about 2 grams (mostly from the sauce stabilizers)
- Sodium: This one is higher, around 550mg, because hot sauces are salty, so maybe skip the extra salt on your veggies!
- Saturated Fat: Roughly 10 grams
See? It’s not terrible for a game-day indulgence, especially since we cut out all that added frying fat. The high protein content is a definite plus! Just remember this is a loose estimate, but it gives you a good idea of what you’re working with!
Share Your Classic Oven Baked Buffalo Wings Experience
Alright, friends, now it’s your turn! We’ve talked about the secret to crispiness, the essential ingredients, and exactly how to avoid a soggy wing disaster. But the real magic happens when you take these steps and make them your own in your kitchen!
I’ve poured out all my best tips—aluminum-free baking powder, the sacred wire rack, and that crucial flipping step—but I absolutely love hearing how you guys tweak things. Did you add a dash of smoked paprika to the dry rub? Did you substitute the vinegar for lime juice? Tell me everything!
Don’t be shy! Drop a rating for these Classic Oven Baked Buffalo Wings down below using those five stars. Even if you only felt they were four-star worthy, I want to know why! Was there a minor adjustment you’d recommend to future readers? Let’s build this wing knowledge together!
If you tried these and loved them, please share a picture on social media and tag me! Knowing you shared a great game day with this recipe honestly makes my whole week. If you have feedback or just want to send some praise (wink, wink), you can always reach out confidentially through my contact page as well. Happy wing eating, and I can’t wait to read your feedback!
Print
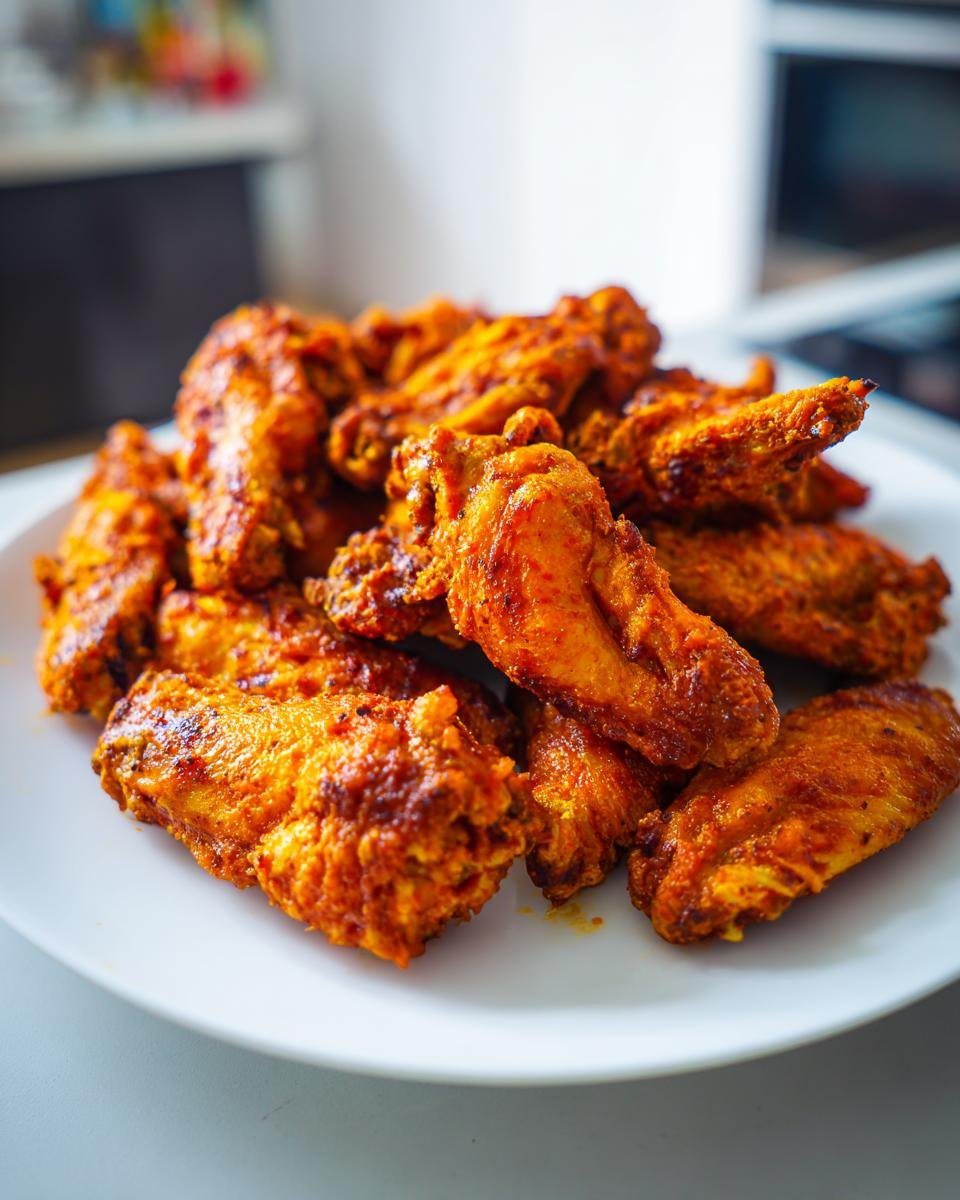
Classic Oven Baked Buffalo Wings
- Total Time: 60 min
- Yield: 4 servings 1x
- Diet: Low Fat
Description
A recipe for making crispy buffalo wings in the oven instead of deep frying.
Ingredients
- 2 lbs chicken wings, separated into flats and drumettes
- 1 tablespoon baking powder (aluminum-free)
- 1 teaspoon salt
- 1/2 teaspoon black pepper
- 1/2 cup unsalted butter
- 1/2 cup Frank’s RedHot Original Cayenne Pepper Sauce
- 1 teaspoon white vinegar
Instructions
- Preheat your oven to 425 degrees Fahrenheit (220 degrees Celsius). Line a baking sheet with aluminum foil and place a wire rack on top of the foil.
- Pat the chicken wings completely dry using paper towels. This step is key for crispiness.
- In a large bowl, toss the dried wings with baking powder, salt, and pepper until evenly coated.
- Arrange the wings in a single layer on the wire rack. Do not overcrowd the rack.
- Bake for 40 to 45 minutes, flipping the wings halfway through the cooking time, until they are golden brown and crispy.
- While the wings bake, prepare the sauce. In a small saucepan over low heat, melt the butter.
- Remove the butter from the heat and stir in the hot sauce and vinegar until combined.
- Place the hot, cooked wings into a large bowl. Pour the buffalo sauce over the wings and toss gently until every piece is coated.
- Serve immediately.
Notes
- For extra crispiness, you can bake the wings for an additional 5 minutes after tossing them in the sauce under the broiler, watching closely to prevent burning.
- Use aluminum-free baking powder for the best results when coating the wings.
- Prep Time: 15 min
- Cook Time: 45 min
- Category: Appetizer
- Method: Baking
- Cuisine: American
Nutrition
- Serving Size: 4 wings
- Calories: 350
- Sugar: 1
- Sodium: 550
- Fat: 25
- Saturated Fat: 10
- Unsaturated Fat: 15
- Trans Fat: 0
- Carbohydrates: 2
- Fiber: 0
- Protein: 28
- Cholesterol: 100
Keywords: buffalo wings, oven baked, baked wings, chicken wings, hot wings, classic buffalo