
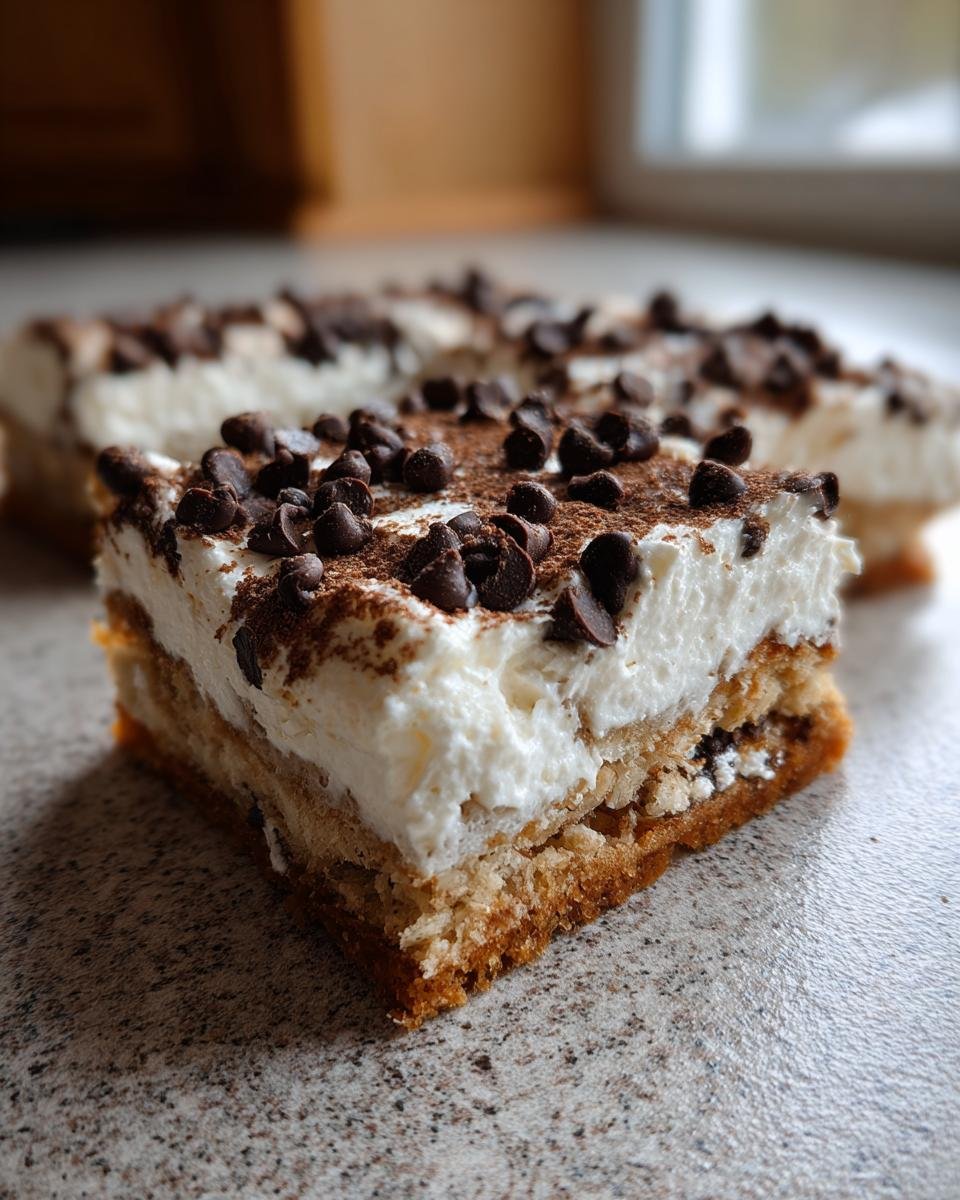
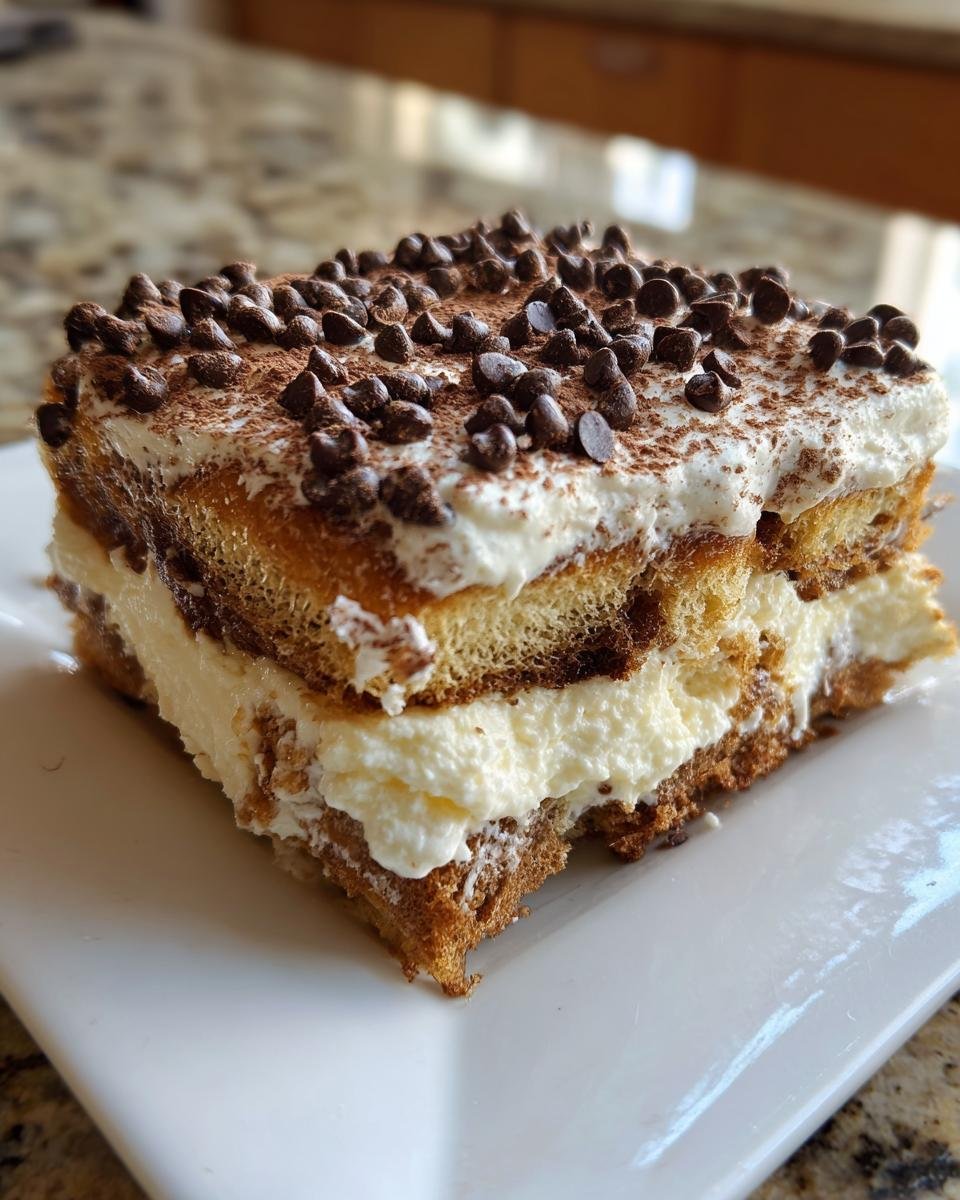
Oh, I adore cannolis, you know I do! That perfect crunch of the shell followed by that sweet, zesty, creamy ricotta filling? Divine. But honestly, who has the time (or the patience) to roll and fry those shells unless it’s a major holiday? Not me, not usually! That’s why I spent an entire weekend trying to figure out how to bottle that amazing Italian flavor into something you can whip up in under an hour. And seriously, I cracked the code. These amazing baked squares capture the heart and soul of that classic dessert. Forget the fuss; we’re making Classic Cannoli Squares that are tender, creamy, and absolutely addictive!
Why You Will Love These Classic Cannoli Squares
Honestly, these squares are my secret weapon for instant Italian gratification. I mean, who can say no to something this easy? Here’s why you need to bake these today:
- They give you that signature cannoli flavor without needing to deep fry anything—thank goodness!
- The crust is wonderfully buttery and tender, not tough like some shells can be.
- The cream cheese filling is unbelievably smooth and sets up perfectly, making them an ideal grab-and-go treat.
- You can seriously have these done from start to finish in about an hour.
Ingredients for Perfect Classic Cannoli Squares
When we talk about making these Classic Cannoli Squares, the ingredients are everything. You need that buttery crust to be crumbly but hold together, and the filling has to be flawlessly smooth. Don’t skip the details on the butter or the cheese!
For the Crust Base
This is what replaces that crispy fried shell, so we want it rich and sandy. Make sure your butter is good quality—it makes a difference!
- 1 1/2 cups all-purpose flour
- 1/2 cup granulated sugar
- 1/2 teaspoon baking soda
- 1/4 teaspoon salt
- 1/2 cup (1 stick) unsalted butter, cold and cubed
- 1 large egg
- 1 teaspoon vanilla extract
For the Creamy Cannoli Filling
My biggest piece of advice here? Make sure your cream cheese isn’t just room temperature—it needs to be truly soft! If it’s cold, you’ll end up with little lumps, and trust me, nobody wants lumpy cannoli filling, even in a square format. You’ll want to use my favorite cream dessert recipes for guidance!
- 8 ounces cream cheese, softened (seriously, let it sit out for an hour!)
- 1/2 cup powdered sugar
- 1 teaspoon lemon zest
- 1/4 cup mini chocolate chips
Step-by-Step Instructions for Classic Cannoli Squares
Okay, this is where the magic happens! Even though these are technically simple bar cookies, the timing is what keeps the crust from getting soggy underneath that beautiful filling. Don’t worry, I track all the times so you don’t have to. We want these beauties baked until they are perfect—we’re aiming for that sweet spot between set and overly dry! You can check out some other great easy baked desserts, but trust me, these squares are worth the little bit of active time.
Preparing and Baking the Crust
First things first, get your oven preheated to 350 degrees F! Grab an 8×8 inch pan and make sure you grease and flour it really well—I hate having to chisel dessert out of a pan.
In a bowl, whisk the flour, sugar, baking soda, and salt together. Now, listen up: cut in that cold butter. You want to use a pastry blender or just your fingertips until that mixture looks like coarse crumbs. Don’t overwork it! This gives us that perfect, slightly granular texture. Then, mix your egg and vanilla separately and gently bring it together with those crumbs to form a basic dough. Press that dough evenly into your prepared pan—use the bottom of a measuring cup if that helps you get it flat!
Pop this crust into the oven for exactly 15 minutes. That initial bake locks everything up so the filling doesn’t soak straight through.
Making and Layering the Cannoli Filling
While the crust is doing its thing in the oven, get your filling mixed up. Beat that softened cream cheese until it’s smooth as silk—remember my tip about temperature? Mix in the powdered sugar until there are zero lumps, and then mix in that bright lemon zest. Wow, the smell!
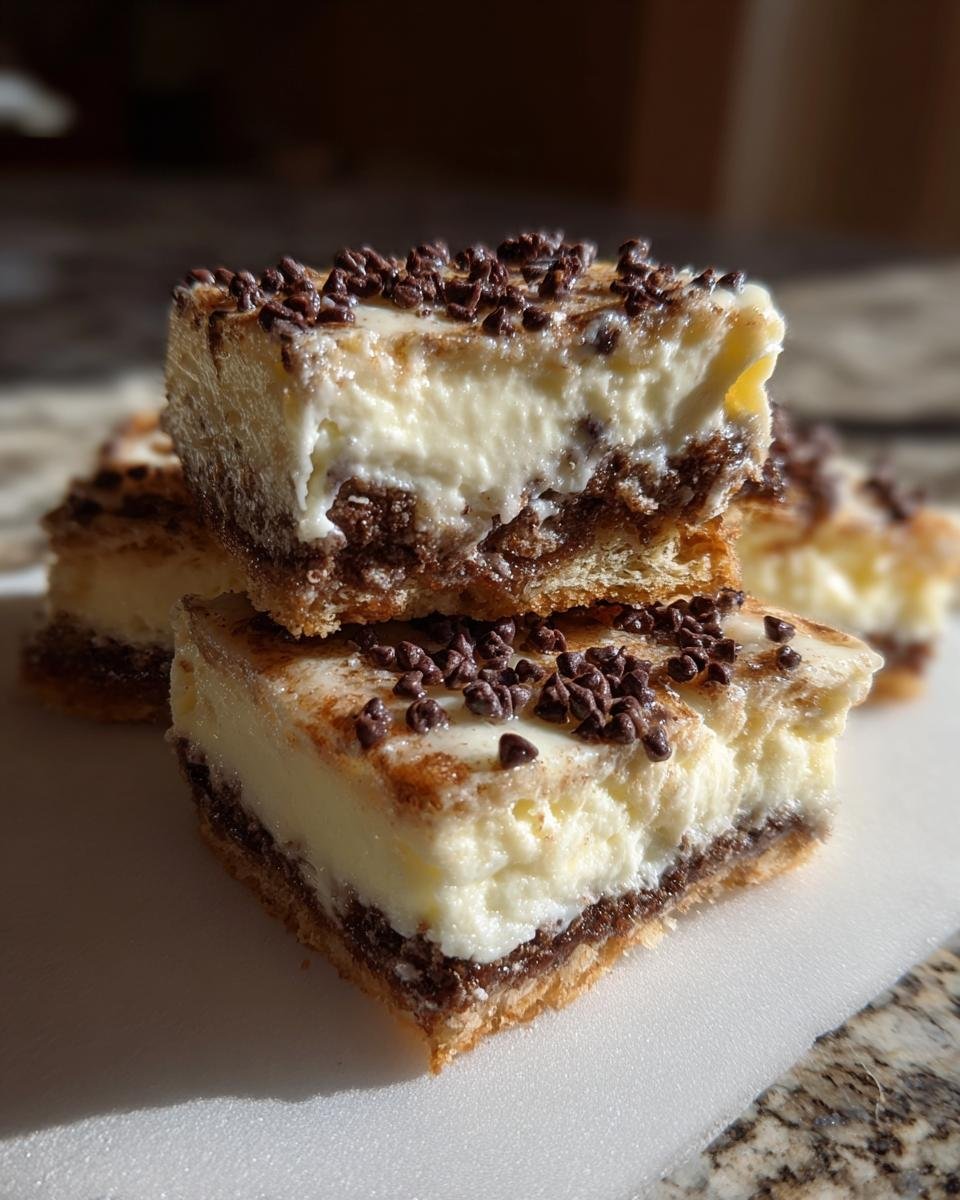
When those 15 minutes are up, pull that crust out. You need to move quickly here! Spread that creamy filling evenly right over the *warm* crust layer. Don’t let it cool down too much! Then, sprinkle those mini chocolate chips right over the top of the cream cheese. They look like little jewels setting on top!

Final Bake and Cooling for Classic Cannoli Squares
Back into the oven it goes! Bake for another 20 to 25 minutes. You’ll know it’s done when the filling looks set. It shouldn’t wobble when you gently shake the pan. This is the hardest part, folks: you MUST let these squares cool completely in the pan on a wire rack. If you try to cut them warm, the filling will run everywhere and you’ll have a soupy mess instead of neat squares.
Tips for Making the Best Classic Cannoli Squares
We’ve got the basics down, but these little tips are what take these Classic Cannoli Squares from good to “Where did you buy these?!” These are the things I learned after making two failed batches where the crust was too soft or the filling was uneven. Don’t let that happen to you!
First up, if you’re making these on a really hot day, or if your kitchen is just naturally warm, the crust dough gets super soft before you even get it pressed evenly. If it starts feeling greasy, slide the whole pan into the fridge for just 10 minutes before pressing it in. A chilled crust means a crumblier, more defined base when it bakes up. It’s a lifesaver!
Since we’re using mini chocolate chips, this is great, but if you only have regular sized ones, you absolutely should chop them up slightly before sprinkling them on top of the filling. You want that little hit of chocolate mixed into every portion, not one giant chunk of chocolate sitting in the middle of a square. Think distribution, people!
Also, when you’re mixing the crust ingredients after you cut in the butter, mix *just* until the dough holds together. Seriously, stop stirring as soon as you don’t see dry flour spots anymore. Overmixing the dough activates the gluten, and instead of a tender shortbread-like base, you end up with something chewy. Nobody wants a chewy cannoli crust!
Finally, for presentation, don’t forget that little dusting I mentioned in the notes. Once these squares are completely cold and completely set—and I mean, wait until they are chilled if you have to!—grab a fine-mesh sieve and dust them lightly with powdered sugar. It fools everyone into thinking you spent hours shell-making, and it adds such a nice visual finish. You can look up some of my favorite chocolate chip recipes for inspiration on chip use!
Ingredient Notes and Substitutions for Classic Cannoli Squares
Now, let’s talk about getting creative if you’re missing something or just want to lean into that authentic Italian flavor profile even more deeply. The recipe calls for cream cheese, and I love it because it sets up so reliably well. But if you want to get closer to the real deal, you can absolutely substitute ricotta cheese. I’ve done this many times, and wow, the flavor is fantastic!
However, you cannot just swap it in 1:1 without a major catch. Ricotta holds so much more water than cream cheese. If you skip draining it, your bottom crust will turn into absolute pudding, and your gorgeous Classic Cannoli Squares adventure will end sadly. You need to strain that ricotta the night before, if possible. Put it in a cheesecloth or a few layers of paper towels and let it drain sitting over a bowl in the fridge. Seriously, let it drip for hours until it feels substantially thicker. You want maybe 6 or 7 ounces of actual cheese left, not liquid runoff!
If you’re worried about the chocolate chips, that’s an easy fix. I prefer mini chips just because they spread out nicely over the filling evenly, but if you only have regular semi-sweet chips, chop them coarsely first. You want little pockets of chocolate, not giant boulders. Or, you know what? If you want to be really decadent, use those tiny dark chocolate shavings instead! It adds a beautiful melt.
If you’re curious about swapping out the base slightly, you can look into making a cream cheese variation. I’ve seen people try to use things similar to what goes into a cream cheese pound cake blend in the crust, but honestly, for these squares, stick to the shortbread crumb. It’s that simple, buttery structure that truly makes the contrast with the rich filling!
Serving Suggestions for Your Classic Cannoli Squares
Once these beauties are totally cooled and set—and I mean truly cold, that’s when the real fun begins! Serving these Classic Cannoli Squares is almost as enjoyable as baking them, mostly because they look so elegant but took barely any effort. Remember how I said Grandma liked a simple dusting of powdered sugar sometimes? Well, for these, skip the powdered sugar if you loaded them up with chocolate chips, but if you kept it fairly plain, that light snow of white sugar just elevates the presentation instantly!
I usually cut them into perfect 4×4 squares, as the recipe suggests, which gives you 16 nice, solid pieces. They hold their shape beautifully after that necessary chilling time, which is key for clean slicing!
Presentation-wise, I love lining them up on a simple white platter. They don’t need fancy garnishes, but if you feel like going the extra mile, grab a few candied orange peels—they echo that gorgeous hint of zest in the filling! Or, for a super vibrant look, grab some fresh mint leaves and tuck a tiny one next to every few squares on the tray.
What do I serve them with? Coffee, always! These rich, sweet squares begged for a strong, slightly bitter counterpoint. A fresh, hot espresso is my absolute favorite pairing. It cuts through the richness of the cream cheese perfectly. If you’re doing an afternoon treat spread, they pair great with something tart like a raspberry sorbet or even a refreshing citrus drink, just to keep things bright!
Storage and Make-Ahead Tips for Classic Cannoli Squares
Since these Classic Cannoli Squares have that luxurious, creamy filling, we definitely need to talk about storage. You can’t just leave these innocent things sitting on the counter waiting for disaster to strike! They are much happier hanging out in the cool part of the fridge, trust me. That chilling time isn’t just for setting after baking; it’s crucial for keeping that cream cheese filling tasting fresh and firm.
You can totally make these ahead of time, which is fantastic for parties! If you bake them one day, let them cool completely, and then cover them tightly—I mean *tightly*—they will last wonderfully in the refrigerator for three, maybe even four days. The crust might soften up just a tiny bit after Day Two, but honestly, it still tastes amazing. The flavor actually seems to deepen overnight!
When you are ready to serve them, pull the pan out of the fridge about 20 minutes before you plan to slice them. If they are rock hard, it’s nearly impossible to get those clean cuts we talked about earlier. If you are prepping them for a big gathering, I recommend baking them the day before service, cooling them completely, slicing them after they’ve chilled overnight, and then covering the *cut* squares loosely with plastic wrap before putting them back in the fridge. That way, when guests arrive, you just pop them onto a platter!
And just a heads up, because this is a dairy-based filling, we are skipping the freezer on this one totally. I’ve tried freezing bar cookies with cream cheese filling before, and it never goes well—the texture gets kind of grainy when thawed. Stick to the fridge for the best results. If you want to see some incredible desserts you don’t have to think about storing because they disappear so fast, you should check out my guide on no-bake cake recipes!
Frequently Asked Questions About Classic Cannoli Squares
I always get a mountain of questions after sharing this recipe because everyone wants their Classic Cannoli Squares to turn out absolutely perfect! It’s just so handy, but because it’s a hybrid recipe—part shortbread, part cheesecake, all amazing—people have little hang-ups. Don’t worry, I’ve got answers for everything from sticky messes to flavor tweaks. If you’re looking for your next truly decadent dessert, these questions cover the final hurdles!
Can I use pre-made cannoli shells instead of baking a crust?
That’s a great thought, but I would really advise against it for this specific recipe! Remember, these are Classic Cannoli Squares—they are meant to be uniform, flat bars with a baked, shortbread-like crust baked right in the pan. If you tried to crumble up a pre-made shell and press it down, it wouldn’t bind the same way, and you’d lose that lovely, slightly chewy density we get from the flour and butter base when it bakes.
Also, you’d lose the opportunity for the crust to absorb a tiny bit of the filling’s residual moisture while still warm, which creates a fantastic textural bridge between the bottom and cream top. Stick to the baked crust for the best square experience!
Why is my cream cheese filling runny?
Oh man, a runny filling is the saddest sight when you’re waiting for those squares! This almost always comes down to two things, so check your process! First, was your cream cheese truly soft? If you add lumps of cold cream cheese to the sugar and beat it, it won’t emulsify properly, and it stays looser than it should.
The second, and more common culprit for a soft set, is not letting them cool long enough. You said it’s done in the oven, but the residual heat is still working! You *must* let these cool completely, and I mean completely, on the counter before you even *think* about refrigerating them. Then, they need at least four hours in the fridge—overnight is best—to firm up properly. If you cut them warm or slightly cool, they will absolutely ooze out onto the cutting board.
How can I make these Classic Cannoli Squares taste more like traditional fried shells?
I love this question because it shows you’re really thinking about flavor profiles! We use a simple, buttery crust here, but if you want that whisper of frying flavor—which often comes from orange zest or a touch of cinnamon in the shell dough—you can totally add that into the crust mixture!
Before you add the egg/vanilla mix to the flour/butter crumbs, try stirring in an extra 1/4 teaspoon of ground cinnamon or a tiny splash (maybe 1/2 teaspoon) of orange extract right along with your vanilla. That little boost mimics the spice profile you’d find in a good, authentic shell without overpowering the creamy filling we want front-and-center. It’s a subtle change, but boy, does it make a difference!
Nutritional Estimates for Classic Cannoli Squares
Okay, so let’s get down to brass tacks. I’m not a nutritionist, so take these numbers with a massive grain of salt! I pulled these estimates from the standard databases based on the ingredients list—it’s just a ballpark figure so you know what you’re generally getting into with one of these Classic Cannoli Squares.
Look, these are rich, they have butter, cream cheese, and sugar, so they aren’t exactly a rabbit food salad, right? But for a homemade treat that hits that dessert craving perfectly, they are worth every bite! We’re aiming for flavor payoff here, not counting macros!
Here are the estimated numbers based on yielding 16 squares. Remember, if you cut them bigger or smaller, these figures shift wildly! For more reading on sugar content, have a look at how fruit sugars stack up; it’s actually fascinating stuff I found here.
- Serving Size: 1 square
- Calories: Around 210
- Fat: About 12 grams (7g saturated)
- Carbohydrates: Roughly 24 grams
- Sugar: About 18 grams
- Protein: A modest 3 grams
- Cholesterol: Around 45mg
As I always say, these are just *estimates*. The actual values can change based on the brand of butter you use, if you drain your ricotta (if you substituted!), or even how much chocolate chips decide to spill onto your neighbor’s square versus yours. Just know that they are heavenly, and that’s the only metric that truly matters in my kitchen!
Print
Classic Cannoli Squares
- Total Time: 60 min
- Yield: 16 squares 1x
- Diet: Vegetarian
Description
A simple recipe for baked squares mimicking the flavors of traditional cannoli.
Ingredients
- 1 1/2 cups all-purpose flour
- 1/2 cup granulated sugar
- 1/2 teaspoon baking soda
- 1/4 teaspoon salt
- 1/2 cup (1 stick) unsalted butter, cold and cubed
- 1 large egg
- 1 teaspoon vanilla extract
- 8 ounces cream cheese, softened
- 1/2 cup powdered sugar
- 1 teaspoon lemon zest
- 1/4 cup mini chocolate chips
Instructions
- Preheat your oven to 350 degrees F. Grease and flour an 8×8 inch baking pan.
- In a medium bowl, whisk together the flour, granulated sugar, baking soda, and salt for the crust.
- Cut in the cold butter using a pastry blender or your fingers until the mixture resembles coarse crumbs.
- Beat the egg and vanilla extract together in a small bowl. Add this mixture to the dry ingredients and mix until just combined into a dough.
- Press the dough evenly into the bottom of the prepared baking pan. Bake for 15 minutes.
- While the crust bakes, prepare the filling. Beat the softened cream cheese and powdered sugar together until smooth. Mix in the lemon zest.
- Remove the crust from the oven. Spread the cream cheese mixture evenly over the warm crust.
- Sprinkle the mini chocolate chips over the cream cheese layer.
- Return the pan to the oven and bake for an additional 20 to 25 minutes, or until the filling is set.
- Let the squares cool completely in the pan on a wire rack before cutting into squares.
Notes
- You can substitute ricotta cheese for cream cheese for a more authentic flavor, but ensure the ricotta is well-drained.
- Dust the cooled squares lightly with powdered sugar before serving for presentation.
- Prep Time: 20 min
- Cook Time: 40 min
- Category: Dessert
- Method: Baking
- Cuisine: Italian-American
Nutrition
- Serving Size: 1 square
- Calories: 210
- Sugar: 18
- Sodium: 120
- Fat: 12
- Saturated Fat: 7
- Unsaturated Fat: 5
- Trans Fat: 0
- Carbohydrates: 24
- Fiber: 1
- Protein: 3
- Cholesterol: 45
Keywords: cannoli, squares, dessert, cream cheese, chocolate chip, baked pastry