
Oh, you guys! There’s just something magical about a dessert that’s perfectly portioned, isn’t there? I remember this one time, I was at a potluck, and someone brought a full-sized cheesecake. It was beautiful, truly. But then came the awkward cutting, the messy plates, and half the people politely declining because they felt guilty taking a huge slice. And honestly, who wants to deal with all that fuss when you’re trying to enjoy a good time?
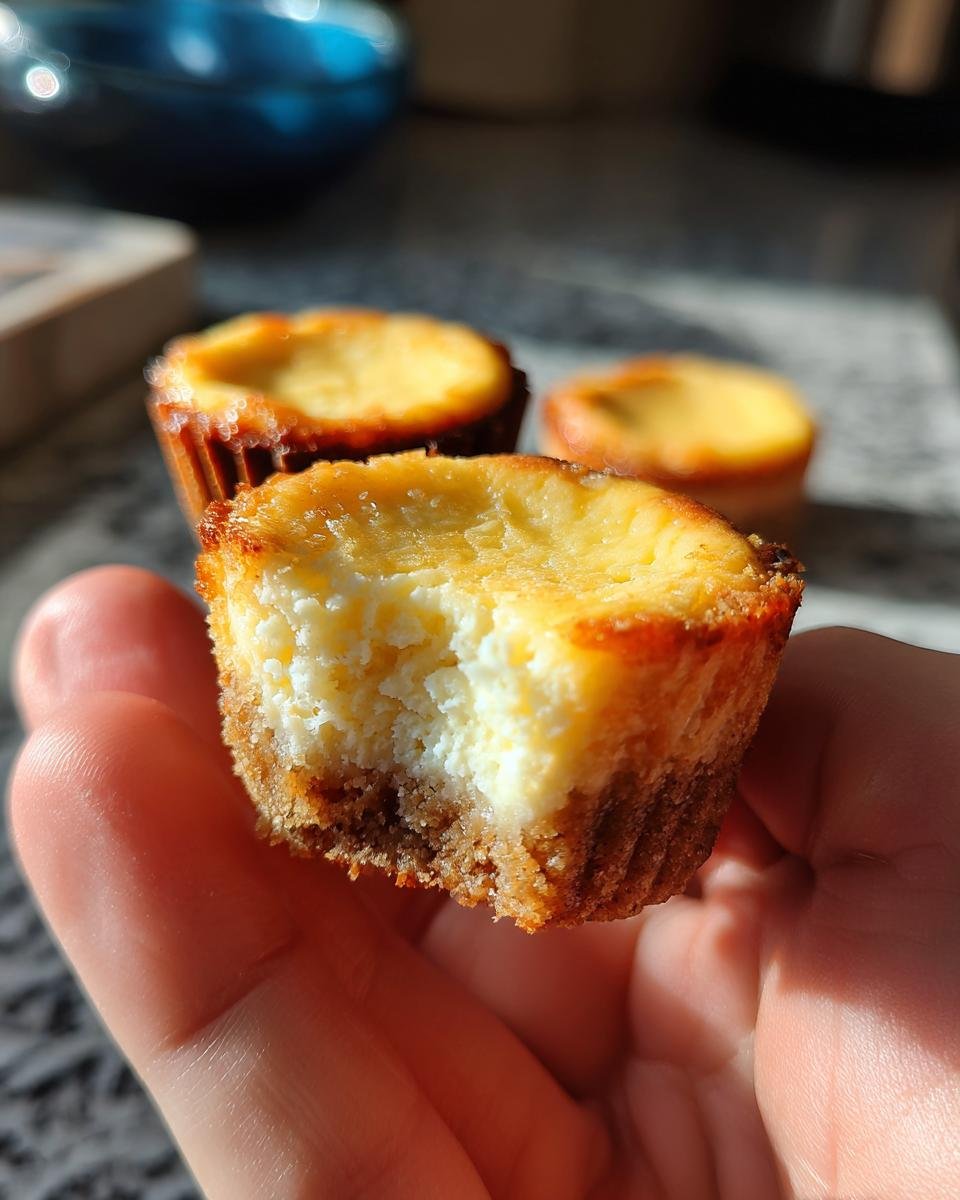
That’s exactly why I fell head over heels for Cheesecake Bites: Flavorful Mini Treats! They’re everything you love about a rich, creamy cheesecake, but in a cute, pop-in-your-mouth package. No plates needed, no guilt, just pure, unadulterated deliciousness. I’ve made these for every occasion imaginable – from casual backyard BBQs to fancy holiday gatherings, and they are always, always the first thing to disappear. Seriously, people go absolutely wild for them!
And the best part? They are ridiculously easy to make. I know, I know, cheesecake sounds intimidating, right? But trust me, these mini versions take all the stress out of it. You’re going to feel like a total baking pro, and your friends will be begging you for the recipe. So, let’s dive in and get baking, because these little bites of heaven are about to become your new favorite go-to dessert!

Why You’ll Love These Cheesecake Bites: Flavorful Mini Treats
Okay, so why are these little beauties my absolute favorite, and why will they be yours too? Well, for starters, they’re just so darn cute! But beyond the adorableness, they’re incredibly practical and always a huge hit. No more messy slices or giant commitments. Plus, they’re:
- Perfectly Portioned: One bite, one treat!
- Super Versatile: Dress them up or keep them simple.
- Crowd-Pleasers: Seriously, everyone loves them!
- Surprisingly Easy: Don’t let the “cheesecake” part scare you.
The Allure of Cheesecake Bites: Flavorful Mini Treats
There’s just something so undeniably appealing about a dessert that’s made for sharing, or, let’s be honest, for enjoying all by yourself without feeling one bit guilty! These cheesecake bites are the ultimate party food, easy to grab and mingle with. But they’re also wonderful for a quiet evening when you just want a little something sweet. They’re just the right size, every single time.
Essential Ingredients for Your Cheesecake Bites: Flavorful Mini Treats
Alright, let’s talk ingredients! This is where the magic really starts, and honestly, you don’t need anything fancy. Just good, honest stuff that’ll come together to make the most incredible little cheesecake bites you’ve ever tasted. I always say, a good recipe starts with good ingredients, and this one is no exception. Here’s what you’ll need to gather:
- 1 ½ cups graham cracker crumbs: You can buy them pre-crushed, or just crush your own graham crackers. Easy peasy!
- ¼ cup granulated sugar (for the crust): Just a little bit to sweeten up that base.
- ¼ cup unsalted butter, melted: This is what holds that delicious crust together.
- 2 (8 ounce) packages cream cheese, softened: And I mean *softened*. More on that in a sec!
- 1 cup granulated sugar (for the filling): The perfect amount of sweetness.
- ½ cup sour cream: This is my little secret for extra creaminess and a slight tang.
- 1 teaspoon vanilla extract: Don’t skimp on the good stuff here!
- 2 large eggs: These help bind everything together and give the cheesecake its structure.
Gathering Your Quality Ingredients for Cheesecake Bites
Okay, so that cream cheese? It’s super important to let it come to room temperature. Seriously, take it out of the fridge at least an hour before you plan to bake. If it’s too cold, you’ll end up with lumps in your filling, and nobody wants lumpy cheesecake! And for the vanilla, please, please use a good quality pure vanilla extract. It really makes a difference in the overall flavor of your cheesecake bites. Trust me on this one!
Step-by-Step Guide to Perfect Cheesecake Bites
Alright, you’ve got your ingredients, you’re excited, and now it’s time to make some magic! This is my favorite part because it’s so satisfying to watch these little bites come together. Don’t stress, I’m going to walk you through every single step, just like I’m right there in the kitchen with you. We’ll get these perfect, I promise!
First things first, preheat your oven to 325°F (160°C). And grab a 12-cup muffin tin. You’ll want to line each cup with paper liners. Trust me, it makes getting them out so much easier and cleaner!
Crafting the Crust for Your Cheesecake Bites
This is where our foundation begins! In a medium bowl, just toss your graham cracker crumbs, that little bit of sugar, and the melted butter. Give it a good stir until everything is nicely combined and looks like wet sand. Then, press about one tablespoon of this mixture into the bottom of each muffin liner. Use the back of a spoon or your fingers to make sure it’s nice and even. This is your delicious base!
Mixing the Creamy Filling for Cheesecake Bites
Now for the star of the show – the creamy filling! Grab your softened cream cheese and the cup of sugar. Beat them together in a large bowl with an electric mixer until it’s super smooth and creamy. No lumps allowed! Next, stir in your sour cream and that lovely vanilla extract. Finally, add your eggs, but here’s a crucial tip: add them one at a time, and beat on low speed *just* until combined after each one. Don’t overmix, or your cheesecake might crack later!
Baking and Cooling Your Cheesecake Bites to Perfection
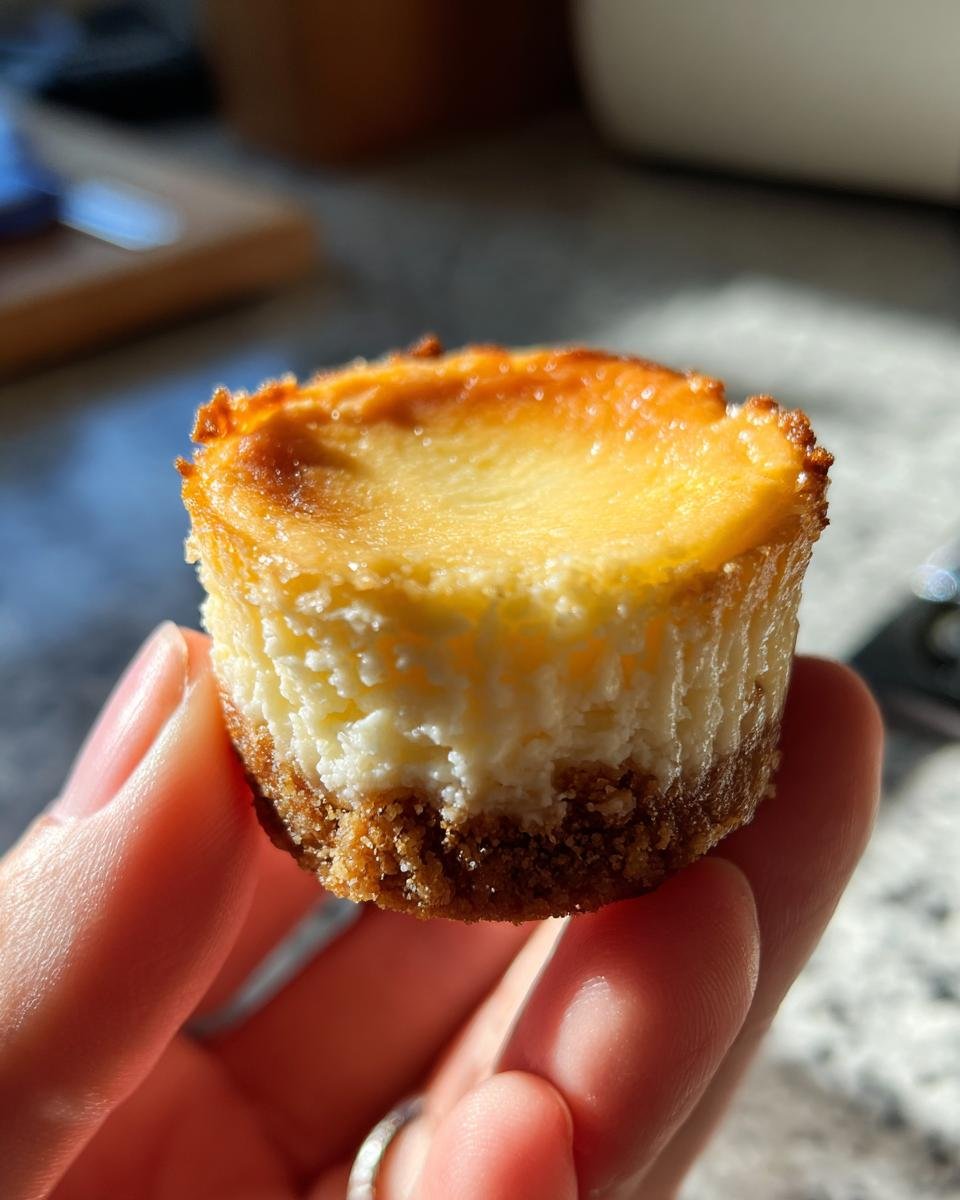
Okay, once your filling is mixed, pour it evenly over those crusts in your muffin tin. Pop them into your preheated oven for about 18-22 minutes. You’re looking for the centers to be just set – they might still have a tiny wobble, but they shouldn’t look liquidy. Once they’re done, take them out and let them cool completely in the muffin tin before you even think about moving them. This is super important for preventing cracks! After they’re cool, straight into the fridge they go for at least 2 hours to really firm up. Patience is key here, my friend!
Pro Tips for Amazing Cheesecake Bites
So, you’ve got the basics down, but I’ve got a few extra tricks up my sleeve that’ll take your cheesecake bites from “good” to “OMG, these are incredible!” These are the little things I’ve picked up over the years that make all the difference. Trust me, a little bit of know-how goes a long way when you’re aiming for that perfect, creamy, crack-free bite!
First, always, always make sure your cream cheese is at room temperature. I can’t stress this enough! It truly does make for the smoothest, lump-free batter. And don’t overmix, especially once those eggs go in. Gentle is the name of the game for a tender, perfect texture.
Troubleshooting Your Cheesecake Bites
Ever had a cheesecake crack on you? It’s the worst! The biggest culprit is usually overbaking or sudden temperature changes. So, don’t open the oven door too much, and let them cool slowly in the muffin tin before chilling. For that super smooth, creamy texture, remember to scrape down the sides of your bowl often when mixing the cream cheese and sugar. And that sour cream? It’s your secret weapon for extra creaminess!
Frequently Asked Questions About Cheesecake Bites: Flavorful Mini Treats
Okay, so you’ve got the recipe down, but I know sometimes little questions pop up! No worries, I’ve got answers to some of the most common things people ask me about these amazing cheesecake bites. Think of me as your personal baking hotline!
Can I Make Cheesecake Bites Ahead of Time?
Absolutely, 100%! These cheesecake bites are actually *better* made ahead of time. They need at least 2 hours in the fridge to set up properly, but I often make them the day before I need them. It just makes party prep so much easier!
What Toppings Pair Best with Cheesecake Bites?
Oh, the possibilities! My favorite part is how versatile these mini treats are. You can go classic with fresh berries (strawberries, blueberries, raspberries are all fantastic!), a drizzle of chocolate sauce, or some homemade caramel. Lemon curd is also amazing, or even a dollop of whipped cream and a sprinkle of cinnamon. Get creative!
How Do I Store Leftover Cheesecake Bites?
If you’re lucky enough to *have* leftovers (it rarely happens in my house!), just pop them in an airtight container. They’ll stay fresh and delicious in the refrigerator for up to 3-4 days. I don’t recommend freezing them, as the texture can change a bit after thawing.
Estimated Nutritional Information for Cheesecake Bites
Now, I know some of you are curious about the nutritional side of things, and I totally get it! While I’m all about enjoying every delicious bite, it’s good to have an idea. Just a heads-up, the numbers below are estimates, and they can totally vary depending on the exact brands you use, how much you pile on the toppings, and even how big your “tablespoon” of crust mixture is! Think of them as a friendly guide, not a strict rulebook.
Share Your Cheesecake Bites: Flavorful Mini Treats Experience
And there you have it, friends! My absolute favorite recipe for these delightful, perfectly portioned cheesecake bites. I truly hope you give them a try – I just know you’re going to fall in love. When you do make them, please, please come back and tell me all about it! Did you try a fun new topping? Were they a hit at your party? I can’t wait to hear your stories and see your creations in the comments below!
Print
Cheesecake Bites: 5-Star Mini Treats for Instant Joy
- Total Time: 2 hours 40 minutes
- Yield: 12 mini cheesecakes 1x
- Diet: Vegetarian
Description
These mini cheesecake bites are rich, creamy, and bursting with flavor. Perfect for parties or a delightful individual treat.
Ingredients
- 1 1/2 cups graham cracker crumbs
- 1/4 cup granulated sugar
- 1/4 cup unsalted butter, melted
- 2 (8 ounce) packages cream cheese, softened
- 1 cup granulated sugar
- 1/2 cup sour cream
- 1 teaspoon vanilla extract
- 2 large eggs
Instructions
- Preheat oven to 325°F (160°C). Line a 12-cup muffin tin with paper liners.
- In a medium bowl, combine graham cracker crumbs, 1/4 cup sugar, and melted butter. Press about 1 tablespoon of the mixture into the bottom of each muffin liner.
- In a large bowl, beat softened cream cheese and 1 cup sugar with an electric mixer until smooth.
- Stir in sour cream and vanilla extract.
- Add eggs one at a time, beating on low speed until just combined after each addition. Do not overmix.
- Pour the cream cheese mixture evenly over the crusts in the muffin tin.
- Bake for 18-22 minutes, or until the centers are just set.
- Remove from oven and let cool completely in the muffin tin before refrigerating for at least 2 hours.
- Top with your favorite fruit, chocolate, or caramel sauce before serving.
Notes
- Ensure cream cheese is at room temperature for a smooth batter.
- Do not overbake the cheesecake bites to prevent cracking.
- Refrigeration is crucial for setting the cheesecake bites.
- Prep Time: 20 minutes
- Cook Time: 20 minutes
- Category: Dessert
- Method: Baking
- Cuisine: American
Nutrition
- Serving Size: 1 mini cheesecake
- Calories: 350
- Sugar: 28g
- Sodium: 220mg
- Fat: 25g
- Saturated Fat: 15g
- Unsaturated Fat: 8g
- Trans Fat: 0.5g
- Carbohydrates: 30g
- Fiber: 1g
- Protein: 6g
- Cholesterol: 100mg
Keywords: cheesecake, mini cheesecake, dessert, party food, bite-sized