
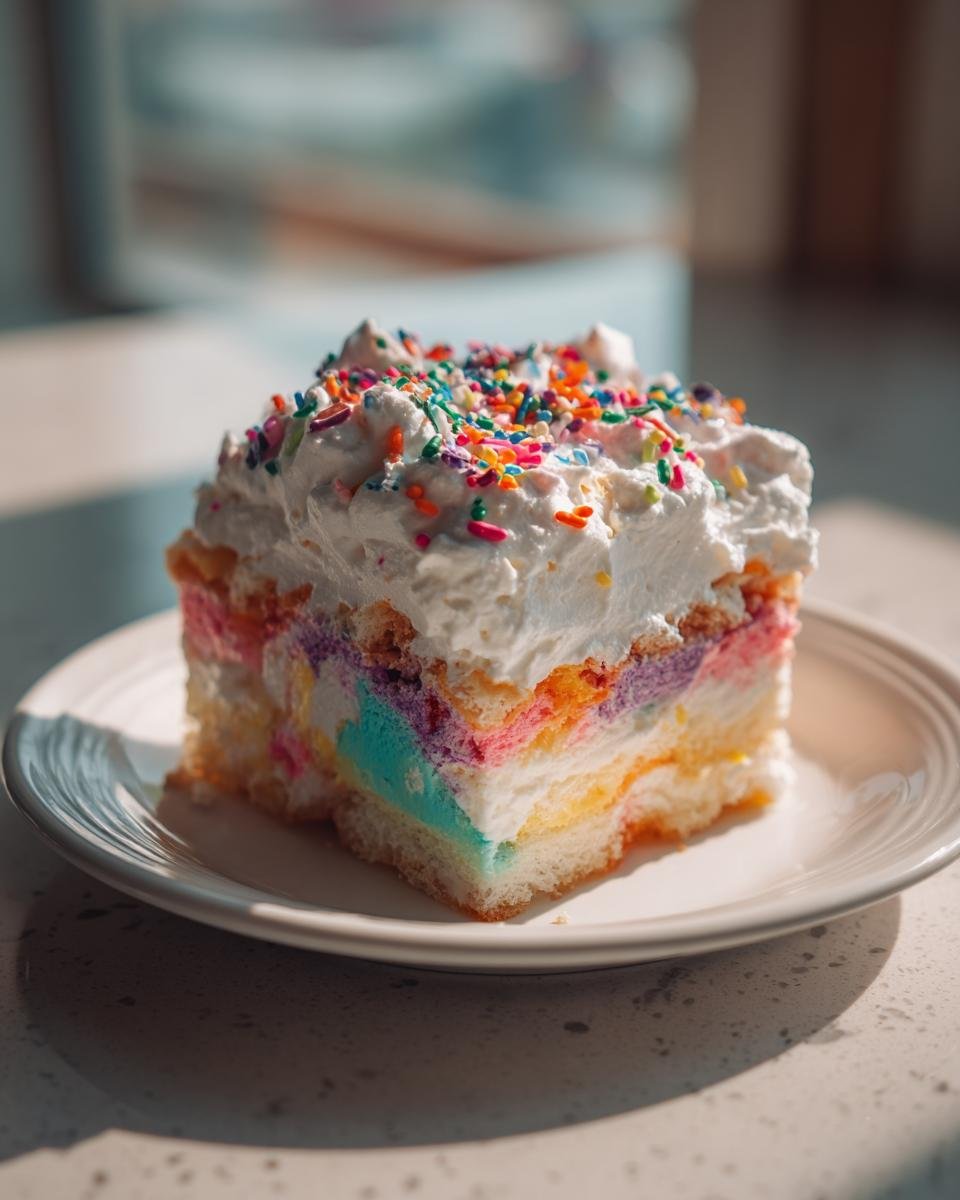
If there’s one thing I absolutely adore in this world, it’s a dessert that requires zero oven drama but delivers maximum celebration vibes! Layers are just so satisfying, aren’t they? You get a little bit of everything in one perfect spoonful. That’s why I’m obsessed with this stunningly easy **Birthday Cake Lush Dessert**.
It has that gorgeous vanilla flavor and those festive sprinkles we all love from childhood parties. I swear, the first time I made a batch of this, it completely saved my nephew’s eighth birthday party—I forgot to buy a cake, can you believe it? This lush dessert came together in a snap, chilled beautifully, and everyone thought it was the fanciest thing on the table! If you love other easy chilled treats, make sure you check out my recipe for Cherries in the Snow, too!
Seriously, you have to try this no-bake layered dessert. It’s what happy memories are made of, and unlike fussy layer cakes, this one is forgiving!
Gathering Ingredients for Your Birthday Cake Lush Dessert
Okay, the magic of this **Birthday Cake Lush Dessert** starts with gathering all your ingredients before you even dare turn on the oven. Precision matters here, especially for the layers to set up right! We separate everything into three main groups so you aren’t scrambling mid-mix. If you look at my favorite cream recipes for fillings, you’ll notice similar component breakdowns!
For the Baked Crust Layer
- 1 cup all-purpose flour
- 1/2 cup unsalted butter, softened
- 1/4 cup granulated sugar
- 1 teaspoon vanilla extract
For the Cream Cheese Layer of the Birthday Cake Lush Dessert
For this middle layer, make sure your fats are properly softened—I can’t stress that enough! That’s how we get that wonderfully smooth texture.
- 8 ounces cream cheese, softened
- 1 cup powdered sugar
- 1/2 cup unsalted butter, softened
- 1 teaspoon almond extract
For the Pudding and Topping Layers
This is where the cake flavor really shines through, so make sure that milk is *cold* for that instant pudding to whip up properly!
- 1 (12 ounce) container frozen whipped topping, thawed
- 1 (3.4 ounce) package instant vanilla pudding mix
- 2 cups cold milk
- 1 cup rainbow sprinkles
Step-by-Step Instructions for the Birthday Cake Lush Dessert
Alright, now for the fun part—putting this whole glorious thing together! It’s surprisingly straightforward, but trust me, you need to give each layer a moment to settle before moving onto the next. If you’re in a huge rush, remember you can skip the oven entirely by using a graham cracker crust like I keep in my back pocket for emergencies! For more ideas on throwing treats together quickly, take a peek at my guide on 4 Exquisite No-Bake Cake Recipes.
Preparing and Baking the Crust
First things first, we need to get that base ready! Start by preheating your oven to 350 degrees F. Grab that flour, the half-cup of softened butter, the granulated sugar, and just one teaspoon of vanilla. Mix those together until it looks crumbly, but cohesive enough to press. Press that mixture firmly into the bottom of your 9×13 inch baking dish. Don’t be shy; press it down well so it doesn’t crumble when you slice it!
Pop that into the oven for exactly 12 minutes. When it comes out, the smell alone is going to make you hungry! Now, this is important: You must let this crust cool completely. I mean it! If the base is warm when the cream cheese layer goes on, everything melts together into a lukewarm puddle. Patience now, dessert later!
Creating the Cream Cheese Filling for the Birthday Cake Lush Dessert
While that base is cooling down—or maybe while you’re doing the dishes, multitask queen!—we tackle the cream cheese layer. You need to beat that 8 ounces of softened cream cheese and the half-cup of softened butter together until they are gloriously smooth. No lumps allowed!
Once smooth, you’ll gradually beat in the cup of powdered sugar along with that teaspoon of almond extract. That little bit of almond really gives it that authentic, sweet, bakery-style flavor we’re going for! When it looks uniform and creamy, spread it gently over that cooled crust. Spread it slow and steady so you don’t disturb the base underneath.

Making and Layering the Pudding and Whipped Topping
Next up is the light, fluffy pudding layer. Take your instant vanilla pudding mix and whisk it vigorously with the two cups of *cold* milk in a separate bowl. Keep whisking until it thickens up nicely; it should look like thick pastry cream. Don’t stop too early, or it’ll weep later!
Pour that thickened pudding right on top of your cream cheese layer. Smooth it out so the surface is flat. Now, take your thawed whipped topping—just gently spread it over the pudding. Don’t mix it in! We want those distinct layers, so use a spatula to float it over the top like a fluffy white cloud.
Final Touches and Chilling the Birthday Cake Lush Dessert
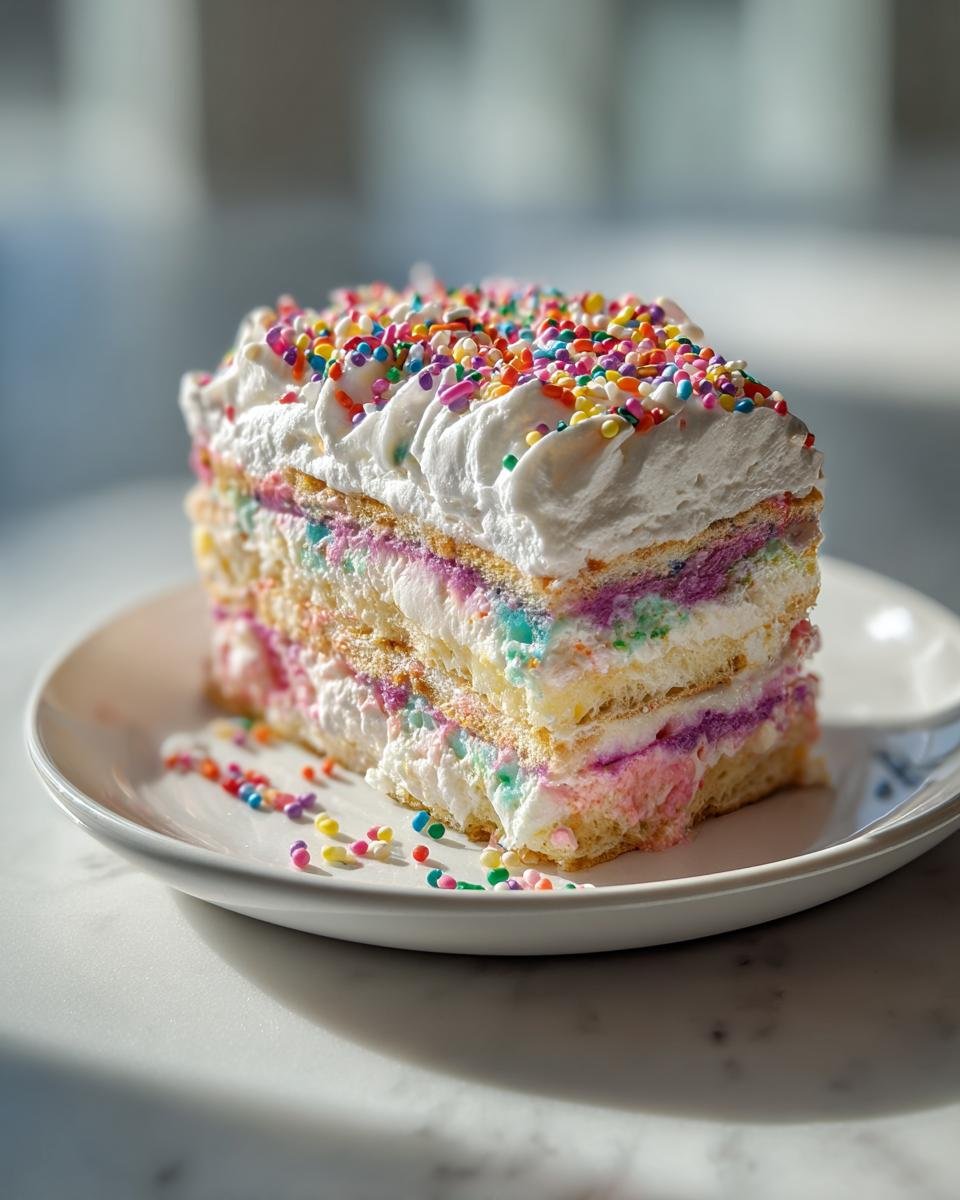
Almost done! This is the best part: the sprinkles! Take that cup of rainbow sprinkles and shower them evenly all over the top whipped topping. Don’t skimp, we want this **Birthday Cake Lush Dessert** to look ready for a parade!
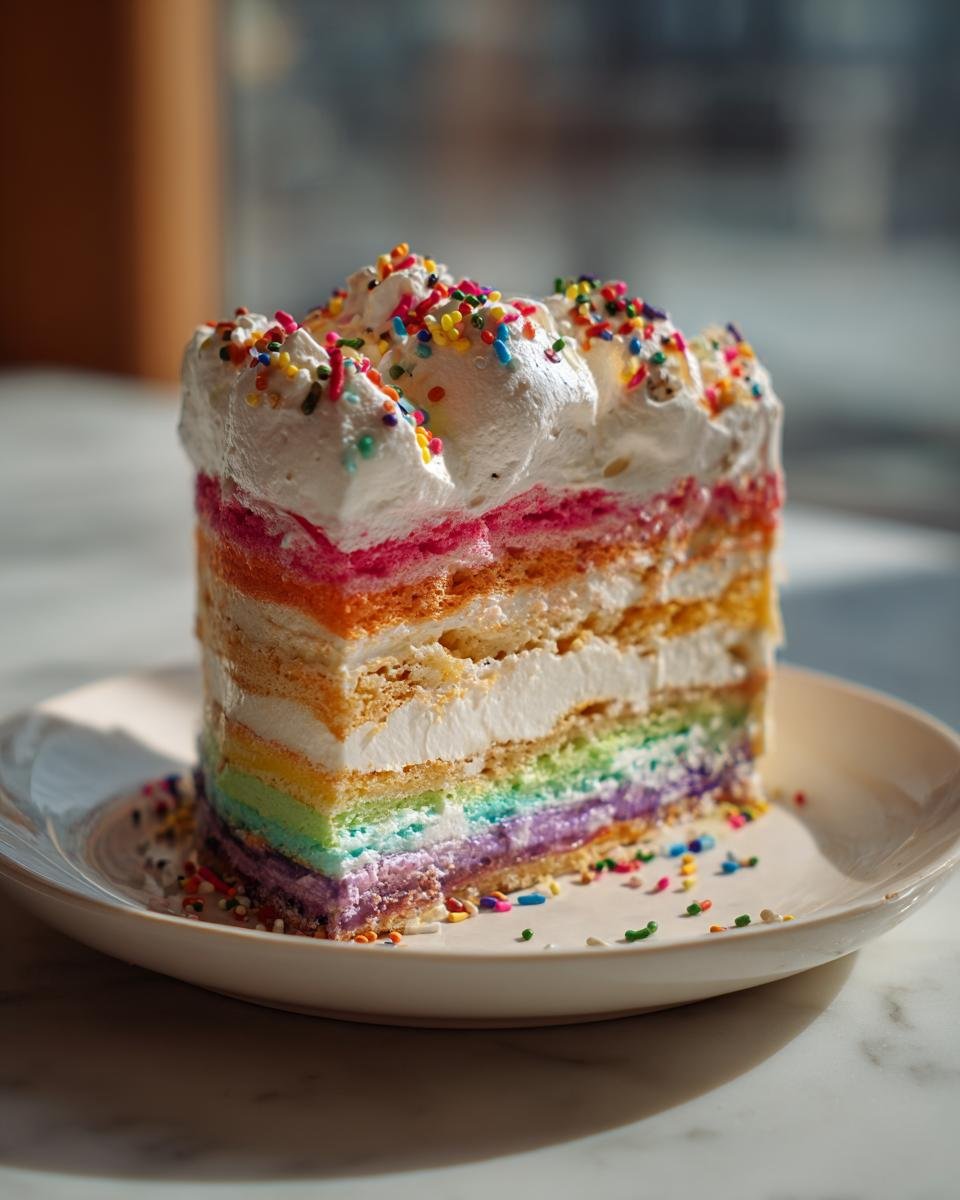
The absolute final, non-negotiable step is chill time. Pop the whole dish into the refrigerator. You need a minimum of four hours here. If you rush this, cutting into it will be a mess. Four hours lets everything firm up beautifully so you get that clean, perfect slice that shows off all those amazing layers! Trust me, waiting is worth it.
Tips for a Perfect Birthday Cake Lush Dessert
Look, even though this recipe is wonderfully simple, there are always little tricks I pick up over the years to make sure it’s absolutely 100% perfect every single time. You want those distinct layers, right? You don’t want soup!
My biggest piece of advice centers around chilling. Seriously, that four-hour minimum isn’t just a suggestion; it’s crucial for structure. If you’re short on time, try chilling it for at least two hours covered very tightly, and then stick it in the freezer for the last 30 to 45 minutes. That helps firm up the pudding quicker without freezing the entire thing solid. It’s not quite as good as a full chill, but it works in a pinch!
Another little thing is how you handle the sprinkles. If you just let them fall from high up, they tend to melt into the white topping before the 4 hours are up, staining the white layer slightly pink or blue. Try dropping them gently from just an inch or two above the surface of the whipped topping. This keeps them sitting right on top, looking bright and festive until serving time. It’s a small detail, but presentations matter when you’re making something this celebratory!
For a slightly richer cream cheese layer flavor—and this is purely my twist—I sometimes use a touch of heavy cream instead of a little bit of the butter when mixing the cream cheese and powdered sugar. It whips up beautifully lighter and almost cheesecake-like. If you’re a fan of that tangy richness, you might want to look into how to perfect those lighter mixes, just like in my guide on Light and Velvety Cheesecake recipes.
Variations on the Birthday Cake Lush Dessert Theme
The beauty of a great layered recipe like this **Birthday Cake Lush Dessert** is that it’s basically a fantastic canvas waiting for you to scribble your favorite flavors onto it! We nailed the classic birthday flavor profile with vanilla and almond, but honestly, you can tweak any of the three main layers without messing up the structure. Since it’s a no-bake situation, swaps are super easy.
If you or your recipient aren’t huge vanilla fans, switching out the pudding is the easiest way to go. You could swap that instant vanilla pudding mix for chocolate or even butterscotch if you wanted a richer, almost caramel vibe! Just make sure whatever instant pudding mix you pick fits into that same 3.4-ounce package size so the volume stays right when you mix it with the cold milk.
Another fun area to play with is that cream cheese layer. That almond extract gives it that classic cake frosting scent, but if you’re not into nuts, just skip it and add a bit more vanilla, or even try one teaspoon of lemon extract for a surprising brightness! The key is keeping the fats and sugar content similar so it still sets up firm under the pudding.
Speaking of sprinkles, while rainbow is the ultimate birthday look, think about adding metallic gold sprinkles for a sophisticated look, or even chocolate sprinkles for a flavor mashup! You can even mix a little finely chopped white chocolate into the cream cheese layer before spreading. Just remember, if you add chunky items, you might need that extra chilling time to ensure everything holds its shape. If you’re looking for other easy ways to incorporate fun mix-ins, check out my guide on 4 Homemade No-Bake Truffle Recipes; the mixing philosophy is similar!
Storage and Make-Ahead Instructions for Your Birthday Cake Lush Dessert
One of the absolute best things about this **Birthday Cake Lush Dessert** is that it’s designed to be made ahead of time! Unlike a traditional baked cake that starts getting stale quickly, this layered dream actually tastes *better* on day two. When those creamy layers have time to mingle overnight, the flavors really deepens. It’s a lifesaver for busy hosts!
You can definitely make this a day—or even two days—before you plan on serving it. Just follow the instructions exactly, making sure you get that essential four-hour minimum chill time in before you even think about cutting into it.
Now, storage is key, especially because the top layer is thawed whipped topping. You have to cover it tightly! If you just toss a loose paper towel over it, the edges of the topping will dry out and get almost leathery, which is just sad. I always use plastic wrap, but here’s my trick: don’t let the plastic touch the sprinkles!
Gently tent the plastic wrap over your dish, making sure there’s an air pocket between the plastic and the sprinkles. If the plastic is touching the topping, it will stick and ruin those beautiful decorations. I learned that the hard way!
When you’re ready to serve, pull it out of the fridge. If you made it the day before, the crust might feel slightly softer than if you made it two hours ago, but that’s okay, usually. If you’re serving slices to a crowd, having the dish covered in plastic wrap for a few days keeps it perfectly fresh for up to three days, just like my notes say. It’s fantastic because you can make it Thursday, and it’s perfect for Sunday brunch!
If you’re looking for similar make-ahead marvels that require zero baking fuss, you absolutely have to check out my recipe for the No-Bake Eclair Cake. It gets the same rave reviews for being make-ahead friendly!
Frequently Asked Questions About This Birthday Cake Lush Dessert
I always get so many questions once people see photos of this dessert because everyone wants their **Birthday Cake Lush Dessert** to turn out perfectly! It’s usually about timing and temperature that people wonder about most. If you have questions, odds are someone else does too! If you’re looking for more quick-fix recipes for inspiration, check out my suggestions for Easy 15-Min No-Bake Pies.
Can I skip baking the crust for this Birthday Cake Lush Dessert?
Oh, absolutely! That’s one of the best ways to make this whole thing even faster. The recipe asks for a baked flour crust because I think it gives a nice, dense contrast to the soft layers above it, but who has time for an oven step sometimes, right? You can totally use a graham cracker crust alternative instead, just like the note mentions.
If you go that route, mix up your graham cracker crumbs with melted butter and press it into the pan. Since it doesn’t need baking, you just pop that straight into the freezer for about 15 minutes while you start making the cream cheese layer. The flavor will be a little more traditional graham cracker and less ‘cakey,’ but it’s delicious and cuts about 12 minutes off your total prep time!
Why is my cream cheese layer not spreading smoothly?
If you ended up with lumps in that gorgeous second layer, I can almost certainly tell you why: your cream cheese and butter weren’t soft enough. This is the #1 issue with any lush or cream cheese-based dessert! If the ingredients start out cold, they just won’t incorporate properly when you beat them, no matter how long you run the mixer.
Aim for the temperature of the ingredients to be truly room temperature—soft enough that if you gently pressed your finger into the block of cream cheese, it would leave a dent without any real pressure. If you’re mixing and you feel a hard chunk, stop, put the mixer on low, and beat it until that chunk disappears. Don’t try to force it; just let the ingredients warm up a bit longer next time you try this **no-bake layered dessert**!
How long does the Birthday Cake Lush Dessert need to chill?
I know everyone is eager to dig in, but you really, really need to respect the chilling time for this recipe. We list a minimum of four hours, and I really mean that. The pudding layer needs that time to fully set up and absorb moisture from the layer below it, and the whole structure needs to firm up so it holds its shape when you slice it.
If you cut it after two hours, what you get is a delicious, creamy mess rather than a neat, impressive slice. If you’re making this for an event the next day, even better! A full overnight chill is the absolute best way to ensure those gorgeous layers don’t squish together when you serve them. The structure is what makes this dessert so satisfying!
Nutritional Estimates for the Birthday Cake Lush Dessert
Now, I know most of us baking treats like this **Birthday Cake Lush Dessert** aren’t doing it for the macro count, but I heard from so many of my readers that they appreciate knowing what’s in their slice! It’s a rich, celebratory dessert, no doubt about it. I pulled the standard estimates for you below, but I always have to say, everything changes based on the brands you use, how much you pile the sprinkles on, and whether you used the buttery crust or a lighter one.
Think of these numbers as a good ballpark guide, okay? If you want a deep dive into how things like fruit sugar compare to processed sugars, you should definitely read my post on The Surprising Sugar Content of Fruits Exposed!
Here’s what we estimate for one nice slice:
- Serving Size: 1 slice
- Calories: 350
- Sugar: 30g
- Fat: 20g (of which Saturated Fat is 12g)
- Carbohydrates: 38g
- Protein: 4g
- Sodium: 150mg
So yes, it’s a treat, but wow, is it worth it when you dig into those defined layers! Just remember this is an estimate based on standard measurements. Enjoy every bite!
Share Your Birthday Cake Lush Dessert Creations
Okay, my wonderful bakers, we’ve come to the end, and now it’s your turn to shine! Making this **Birthday Cake Lush Dessert** is only half the fun; the other half is seeing how *your* layers set up and how you decorate that sprinkle top!
I absolutely live for hearing from you all. Did you use your favorite shade of blue sprinkles? Did you add a touch of lemon extract like I mentioned? Please, don’t keep those delicious secrets to yourself!
If you loved this recipe, please take a second to leave a star rating right below this section! Your feedback really helps other home cooks decide if they should dive into this layered delight. It tells me what’s working and what I should maybe tinker with next time.
And seriously, if you made this and it looked amazing—or even if it got a little messy but tasted incredible—snap a photo! Tag me on social media! I love seeing my recipes travel all over the country, especially when they show up at someone’s big celebration. If you are already looking for new ways to serve up quick desserts, you must look at my guide on Dessert in a Cup recipes; they are perfect for portion control!
Thank you so much for baking with me today. I hope this **Birthday Cake Lush Dessert** becomes a staple for your family celebrations, just like it is for mine!
Print
Birthday Cake Lush Dessert
- Total Time: 4 hours 37 min
- Yield: 12 servings 1x
- Diet: Vegetarian
Description
A layered, no-bake dessert resembling a birthday cake.
Ingredients
- 1 cup all-purpose flour
- 1/2 cup unsalted butter, softened
- 1/4 cup granulated sugar
- 1 teaspoon vanilla extract
- 8 ounces cream cheese, softened
- 1 cup powdered sugar
- 1/2 cup unsalted butter, softened
- 1 teaspoon almond extract
- 1 (12 ounce) container frozen whipped topping, thawed
- 1 (3.4 ounce) package instant vanilla pudding mix
- 2 cups cold milk
- 1 cup rainbow sprinkles
Instructions
- Preheat oven to 350 degrees F.
- Combine flour, 1/2 cup softened butter, 1/4 cup granulated sugar, and vanilla extract. Press mixture into the bottom of a 9×13 inch baking dish. Bake for 12 minutes. Let cool completely.
- Beat cream cheese, 1/2 cup softened butter, and almond extract until smooth. Gradually add powdered sugar. Spread this mixture over the cooled crust.
- In a separate bowl, whisk together instant vanilla pudding mix and cold milk until thickened. Spread pudding mixture over the cream cheese layer.
- Gently spread thawed whipped topping over the pudding layer.
- Sprinkle rainbow sprinkles evenly over the top layer.
- Chill for at least 4 hours before serving.
Notes
- You can use a graham cracker crust instead of the flour crust for a quicker base.
- Use any color sprinkles you prefer for decoration.
- This dessert keeps well in the refrigerator for up to three days.
- Prep Time: 25 min
- Cook Time: 12 min
- Category: Dessert
- Method: No-Bake/Baking
- Cuisine: American
Nutrition
- Serving Size: 1 slice
- Calories: 350
- Sugar: 30
- Sodium: 150
- Fat: 20
- Saturated Fat: 12
- Unsaturated Fat: 8
- Trans Fat: 0.5
- Carbohydrates: 38
- Fiber: 1
- Protein: 4
- Cholesterol: 55
Keywords: birthday cake, lush dessert, layered dessert, no-bake, pudding dessert, sprinkles