
Oh my gosh, you have friends coming over last minute, or maybe you’re planning the most epic holiday spread, and you want something that looks like you spent *days* prepping but honestly took you twenty minutes? I’ve got you covered. Enter the charcuterie board—it’s my absolute favorite way to entertain because it’s all about playing with textures and colors. Forget fussy cooking; this is pure, beautiful assembly! Trust me when I say that this guide on How To Make The Best Charcuterie Board is going to become your secret weapon for easy, elegant hosting.
I just love when people walk into the room and gasp because the appetizer looks like a work of art. For me, assembling these platters connects me back to my grandmother’s kitchen—it was all about arranging things beautifully on her antique serving trays, even if it was just bread and cheese. Mastering the balance is everything, so let’s dive in and make your spread absolutely breathtaking.
Why How To Make The Best Charcuterie Board is Essential for Entertaining
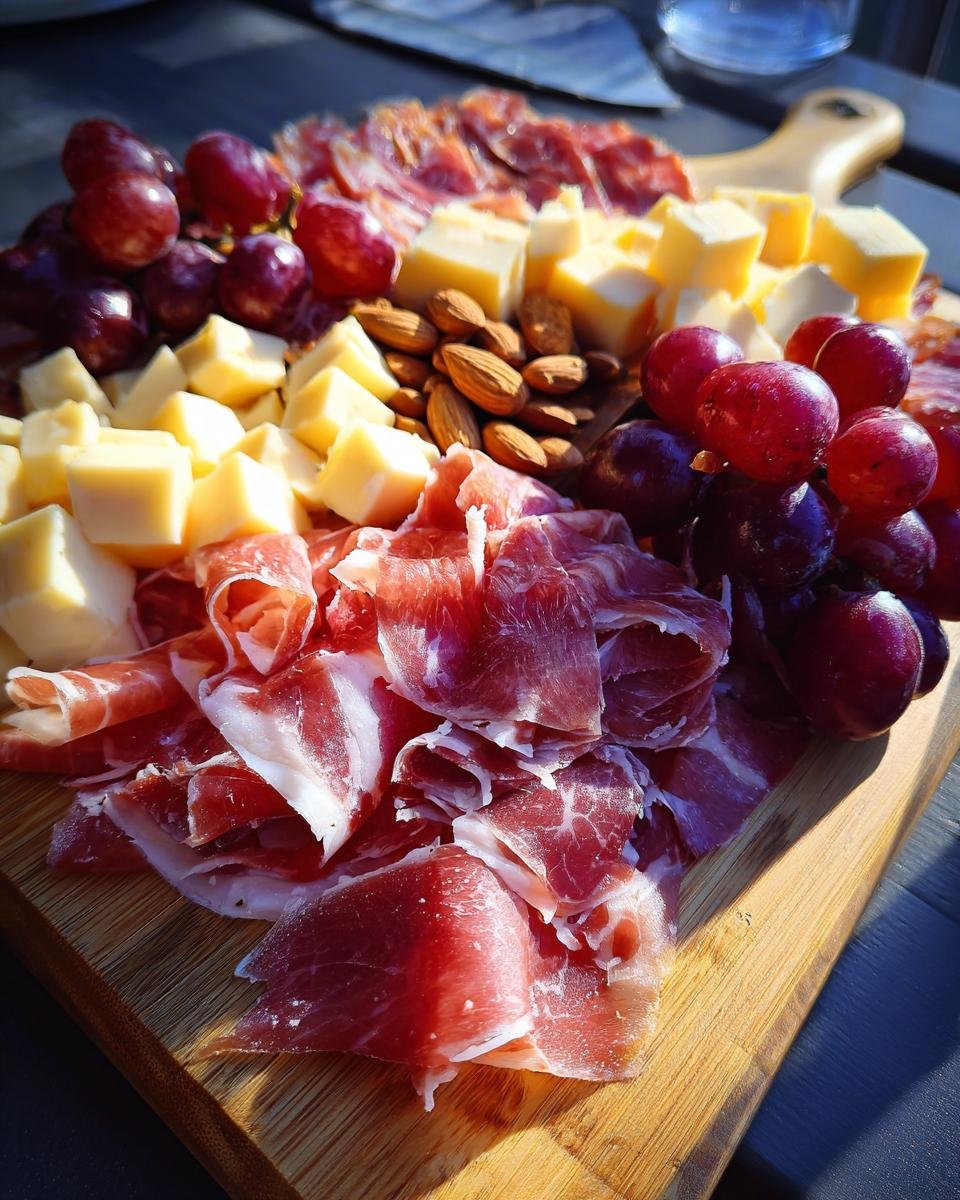
Honestly, there is nothing more low-stress and high-reward than creating a stunning meat and cheese platter. You pull a few things out of the fridge, fold some salami, artfully pile some grapes, and bam! Instant centerpiece. The true magic of **How To Make The Best Charcuterie Board** is that it’s completely customizable; you can tailor it to any diet, any budget, or any theme you can imagine.
The key, though, is finding that perfect interplay between savory, salty, sweet, and crunchy. If all you use are hard cheeses and dry crackers, your guests will get bored fast! You need that sweet surprise balanced by something salty. I always think about texture first: smooth Brie next to crunchy almonds, salty prosciutto next to sweet honey—that variety keeps everyone digging in for more. If you’re looking for other show-stopping appetizers, check out what I do with chorizo rillettes; they pair wonderfully on a similar spread!
Gathering Your Components: Ingredients for How To Make The Best Charcuterie Board
Okay, this is the fun part—shopping! You want variety, which means you need a little bit of everything to hit all those flavor notes we just talked about. Think in categories! For a good spread serving about four people generously, aim for about an ounce or two of each primary item.
You absolutely need something salty like meats, something creamy for spreading, crunch, and a little bit of brightness to cut through the richness. Don’t forget something tangy like pickled onions if you have them! They look so vibrant sitting on the board.
Selecting Cheeses: Hard vs. Soft Varieties
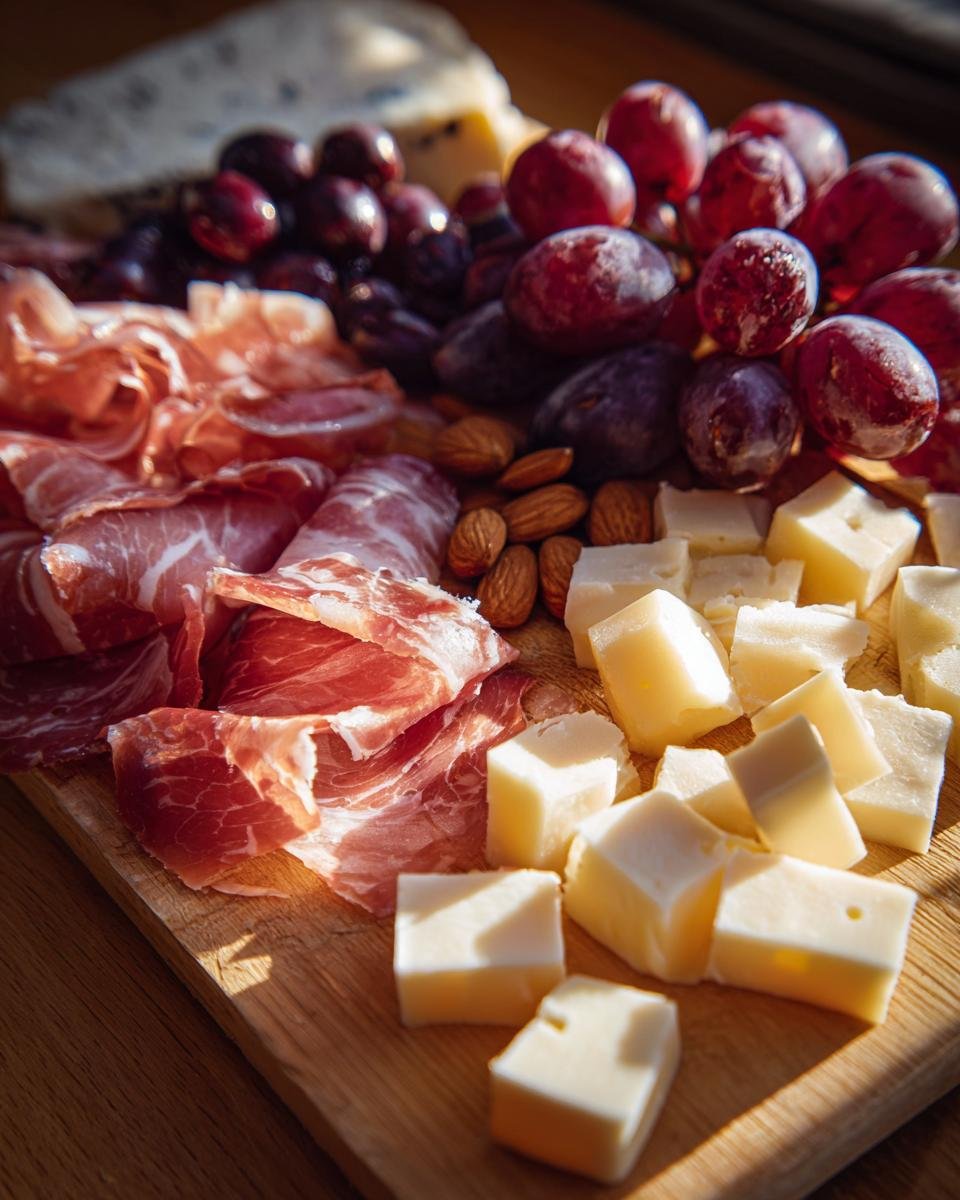
You must have texture contrast in your cheese section. I always grab two types: one hard like a sharp Cheddar or maybe an aged Gruyère that you can cube up easily. Then, you need a soft, creamy buddy, like a round of Brie or a log of tangy goat cheese that people can easily spread onto a cracker. Cut the hard cheeses into manageable little triangles or cubes before you even think about putting them on the board!
Cured Meats and Flavor Pairings
For meats, I usually stick to a couple of ounces—salami slices are great because you can fold them into little quarters or roll them up! Prosciutto is mandatory because it drapes so beautifully. When pairing these salty cured beauties, make sure you place a small dish of jam or honey very close by. The sweetness is the perfect counterbalance to that amazing cured saltiness. It’s an instant flavor explosion, trust me!

Essential Equipment for How To Make The Best Charcuterie Board
You don’t need fancy gear, but a few items make your assembly so much easier and look professional. First, you need that platter! It doesn’t have to be a wooden board; an upside-down baking sheet or a large slate tile works if you’re desperate. Small ramekins or tiny bowls are non-negotiable for holding wet items like olives or that honey.
Next, you need knives! Seriously, don’t forget the utensils. You need a sharp knife for any cheese that needs cutting, but placing little cheese knives right by the cheese blocks is essential for your guests. It looks professional, and it keeps hands clean—it just shows you’ve thought ahead, which is key for great entertaining.
Step-by-Step Assembly: The Art of How To Make The Best Charcuterie Board
Alright, grab your board and your components! We are building this from the ground up. Think of it like creating landscape architecture—you need your big features first before you sprinkle in the details. Remember, we want this looking abundant, not sparse!
Anchoring the Board: Placement of Cheeses and Meats
Start by anchoring the board with your biggest elements: the cheeses and the meats. Place the cheeses in different corners of the board so they aren’t touching. Don’t try to lay the meat flat! Fold that salami into quarters or roll the prosciutto into rosy little bundles; they look much more inviting when they have some height. Spreading these main items out gives you a blueprint for where everything else will fit.

Adding Texture and Depth with Small Bowls
Once your anchors are set, it’s time to introduce structure using those little bowls. Put your 1/2 cup of olives, your 1/4 cup of nuts (I love toasted walnuts here!), and your 2 tablespoons of jam or honey into those ramekins. Place these bowls in the larger gaps between the cheeses and meats. This is brilliant because it keeps wet things from making your crackers soggy, and the bowls add height, which makes the whole board look much more dynamic. It’s a simple trick, but it makes a huge difference!
Filling Gaps and Final Touches
Now, for the final fill! This is where we make the board look overflowing. Take your crackers and lean them against the bowls or cheeses so they fan out a bit. Use those beautiful 1 cup of grapes and tuck them into any remaining empty spaces. Slice up that baguette and place those pieces artfully near the soft cheeses. The goal now is to leave almost zero empty board space showing. When you’re done, make sure you remember to keep the entire thing chilled until your guests arrive!
Tips for Success When You Make How To Make The Best Charcuterie Board
If you want your board to go from good to truly memorable, it comes down to the details. Remember that variety we talked about? Make sure you look at your finished board before serving and ask yourself: Do I have something soft, something crunchy, something sweet, and something salty? If the answer is yes to all four, you’ve nailed it.
Color is huge, too! That’s why grapes are perfect—they look lush. If you’re using hard cheeses, make sure they are cut right away so they look ready to eat. If you’re making this for a party, I usually estimate about 2 ounces of meat and 2 ounces of cheese per person if it’s strictly an appetizer. If your board is totally replacing dinner (which I totally support!), you need to double that amount! Don’t forget to keep everything cold until the last minute. If you ever make homemade cheese pie, you know the importance of temperature control!
Variations to Keep Your How To Make The Best Charcuterie Board Fresh
Once you master the basic meat and cheese platter, the possibilities are endless! This general assembly structure works for almost anything. If you’re having a summer party, you can go completely Mediterranean—trade the salami for hummus, use feta instead of Brie, and add lots of roasted peppers, artichoke hearts, and maybe some pita wedges instead of crackers. Or, if you want something wild, try a dessert board!
A dessert board is just as fun! Skip the meats entirely and focus on chocolate squares, dried apricots, fresh berries, little bowls of caramel or fudge sauce, and shortbread cookies. You can even use fruits like sweet grapes mixed with salty pistachios. It’s the same principle—balance of texture—but all sweet!
Serving Suggestions to Complement Your Creation
What do you drink with a beautiful assortment of cheeses and meats? If you’re keeping it light, you absolutely cannot go wrong with a crisp Sauvignon Blanc—it pairs well with almost everything salty and tangy. If you’re running a cocktail hour, a light, bright drink like my coconut lime daiquiri is surprisingly refreshing against rich salami. Keep the wine chilled and the cocktails icy, and your guests will be thrilled.
Storage and Leftover Handling
If—and I mean *if*—you have leftovers, don’t just wrap the whole board up! The crackers will get instantly stale, and the high-acid olives will start to affect the softer cheeses overnight. First, scrape off any stray jam or honey.
Separate everything into airtight containers. Put the cheese back in its original wrapping or wax paper. Keep the nuts and any remaining bread separate. The olives and pickled items are fine together in their brine. The next day, you can serve the cheese and meat leftovers with fresh crackers; it’s worth the extra minute!
Frequently Asked Questions About How To Make The Best Charcuterie Board
How much food should I plan per person for a charcuterie board?
For general entertaining where the board isn’t supposed to be the only meal, plan on about 2 ounces of combined cheese and 1 ounce of meat per person. If you’re building a grand meat and cheese platter that’s replacing dinner (which I totally support!), you need to double that amount! Always have extra crackers! I always feel like there are never enough sturdy dipping vehicles.
Can I include fresh fruit besides grapes?
Yes, please! Grapes are just the easiest anchor fruit, but you should absolutely include more. Thinly sliced apples are amazing next to Cheddar, but here’s a pro tip: toss those slices in a little lemon juice and water right away to stop them from browning. Figs, when fresh, are incredible with salty prosciutto. Berries are always beautiful, too!
What is the difference between a charcuterie board and a meat and cheese platter?
Technically, charcuterie is French and specifically refers to the art of preparing cured meats—think pâtés, sausages, and smoked goods. So, a true charcuterie board focuses heavily on those meats. A meat and cheese platter is the more common, all-encompassing term for any board loaded up with meats, cheeses, fruits, nuts, and crackers. For most home hosts, they are used interchangeably, and either way, tasty appetizers are guaranteed!
Estimated Nutritional Data for This Assembly
Since this creation is mostly assembly and relies heavily on the specific brands of cheese, salami, and jam you choose, the estimated nutritional data here is just a general guide. Factors like the fat content in your Brie versus a low-fat cheddar, or how much honey you drizzle on, change things instantly. Always adjust based on the specific products you decide to use for your amazing spread!
Share Your Masterpiece
Now you have all the secrets! Go forth and build the most stunning spread your friends have ever seen. When you finish your beautiful board, I seriously want to see it! Tag me in your photos online so I can admire your arrangement skills. And please, let me know in the comments below: What’s your go-to cheese, and what flavor do you always pair it with? Happy entertaining!
Why How To Make The Best Charcuterie Board is Essential for Entertaining
Honestly, there is nothing more low-stress and high-reward than creating a stunning meat and cheese platter. You pull a few things out of the fridge, fold some salami, artfully pile some grapes, and bam! Instant centerpiece. The true magic of **How To Make The Best Charcuterie Board** is that it’s completely customizable; you can tailor it to any diet, any budget, or any theme you can imagine.
The key, though, is finding that perfect interplay between savory, salty, sweet, and crunchy. If all you use are hard cheeses and dry crackers, your guests will get bored fast! You need that sweet surprise balanced by something salty. I always think about texture first: smooth Brie next to crunchy almonds, salty prosciutto next to sweet honey—that variety keeps everyone digging in for more. If you’re looking for other show-stopping appetizers, check out what I do with chorizo rillettes; they pair wonderfully on a similar spread!
Gathering Your Components: Ingredients for How To Make The Best Charcuterie Board
Okay, this is the fun part—shopping! You want variety, which means you need a little bit of everything to hit all those flavor notes we just talked about. Think in categories! For a good spread serving about four people generously, aim for about an ounce or two of each primary item.
You absolutely need something salty like meats, something creamy for spreading, crunch, and a little bit of brightness to cut through the richness. Don’t forget something tangy like pickled onions if you have them! They look so vibrant sitting on the board.
Selecting Cheeses: Hard vs. Soft Varieties
You must have texture contrast in your cheese section. I always grab two types: one hard like a sharp Cheddar or maybe an aged Gruyère that you can cube up easily. Then, you need a soft, creamy buddy, like a round of Brie or a log of tangy goat cheese that people can easily spread onto a cracker. Cut the hard cheeses into manageable little triangles or cubes before you even think about putting them on the board!
Cured Meats and Flavor Pairings
For meats, I usually stick to a couple of ounces—salami slices are great because you can fold them into little quarters or roll them up! Prosciutto is mandatory because it drapes so beautifully. When pairing these salty cured beauties, make sure you place a small dish of jam or honey very close by. The sweetness is the perfect counterbalance to that amazing cured saltiness. It’s an instant flavor explosion, trust me!
Essential Equipment for How To Make The Best Charcuterie Board
You don’t need fancy gear, but a few items make your assembly so much easier and look professional. First, you need that platter! It doesn’t have to be a wooden board; an upside-down baking sheet or a large slate tile works if you’re desperate. Small ramekins or tiny bowls are non-negotiable for holding wet items like olives or that honey. You’ll also need crackers, of course—a variety helps!
Next, you need knives! Seriously, don’t forget the utensils. You need a sharp knife for any cheese that needs cutting, but placing little cheese knives right by the cheese blocks is essential for your guests. It looks professional, and it keeps hands clean—it just shows you’ve thought ahead, which is key for great entertaining.
Step-by-Step Assembly: The Art of How To Make The Best Charcuterie Board
Alright, grab your board and your components! We are building this from the ground up. Think of it like creating landscape architecture—you need your big features first before you sprinkle in the details. Don’t try to assemble this ahead of time more than an hour or so; aim to keep the entire board refrigerated until guests arrive so everything stays perfectly firm and fresh.
This process is all about visual flow. If you put the tiny nuts down first, you’ll have nowhere to put the big cheese wheel later. So, we build an aesthetic foundation first, then we fill in the fun, textured gaps. It’s surprisingly fast once you have your rhythm!
Anchoring the Board: Placement of Cheeses and Meats
Start by anchoring the board with your biggest elements: the cheeses and the meats. Place the cheeses in different corners of the board so they aren’t touching—this gives guests options! Don’t try to lay the meat flat! Fold that salami into quarters or roll the prosciutto into rosy little bundles; they look much more inviting when they have some height and texture. Spreading these main items out gives you a clear blueprint for where everything else will fit.
Adding Texture and Depth with Small Bowls
Once your anchors are set, it’s time to introduce structure using those little bowls we talked about earlier. You must use vessels for things that are wet or loose! Put your olives, your nuts, and your jam or honey into those ramekins and place them in the larger gaps between the cheese and meat clusters. This is brilliant because it keeps the brine from making your crackers soggy, and the bowls add height, creating cool shadows and making the whole board look much more dynamic. You can find some great ideas for dips that work perfectly in these spots over in my guide on party dips!
Filling Gaps and Final Touches
Now, for the final fill! This is where we make the board look overflowing and super generous. Take your crackers and lean them against the bowls or cheeses so they fan out artistically—don’t just stack them in the middle! Use those beautiful grapes and tuck them into any remaining empty spaces to add pops of color. Finally, slice up that baguette and place those pieces near the soft cheeses. The goal now is to leave almost zero empty board space showing!
Tips for Success When You Make How To Make The Best Charcuterie Board
If you want your board to go from just ‘nice’ to truly show-stopping, it all comes down to the details we’ve already touched on. Remember that variety we talked about? Before you set it out for guests, take a quick sweep of the whole platter and ask yourself: Do I have something soft, something crunchy, something sweet, and something salty? If the answer is a definite yes to all four, you’ve absolutely nailed the balance!
Color is huge, too! That’s why green grapes and vibrant olives work so perfectly—they just look lush and intentional. If you go heavy on the brown meats and beige crackers, it all starts to blur together. Speaking of intentionality, texture contrast is everything; make sure you pair that smooth Brie right next to those crunchy almonds or walnuts. It keeps everybody excited about the next bite.
Now, about timing: Keep everything cold right up until the moment company walks in the door. If you assemble this too early on a warm day, that beautiful Brie starts looking sad really fast. If you are making something rich like a homemade cheese pie, you know the importance of temperature control for texture!
And one final planning trick: If this board is just an appetizer before a big meal (like maybe some pasta), I usually plan for about 2 ounces of combined cheese and 1 ounce of meat per person. If it’s replacing dinner entirely, you need to bump up that quantity significantly so people feel satisfied!
Variations to Keep Your How To Make The Best Charcuterie Board Fresh
Once you master the basic meat and cheese platter blueprint, just know that the possibilities are genuinely endless! This general assembly structure works for almost any theme you can dream up, which is why it’s such a flexible concept for entertaining. You don’t just have to stick to salami and Gruyère forever!
If you’re having a summer gathering or want something lighter, try going completely Mediterranean. Just ditch the cured meats entirely! You can focus on creamy feta, maybe some marinated mozzarella balls, and feature things like roasted red peppers, artichoke hearts, and use slices of warm pita bread or those crunchy bagel chips instead of regular crackers. It brings a whole new flavor profile to the table.
Or, how about a full-blown dessert board? This is my favorite surprise option! Skip all the savory stuff and load up with chocolate squares, dried apricots, fresh seasonal berries—strawberries and blueberries look gorgeous clustered together—and maybe serve little bowls of caramel sauce or even chocolate hazelnut spread. For the vehicles, use shortbread cookies or graham crackers. If you’ve ever made my grape salad, you know how amazing fruit looks paired with something creamy on a platter, and that totally translates here!
Serving Suggestions to Complement Your Creation
What do you drink with a beautiful assortment of cheeses and meats? If you’re keeping it light, you absolutely cannot go wrong with a crisp Sauvignon Blanc—it pairs well with almost everything salty and tangy, cutting right through that creamy Brie. If you’re running a cocktail hour because you feel fancy, a light, bright drink like my coconut lime daiquiri is surprisingly refreshing against salty prosciutto. Keep the wine chilled and the cocktails icy, and your guests will be thanking you!
Storage and Leftover Handling
If—and I mean *if*—you have leftovers, don’t just wrap the whole board up! The crackers will instantly turn to mush overnight, and that wonderful texture you built will be ruined. So, take five extra minutes when cleaning up.
Separate everything completely into airtight containers. Keep the cheese safely wrapped on its own. Put all the wet things, like olives, grapes, and that delicious jam, into their own little sealed boxes. The nuts and crackers absolutely must go in a separate, dry container or they will absorb moisture from the air!
Frequently Asked Questions About How To Make The Best Charcuterie Board
How much food should I plan per person for a charcuterie board?
It really depends on whether this delightful meat and cheese platter is the main event or just a starter for your entertaining! If you’re just snacking before dinner, I tell people to plan for about 2 ounces of combined cheese and 1 ounce of total meat per person. But honestly, if you’re having a party and that board *is* the dinner, you need to seriously ramp up the quantities—plan for 4 to 5 ounces of proteins and cheeses per person, minimum. Always have extra sturdy crackers nearby, because those disappear first! If you need something to fill a big gap that isn’t meat, check out my recipe for an addicting dip to place right in the middle!
Can I include fresh fruit besides grapes?
Oh, absolutely! Grapes are great because they don’t need any prep, but you should definitely add more color and flavor. Thinly sliced apples are surprisingly wonderful next to a sharp Cheddar, but here’s my secret for entertaining: toss those slices in a little bowl of water mixed with lemon juice for just a minute before you put them on the board. That keeps them from looking yucky and brown! Pears and figs are also top-tier choices for pairing with soft cheeses.
What is the difference between a charcuterie board and a meat and cheese platter?
That’s such a good question that always comes up when people are planning their entertaining! Traditionally, *charcuterie* is a French culinary term strictly referring to prepared meat products—think smoked, cured, or preserved meats like pâtés and sausages. So, a true charcuterie board should really focus heavily on those meats. However, nowadays, everyone uses the terms pretty interchangeably. If you put out five cheeses and two meats, most people will still call it a gorgeous charcuterie board! As long as it’s beautiful and delicious, nobody is testing you on the terminology.
Estimated Nutritional Data for This Assembly
Now, listen closely because this is important, especially since we aren’t actually *baking* anything here—we are assembling! Because this whole amazing thing relies on the specific brands and the exact quantity of jam, nuts, cheese, and meat that you choose, any nutritional label I give you is just a wild guess, frankly.
The fat content in that beautiful Brie is going to be vastly different from a low-fat Colby, right? And the sugar totally depends on how much honey you decide to drizzle over the goat cheese. So, I’m not going to list any specific numbers because they won’t be accurate for *your* spread!
If you are tracking anything specific, just look up the nutrition information for the individual meats, cheeses, crackers, and fruits you select. But truly, when you look at a stunning board like this, it’s all about balance and enjoying the moment with friends, not counting milligrams!
Share Your Masterpiece
Whew! Now that you have all the tools and the assembly steps down, you have officially mastered **How To Make The Best Charcuterie Board**! You’ve got the visual appeal, you’ve balanced the salty and sweet, and most importantly, you didn’t have to turn on your oven once. That is peak entertaining if you ask me!
I really, truly want to see what you put together. When you finish creating your beautiful meat and cheese platter, please snap a picture! Tag me online—it genuinely makes my day to see how you interpreted these steps. Whether you went ultra-modern or traditional, I’m eager to admire your handiwork.
And please, don’t just look, talk back to me! Hop down into the comments section below and tell me what your absolute favorite cheese pairing was. Did the honey and goat cheese pairing win out, or are you a sharp Cheddar and salami loyalist? Let’s share our successes and keep inspiring each other for the next gathering!
Print
How To Make The Best Charcuterie Board
- Total Time: 20 min
- Yield: 4 servings 1x
- Diet: Vegetarian
Description
A guide for assembling an attractive and balanced charcuterie board.
Ingredients
- 2 oz cured meats (salami, prosciutto)
- 2 oz hard cheese (cheddar, Gruyère)
- 2 oz soft cheese (Brie, goat cheese)
- 1 small baguette
- 1 cup grapes
- 1/2 cup olives
- 1/4 cup nuts (almonds, walnuts)
- 2 tbsp jam or honey
- Crackers as needed
Instructions
- Select a board or platter for assembly.
- Cut cheeses into manageable shapes or cubes.
- Fold or roll cured meats neatly.
- Arrange cheeses and meats on the board first, spacing them out.
- Place small bowls of olives, nuts, and jam/honey onto the board.
- Fill empty spaces with grapes and crackers.
- Place the sliced baguette near the cheeses.
- Serve immediately.
Notes
- Use a variety of textures and colors for visual appeal.
- Place sharp items like knives near the cheeses.
- Keep the board refrigerated until serving time.
- Prep Time: 20 min
- Cook Time: 0 min
- Category: Appetizer
- Method: Assembly
- Cuisine: French
Nutrition
- Serving Size: 1 serving
- Calories: 350
- Sugar: 10
- Sodium: 650
- Fat: 25
- Saturated Fat: 10
- Unsaturated Fat: 15
- Trans Fat: 0
- Carbohydrates: 18
- Fiber: 2
- Protein: 15
- Cholesterol: 50
Keywords: charcuterie board, meat and cheese platter, appetizer assembly, entertaining