
Have you ever taken a bite of cheesecake and thought, “This is good, but… where is that signature, rich density?” I searched for ages for that perfect, almost velvety texture that only a true New York Style Cheesecake can deliver. Most store-bought or even bakery versions lean too light or too sweet, and honestly, I want something that feels substantial! Trust me, getting the texture right was a genuine battle for me; my first attempts were either cracking disasters or sadly spongy. But I finally cracked the code on this Not So Classic New York Style Cheesecake recipe. It guarantees that thick, creamy, slightly tangy experience that makes you close your eyes on the first bite. It’s the real deal, and you’re going to love how simple the technique is once you know the secrets to that perfectly dense crumb. If you’re ever looking for an alternative that skips the oven, check out my recipe for light and velvety cheesecake, but for pure New York flavor, stick right here!
Why This Not So Classic New York Style Cheesecake Stands Out
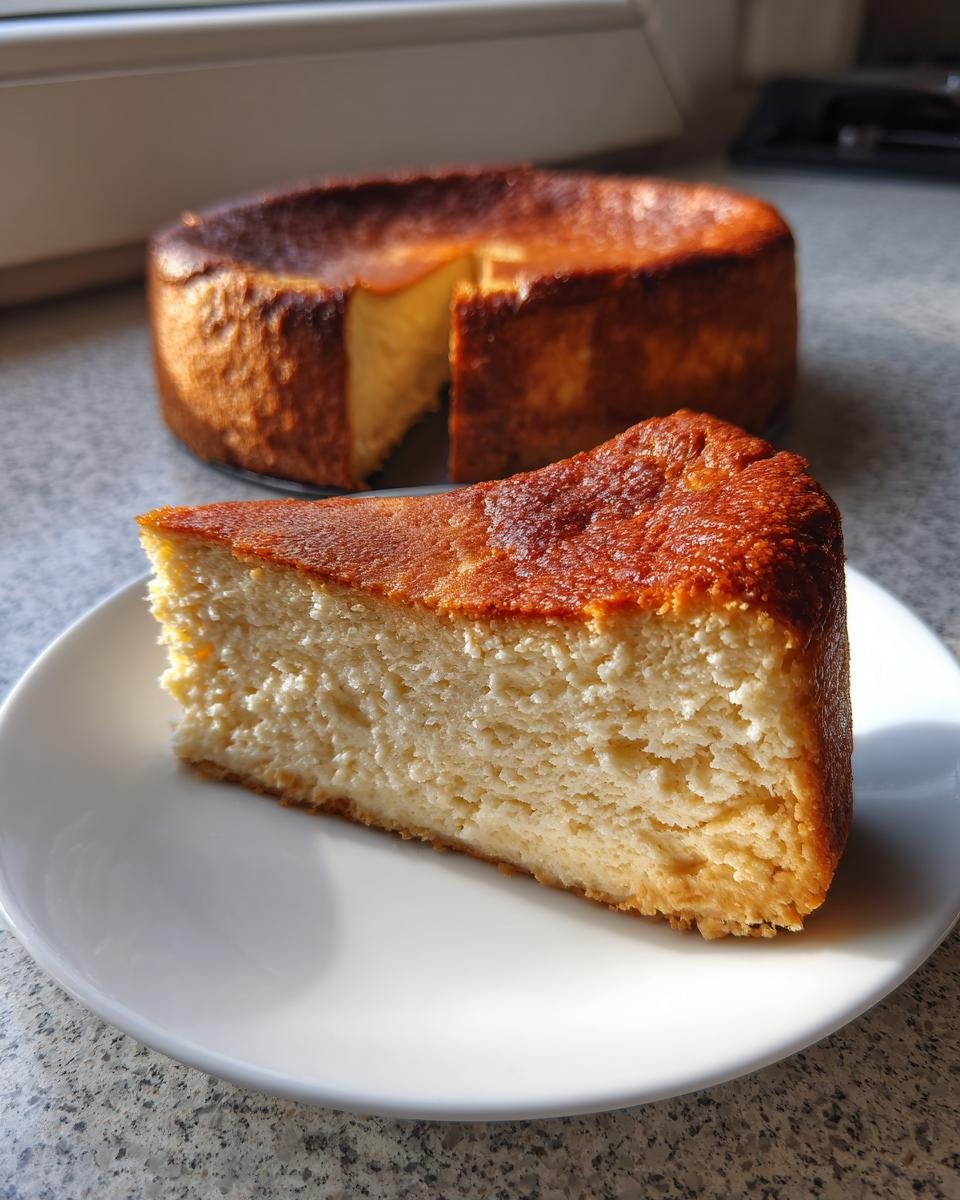
There are a million cheesecake recipes out there, but this one gets that beautiful southern New York vibe just right. I’m not kidding when I say the difference is in the careful steps we take before it even hits the oven. You end up with a cake that has backbone, if that makes sense! It holds up beautifully when you slice it, and it never feels overly sweet.
- The texture is unmatched: incredibly dense, super creamy, and without that annoying airy fluffiness you sometimes get.
- We nail the tang! That slight pucker from the sour cream balances the richness of the cream cheese perfectly.
- The slow-bake method using the water bath is non-negotiable, and I walk you through exactly how to set it up so you avoid any frustrating cracks—zero guesswork!
It’s the best kind of indulgence, and you won’t look at another recipe for a classic style again. If you’re feeling adventurous later, you might enjoy trying out my recipe for chilled banana split cheesecake!
Ingredients for Your Not So Classic New York Style Cheesecake
Okay, gathering your supplies is half the battle, and I’m going to break this down simply. The ingredients list looks short, but every item has a job to do, especially the way we handle temperatures! Don’t even think about starting before your dairy is up to temperature. If your cream cheese is cold, you’ll end up with lumps, and we are aiming for silky smooth here. Trust me on this one—room temperature ingredients are your best friend for achieving that unbelievably silky texture we talked about. If you like finding new ways to use cream cheese, you should definitely check out my recipe for cream cheese pound cake or maybe a lovely cream cheese flan recipe!
For the Graham Cracker Crust
This part sets the stage, so we need a good, sturdy base. You just mix these three things up and press! It’s so fast.
- 1 1/2 cups graham cracker crumbs
- 1/4 cup granulated sugar
- 6 tablespoons unsalted butter, melted
For the Rich Cheesecake Filling
Here’s where the magic happens. See how we need three full 8-ounce packages of cream cheese, softened? That volume is what gives us that signature New York heft. And please, make sure those eggs are big—only 3 large eggs are needed, and they must be room temperature, too!
- 3 (8 ounce) packages cream cheese, softened
- 1 1/2 cups granulated sugar
- 1/4 cup all-purpose flour
- 1 teaspoon vanilla extract
- 1/4 teaspoon salt
- 3 large eggs
- 1/2 cup sour cream
Essential Equipment for Making Not So Classic New York Style Cheesecake
You can’t rush perfection, and cheesecake demands the right tools, especially when you’re doing that water bath thing, which, trust me, is essential for keeping that creamy texture steady! Don’t try to fake your equipment here; these tools are non-negotiable if you want that perfect, crack-free result. My first few attempts tried to skip the foil wrapping and ended in a soggy mess. Learn from my early kitchen disasters!
You’ll need a few specific things ready before the first ingredient hits the bowl. Having everything laid out means you won’t panic when it’s time to move fast, especially once those eggs are in the batter. If you’re looking for fun ways to serve smaller portions later, you have to try making cherry chip cheesecake bites!
Here is the lineup of what you must have on hand:
- 9-inch Springform Pan: This is technically the only way to get a cheesecake out gracefully. The removable sides are a lifesaver.
- Heavy-Duty Aluminum Foil: You need the heavy stuff! We’re wrapping this pan completely, maybe even twice, to ensure absolutely zero water from the bath seeps in and makes your graham cracker crust soggy.
- Large Roasting Pan: This pan needs to be big enough to sit the springform pan inside comfortably with room around the sides—this is for the hot water bath we use for baking.
- Electric Mixer (Handheld or Stand): While you could do it by hand, beating that much cream cheese until fluffy takes serious arm strength. I prefer my stand mixer for hands-free scraping.
- Good Sturdy Spatula and Whisk: For folding in that last bit of sour cream gently.
Step-by-Step Instructions for Not So Classic New York Style Cheesecake
This is where patience really pays off, just like when I taught my nephew how to assemble a bookshelf—follow the order, and you win! If you follow these steps exactly, especially the cooling part later, you’ll get that unbelievably smooth, crack-free top. I learned this the hard way after ruining three perfectly good cheesecakes by rushing them out of the oven too fast. Nobody wants that sad, jagged crack running through their beautiful dessert!
Preparing the Crust and Pan
First things first, get that oven warmed up to 350 degrees F (175 degrees C). While it heats, take your 9-inch springform pan and wrap the outside—bottom and sides—thickly in heavy-duty aluminum foil. Seriously, use two layers if you think one might not hold up. We’re trying to keep every drop of water out! For the crust, just mix those graham cracker crumbs, the 1/4 cup of sugar, and the melted butter right in a bowl until it looks like wet sand. Press that firmly into the bottom of your wrapped pan. Pop it into the oven for 10 minutes to set it up, then take it out while you make the filling.
Mixing the Cheesecake Filling
This requires a gentle touch! Start by beating that softened cream cheese until it is completely smooth and there are no lumps left—this is your base layer of texture. Next, gradually beat in the remaining sugar and the flour until it’s just combined. We don’t want to overdo it! Now, stir in the vanilla and salt. This is the important part regarding the eggs: beat them in one at a time, and I mean just until you see them disappear into the batter after each addition. Stop mixing! Too much air is our enemy here, leading to fluffiness instead of dense creaminess. Finally, gently fold in the sour cream at the end.
Baking and Slow Cooling for a Perfect Not So Classic New York Style Cheesecake
After you pour that gorgeous filling over your cooled crust, it’s time for the spa treatment: the water bath. Place your foil-wrapped springform pan inside that larger roasting pan. Carefully pour hot water into the roasting pan until it comes about halfway up the sides of the cheesecake pan. This humidity is what keeps the top smooth! Bake it for about 55 to 65 minutes. The center should still have a tiny bit of jiggle to it when you shake the pan gently. Now, here’s the golden rule: when that time is up, turn the oven OFF. Prop the door open just a crack, and let your cheesecake sit inside that cooling oven environment for a full hour. This slow descent in temperature is what builds the dense texture and definitely prevents cracking. You can check out recipes like my brownie layered cookie dough cheesecake recipe for another baked treat inspiration once you master this one!

Tips for Success with Your Not So Classic New York Style Cheesecake
I’ve been here, I’ve made the mistakes, and I am telling you these three things are what elevate this from a good cheesecake to a truly legendary one. Follow the notes above, and you’ll be so proud when you pull this baby out!
The most important thing I learned? Patience with temperature! You absolutely must bring your cream cheese and those eggs out onto the counter early. I usually set them out before I even start making coffee. If they’re cold, you’re going to stir forever trying to get rid of lumps in the filling, and that beating introduces air, which is exactly what we don’t want in a classic New York Style Cheesecake.
Speaking of air, remember what I said about the eggs? Don’t rush them. Beat them in one at a time, and once you see that yolk vanish, stop the mixer immediately. Seriously, stop it! If you overmix after the eggs are in, you’re whipping air into the batter, and that air expands while baking, only to collapse and crack the surface when it cools down. We want density, not a trampoline for our topping!
Now, for my favorite expert tip that saves the day every single time: pan release. Even with all that foil wrapping, sometimes the edges just get stuck after chilling overnight. Before you take the foil off to get it ready for serving, I like to run a very thin, flexible offset spatula or even a sharp, thin knife carefully around the edge where the cake meets the springform side. You have to be gentle, but that light separation usually ensures that when you finally release the clasp, the whole side slides away cleanly, leaving you with that beautiful, straight edge.

If you’re looking for some less dense ideas to try after you conquer this classic, check out my recipe for light and velvety cheesecake, or if you’re watching the carbs, my no-bake keto cheesecake bites are shockingly good!
Storage and Serving Suggestions for Not So Classic New York Style Cheesecake
Okay, you survived the baking, the cooling bath, and the agonizing wait in the fridge—now what? Resist the urge to slice into it immediately after it comes out of the water bath! The chilling time is just as crucial as the baking time for achieving that proper firmness in a New York Style Cheesecake. Seriously, you need to let it rest and firm up properly.
The minimum chill time for this recipe is six hours, but honestly, if you can manage it, let it hang out in the refrigerator overnight. I promise you, the flavor deepens, and the texture becomes wonderfully dense and almost buttery when it’s fully set. Leaving the springform ring on while it chills helps it maintain that beautifully straight edge.
When it comes time to serve, keep it simple. This cheesecake is so rich and flavorful on its own that it doesn’t really need much fussing over. A light topping is usually all you need to make it look spectacular.
Fresh Berries and Simple Sauces
My favorite way to serve this rich dessert is with vibrant fresh fruit to cut through that richness. Think beautiful sliced strawberries or a handful of raspberries scattered right on top of each slice. The bright acidity is perfect against the sweet, tangy cream cheese.
If you want a sauce, go light. A simple homemade raspberry coulis or even a drizzle of good quality cherry pie topping works wonders. You don’t want something heavy that competes with the cheesecake itself. For more inspiring topping ideas, you should look at my recipe for amazing strawberry shortcake cheesecake—some of those topping ideas cross over beautifully!
Slicing It Like a Pro
When you know the cheesecake is fully chilled and ready to go, remember the trick I mentioned earlier: a hot knife! Fill a tall glass with very hot water. Dip your sharp, thin knife into the water, wipe it clean and dry with a paper towel, then make your slice. Dip and wipe between every single cut. This keeps the blade clean, ensures you get a clean slice without dragging the creamy filling, and makes your finished presentation look professional. It’s fussy? A little bit. Is it worth it? Absolutely!

Frequently Asked Questions About This Cheesecake
I know you guys are going to have questions, because baking a true New York Style cheesecake is serious business! It’s not difficult, but it is fussy, and the difference between a good result and a great result usually comes down to just one tiny step skipped. Don’t fret, though! I’ve gathered the most common things folks ask me after they’ve tried this recipe. If you’re looking for something less serious next time, you might want to peep my Cinnamon Toast Crunch cheesecake recipe!
Can I make this Not So Classic New York Style Cheesecake without a water bath?
Oh, I wish I could tell you yes, but for this specific style, the water bath is the MVP! Think of it this way: we are baking a giant egg custard, and eggs hate sudden, dry heat. The hot water—or the bain-marie—surrounds the pan, creating a moist, steamy oven environment. This keeps the sides from cooking faster than the center, which is what causes those awful cracks and that dry, slightly rubbery texture around the edges. If you skip it, you might get a denser cake, but you risk a cracked top and uneven cooking. For that signature velvety smooth texture we’re aiming for? The water bath is absolutely necessary, trust me on this one!
What is the best way to slice a chilled cheesecake?
This is the secret to making your slices look perfect on the plate, just like you see in fancy bakeries. You need a knife that’s long, thin, and very sharp. The trick, which I mentioned earlier, is using heat! Get a tall glass filled with very hot water. Dip your knife into the hot water for a few seconds to heat the blade up, wipe it perfectly dry, and then make your cut. The heat melts just the tiniest layer of the cream cheese as it cuts, allowing the blade to glide through without dragging or sticking. You have to clean and reheat the knife between practically every slice, but the clean edges are totally worth the extra 30 seconds of effort!
Nutritional Snapshot
Now look, I’m not going to lie to you—this amazing, dense, rich Not So Classic New York Style Cheesecake is certainly a treat, not an everyday snack! We put in a lot of cream cheese and sugar to get that beautiful flavor and texture, so we need to be realistic about what we’re eating here. It’s worth every single calorie, but you should know what you’re diving into!
The numbers below are the estimated breakdown per slice (assuming you get 12 perfect slices out of your 9-inch pan). These figures are calculated based on the standard ingredients I listed, so if you swap out butter for oil or use a different sugar, your count will change, of course. Think of this as a general guide for planning your indulgences!
If you are ever curious about how to lighten things up without sacrificing flavor, you should take a look at my recipe for keto blueberry cheesecake parfaits—total game-changer for dessert nights!
- Serving Size: 1 slice
- Calories: Around 450 (Yes, it’s a heavy slice, but it’s satisfying!)
- Fat: About 30g (Remember, a lot of that comes from that wonderful, real cream cheese!)
- Saturated Fat: 18g
- Trans Fat: 0.5g
- Total Carbohydrates: 38g
- Sugar: 35g (This is where the flavor comes from, folks!)
- Protein: 8g
- Cholesterol: 110mg
- Fiber: 1g
Please remember, these are based on averages, and you know I’m never using any strange ingredient substitutes, so these numbers reflect real butter, good sugar, and genuine cream cheese used generously! Enjoy this decadent dessert responsibly!
Share Your Not So Classic New York Style Cheesecake Creations
Well, there you have it! You’ve mastered the water bath, you’ve respected the slow cool-down, and now you have the most wonderfully dense, luxurious Not So Classic New York Style Cheesecake resting in your fridge. I sincerely hope you enjoy that first slice with a cup of strong coffee—it’s a moment of pure culinary victory!
I put my heart and soul into figuring out the exact balance for this recipe, and honestly, the best part of blogging is hearing from you folks when you try my go-to desserts. So please, don’t be shy! Once you’ve had it chilled overnight, I want to know everything.
Tell Me What You Think!
Did the slow cool teach you patience? Did you use a different topping that you absolutely loved? Or, did you try the hot knife trick for slicing? Drop all your thoughts, tips, and triumphs in the comments section right below this. Your feedback helps other bakers trust the process!
If you had success, please consider leaving a star rating! Those stars mean the world to me, they tell me which recipes I absolutely nailed. And if you snapped any photos of your perfectly smooth, shiny cheesecake, tag me on social media! I absolutely love seeing your finished desserts, especially how you present them. If you’re already looking for your next fun mini-treat, my recipe for cheesecake bites: flavorful mini treats is a perfect follow-up!
Thank you so much for baking with me today. Go enjoy that slice—you earned it!
Print
New York Style Cheesecake
- Total Time: 7 hours 25 min
- Yield: 12 servings 1x
- Diet: Vegetarian
Description
A recipe for a dense, rich New York style cheesecake.
Ingredients
- 1 1/2 cups graham cracker crumbs
- 1/4 cup granulated sugar
- 6 tablespoons unsalted butter, melted
- 3 (8 ounce) packages cream cheese, softened
- 1 1/2 cups granulated sugar
- 1/4 cup all-purpose flour
- 1 teaspoon vanilla extract
- 1/4 teaspoon salt
- 3 large eggs
- 1/2 cup sour cream
Instructions
- Preheat your oven to 350 degrees F (175 degrees C). Wrap the outside of a 9-inch springform pan with heavy-duty aluminum foil.
- Combine graham cracker crumbs, 1/4 cup sugar, and melted butter. Press the mixture firmly into the bottom of the prepared springform pan. Bake for 10 minutes. Remove from oven and let cool slightly.
- In a large bowl, beat the cream cheese until smooth. Gradually beat in 1 1/2 cups sugar and flour until just combined. Mix in vanilla extract and salt.
- Beat in the eggs one at a time, mixing just until incorporated after each addition. Stir in the sour cream.
- Pour the filling over the cooled crust. Place the springform pan into a larger roasting pan. Pour hot water into the roasting pan until it reaches halfway up the sides of the springform pan.
- Bake for 55 to 65 minutes, or until the center is almost set but still slightly jiggly.
- Turn off the oven, but leave the cheesecake inside with the oven door propped open for 1 hour.
- Remove the cheesecake from the water bath and let it cool completely on a wire rack. Refrigerate for at least 6 hours, preferably overnight, before serving.
Notes
- For best results, bring the cream cheese and eggs to room temperature before starting.
- Do not overmix the batter once the eggs are added.
- Cooling the cheesecake slowly in the oven prevents cracking.
- Prep Time: 25 min
- Cook Time: 60 min
- Category: Dessert
- Method: Baking
- Cuisine: American
Nutrition
- Serving Size: 1 slice
- Calories: 450
- Sugar: 35g
- Sodium: 250mg
- Fat: 30g
- Saturated Fat: 18g
- Unsaturated Fat: 12g
- Trans Fat: 0.5g
- Carbohydrates: 38g
- Fiber: 1g
- Protein: 8g
- Cholesterol: 110mg
Keywords: cheesecake, New York style, graham cracker crust, baked dessert, cream cheese