
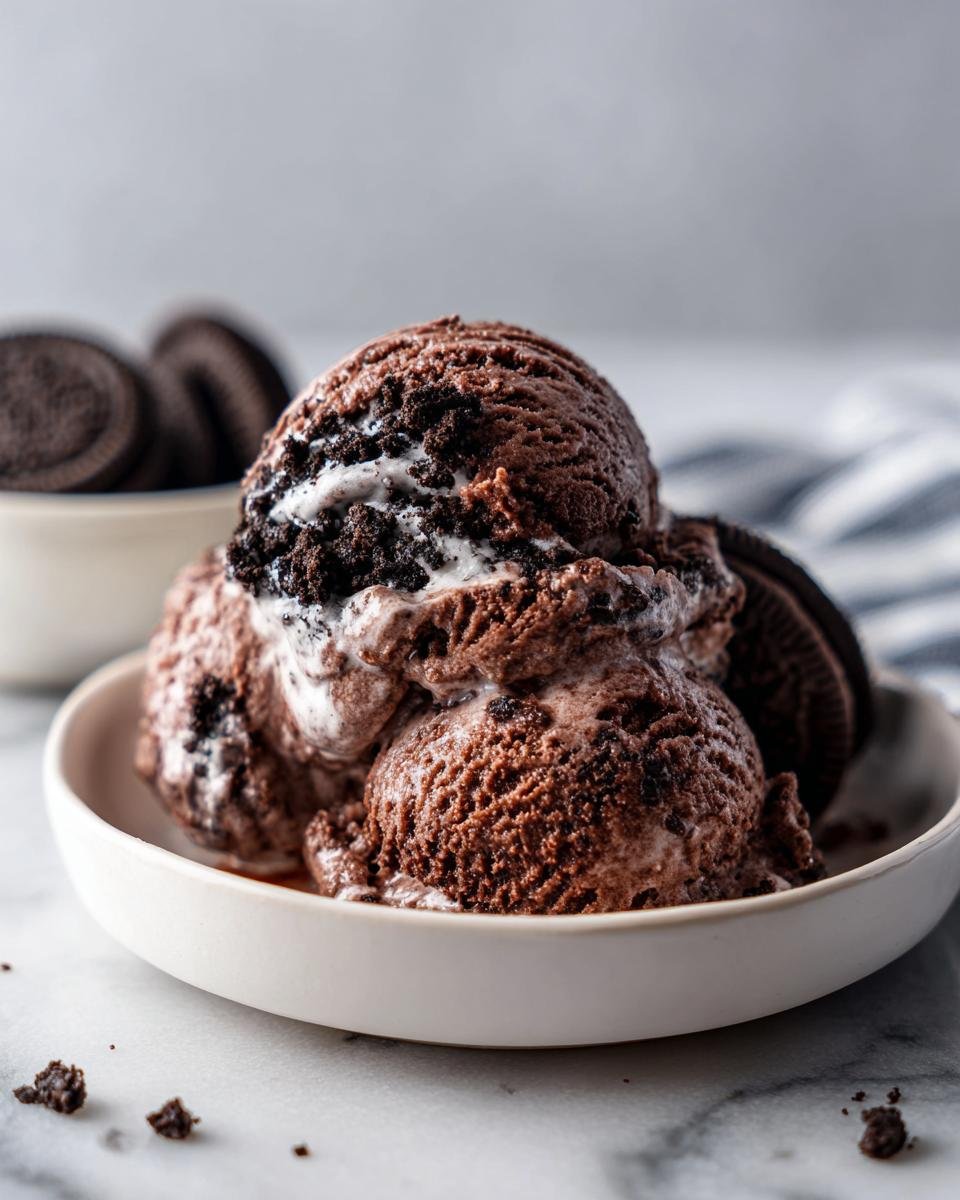
Oh, friends, let me tell you—nothing beats that moment when you scoop truly decadent homemade ice cream. Forget the machine! Seriously, who has the time to clean those bulky things? That’s why I am absolutely obsessed with this recipe for **Chocolate Oreo Ice Cream No Churn**.
I mean it; this recipe is my emergency kit for when a serious dessert craving hits at 8 PM on a Tuesday. We’re talking rich, dark chocolate flavor swirled around crunchy, beloved Oreos, and it’s so incredibly creamy you’d swear I spent hours cranking away at an ice cream maker.

The beauty of this method is its sheer simplicity—just heavy cream and condensed milk doing all the hard work. Trust me, once you try this, you won’t look back. It comes together in about fifteen minutes of actual work, and the quality you get feels like cheating! For another fun twist on frozen treats, you should really check out my loaded no-churn Snickers ice cream idea, too!
Why This Chocolate Oreo Ice Cream No Churn Recipe Works So Well
Look, I’ve tried every shortcut ice cream recipe out there, and honestly, most of them end up tasting icy or weirdly gummy. But this recipe for **Chocolate Oreo Ice Cream No Churn** is different! It consistently delivers that dreamy, slow-melting texture you usually only get from an expensive machine churning away for half an hour.
The secret isn’t magic; it’s chemistry, my friends! This method is built around two heavy-hitters that stop those annoying hard ice crystals from forming. It’s all about relying on the right ingredients instead of brute mechanical force.
Achieving Ultimate Creaminess in Your Chocolate Oreo Ice Cream No Churn
The real heroes here are the heavy whipping cream and the sweetened condensed milk. You whip the cream until it’s super stiff—and I mean *stiff*—which traps tons of air. That air is what makes it light! Then, the sweetened condensed milk swoops in; its high sugar content actually lowers the freezing point of the whole mixture.
Because the sugar interferes with water turning into sharp ice, the result is smooth, dense, and unbelievably creamy. I can’t stress enough how important it is that both your cream and your can of milk are cold, straight from the fridge. Warm ingredients just won’t whip right!
Flavor Profile and Oreo Distribution
When it comes to flavor, we’re going deep. We use unsweetened cocoa powder, which gives us a rich, slightly bitter dark chocolate backdrop to balance the sweetness coming from the condensed milk. It’s not a kid’s sweet vanilla base; we want real chocolate depth here.
And the Oreos? Oh, the Oreos. They provide that essential textural contrast. You want them crushed, not pulverized into dust, so you get those satisfying, chunky pockets of cookie goodness. If you want to explore fantastic whipped textures in other desserts, check out the tips on making the perfect whipped cream—it really applies here too!
Gathering Ingredients for Your Chocolate Oreo Ice Cream No Churn
Let’s talk about what you need to gather for this amazing **Chocolate Oreo Ice Cream No Churn**. This recipe is so short on ingredients, which is just another reason why it’s absolutely perfect for spontaneous dessert making!
You absolutely must secure two full cups of heavy whipping cream—and I mean ice cold, straight from the back of the fridge. Then, you’ll need a can of sweetened condensed milk; make sure it’s the regular kind, not the low-fat stuff, because we need all that sugar working its magic! Don’t forget your vanilla extract for a little aromatic boost, and crucially, unsweetened cocoa powder for that rich, dark color and taste.
Finally, the star: the Oreos! Grab at least a cup and a half of those glorious sandwich cookies. These are what make this dessert truly irresistible.
Ingredient Preparation Notes
Okay, preparation is key, even with only five things! First, those Oreos need attention. You want them crushed, yes, but don’t turn them into dust in the food processor. Pulse them until you have a mix of fine crumbs and larger, satisfying little chunks. We want texture, remember?
Also, please take my advice on chilling your heavy cream. If your bowl and whisk attachments are cold—I stick mine in the freezer for ten minutes before I even start—you will get much firmer, faster-whipping cream. Seriously, cold inputs equal maximum airiness for our **Chocolate Oreo Ice Cream No Churn** base. It makes whisking so much easier and keeps that air locked in.
Expert Steps to Make Chocolate Oreo Ice Cream No Churn
Alright, deep breath! This is where the magic happens. You’re only about 15 minutes away from having the structure ready for freezing. Remember, the key to making great **Chocolate Oreo Ice Cream No Churn** without churning is being gentle after you whip that cream. We want to keep all that beautiful trapped air!
Whipping the Cream to Stiff Peaks
First things first, if you remembered to chill your bowl and whisk attachments in the freezer like I suggested, you’re already ahead of the game! Get your two cups of ice-cold heavy whipping cream into that bowl. Start whipping slowly, increasing the speed until you see soft peaks forming. Keep going!
You need to keep whipping until you reach stiff peaks. That means when you pull the whisk out, the peak stands straight up without flopping over at all. If you tilt the bowl sideways, the cream shouldn’t even budge. This takes patience, so don’t rush it, but watch closely so you don’t accidentally make butter!
Creating the Chocolate Base and Folding
Now for the flavor component! In a separate, medium bowl, whisk together your cold container of sweetened condensed milk, your vanilla extract, and that lovely unsweetened cocoa powder. Whisk until it’s completely smooth—no dry pockets of cocoa powder allowed! It should look like rich, thick chocolate syrup.
This part is critical: Take about a third of your stiffly whipped cream and add it into the chocolate mixture. Use a rubber spatula and gently fold it in to lighten the chocolate base. Now, carefully pour that lightened chocolate mixture back into the large bowl with the rest of your whipped cream. Fold—and I mean truly fold—until it is *just* combined. Seriously, stop mixing as soon as you don’t see white streaks anymore. **Do not overmix** or you will deflate all the air we just worked so hard to build up!
Incorporating Oreos and Freezing
Time for the crunch! Take most of your crushed Oreos—save a nice handful for sprinkling on top later—and gently fold those in too. Again, very gentle hand movements here to keep the volume. We want those cookies distributed evenly.
Next, grab your freezer-safe container—a standard loaf pan works perfectly for me. Pour that glorious chocolate mixture in and spread it out evenly across the top. Cover it tightly with plastic wrap, making sure the wrap doesn’t stick to the surface as much as possible if you can manage it, or just use a lid.
Tuck it into the back of your freezer where it stays coldest. You need to let it freeze firm for at least six hours. Honestly, overnight is best just knowing it’s perfectly set up for scooping later. Want to see some other fantastic no-bake recipes while this chills? You should check these out!
Tips for Perfect Chocolate Oreo Ice Cream No Churn Texture
Even though this is super easy, we still want that perfect scoopability! If you pull your **Chocolate Oreo Ice Cream No Churn** out of the freezer and it’s rock solid—like you could chip a tooth on it—that usually means your freezer is running a little too cold, or maybe you didn’t get quite enough air in that initial whip.

Don’t panic if it feels like a block of chocolate granite! Just let it sit on the counter for about 10 to 15 minutes before you even think about scooping. That little bit of warming time makes all the difference!
Now, if you’re like me and you like your ice cream a little softer, almost like soft-serve texture right out of the container, you can absolutely adjust the freezing time. Instead of aiming for a solid six hours, try pulling it at the four-hour mark. It won’t be quite as firm, but it’s wonderfully soft and ready to eat right away. Knowing these little tricks is what separates good homemade ice cream from *amazing* homemade ice cream. You can read more about mastering whipped cream texture here: easy whipped cream recipe.
Variations on Your Chocolate Oreo Ice Cream No Churn
Once you master the base recipe for this incredible **Chocolate Oreo Ice Cream No Churn**, you’re going to want to start tinkering, right? I totally get it! It’s so easy to customize because the base is so sturdy and delicious.
For a little extra depth, try swapping out the vanilla extract. A half-teaspoon of peppermint extract makes this taste like a holiday treat, especially paired with the dark chocolate. Or, if you love coffee, a teaspoon of instant espresso powder dissolved in a tiny bit of hot water before adding it to the condensed milk mixture kicks the chocolate flavor up about ten notches. It’s rich, intense, and just wonderful.
If you have random leftovers, toss them in! Peanut butter cups? Totally welcome! Broken pieces of brownie? Yes, please! The beauty of no-churn is its flexibility. You absolutely must check out my recipe for chocolate chip cookie dough dip; those same cookie dough chunks would be fantastic mixed into this ice cream base too!
Serving Suggestions for Chocolate Oreo Ice Cream No Churn
Okay, the hard part’s over, and now it’s time to make things look as good as they taste! Grab those reserved crushed Oreos we saved earlier—sprinkle a generous layer right on top before you even think about putting the lid on. That makes the first scoop look magnificent.
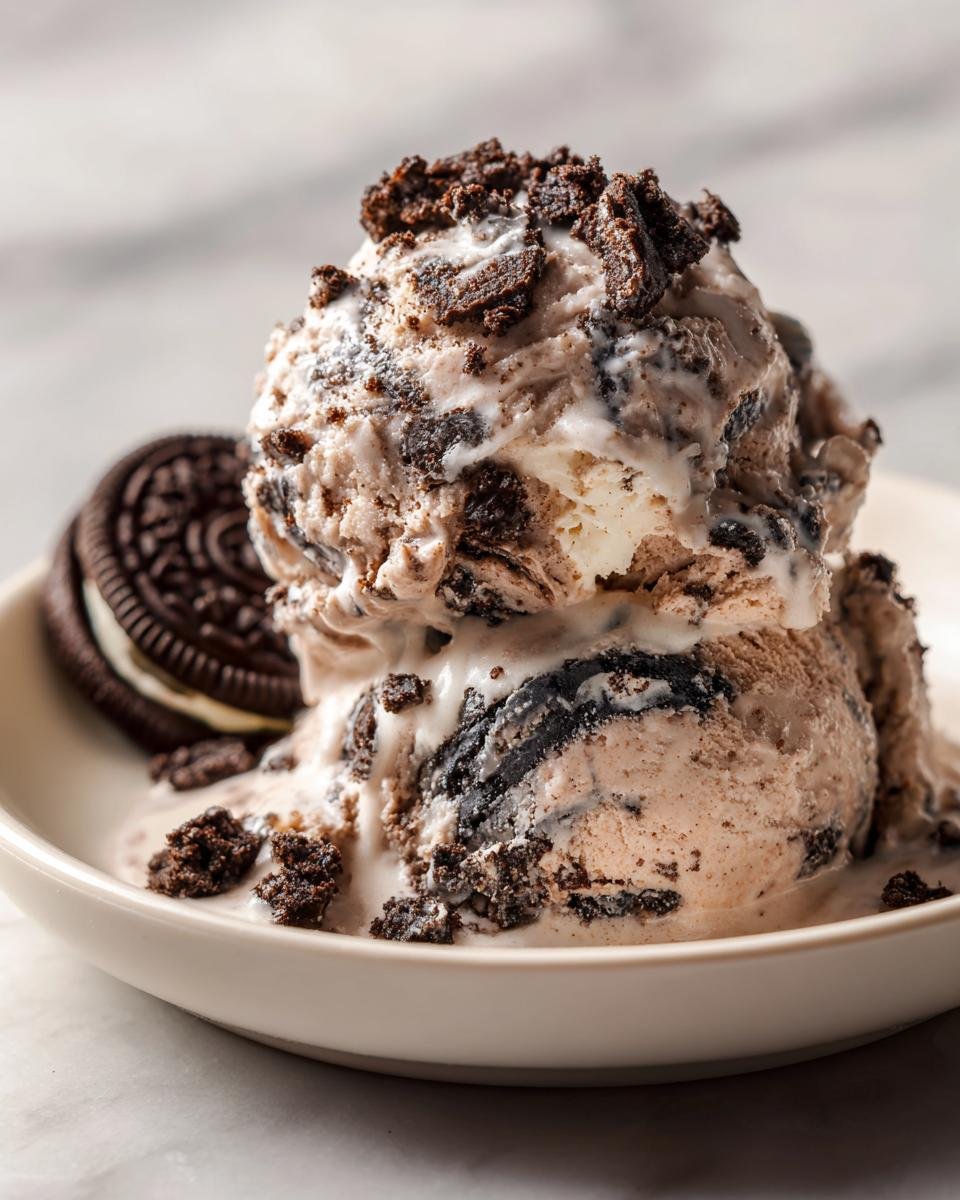
If you want to get really fancy with your **Chocolate Oreo Ice Cream No Churn**, a drizzle of hot fudge sauce or thick marshmallow fluff across the top is just heavenly. For something a little brighter to cut through the richness, a few fresh raspberries or sliced strawberries work wonders alongside it. For more decadent pairing ideas, check out my guide to decadent dessert pairings; you might find a new favorite!
Storage and Make-Ahead Instructions for Chocolate Oreo Ice Cream No Churn
This **Chocolate Oreo Ice Cream No Churn** is definitely best made the day ahead, just to make sure it sets up nicely, but storing leftovers is super simple!
The biggest enemy here is freezer burn, those yucky white ice crystals that form on top. To avoid that, make sure you press a piece of plastic wrap directly onto the surface of the ice cream before you seal the container lid on tight. That little barrier keeps the air away from your good stuff.
No matter how long it sits in there—a couple of days, or heck, even a week—you have to let it sit on the counter for about 5 to 10 minutes before scooping. Trust me, that tempering time is worth the wait for that perfect, creamy texture we worked so hard to achieve!
Frequently Asked Questions About No-Churn Ice Cream
I know you guys probably have a few burning questions swirling around, especially if you’ve tried other no-churn attempts that maybe didn’t quite work out! This section is for all those little things that pop up when you’re making **Chocolate Oreo Ice Cream No Churn**.
Can I use regular milk instead of sweetened condensed milk?
Oh, honey, please don’t try that! If you substitute regular milk for the sweetened condensed milk, you are absolutely setting yourself up for a disaster. Regular milk is mostly water, and what happens when water freezes without any interference? Yep, big, hard ice crystals! The whole point of using that thick, syrupy sweetened condensed milk is the incredibly high sugar content—that sugar acts like an antifreeze in our mix, preventing those sharp ice crystals from forming.
Without it, your **Chocolate Oreo Ice Cream No Churn** will be rock solid, not creamy. It’s the backbone of the entire no-churn magic trick!
How long does this Chocolate Oreo Ice Cream No Churn last in the freezer?
Because this recipe is so rich in fat (from the cream) and sugar (from the condensed milk), it actually holds up pretty well in a well-sealed container! If you’ve covered it tight, using that plastic wrap trick I mentioned, it will be fantastic quality for about two to three weeks. After that, you might start noticing a tiny bit of flavor fading, but texture-wise, it stays pretty good for a month!
If you’re looking for other ways to store your lovely creations, I’ve got some tips in my guide on teaching you 4 exquisite no-bake cake recipes that might give you storage ideas too!
Can I use different cookies instead of Oreos?
Absolutely! This base is just begging for experimentation, and Oreos are just my personal favorite crunch factor. If you don’t have Oreos on hand, any sturdy chocolate cookie will work just fine. Think chocolate wafer cookies or even those little pre-made brownie bites!
If you want a totally different flavor profile, swap them out for crunchy shortbread or even peanut butter cookies. Just know that you’ll change the overall flavor from “Choc-Oreo Heaven” to something else delicious, but the texture payoff will be similar. The main thing is resisting the urge to use something too soft that might just dissolve into goo!
Nutritional Estimates for This Recipe
I always feel a *tiny* bit guilty looking at the numbers for this **Chocolate Oreo Ice Cream No Churn**, but hey, it’s a treat, right? Remember that nutrition labels are just guides, and since this is homemade, the exact amounts can change based on how much cream you manage to whip in or the exact brand of Oreos you crush up!
These numbers are based on the recipe making about six generous servings, so keep that in mind when you’re portioning things out. I always recommend checking the labels of your specific ingredients if you need precise tracking. For a fun read on ingredients we often think are healthy but pack a secret sugar punch, check out my thoughts on the surprising sugar content of fruits!
Here’s the estimated breakdown per serving:
- Calories: About 350 here. Not too bad for deep, rich ice cream!
- Total Fat: Right around 22 grams, which gives us that amazing mouthfeel.
- Protein: We’re getting about 5 grams, mostly from the condensed milk.
- Carbohydrates: Roughly 35 grams total.
- Sugar: About 35 grams. Remember, a lot of this sugar is necessary to keep the texture soft and scoopable!
It’s important to know what’s in your frozen dessert, but honestly, the joy of scooping this up on a hot evening far outweighs any concerns!
Share Your Homemade Chocolate Oreo Ice Cream No Churn Experience
Now that you have the secret to making the creamiest **Chocolate Oreo Ice Cream No Churn** right in your own freezer, I truly want to see your results! Seriously, don’t keep these glorious scoops to yourself!
Did your whipping go perfectly? Did those Oreo chunks land exactly where you wanted them? Did you try sneaking in a different cookie? Tell me everything you loved about it down in the comments below. A rating helps other folks know this recipe is legitimately worth making too!
If you take a gorgeous picture of your finalized ice cream—maybe melting just right on the counter before serving—I’d absolutely love to see it! You can share your pictures or just drop me a line over on my contact page. Happy scooping, everyone!
Print
No-Churn Chocolate Oreo Ice Cream
- Total Time: 6 hr 15 min
- Yield: 6 servings 1x
- Diet: Vegetarian
Description
Make rich, creamy chocolate ice cream with Oreo pieces without an ice cream maker.
Ingredients
- 2 cups heavy whipping cream, cold
- 1 (14 ounce) can sweetened condensed milk, cold
- 1 teaspoon vanilla extract
- 1/2 cup unsweetened cocoa powder
- 1 1/2 cups Oreo cookies, crushed
Instructions
- In a large bowl, whip the cold heavy cream with an electric mixer until stiff peaks form.
- In a separate bowl, whisk together the cold sweetened condensed milk, vanilla extract, and cocoa powder until smooth.
- Gently fold the condensed milk mixture into the whipped cream until just combined. Do not overmix.
- Fold in most of the crushed Oreo cookies, reserving some for topping.
- Pour the mixture into a freezer-safe container, such as a loaf pan.
- Cover the container tightly with plastic wrap or a lid.
- Freeze for at least 6 hours, or until firm.
- Let the ice cream sit at room temperature for 5-10 minutes before scooping. Top with remaining crushed Oreos.
Notes
- For easier mixing, chill the bowl and whisk attachments before whipping the cream.
- If you prefer a softer texture, reduce the freezing time slightly.
- Prep Time: 15 min
- Cook Time: 0 min
- Category: Dessert
- Method: Freezing
- Cuisine: American
Nutrition
- Serving Size: 1/2 cup
- Calories: 350
- Sugar: 35
- Sodium: 150
- Fat: 22
- Saturated Fat: 14
- Unsaturated Fat: 8
- Trans Fat: 0.5
- Carbohydrates: 35
- Fiber: 1
- Protein: 5
- Cholesterol: 75
Keywords: chocolate, Oreo, ice cream, no churn, easy dessert, homemade ice cream