
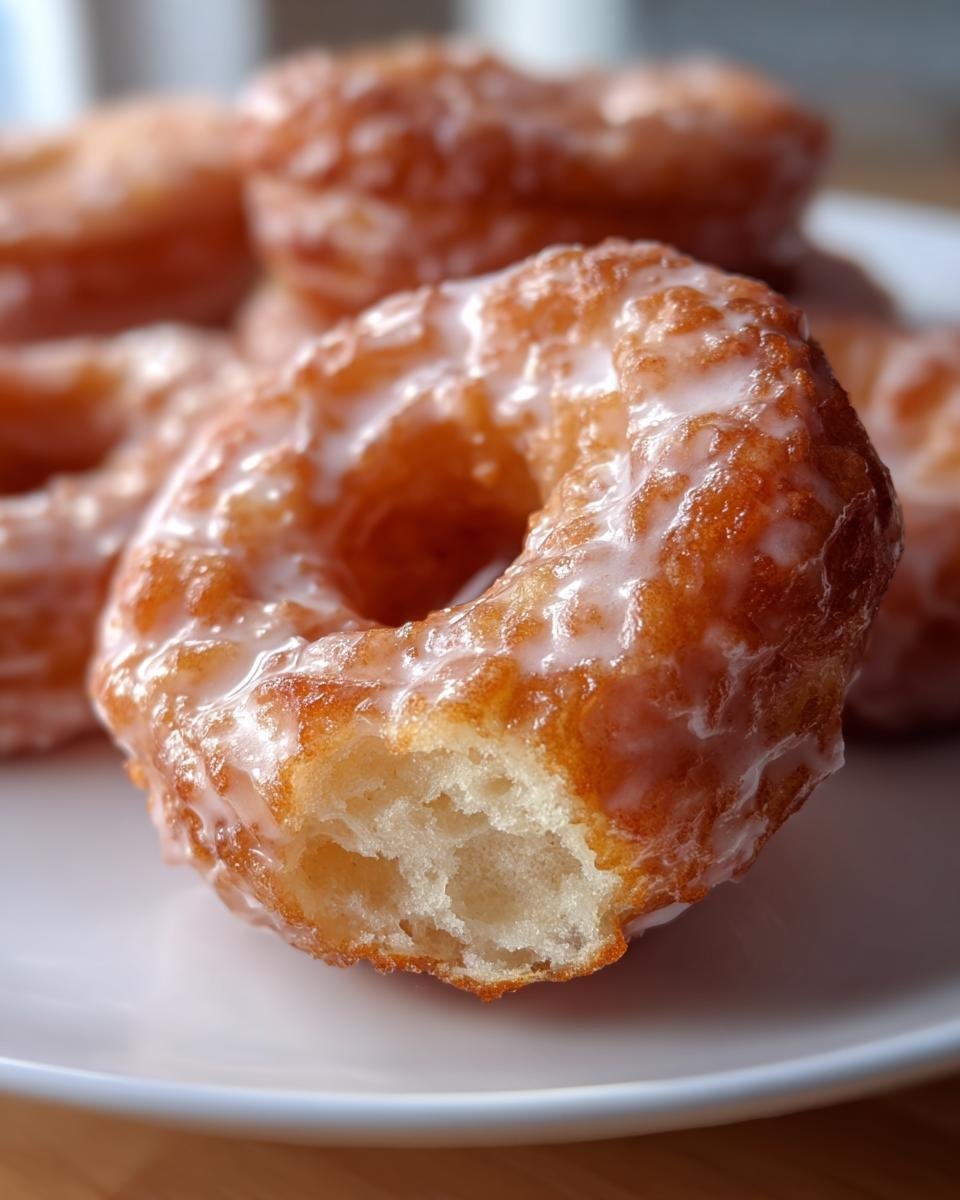
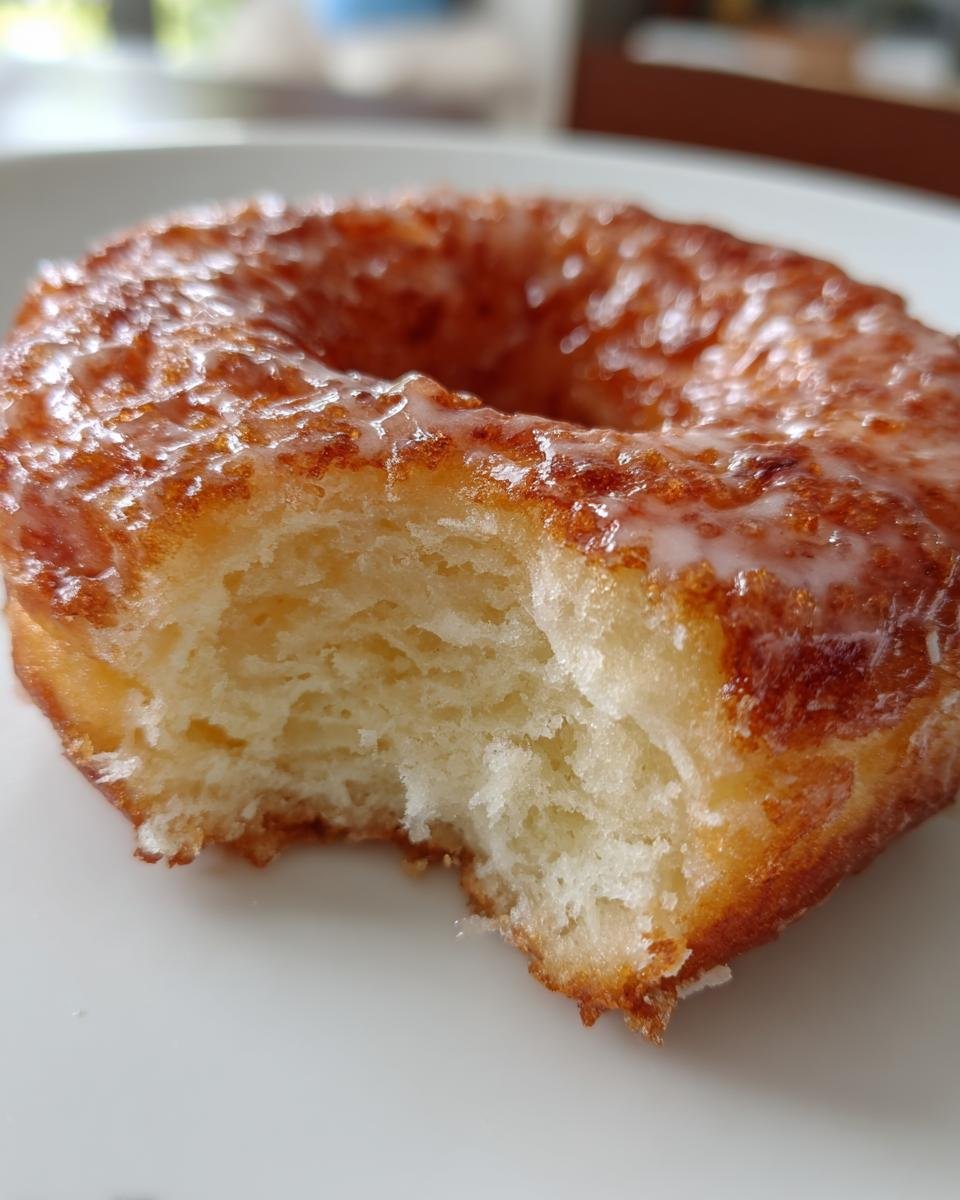
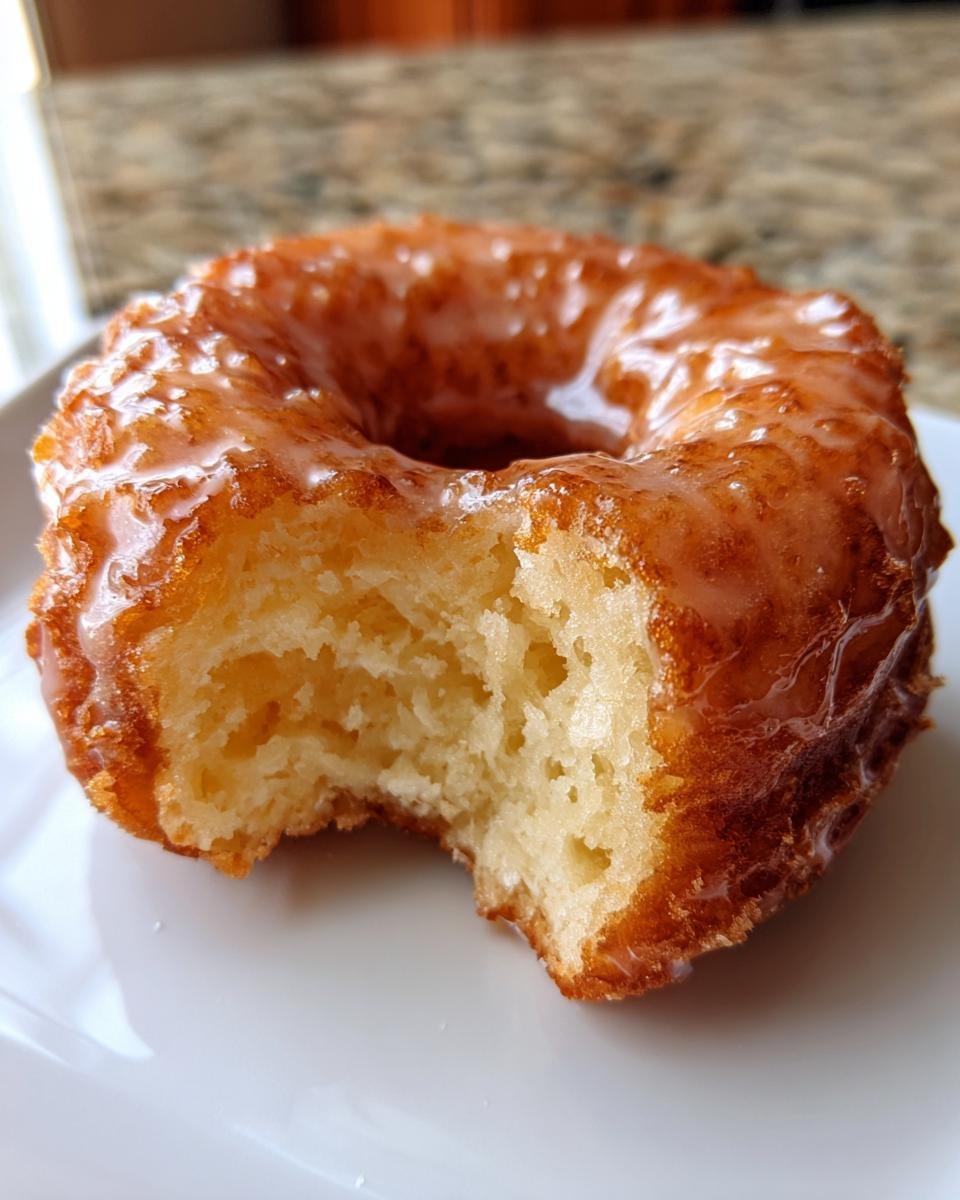
Oh, the smell of freshly fried, perfectly puffed raised doughnuts! There’s just nothing quite like it, is there? Forget those sad, store-bought versions; we’re talking about doughnuts that are impossibly light and fluffy on the inside, with that gorgeous, delicate golden-brown crust on the outside. Making them yourself might sound a little intimidating, but trust me, it’s one of the most rewarding baking adventures you can have. Once you get the hang of it, you’ll be whipping these babies up for every occasion (or just because it’s Tuesday!). This guide is packed with all my go-to tips and tricks to make sure your homemade raised doughnuts are an absolute triumph. Get ready to impress everyone, including yourself!

Why You’ll Love These Raised Doughnuts
Honestly, why wouldn’t you love these? They’re an absolute dream! Here’s why you’ll be hooked:
- Incredibly Fluffy Texture: Seriously, they’re like little clouds of deliciousness. The yeasted dough just makes them so airy and tender.
- Deliciously Sweet Flavor: That perfect balance of sweet dough, a hint of vanilla, and of course, that yummy glaze. It’s pure happiness in every bite.
- Satisfyingly Simple to Make: Don’t let the yeasted dough scare you! Once you get the hang of it, it’s a really straightforward process, and so rewarding.
- Perfect for Sharing: Whether it’s a weekend brunch, a holiday, or just a Tuesday treat, these doughnuts are guaranteed crowd-pleasers. Get ready for the compliments!
Essential Ingredients for Your Raised Doughnuts
Alright, let’s get down to the good stuff – the ingredients! Having everything prepped and ready makes the whole process so much smoother. Here’s what you’ll need for these glorious raised doughnuts:
- 2 1/4 teaspoons active dry yeast: This is the magic maker that gives us that fluffy lift!
- 1/2 cup warm milk: Think lukewarm, like a comfy bath, around 105-115°F. This wakes up the yeast.
- 1/4 cup warm water: More cozy warmth to get that yeast party started.
- 1/4 cup granulated sugar: A little sweetness for the dough itself, and food for the yeast.
- 2 large eggs, at room temperature: This is super important! Room temp eggs mix in better and help the dough rise beautifully.
- 1/4 cup unsalted butter, melted and cooled: Melted butter adds richness and tenderness. Make sure it’s not hot, or it’ll kill your yeast!
- 1 teaspoon vanilla extract: For that classic, comforting doughnut flavor.
- 1 teaspoon salt: Balances the sweetness and strengthens the dough.
- 4 cups all-purpose flour, plus extra for dusting: The backbone of our doughnuts! We’ll add more as needed.
- Vegetable oil, for frying: You’ll need a good amount for that gorgeous deep fry.
- Glaze ingredients: Just some powdered sugar, a splash of milk, and more vanilla. Easy peasy!
Ingredient Notes and Substitutions for Raised Doughnuts
A few little notes about these ingredients can really make a difference. The milk and butter? They’re key players in making sure our doughnuts are super tender and rich, not tough at all. If you don’t have whole milk, 2% works just fine, but whole milk really gives it that extra bit of luxury. You *could* technically use other flours, but honestly, all-purpose flour is your best bet for that classic raised doughnut texture. Anything else might make them a bit too dense or change how they absorb the oil. Speaking of oil, vegetable oil is my go-to because it has a high smoke point and a neutral flavor, so it doesn’t mess with the doughnut taste. Canola or even a light peanut oil would work too, but definitely steer clear of olive oil – too strong a flavor!
Step-by-Step Instructions for Making Raised Doughnuts
Okay, deep breaths! We’re going to make some amazing raised doughnuts together. It’s a process, but so worth it! Let’s dive in:
- First things first, let’s get that yeast happy. In a small bowl, whisk together the 2 1/4 teaspoons active dry yeast, 1/2 cup warm milk, and 1/4 cup warm water. Give it a gentle stir and let it sit for about 5 to 10 minutes. You’ll know it’s ready when it gets all foamy and bubbly – like a tiny yeast party!
- Now, grab a big bowl (or your stand mixer bowl if you have one). Whisk together the 1/4 cup granulated sugar, 2 large eggs (remember, room temp!), the 1/4 cup melted and cooled butter, 1 teaspoon vanilla extract, and the 1 teaspoon salt. Just get them all mixed up nicely.
- Pour that happy yeast mixture into the egg mixture and give it a quick stir to combine everything.
- Time for the flour! Gradually add in the 4 cups of all-purpose flour. Mix it in until a soft dough starts to form. It’ll be a little sticky, and that’s totally okay.
- Now for the arm workout (or stand mixer magic!). Turn the dough out onto a lightly floured surface. Knead it for about 8 to 10 minutes. You’re looking for a dough that’s smooth, soft, and elastic – it should spring back slowly when you poke it. If you’re using a stand mixer, use the dough hook and let it knead for about 6 to 8 minutes.
- Grease a clean bowl lightly with some oil or cooking spray. Pop your kneaded dough into the bowl, turning it to coat. Cover the bowl tightly with plastic wrap. Find a nice, warm spot in your kitchen – maybe near a sunny window or the oven (turned off, of course!) – and let it rise for 1 to 2 hours, or until it has doubled in size. It’s like magic happening right before your eyes!
- Once it’s puffed up, gently punch down the dough to release the air. Turn it out onto your floured surface again.
- Roll the dough out to about 1/2 inch thickness. This is the sweet spot for perfect doughnut height.
- Now for the fun part – cutting! Use a doughnut cutter if you have one. If not, just use a larger round cutter (like a biscuit cutter) for the outside and a smaller one (like a shot glass or bottle cap) for the hole. Save those little doughnut holes – they’re a bonus treat!
- Line some baking sheets with parchment paper. Carefully place your cut doughnuts onto the parchment. Cover them loosely with plastic wrap again. Let them have another little rest and rise for about 30 to 45 minutes. They’ll get a bit puffier and lighter.
- While they’re having their second rise, it’s time to get the oil ready. Pour about 3 inches of vegetable oil into a deep pot or Dutch oven. Heat it over medium-high heat until it reaches 360-375°F (180-190°C). A candy thermometer is super helpful here, or you can test it by dropping a tiny bit of dough in – it should sizzle immediately and float.
- Carefully lower about 2 or 3 doughnuts into the hot oil at a time. Don’t overcrowd the pot, or the oil temperature will drop, and you’ll get greasy doughnuts. Fry them for about 2-3 minutes per side, until they’re a beautiful golden brown. They cook fast, so keep an eye on them!
- Use a slotted spoon or spider strainer to gently lift the doughnuts out of the oil. Let them drain on a wire rack set over paper towels. This lets the excess oil drip off.
- Once they’re still warm (but not too hot to handle!), dip them into your prepared glaze or give them a nice dusting of powdered sugar. Enjoy your amazing homemade raised doughnuts!
Achieving the Perfect Dough Consistency
Getting that dough just right is the secret sauce to fluffy doughnuts. When you’re kneading, you’re developing gluten, which gives the dough structure. You want it to feel smooth and elastic, like a soft pillow. If it’s too sticky, add just a tiny bit more flour, like a tablespoon at a time. If it feels too stiff, a splash more milk can help. After kneading, cover that dough and let it rise in a warm spot. It needs a cozy place to double in size – think of it as giving the yeast time to work its magic and create all those lovely air pockets that make doughnuts light and airy.
Shaping and Second Rise for Your Raised Doughnuts
Once your dough has had its first big rise, gently punch it down. Rolling it out to about half an inch thick is key – too thin and they’ll be flat, too thick and they might not cook through evenly. Use your doughnut cutter to make those classic shapes. If you don’t have one, a larger round cutter for the outside and a smaller one for the hole works like a charm! Place them on your parchment-lined sheets and cover them loosely. This second rise is important because it makes them puff up again, giving you that beautiful, airy texture when they fry. Don’t skip this step!
Frying Your Beautiful Raised Doughnuts to Golden Perfection
Frying is where the real transformation happens! Keeping that oil temperature between 360-375°F is crucial. If it’s too low, they’ll soak up oil and be greasy. Too high, and they’ll burn on the outside before cooking inside. Fry them in batches, just a few at a time, so the oil temperature stays stable. You’ll see them puff up and turn a gorgeous golden brown. They usually only need 2-3 minutes per side. Once they’re perfectly golden, lift them out with a slotted spoon and let them drain on paper towels. This little step makes a big difference in getting that perfect finish!
Glazing Your Raised Doughnuts
The glaze is the crown jewel! It’s super simple: just whisk together about 1 cup of powdered sugar with 1-2 tablespoons of milk and a splash of vanilla extract until it’s smooth and pourable. If it’s too thick, add a tiny bit more milk; if it’s too thin, add more powdered sugar. While the doughnuts are still warm (but not piping hot!), dip the tops into the glaze, or just drizzle it over them. It sets up beautifully and makes them look and taste absolutely professional. It’s the perfect sweet finish!
Tips for Doughnut Success
You’ve got this! Making raised doughnuts is totally doable, but a few little tricks can make all the difference between good and absolutely *amazing*. First off, seriously, don’t rush the rising process. That yeast needs time to do its thing, creating all those airy pockets. Let it rise until it’s doubled, no matter how long it takes. Also, keeping that oil temperature steady is super important. If it drops too much when you add the doughnuts, they’ll get greasy. So, keep an eye on your thermometer and adjust the heat as needed. If you’re a bit nervous about frying, try this: drop a tiny scrap of the doughnut dough into the oil before you start with the real doughnuts. If it sizzles happily and floats, your oil is ready to go!
Equipment Needed for Raised Doughnuts
To make these fantastic raised doughnuts, you won’t need anything too fancy, but a few key tools really help. You’ll definitely want some large bowls for mixing and letting the dough rise. Of course, you’ll need your trusty measuring cups and spoons to get those ingredients just right. A rolling pin is essential for getting the dough to that perfect half-inch thickness. For cutting them out, a dedicated doughnut cutter is great, but honestly, two round cutters of different sizes work just as well. You’ll also need a couple of baking sheets lined with parchment paper to keep the doughnuts from sticking during their second rise. A slotted spoon or a spider strainer is a lifesaver for safely getting the doughnuts in and out of the hot oil. And, of course, you’ll need a deep pot or Dutch oven for frying. A stand mixer with a dough hook is super helpful but totally optional – your hands can do the job just fine!
Frequently Asked Questions About Raised Doughnuts
Got questions about making these amazing raised doughnuts? I totally get it! Here are a few things people often ask:
Q: Can I bake these doughnuts instead of frying them?
You *can*, but they won’t be quite the same. Baked doughnuts tend to be more cake-like. For that classic fluffy, slightly chewy texture that raised doughnuts are known for, frying is really the way to go. Trust me, the flavor difference is huge!
Q: How long do raised doughnuts stay fresh?
Honestly, they are best enjoyed the day they are made. That super fluffy texture starts to fade pretty quickly. If you have leftovers, store them in an airtight container at room temperature, and they should be okay for a day or two, but they won’t be as soft as when they were fresh.
Q: What can I use if I don’t have a doughnut cutter?
No worries at all! You can use two round cutters: a larger one (like a biscuit cutter, about 3 inches) for the outside, and a smaller one (like a shot glass or even a bottle cap, about 1 inch) for the center hole. The little dough scraps from the centers are the best part – fry those up too, they make perfect mini doughnut bites!
Q: Why are my doughnuts not fluffy?
This usually happens for a couple of reasons. Make sure your yeast was active (foamy!) before you mixed it in. Also, don’t skip the rising times! The dough needs that time to develop air pockets. And make sure you’re not overcrowding the pot when frying – this can drop the oil temperature and lead to denser doughnuts.
Q: Can I make the glaze ahead of time?
Yes, you absolutely can! Just whisk up your glaze ingredients and store it in an airtight container in the fridge. You might need to add a tiny splash of milk or water to loosen it up a bit when you’re ready to use it, especially if it thickens up too much.
Understanding the Nutritional Value of Raised Doughnuts
Just a friendly heads-up: all the nutritional info you see for these amazing raised doughnuts is going to be an estimate. It can totally change depending on the exact brands you use, how much oil they soak up, or even how generous you are with that glaze! Think of it as a ballpark figure to give you an idea.
Print
Glorious Raised Doughnuts: Pure Bliss
- Total Time: 3 hours 50 minutes
- Yield: 15-20 doughnuts 1x
- Diet: Vegetarian
Description
Fluffy and tender doughnuts made from a yeasted dough, deep-fried to a golden brown and often glazed.
Ingredients
- 2 1/4 teaspoons active dry yeast
- 1/2 cup warm milk
- 1/4 cup warm water
- 1/4 cup granulated sugar
- 2 large eggs, room temperature
- 1/4 cup unsalted butter, melted and cooled
- 1 teaspoon vanilla extract
- 1 teaspoon salt
- 4 cups all-purpose flour, plus more for dusting
- Vegetable oil, for frying
- Glaze ingredients (powdered sugar, milk, vanilla)
Instructions
- In a small bowl, combine yeast, warm milk, and warm water. Let stand for 5-10 minutes, or until foamy.
- In a large bowl or the bowl of a stand mixer, whisk together sugar, eggs, melted butter, vanilla extract, and salt.
- Add the yeast mixture to the egg mixture and stir to combine.
- Gradually add the flour, mixing until a soft dough forms.
- Knead the dough on a lightly floured surface for 8-10 minutes, or until smooth and elastic. If using a stand mixer, knead with the dough hook for 6-8 minutes.
- Place the dough in a lightly greased bowl, cover with plastic wrap, and let rise in a warm place for 1-2 hours, or until doubled in size.
- Punch down the dough and turn it out onto a lightly floured surface. Roll the dough to about 1/2 inch thickness.
- Cut out doughnuts using a doughnut cutter or two round cutters of different sizes.
- Place the cut doughnuts on parchment-lined baking sheets, cover loosely with plastic wrap, and let rise for another 30-45 minutes.
- Heat about 3 inches of vegetable oil in a deep pot or Dutch oven to 360-375°F (180-190°C).
- Carefully fry the doughnuts in batches, about 2-3 minutes per side, until golden brown.
- Remove doughnuts with a slotted spoon and drain on paper towels.
- Dip warm doughnuts in glaze or sprinkle with powdered sugar.
Notes
- Ensure your ingredients are at room temperature for best results.
- Do not overcrowd the pot when frying; this can lower the oil temperature.
- Adjust frying time based on doughnut thickness and desired color.
- Prep Time: 30 minutes
- Cook Time: 20 minutes
- Category: Dessert
- Method: Frying
- Cuisine: American
Nutrition
- Serving Size: 1 doughnut
- Calories: 250 kcal
- Sugar: 15 g
- Sodium: 150 mg
- Fat: 12 g
- Saturated Fat: 4 g
- Unsaturated Fat: 8 g
- Trans Fat: 0 g
- Carbohydrates: 30 g
- Fiber: 1 g
- Protein: 4 g
- Cholesterol: 50 mg
Keywords: raised doughnuts, yeasted doughnuts, fried doughnuts, homemade doughnuts, glazed doughnuts