
No heading needs to be written for the introduction. Oh my goodness, get ready to have your dessert world rocked! Seriously, if you’re looking for that perfect blend of creamy indulgence and grab-and-go convenience, then you absolutely HAVE to try my recipe for Cheesecake in a Jar. I remember the first time I stumbled upon this idea – I was prepping for a picnic, and I just couldn’t face carting a whole cheesecake in a flimsy box. Then it hit me: jars! It was a total game-changer. These little beauties are not just adorable; they’re incredibly easy to make, totally portable, and taste like a dream. Trust me, once you make these, you’ll wonder why you ever bothered with a whole traditional cheesecake again!
Why You’ll Love This Cheesecake in a Jar
Honestly, what’s not to love? This isn’t just dessert; it’s a little bit of magic in a jar! You get all the rich, creamy goodness of a classic cheesecake, but without any of the fuss. It’s perfect for parties, picnics, or just a quiet night in when you want something special. Plus, they look absolutely adorable, don’t they?
- Effortless elegance
- Perfectly portioned
- No-bake bliss
- Totally portable
The Allure of Cheesecake in a Jar
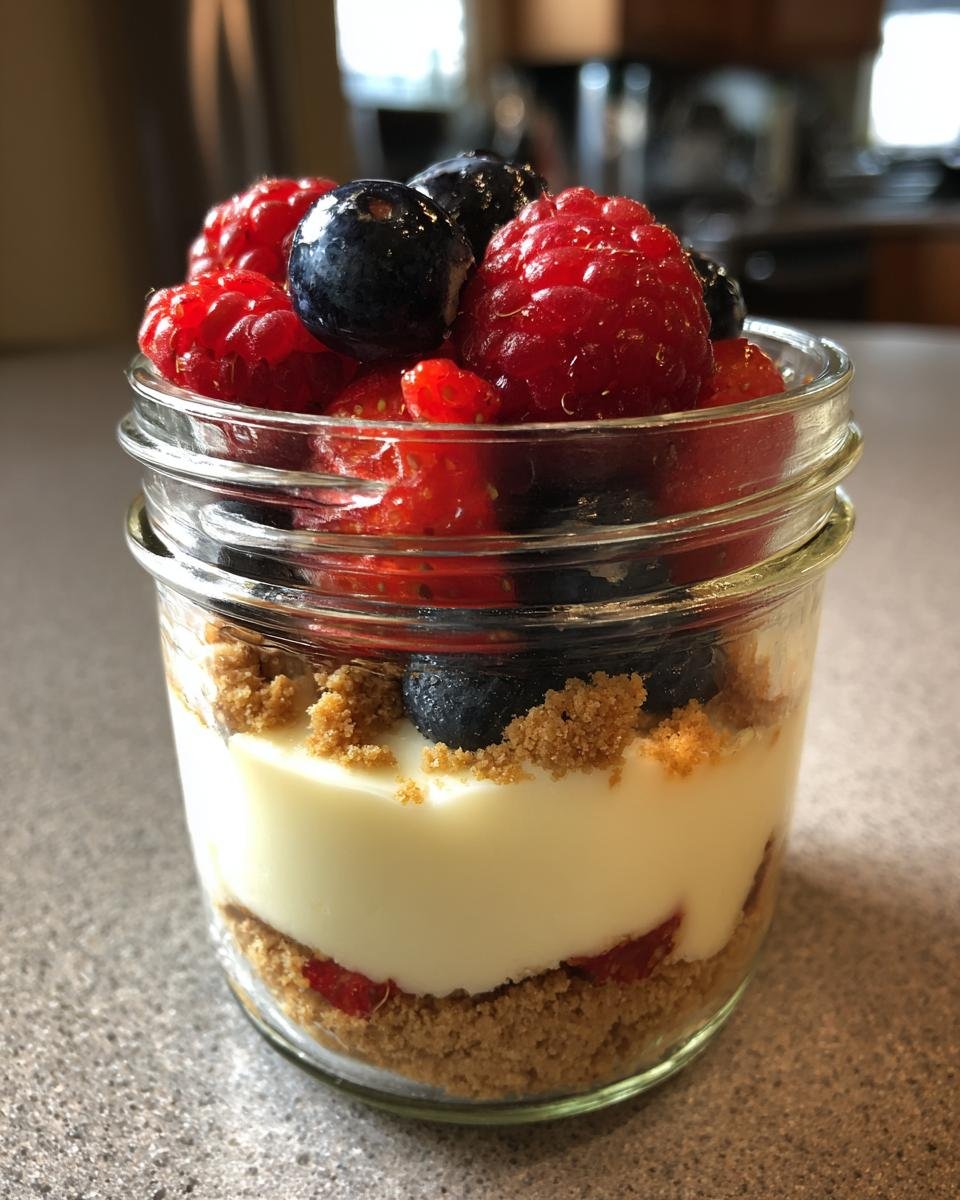
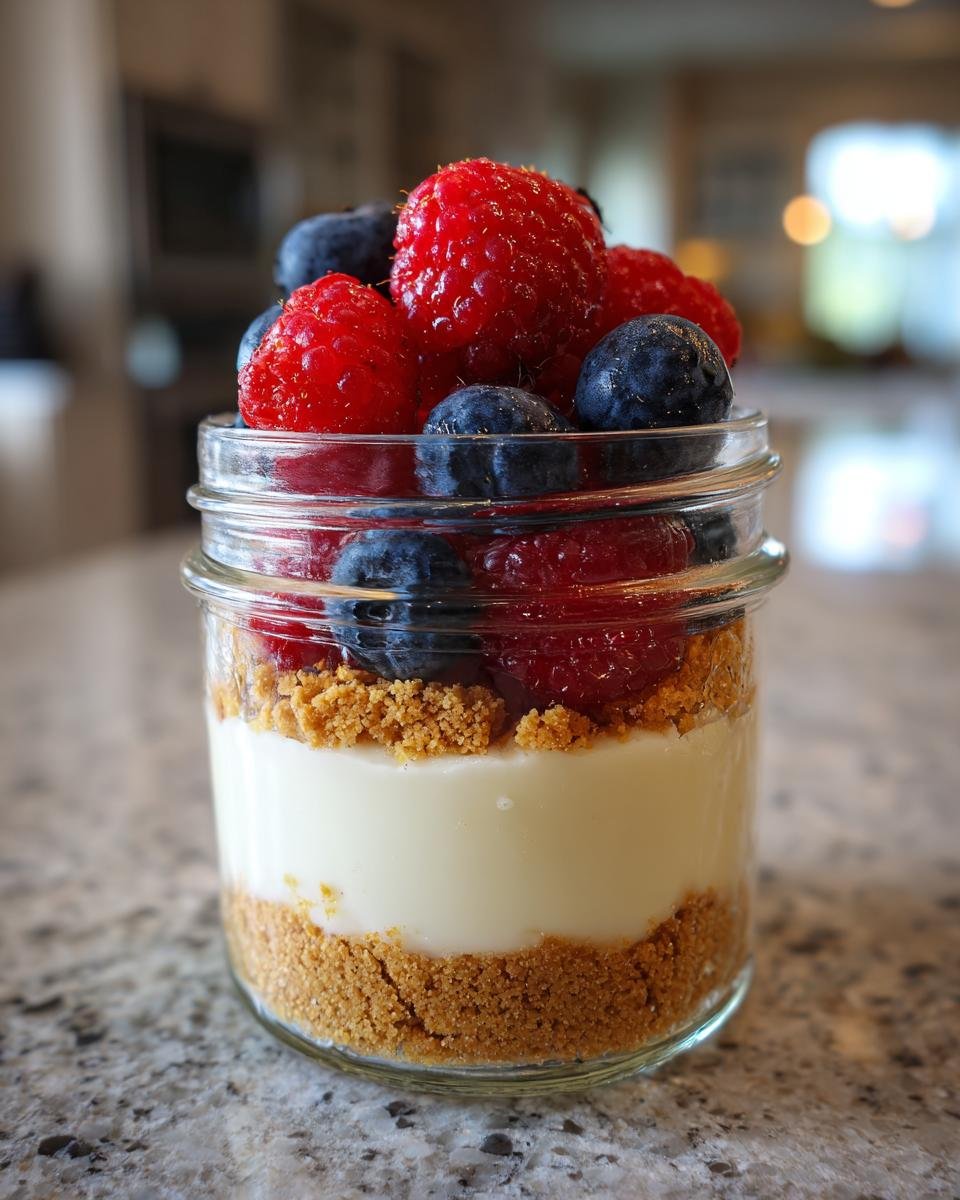
There’s just something so charming about these individual desserts. No more slicing and serving a messy cake – everyone gets their own perfect little portion! They’re super easy to transport, making them ideal for any gathering. And let’s be real, seeing those beautiful layers of graham cracker, creamy cheesecake, and bright berries through the glass? Pure dessert art!

Essential Ingredients for Your Perfect Cheesecake in a Jar
Alright, let’s talk ingredients! This is where the magic really starts to happen, and honestly, the better your ingredients, the better your cheesecake will be. You don’t need anything fancy, just good quality stuff. Here’s what you’ll want to gather:
- 1 1/2 cups graham cracker crumbs: I like to buy the pre-crushed ones to save time, but if you have whole crackers, just pop ’em in a food processor or a baggie and bash ’em with a rolling pin until they’re nice and fine!
- 1/4 cup granulated sugar: For that perfect touch of sweetness in the crust.
- 1/4 cup unsalted butter, melted: This really holds the crust together, so don’t skip it!
- 16 ounces cream cheese, softened: This is CRUCIAL. Make sure it’s full-fat and, please, let it sit out on the counter for at least an hour, or even two, until it’s really soft. No cold cream cheese, okay? It’ll just be lumpy.
- 1 cup powdered sugar: Also known as confectioners’ sugar. This dissolves beautifully into the creamy filling.
- 1 teaspoon vanilla extract: A good quality vanilla makes all the difference!
- 1/2 cup heavy cream, cold: This is going to get whipped up into glorious clouds of deliciousness. Make sure it’s super cold when you start!
- 1 cup mixed berries (strawberries, blueberries, raspberries): Fresh is best here, but frozen (thawed and drained) works in a pinch too.
Smart Substitutions for Your Cheesecake in a Jar
Now, I love the classic, but sometimes you gotta shake things up or just use what you have! For the crust, feel free to swap out graham crackers for crushed Oreos (yum!), Nilla wafers, or even digestive biscuits. As for the fruit, the sky’s the limit! Peaches, cherries, mango, or even a drizzle of caramel or chocolate sauce would be divine. Get creative!
Crafting Your Delicious Cheesecake in a Jar
Alright, now for the fun part – putting these beauties together! Don’t worry, it’s super straightforward, and since it’s no-bake, you won’t even need to turn on your oven. Just follow these steps, and you’ll have perfect little cheesecakes in no time. Grab your jars, and let’s get layering!
- Crust Time!: First things first, get that crust ready. In a medium-sized bowl, toss together your graham cracker crumbs, granulated sugar, and that lovely melted butter. Give it a good stir until everything is nicely combined and looks like wet sand. You want every crumb coated!
- Cheesecake Base Prep: Now, for the star of the show! In a large mixing bowl (or your stand mixer), beat your softened cream cheese until it’s super smooth and creamy. No lumps allowed here, so really give it some love.
- Sweeten Things Up: Next, add the powdered sugar and vanilla extract to your cream cheese mixture. Beat it again until everything is perfectly combined and looks light and fluffy. Scrape down the sides of the bowl a few times to make sure no dry bits are hiding.
- Whip the Cream: In a separate, *cold* bowl (this is important for good whipping!), pour in your cold heavy cream. Whip it with an electric mixer until stiff peaks form. You want it to hold its shape when you lift the beaters, but be careful not to over-whip it into butter!
- Fold with Love: This is a gentle step. Take your whipped cream and gently fold it into the cream cheese mixture. Use a spatula and fold it in slowly, trying not to deflate all that lovely air you just whipped in. You want it to be light and airy, not dense.
- Layer One: The Crust: Grab your jars! Spoon about 2 tablespoons of that graham cracker mixture into the bottom of each of your 6-8 half-pint jars. You can press it down gently with the back of a spoon if you like, but I usually just leave it loose for a more crumbly texture.
- Layer Two: The Cheesecake: Now for the good stuff! Spoon about 1/4 cup of your creamy cheesecake filling over the graham cracker layer. You can use a piping bag for a super neat look, but a spoon works just fine too.
- Layer Three: Berries!: Top that beautiful cheesecake layer with a generous amount of your mixed berries. I love how the vibrant colors pop against the white filling!
- Repeat!: Go back and repeat the layers – more graham cracker, more cheesecake filling, and then finish with a final flourish of berries on top. Make sure your top layer is nice and pretty!
- Chill Out: Pop those jars into the fridge for at least 2 hours. This chilling time is essential for the cheesecake to set up properly and for all those flavors to meld together. Trust me, it’s worth the wait!
Expert Tips for the Best Cheesecake in a Jar
Okay, here are my little secrets for making these cheesecakes absolutely perfect every single time. First, that cream cheese? Seriously, make sure it’s at room temperature. It makes all the difference for a smooth, lump-free filling. And for the whipped cream, a cold bowl and cold beaters are your best friends; it helps the cream whip up faster and hold its shape better. Don’t rush the chilling either – those two hours are non-negotiable for a properly set cheesecake. You’ve got this!
Frequently Asked Questions About Cheesecake in a Jar
Got questions? I bet you do! It’s totally normal when you’re trying a new recipe, even one as simple as this one. I get asked a lot of things about my no-bake cheesecake in a jar, so I’ve put together some of the most common questions and my best answers. Hopefully, this helps you feel super confident in making your own delicious little treats!
Can I Make Cheesecake in a Jar Ahead of Time?
Absolutely! That’s one of the best parts about these little guys. You can totally assemble them up to two days in advance. Just keep them covered and chilled in the fridge, and they’ll be perfect when you’re ready to serve.
How Long Does Cheesecake in a Jar Last?
Once assembled and chilled, your cheesecake in a jar will last beautifully in the refrigerator for up to 3-4 days. Just make sure those lids are on tight to keep them fresh!
Storing Your Heavenly Cheesecake in a Jar
Okay, so you’ve made these delicious little cheesecakes, and maybe, just maybe, you have a few left over. Lucky you! Storing them is super easy. Just make sure those jars have tight-fitting lids – that’s key to keeping them fresh. Pop them straight into the refrigerator. They’ll stay wonderfully creamy and delicious for about 3 to 4 days. I love that I can just grab one from the fridge whenever a craving hits!
Estimated Nutritional Information
I know some of you out there like to keep an eye on what you’re eating, and that’s totally understandable! While I’m not a nutritionist, I can give you an estimated breakdown for one serving (one jar) of this delicious Cheesecake in a Jar. Just remember, these are approximate values and can vary a bit depending on the exact brands you use and how generously you fill those jars. Think of it as a helpful guide rather than a precise measurement!
- Serving Size: 1 jar
- Calories: Approximately 450
- Sugar: Around 35g
- Sodium: About 250mg
- Fat: Roughly 30g
- Saturated Fat: Around 18g
- Unsaturated Fat: About 10g
- Trans Fat: Roughly 0.5g
- Carbohydrates: Approximately 40g
- Fiber: About 2g
- Protein: Around 6g
- Cholesterol: Roughly 90mg
Share Your Cheesecake in a Jar Creations
Well, there you have it! Your very own little jars of cheesecake heaven. I just know you’re going to love them. When you make these, I would absolutely LOVE to see your creations! Snap a photo and share it with me on social media, or even better, leave a comment below and tell me how they turned out. Did you try a fun new fruit? A different crust? Your feedback and ideas totally make my day, and it helps other home cooks too!
Print
Cheesecake in a Jar: Portable 2-Hour Bliss
- Total Time: 2 hours 20 minutes
- Yield: 6-8 servings 1x
- Diet: Vegetarian
Description
This recipe offers a delightful and convenient way to enjoy cheesecake. Layers of creamy cheesecake filling, crushed graham crackers, and fresh berries are assembled in individual jars, making them perfect for on-the-go treats or easy entertaining.
Ingredients
- 1 1/2 cups graham cracker crumbs
- 1/4 cup granulated sugar
- 1/4 cup unsalted butter, melted
- 16 ounces cream cheese, softened
- 1 cup powdered sugar
- 1 teaspoon vanilla extract
- 1/2 cup heavy cream, cold
- 1 cup mixed berries (strawberries, blueberries, raspberries)
Instructions
- In a medium bowl, combine graham cracker crumbs, granulated sugar, and melted butter. Mix well.
- In a large bowl, beat softened cream cheese until smooth.
- Add powdered sugar and vanilla extract to the cream cheese; beat until combined.
- In a separate cold bowl, whip heavy cream until stiff peaks form.
- Gently fold the whipped cream into the cream cheese mixture.
- Spoon about 2 tablespoons of the graham cracker mixture into the bottom of 6-8 half-pint jars.
- Spoon about 1/4 cup of the cheesecake filling over the graham cracker layer.
- Top with a layer of mixed berries.
- Repeat the layers, ending with berries on top.
- Refrigerate for at least 2 hours before serving.
Notes
- For best results, ensure cream cheese is at room temperature.
- Chill the mixing bowl and beaters before whipping heavy cream.
- You can prepare these jars up to 2 days in advance.
- Prep Time: 20 minutes
- Cook Time: 0 minutes
- Category: Dessert
- Method: No-Bake
- Cuisine: American
Nutrition
- Serving Size: 1 jar
- Calories: 450
- Sugar: 35g
- Sodium: 250mg
- Fat: 30g
- Saturated Fat: 18g
- Unsaturated Fat: 10g
- Trans Fat: 0.5g
- Carbohydrates: 40g
- Fiber: 2g
- Protein: 6g
- Cholesterol: 90mg
Keywords: cheesecake, jar dessert, no-bake, dessert, easy dessert, individual dessert