
There’s just something about a plate of warm, homemade pierogi that instantly takes me back to my grandma’s kitchen. The smell of the dough and the savory filling simmering away… it’s pure comfort, isn’t it? That’s why I’m so excited to share my go-to recipe for the most delicious and classic Polish Pierogi with you today. This isn’t just any recipe; it’s one I’ve honed over years, learning all the little tricks to get them just right. Trust me, once you taste these authentic, tender dumplings filled with creamy potato and cheese, you’ll never want store-bought again. Get ready to roll up your sleeves – we’re making some magic!

Why You’ll Love These Delicious and Classic Polish Pierogi
Oh, where do I even begin? These aren’t just dumplings; they’re little pockets of pure joy! You’re going to fall head over heels for these delicious and classic Polish Pierogi because they’re:
- Super comforting: Like a warm hug on a plate, perfect for any day.
- Incredibly versatile: The potato and cheese filling is a classic, but you can totally play around with it!
- So satisfying: They fill you up in the best way possible without feeling heavy.
- Easier than you think: Seriously, don’t be intimidated! I’ll walk you through every step.
The Comfort of Delicious and Classic Polish Pierogi
There’s a reason these pierogi are a staple in so many homes, including mine. They just have this way of bringing everyone together. It’s that perfect dish for a cozy family dinner, a holiday gathering, or just when you need a little taste of home.

Gathering Your Ingredients for Delicious and Classic Polish Pierogi
Alright, let’s talk ingredients! This part is super important because good pierogi start with good stuff. Don’t worry, nothing too fancy here, just your everyday pantry staples, but knowing exactly what you need and how to prep it makes all the difference. We’re aiming for delicious and classic Polish Pierogi, and that means paying a little attention to these details. Get everything ready before you start, and the whole process will be smooth sailing, I promise!
Essential Dough Ingredients for Delicious and Classic Polish Pierogi
For that perfectly tender, yet sturdy, pierogi dough, you’ll want to grab these:
- 2 cups all-purpose flour
- 1 large egg
- 1/2 cup warm water (not hot, just warm!)
- 1/2 teaspoon salt
- 2 tablespoons unsalted butter, melted
Hearty Filling Ingredients for Delicious and Classic Polish Pierogi
Now, for the star of the show – that creamy, savory potato and cheese filling. Make sure your potatoes are nice and soft for mashing!
- 3 medium potatoes, peeled and boiled until tender
- 1 cup farmer’s cheese or ricotta cheese (I love farmer’s cheese for that authentic taste!)
- 1/2 cup finely chopped onion, sautéed until golden and sweet
- Salt to taste
- Black pepper to taste
Step-by-Step Guide to Crafting Delicious and Classic Polish Pierogi
Alright, this is where the magic happens! Don’t be intimidated; making pierogi is a process, but each step is pretty straightforward. Just follow along, and you’ll be a pierogi master in no time. We’re going to create the most delicious and classic Polish Pierogi you’ve ever tasted, right in your own kitchen. Take your time, enjoy the process, and soon you’ll have a plate full of these comforting beauties!
Preparing the Perfect Dough for Delicious and Classic Polish Pierogi
First up, the dough! This is the foundation of our delicious and classic Polish Pierogi. In a big bowl, combine your flour, egg, warm water, salt, and melted butter. Mix it all up until it looks shaggy – that’s a good sign! Now, turn that dough out onto a lightly floured surface. Knead it for about 5-7 minutes. You want it to be smooth and elastic, almost like playdough. Once it’s ready, cover it with plastic wrap and let it rest for a good 30 minutes. This resting time is super important; it relaxes the gluten and makes the dough much easier to roll out.
Assembling the Savory Filling for Delicious and Classic Polish Pierogi
While your dough is resting, let’s get that amazing filling ready! Grab your perfectly boiled potatoes and mash them up in a bowl. You can use a fork, a potato masher, whatever works for you. Now, add in your farmer’s cheese (or ricotta, if that’s what you have), your sautéed onion, and a good pinch of salt and pepper. Mix it all together until it’s wonderfully combined and creamy. Give it a taste – does it need more salt? More pepper? Make it perfect for you!
Forming and Sealing Your Delicious and Classic Polish Pierogi
Okay, dough’s rested, filling’s ready – time to form those delicious and classic Polish Pierogi! Divide your dough into two portions. On a lightly floured surface, roll out one portion until it’s about 1/8-inch thick. Don’t go too thin, or it’ll tear! Use a 3-inch round cookie cutter or even a glass to cut out circles. Place a small teaspoon of filling right in the center of each circle. Now, fold the dough over to make a half-moon shape. Gently press the edges together, then use a fork to crimp them sealed. This not only looks pretty but also makes sure your filling stays put! Repeat with the rest of your dough and filling.
Cooking and Serving Your Delicious and Classic Polish Pierogi
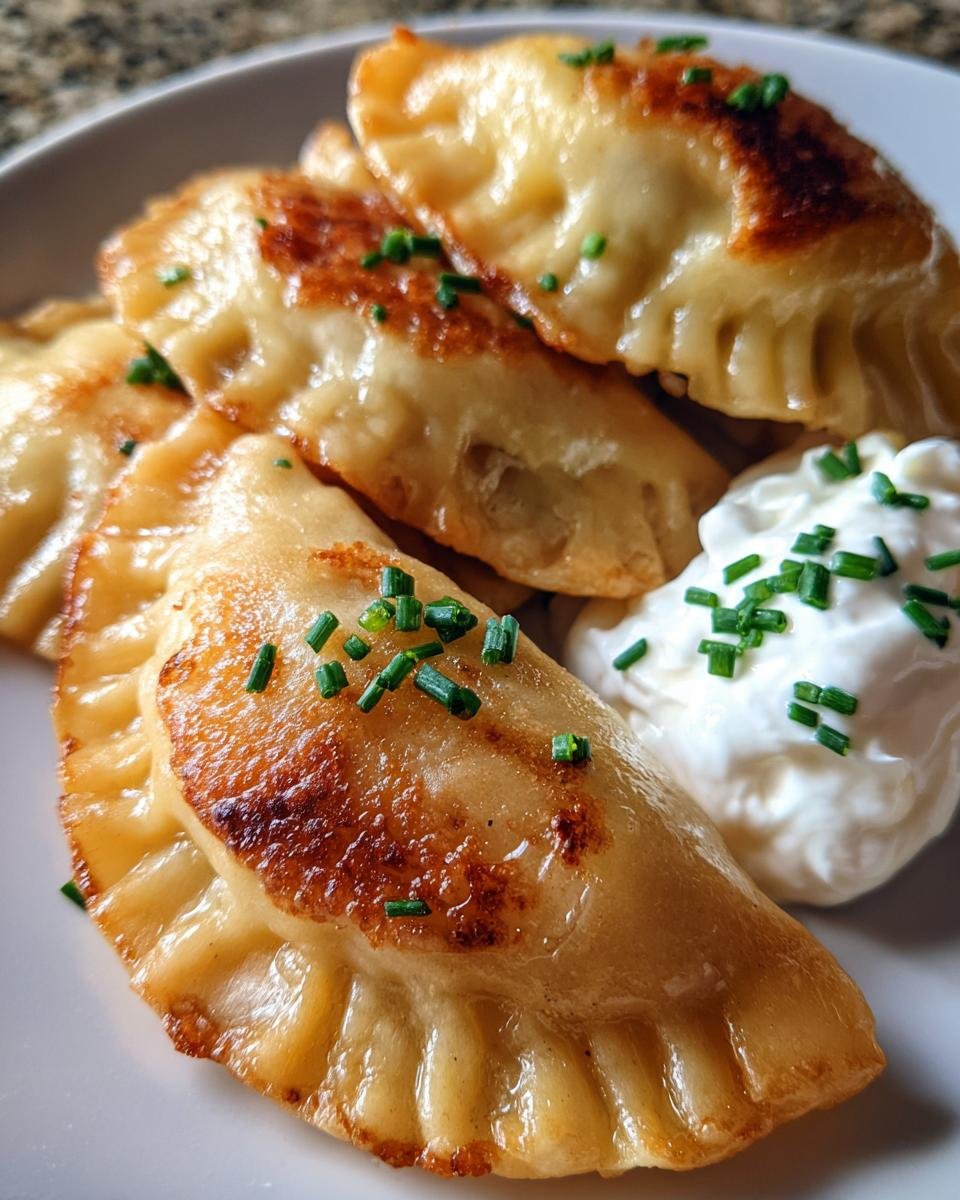
Almost there! Bring a large pot of salted water to a rolling boil. Carefully, and I mean carefully, drop your delicious and classic Polish Pierogi into the boiling water, just a few at a time so you don’t overcrowd the pot. They’ll sink at first, but don’t worry! Cook them for about 3-5 minutes, or until they float to the top and look cooked through. Use a slotted spoon to scoop them out. Serve them hot, with a generous dollop of sour cream (it’s a must!) and a sprinkle of fresh chives. Pure comfort on a plate!

Expert Tips for Perfecting Delicious and Classic Polish Pierogi
You’ve made it this far, and your kitchen probably smells amazing! Now, let me share a few of my go-to tips and tricks that really take these delicious and classic Polish Pierogi from great to absolutely unforgettable. Trust me, these little nuggets of wisdom will help you avoid common pitfalls and make you feel like a true pierogi pro. Whether it’s adding extra flavor or making a big batch for later, I’ve got you covered!
Enhancing Flavor with Delicious and Classic Polish Pierogi
While boiled pierogi are wonderfully tender, if you want to take them to the next level, pan-frying is your best friend! After boiling, heat a little butter (or even some bacon fat, if you’re feeling adventurous!) in a skillet. Fry the pierogi until they’re golden brown and slightly crispy on both sides. This adds an amazing nutty flavor and a lovely texture contrast. So good!
Freezing and Storing Delicious and Classic Polish Pierogi
Making a big batch of delicious and classic Polish Pierogi is smart! You can totally freeze them for later. If you’re freezing them raw, just place them in a single layer on a lightly floured baking sheet and pop them in the freezer until they’re solid. Then, transfer them to a freezer-safe bag. If you’ve already boiled them, let them cool completely, then freeze them in a single layer before bagging. They’ll keep for months, ready for a quick and comforting meal!
Frequently Asked Questions About Delicious and Classic Polish Pierogi
Got questions about making your delicious and classic Polish Pierogi? You’re not alone! These are some of the most common things people ask me. I hope these answers help you feel even more confident in your pierogi-making journey!
Can I Make Delicious and Classic Polish Pierogi Ahead of Time?
Absolutely, yes! You can make the filling and dough a day ahead and store them in the fridge. As for the assembled pierogi, you can boil them and then pan-fry later, or even freeze them raw or cooked. They’re super convenient for meal prep!
What are Some Variations for Delicious and Classic Polish Pierogi?
Oh, the possibilities are endless! While potato and cheese pierogi are classic, you can get creative. Try a savory sauerkraut and mushroom filling, or a sweet one with fresh fruit like blueberries or cherries (just be sure to add a little sugar!). Some folks even love a meat-filled pierogi. Don’t be afraid to experiment!
How Do I Prevent My Delicious and Classic Polish Pierogi From Sticking?
The key is to use a large pot with plenty of salted boiling water. Don’t overcrowd the pot; cook them in batches if needed. Give them a gentle stir right after dropping them in to prevent sticking to the bottom or to each other. A little oil in the water can also help, but mostly it’s about space and movement!
Estimated Nutritional Information for Delicious and Classic Polish Pierogi
Just a little heads-up about the numbers! While I’ve included estimated nutritional information for these delicious and classic Polish Pierogi, please remember these are just that – estimates. The actual values can totally vary depending on the specific brands of ingredients you use, how much filling you put in each pierogi, and even the size you cut them. It’s a good general guide, but not set in stone, okay?
Share Your Delicious and Classic Polish Pierogi Experience
Well, there you have it! Your very own batch of delicious and classic Polish Pierogi. I really hope you loved making (and eating!) them as much as I do. Please, please, please tell me all about it! Leave a comment below and let me know how they turned out for you. Did you try a different filling? What’s your favorite part? Don’t forget to rate the recipe and share your pierogi creations on social media. I can’t wait to see them!
Print
Delicious and Classic Polish Pierogi: One Bite Changes Everything
- Total Time: 1 hour 5 minutes
- Yield: About 30 pierogi 1x
- Diet: Vegetarian
Description
Homemade Polish pierogi with a savory potato and cheese filling, perfect for a comforting meal.
Ingredients
- 2 cups all-purpose flour
- 1 large egg
- 1/2 cup warm water
- 1/2 teaspoon salt
- 2 tablespoons unsalted butter, melted
- 3 medium potatoes, peeled and boiled
- 1 cup farmer’s cheese or ricotta cheese
- 1/2 cup finely chopped onion, sautéed
- Salt to taste
- Black pepper to taste
- Sour cream for serving
- Chopped fresh chives for garnish
Instructions
- To make the dough, combine flour, egg, warm water, salt, and melted butter in a large bowl. Mix until a shaggy dough forms.
- Turn the dough out onto a lightly floured surface and knead for 5-7 minutes until smooth and elastic. Cover with plastic wrap and let rest for 30 minutes.
- For the filling, mash the boiled potatoes in a bowl. Add the farmer’s cheese, sautéed onion, salt, and pepper. Mix until well combined.
- Divide the dough into two portions. On a lightly floured surface, roll out one portion of dough to about 1/8-inch thickness.
- Cut out circles using a 3-inch round cookie cutter or glass.
- Place a teaspoon of filling in the center of each circle. Fold the dough over to form a half-moon shape and crimp the edges with a fork to seal.
- Bring a large pot of salted water to a boil. Carefully drop the pierogi into the boiling water, a few at a time.
- Cook for 3-5 minutes, or until they float to the top and are cooked through. Remove with a slotted spoon.
- Serve hot with a dollop of sour cream and a sprinkle of fresh chives.
Notes
- You can pan-fry the boiled pierogi in butter until golden brown for extra flavor.
- Pierogi can be frozen before or after boiling. If freezing raw, place on a floured baking sheet and freeze until solid, then transfer to a freezer bag.
- Experiment with different fillings like sauerkraut and mushroom, or sweet fruit fillings.
- Prep Time: 45 minutes
- Cook Time: 20 minutes
- Category: Main Course
- Method: Boiling, Pan-frying (optional)
- Cuisine: Polish
Nutrition
- Serving Size: 5 pierogi
- Calories: 350
- Sugar: 5g
- Sodium: 300mg
- Fat: 12g
- Saturated Fat: 7g
- Unsaturated Fat: 4g
- Trans Fat: 0g
- Carbohydrates: 45g
- Fiber: 4g
- Protein: 15g
- Cholesterol: 50mg
Keywords: pierogi, Polish, potato and cheese, classic, comfort food