
Alright, gather ’round! If you’re anything like me, the best part about being outdoors isn’t just the fresh air and starry skies, it’s the food! And let’s be honest, no campfire is complete without a sweet treat. Forget fiddly s’mores that fall apart and leave you sticky up to your elbows. Today, we’re talking about Campfire Cones! These little bundles of joy are seriously the easiest, most fun campfire dessert you can make. Just grab some waffle cones, your favorite goodies, wrap ’em up, and toss ’em in the fire. Seriously, it’s that simple. The first time I made these, my nephews thought I was a magician. They’re perfect for camping trips, backyard bonfires, or even just grilling in the park. Trust me, once you try Campfire Cones, you’ll never go back!
Why You’ll Love These Campfire Cones
Okay, so why are these Campfire Cones my absolute go-to when we’re gathered around the fire? It’s simple:
- They’re ridiculously easy – seriously, even the kids can help!
- Way less messy than traditional s’mores (score!).
- You can stuff ’em with pretty much *anything* you like.
- They’re just plain fun to make and eat outdoors.
- Warm, gooey goodness in a cone – what’s not to love?!
Essential Ingredients for Campfire Cones
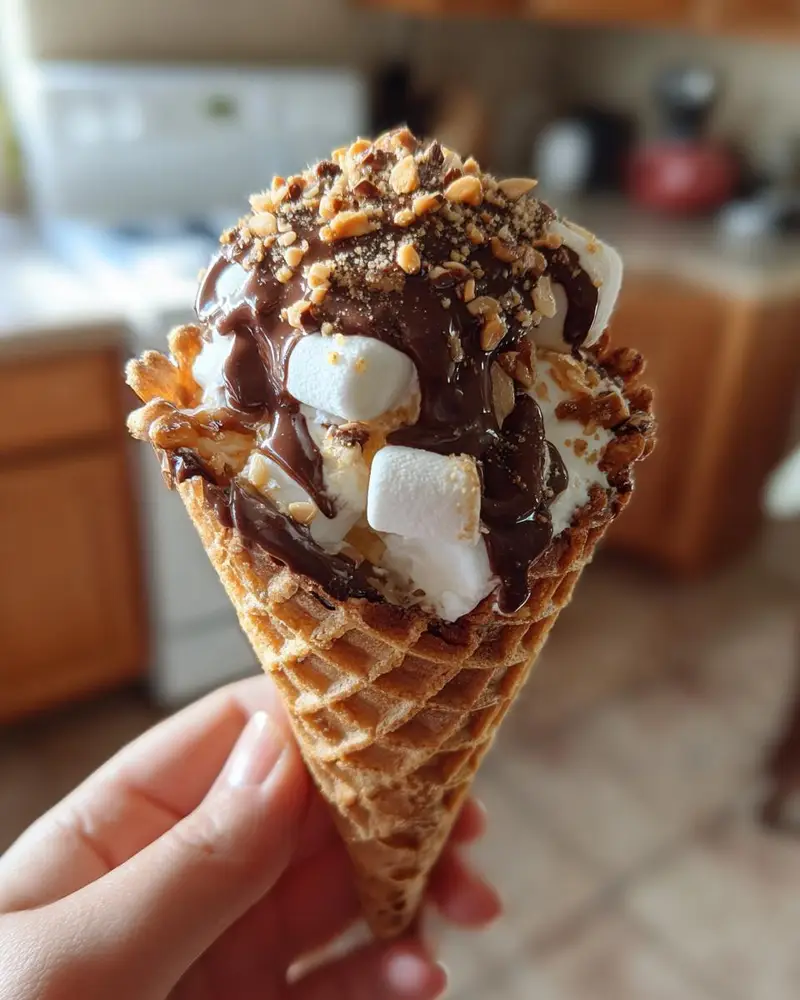
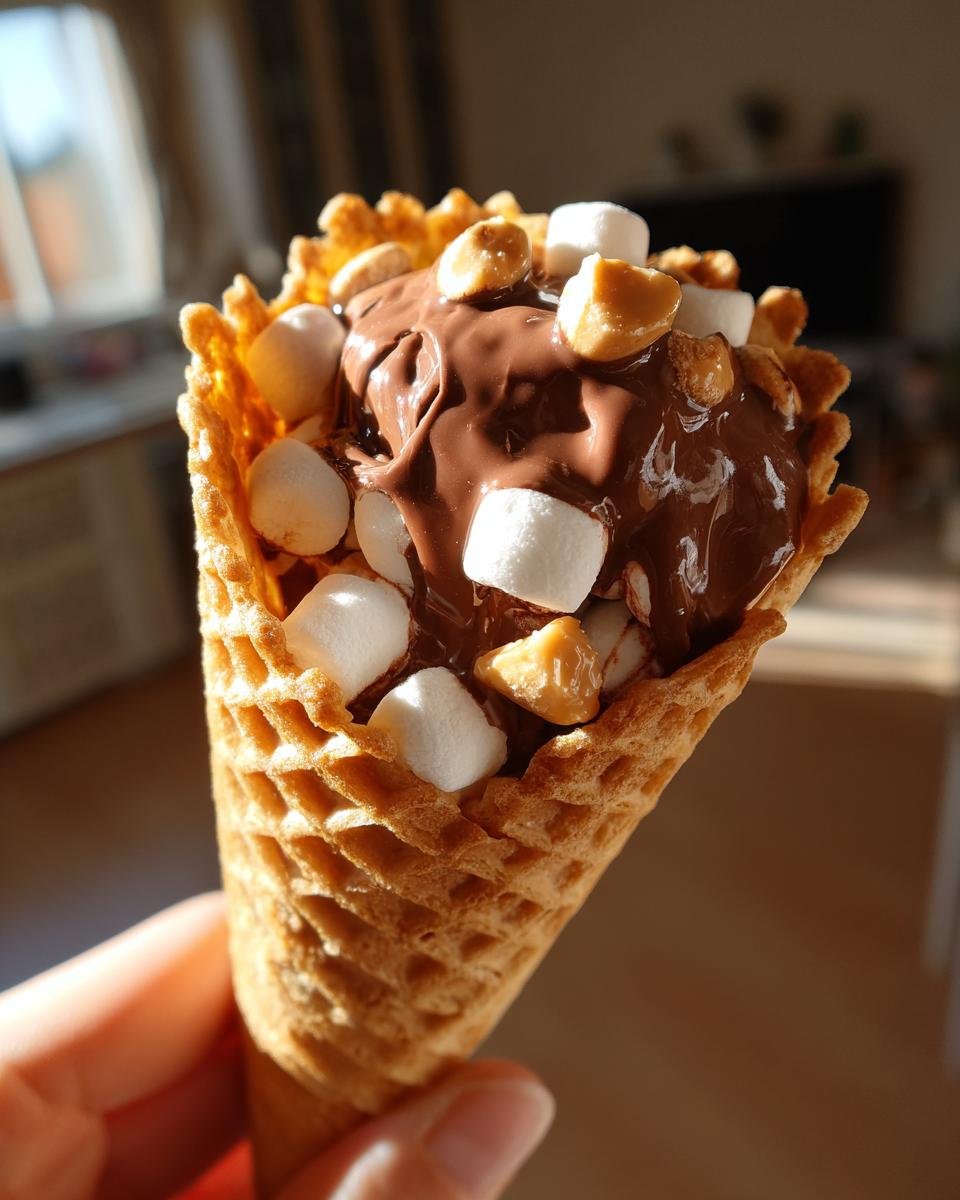
Alright, let’s talk about what you need to make these little pockets of deliciousness. The beauty of Campfire Cones is that the ingredient list is short and sweet! You’ll want to grab four large waffle cones – the bigger ones are easier to stuff and hold up better over the heat. Then, it’s all about the fillings! I like a classic mix of about a cup of mini marshmallows, half a cup of chocolate chips (milk chocolate is my go-to!), and about a quarter cup of peanut butter chips for that salty-sweet vibe. And don’t forget a couple of tablespoons of melted butter – it helps everything get nice and gooey inside. Oh, and of course, plenty of aluminum foil for wrapping!

Step-by-Step Guide to Making Campfire Cones
Okay, now for the fun part – actually putting these together! It’s super easy, I promise. Just follow these simple steps, and you’ll have warm, gooey Campfire Cones in no time. Make sure your campfire or grill is ready to go with medium heat before you start assembling everything.
Preparing the Campfire Cones Filling
First things first, let’s get that yummy filling ready. Grab a small bowl and toss in your mini marshmallows, chocolate chips, and peanut butter chips. Give it a quick stir to mix everything up. Then, drizzle that melted butter right over the top and stir again until everything looks nicely coated. This butter step is key for that perfect melted gooeyness!
Filling and Wrapping Your Campfire Cones
Now for the cones! Carefully spoon your delicious filling mixture into each waffle cone. Don’t be shy, pack it in there, but leave a little room at the top so it doesn’t spill out when it melts. Once they’re filled, tear off a generous square of aluminum foil for each cone. You want enough to wrap it completely and then some. Place the cone in the center of the foil and wrap it up tightly, twisting the top to seal it like a little present. Make sure there are no gaps where the melted goodness can escape!
Cooking Your Campfire Cones Over the Fire
This is where the magic happens! Once your cones are all wrapped up, it’s time to cook ’em. You can place them directly in the low embers of your campfire (just the glowing coals, not the flames!) or right on the grill grate over medium heat. Cook them for about 5 to 7 minutes. You’ll need to turn them every couple of minutes so they cook evenly. You’ll know they’re ready when you can feel that the chocolate and marshmallows are all melty inside. Be super careful when you take them off the heat – they will be hot! Use tongs or heat-resistant gloves. Let them cool for just a minute or two before you unwrap and dig in!
Tips for Perfect Campfire Cones
Okay, so making Campfire Cones is super easy, but a few little tricks can make them absolutely perfect every single time. First off, pay attention to your fire. You want nice, glowing embers, not roaring flames if you’re putting them directly in the fire. Flames will just burn the cone! If you’re using a grill, keep it over medium heat. Also, don’t overfill the cones, or you’ll have a gooey mess escaping the foil. Make sure that foil wrap is nice and tight! And seriously, trust me on this – use tongs to take them off the fire. Those things get HOT! Give them a minute to cool down before unwrapping so you don’t burn your fingers (or your tongue!).
Customizing Your Campfire Cones
One of the best things about Campfire Cones? You can totally make them your own! My basic mix is a great starting point, but don’t stop there. Swap out the chocolate chips for white chocolate or even butterscotch chips. Add some chopped nuts like pecans or walnuts for a little crunch. Got some leftover Halloween candy? Chop up mini peanut butter cups, caramel pieces, or even gummy bears (though those can get a little weirdly melty!). Diced fresh fruit like strawberries or bananas can add a lovely freshness, but be aware they might make things a bit wetter. The possibilities are pretty much endless, so get creative and stuff those cones with whatever makes your taste buds happy!
Frequently Asked Questions About Campfire Cones
Got questions about these glorious Campfire Cones? You’re not alone! Here are a few things folks often ask me:
Q: Can I make Campfire Cones ahead of time?
Absolutely! You can assemble and wrap the cones a few hours before you plan to cook them. Just keep them somewhere cool so the chocolate doesn’t start melting before they hit the fire. They’re perfect for prepping before a camping trip or bonfire!
Q: What kind of chocolate works best?
Honestly, any kind of chocolate chips you love will work! Milk chocolate gives you that classic sweet gooeyness, but semi-sweet or dark chocolate are fantastic too if you prefer a richer flavor. Chocolate chunks work great too, they just might take a tiny bit longer to fully melt.
Q: Can I use sugar cones instead of waffle cones?
You can, but I really recommend sticking with waffle cones if you can. Sugar cones are thinner and tend to get soft and sometimes even a little soggy when they heat up. Waffle cones are sturdier and hold up to the heat much better, giving you that nice crunchy shell around the melted goodness inside.
Q: How do I know when they’re done without opening the foil?
Give the wrapped cone a gentle squeeze (carefully, they’re hot!). You should feel that everything inside is soft and melted. If it still feels a little hard or chunky, give it another minute or two over the heat.
Estimated Nutritional Information for Campfire Cones
Now, I’m not a nutritionist, and honestly, when I’m sitting around a campfire with one of these in my hand, the last thing I’m thinking about is calories! But I know some folks like to have an idea, so here’s a rough estimate of what you’re looking at per Campfire Cone. Remember, this is just an *estimate*! It’ll totally change depending on exactly what you stuff in there and the specific brands you use. Think of it as a ballpark figure, not a hard-and-fast rule.
- Serving Size: 1 cone
- Calories: Around 350
- Sugar: About 30g
- Sodium: Roughly 50mg
- Fat: Approximately 18g
- Saturated Fat: Around 9g
- Unsaturated Fat: About 7g
- Trans Fat: 0g (Yay!)
- Carbohydrates: Roughly 45g
- Fiber: About 2g
- Protein: Around 5g
- Cholesterol: Approximately 10mg
So yeah, definitely a treat! But totally worth it for those gooey, chocolatey campfire vibes, right?
Enjoy Your Campfire Cones
Seriously, that’s it! See how easy that was? Now go forth and make these glorious Campfire Cones! They are such a hit every single time. Give them a try on your next outdoor adventure, or even just over your grill in the backyard. I promise you, they won’t disappoint. Let me know how yours turn out in the comments below, or better yet, tell me what fun fillings you used! Happy camping (and eating)!
Print
Campfire Cones: The 4-min Magical Treat
- Total Time: 17 minutes
- Yield: 4 cones 1x
- Diet: Vegetarian
Description
Campfire cones are a fun and easy dessert you can make over a campfire. They are waffle cones filled with your favorite treats and chocolate chips.
Ingredients
- 4 large waffle cones
- 1 cup mini marshmallows
- 1/2 cup chocolate chips
- 1/4 cup peanut butter chips
- 2 tablespoons butter, melted
- Aluminum foil
Instructions
- Preheat your campfire or grill to medium heat.
- In a small bowl, mix together the mini marshmallows, chocolate chips, and peanut butter chips.
- Drizzle the melted butter over the mixture and stir to combine.
- Carefully fill each waffle cone with the mixture.
- Wrap each filled cone tightly in aluminum foil.
- Place the wrapped cones directly in the embers of your campfire or on the grill grate.
- Cook for 5-7 minutes, turning occasionally, until the chocolate and marshmallows are melted.
- Carefully remove the cones from the heat and let them cool slightly before unwrapping and enjoying.
Notes
- You can customize the fillings with your favorite candies, fruits, or nuts.
- Be careful when handling the hot cones.
- These are best enjoyed warm.
- Prep Time: 10 minutes
- Cook Time: 7 minutes
- Category: Dessert
- Method: Grilling
- Cuisine: American
Nutrition
- Serving Size: 1 cone
- Calories: 350
- Sugar: 30g
- Sodium: 50mg
- Fat: 18g
- Saturated Fat: 9g
- Unsaturated Fat: 7g
- Trans Fat: 0g
- Carbohydrates: 45g
- Fiber: 2g
- Protein: 5g
- Cholesterol: 10mg
Keywords: campfire dessert, s'mores cones, waffle cone dessert, grilled dessert