
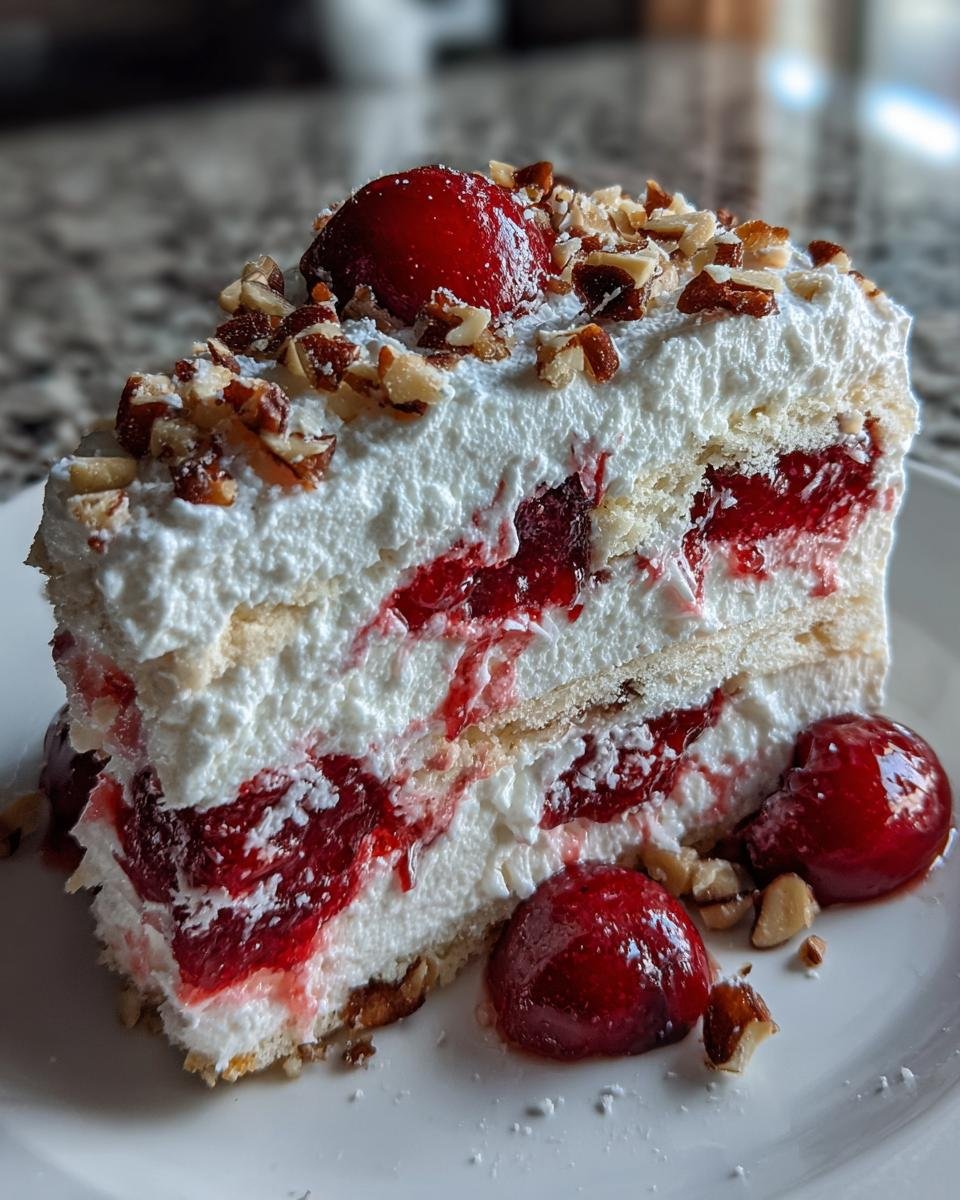
Okay, listen up! If you need a dessert that’s ridiculously easy, totally delicious, and disappears faster than you can say “seconds,” you HAVE to make Cherries in the Snow. Seriously, this is one of those recipes that feels like pure magic because it’s no-bake, but everyone thinks you slaved away in the kitchen. It’s creamy, it’s fruity, it’s just… perfect.
I first stumbled upon this gem years ago when I needed something quick for a potluck. I was running late (story of my life!) and remembered seeing a recipe for something called Cherries in the Snow. It sounded intriguing, and the ingredient list looked like things I actually had on hand. I whipped it up in about 15 minutes, shoved it in the fridge, and hoped for the best.
Well, let me tell you, it was a HUGE hit! People kept asking for the recipe. They couldn’t believe it was so simple. Since then, it’s become my go-to for last-minute gatherings, busy weeknights when I need a sweet treat, and just when I want something comforting without turning on the oven. As someone who loves making crowd-pleasing desserts that don’t require a ton of fuss, this one is definitely in my Hall of Fame. Get ready to fall in love!

Why You’ll Love This Cherries in the Snow Recipe
Seriously, what’s not to love about this dessert? It hits all the sweet spots! Here’s why I keep coming back to this Cherries in the Snow recipe:
- It’s ridiculously easy. Like, “mix a few things in a bowl” easy. No fancy techniques here!
- No baking required! Perfect for hot summer days or when your oven is already full.
- The flavor is amazing. That creamy, tangy base with the sweet cherries? Chef’s kiss!
- It’s a total crowd-pleaser. Kids and adults alike devour this stuff. Be prepared for recipe requests!
- You likely have the ingredients already. Pantry staples for the win!
Trust me, this recipe is a keeper for those moments you need something impressive without breaking a sweat.
Ingredients for Perfect Cherries in the Snow
Alright, let’s talk ingredients! You won’t need anything wild or hard to find for this Cherries in the Snow. It’s all pretty standard stuff you can grab at any grocery store. Here’s what you’ll need to make this magical no-bake dessert:
- One can (that’s 21 ounces) of your favorite cherry pie filling. Go for a good quality one, it really makes a difference!
- One can (the 14-ounce size) of sweetened condensed milk. This is where a lot of the creamy sweetness comes from.
- One container (the 8-ounce one) of frozen whipped topping. Make sure it’s thawed completely before you start!
- One package (a standard 3-ounce block) of cream cheese. Absolutely make sure this is softened – it’s crucial for a smooth base.
- One teaspoon of vanilla extract. Just a splash to bring everything together.
- And totally optional, but I love it: about half a cup of chopped nuts. Walnuts or pecans are great here!
See? Simple! Nothing complicated, just pantry heroes working together.
Step-by-Step Guide to Making Cherries in the Snow
Okay, now for the fun part – putting it all together! This is where the magic happens with minimal effort. You’re going to be amazed at how quickly this comes together. Just follow these simple steps, and you’ll have a stunning dessert ready to chill.
Preparing the Creamy Base for Cherries in the Snow
First things first, let’s get that dreamy, creamy layer sorted. You absolutely *must* start with softened cream cheese. Seriously, don’t skip this! If it’s cold, you’ll end up with lumps, and nobody wants lumpy Cherries in the Snow. Pop it in a large bowl and beat it with an electric mixer until it’s nice and fluffy. It should look smooth and easy to spread.
Next, slowly pour in the sweetened condensed milk while you keep mixing. Do this gradually, letting it incorporate fully before adding more. You want this mixture to be super smooth and glossy. Once that’s all combined, stir in that little teaspoon of vanilla extract. Just a quick mix to get that lovely flavor distributed. Finally, gently fold in your thawed whipped topping. Be gentle here! You want to keep that airy texture, so use a spatula and fold it in until it’s just combined, no vigorous beating needed.
Layering Your Cherries in the Snow Dessert
Time to build this beauty! Grab your 9×13 inch dish. I love using a clear one so you can see those gorgeous layers! Spoon about half of your creamy mixture into the bottom of the dish. Use a spatula or the back of a spoon to spread it out evenly. It doesn’t have to be perfect, just a nice base layer.
Now for the star: the cherry pie filling! Spoon the entire can of cherry pie filling right over that first layer of cream cheese mixture. Spread it out gently, covering the creamy layer completely. Don’t stir it in! We want those distinct layers.
Finally, take the remaining creamy mixture and carefully dollop it over the cherry filling. Then, gently spread it out to cover the cherries. Take your time here so you don’t drag a bunch of cherries into the top layer. If you’re adding nuts, sprinkle them over the top now! They add a nice little crunch.
Chilling Your Delicious Cherries in the Snow
This is arguably the hardest part – waiting! Once your dessert is assembled, cover the dish tightly. Plastic wrap works great. Pop it in the fridge to chill. It needs at least 4 hours to set up properly, but honestly? Overnight is even better if you can manage it. This chilling time is crucial! It lets all those flavors meld together and gives you that perfect, scoopable texture. Don’t rush it, I promise the wait is worth it!
Tips for the Best Cherries in the Snow
Making Cherries in the Snow is already super easy, but a few little tricks can take it from great to absolutely amazing! Here are my go-to tips for making sure your dessert is the best it can be:
- Soften that cream cheese! I know I said it before, but it’s *that* important. Leave it out on the counter for an hour or two, or give it a quick zap in the microwave (like 10-15 seconds!) until it’s nice and soft.
- Chill, chill, chill! Seriously, don’t skimp on the fridge time. That 4 hours is a minimum, and letting it sit overnight really lets those flavors deepen and the dessert set up perfectly. It makes a huge difference in texture.
- Presentation matters (a little!). If you’re feeling fancy, you can save a few cherries from the filling and place them on top of the final creamy layer before chilling. A sprinkle of extra nuts or even some grated chocolate can make it look extra special!
- Use good quality ingredients. Since there are only a few things in this, the quality of your pie filling and whipped topping really shines through.
Follow these simple tips, and you’ll have a dessert that everyone will rave about!
Variations for Your Cherries in the Snow
One of the best things about this Cherries in the Snow recipe is how easy it is to play with! You can totally switch things up based on what you have or what you’re craving. Don’t feel boxed in by just cherries!
Try swapping out the cherry pie filling for another flavor. Blueberry, strawberry, or even peach pie filling would be delicious! For an extra layer of texture and flavor, you could press a layer of crushed graham cracker or shortbread cookies into the bottom of the dish before adding the first creamy layer. And if you’re not a fan of nuts, just leave them off, or try toasted coconut flakes instead!
Serving and Storing Cherries in the Snow
Okay, you’ve patiently waited, and now it’s time to enjoy your masterpiece! Serving Cherries in the Snow is as easy as making it. Just grab a spoon and dish it out! It looks beautiful on a plate, showing off those pretty layers. If you added nuts, you get a lovely little crunch in every bite.
For leftovers (if there are any!), just keep the dish covered tightly in the refrigerator. It usually stays good for about 3-4 days. The texture might soften a tiny bit over time, but the flavor is still spot on. Sadly, this isn’t a dessert that freezes well because the texture of the whipped topping changes when it thaws, so stick to keeping it in the fridge!
Frequently Asked Questions About Cherries in the Snow
Okay, so you’ve got questions about this magical Cherries in the Snow, and I’ve got answers! Here are a few common things people ask:
Q: Can I use fresh cherries instead of pie filling?
A: While fresh cherries are delicious, this recipe specifically relies on the thickness and sweetness of the canned pie filling. Using fresh cherries would change the texture and sweetness balance quite a bit, and you wouldn’t get that distinct cherry layer. So, for this recipe, stick with the pie filling!
Q: How long does Cherries in the Snow last in the refrigerator?
A: When covered tightly, your Cherries in the Snow should last happily in the fridge for about 3 to 4 days. The texture might soften slightly as the days go on, but it will still be perfectly delicious.
Q: Can I freeze Cherries in the Snow?
A: Unfortunately, freezing isn’t the best option for this dessert. The whipped topping and cream cheese base can change texture when frozen and thawed, becoming a bit watery or separated. It’s definitely best enjoyed fresh from the fridge!
Q: Do I have to use nuts?
A: Absolutely not! The nuts are completely optional. If you have allergies or just don’t like them, feel free to leave them out. The dessert is still fantastic without them.
Hopefully, that clears up any lingering questions! Now go make some!
Estimated Nutritional Information
Just a quick heads-up about the nutritional info I’ve included for this Cherries in the Snow. Think of it as a friendly estimate! The actual numbers can bounce around a bit depending on the exact brands you use for things like the cherry pie filling or whipped topping. Ingredients can vary, you know? So, while it gives you a general idea, it’s not set in stone. Just something to keep in mind as you whip up this deliciousness!
Enjoy Your Homemade Cherries in the Snow
So there you have it! My super simple, incredibly delicious recipe for Cherries in the Snow. I really hope you give it a try. It’s truly one of those desserts that just brings smiles to faces without any fuss. If you make it, please pretty please let me know how it turns out! Snap a picture and tag me, or better yet, leave a comment below and tell me what you thought. Did you add nuts? Try a different filling? I can’t wait to hear about your Cherries in the Snow adventure!
Print
Magic Cherries in the Snow: 1 Secretly Easy Treat
- Total Time: 4 hours 20 minutes
- Yield: 12 servings 1x
- Diet: Vegetarian
Description
A delightful dessert featuring cherries and a creamy base, often chilled.
Ingredients
- 1 can (21 ounces) cherry pie filling
- 1 can (14 ounces) sweetened condensed milk
- 1 container (8 ounces) frozen whipped topping, thawed
- 1 package (3 ounces) cream cheese, softened
- 1 teaspoon vanilla extract
- 1/2 cup chopped nuts (optional)
Instructions
- In a large bowl, beat the cream cheese until fluffy.
- Gradually beat in the sweetened condensed milk until smooth.
- Stir in the vanilla extract.
- Fold in the thawed whipped topping.
- Spread half of the mixture into a 9×13 inch dish.
- Spoon the cherry pie filling over the cream cheese mixture.
- Spread the remaining cream cheese mixture over the cherry filling.
- Sprinkle with chopped nuts if desired.
- Cover and chill for at least 4 hours, or overnight.
Notes
- Ensure the cream cheese is softened for easy mixing.
- Chill the dessert thoroughly for the best texture.
- Adjust the amount of nuts to your preference.
- Prep Time: 20 minutes
- Cook Time: 0 minutes
- Category: Dessert
- Method: No Bake
- Cuisine: American
Nutrition
- Serving Size: 1 serving
- Calories: 350
- Sugar: 40g
- Sodium: 150mg
- Fat: 15g
- Saturated Fat: 8g
- Unsaturated Fat: 5g
- Trans Fat: 0g
- Carbohydrates: 50g
- Fiber: 1g
- Protein: 4g
- Cholesterol: 30mg
Keywords: cherries in the snow, cherry dessert, no bake dessert, creamy dessert, easy dessert