
Okay, so listen up! If you grew up in a house like mine, Nesquik wasn’t just a drink mix, right? It was like a little burst of chocolatey happiness in a yellow container. And honestly? It’s still one of my absolute favorite pantry staples for whipping up quick, easy, and totally delicious treats that the whole family will devour. Forget complicated fancy stuff; Nesquik is your secret weapon for simple desserts that taste way more special than they have a right to!
I remember sneaking spoonfuls of the powder straight from the can as a kid (don’t judge!), and now I love seeing that same little sparkle in my own kids’ eyes when I make something with it. Over the years, I’ve messed around in the kitchen, finding ways to use that classic chocolate flavor in more than just milk. Trust me, these four recipes are tried-and-true winners in my house, perfect for busy weeknights or when you just need a quick chocolate fix.

Why You’ll Love These 4 Easy and Delicious Recipes with Nesquik
Honestly, what’s not to love? These little gems are:
- Super Simple: We’re talking minimal fuss and ingredients you probably already have.
- Crazy Fast: Seriously, you can whip these up in no time, perfect for those “I need chocolate NOW” moments.
- Total Crowd-Pleasers: That classic Nesquik taste is pure nostalgia and comfort food for everyone.
- Family-Friendly: Kids go absolutely wild for these, and honestly, so do the adults!
They just bring a smile to your face, you know?
Ingredients for These 4 Easy and Delicious Recipes with Nesquik
Alright, let’s talk ingredients! The best part about using Nesquik is that you don’t need a million things. For these four recipes, you’ll just need:
- Nesquik powder (of course!)
- Milk
- Sugar
- Butter (you’ll need some melted and some softened)
- Vanilla extract
- All-purpose flour
- Baking powder
- Salt
- A large egg
- And maybe some powdered sugar for dusting, if you’re feeling fancy!
See? Simple stuff. You’ve probably got most of it hiding in your pantry right now!
Equipment for Making These 4 Easy and Delicious Recipes with Nesquik
You won’t need a ton of fancy gadgets for these! Just grab your basics:
- A blender (for that perfect milkshake!)
- A saucepan (for cozy hot chocolate)
- Some mixing bowls
- A whisk
- A baking pan (8×8 inch is great for the brownies)
- A baking sheet (for cookies!)
- And a wire rack for cooling.
Pretty standard kitchen stuff, right?
How to Make These 4 Easy and Delicious Recipes with Nesquik
Okay, let’s get to the fun part – actually making these goodies! I’ve broken down each recipe step-by-step so you can follow along easily. Don’t overthink it, remember? We’re keeping it simple and delicious!
Nesquik Milkshake Instructions
This is probably the fastest one, perfect for when you need a treat *right now*. Grab your blender and make sure your milk is nice and cold – that’s key for a thick, frosty shake. Just pour in about 2 cups of cold milk and add about 4 tablespoons of Nesquik powder. You can adjust the amount of Nesquik depending on how chocolatey you like it! Pop the lid on tight (learned that the hard way once, oops!) and blend until everything is smooth and creamy. Pour into a glass and enjoy immediately! Seriously, that’s it.
Nesquik Hot Chocolate Instructions
For a cozy, warm treat, hot chocolate is the way to go. Get a saucepan and heat up about 2 cups of milk over medium heat. You don’t want it to boil, just nice and warm. Once it’s warm, stir in about 4 tablespoons of Nesquik powder. Keep stirring until all the powder is completely dissolved and you have a smooth, chocolatey milk. Pour into your favorite mug and warm your hands! So comforting.
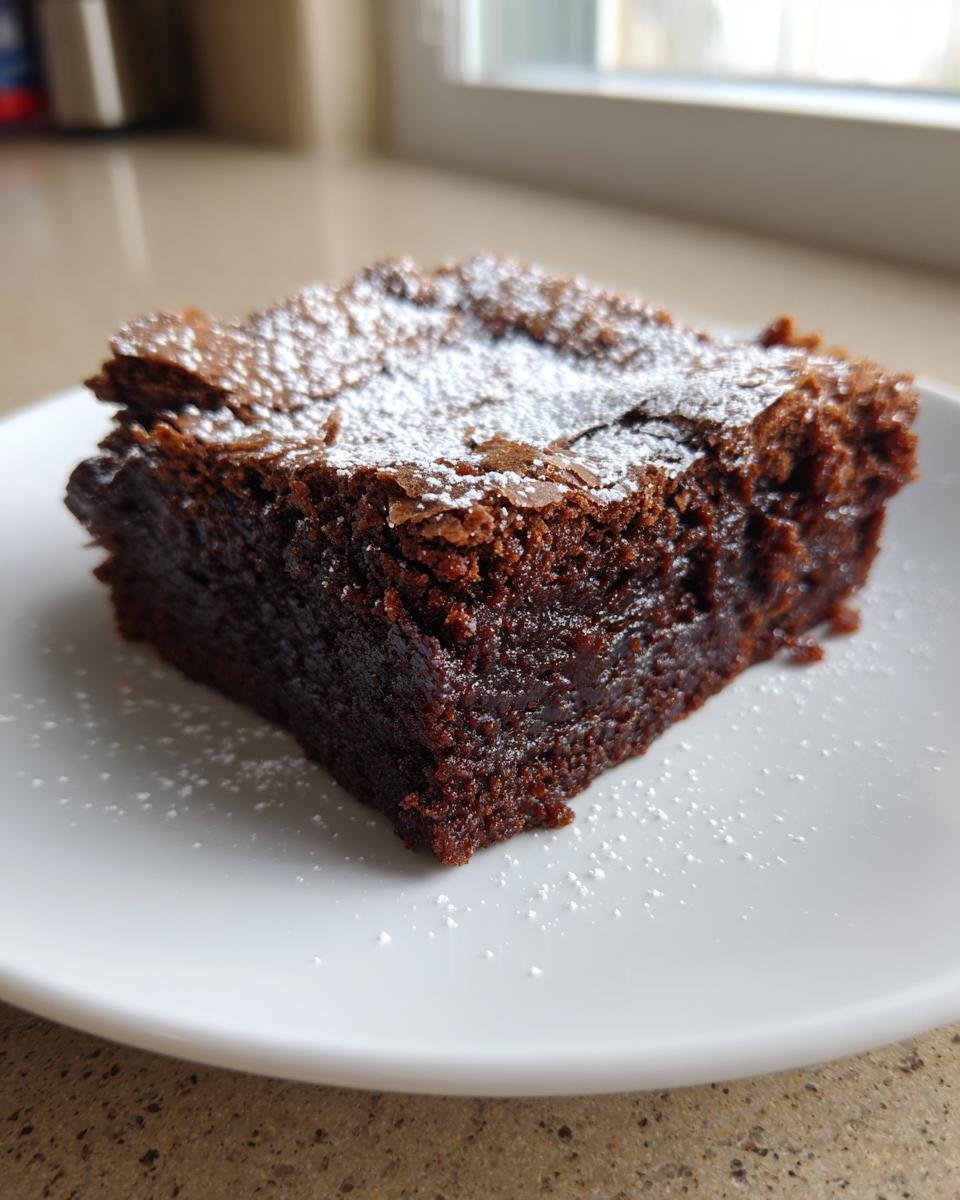
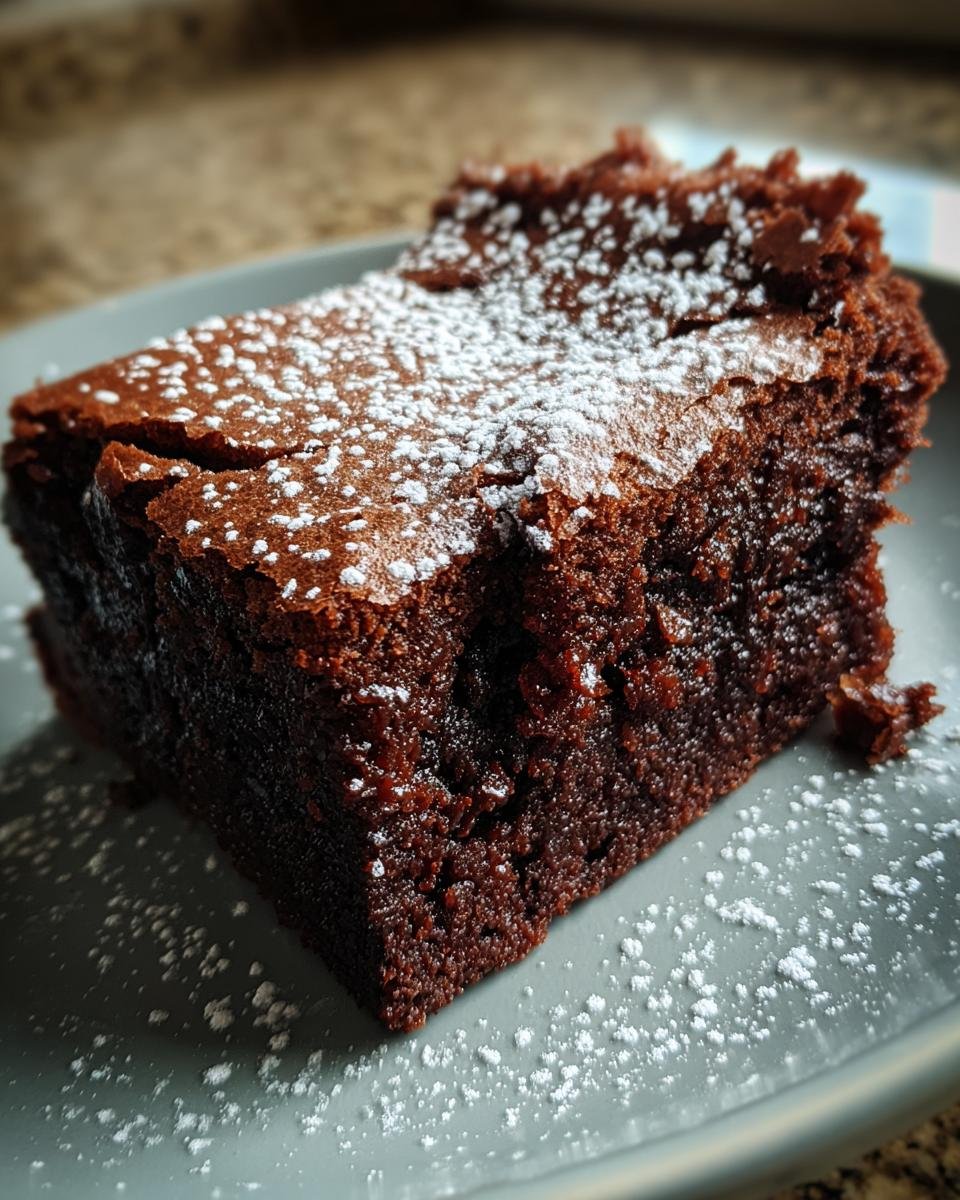
Nesquik Brownie Instructions
Okay, brownie time! Start by preheating your oven to 350°F (175°C). While the oven heats up, grab a bowl and whisk together your melted butter, sugar, the egg, and vanilla extract until it’s all combined. In another bowl, whisk together your dry ingredients: the flour, Nesquik powder, baking powder, and salt. Now, gradually add the dry mixture to the wet mixture. I like to do it in a couple of batches, mixing just until everything is combined. Don’t overmix! Pour the batter into a greased 8×8 inch baking pan. Pop it in the oven for about 20-25 minutes. To check if they’re done, stick a toothpick in the center – it should come out with moist crumbs, not wet batter. Let them cool completely in the pan before you even *think* about cutting them. That helps them set up perfectly.
Nesquik Cookie Instructions
Cookie cravings? Nesquik has you covered! Preheat your oven to 375°F (190°C). In a large bowl, cream together your softened butter and sugar until it’s light and fluffy. Then beat in the egg and vanilla extract. In a separate bowl, whisk together the dry ingredients: the flour, Nesquik powder, baking soda, and salt. Now, gradually add the dry ingredients to the wet ingredients, mixing until everything is just combined. Again, don’t overmix! Drop spoonfuls of dough onto a baking sheet. They don’t spread a ton, so you can get a good amount on there. Bake for 8-10 minutes, or until the edges look golden brown. Let them cool on the baking sheet for a few minutes before moving them to a wire rack to cool completely. Resist the urge to eat them all hot off the pan… or don’t, I won’t tell!
Tips for Perfect 4 Easy and Delicious Recipes with Nesquik
Okay, so you’ve got the basic steps down, but here are a few little tricks I’ve picked up to make sure your Nesquik creations turn out absolutely perfect every single time. Trust me on these!
For the drinks, make sure your milk is really cold for milkshakes – it makes them extra thick and frosty. And when you’re making hot chocolate, don’t overheat the milk; just warm it gently so you don’t scald it. With the baked goods, the biggest thing is *not* to overmix the batter once you add the dry ingredients. Just mix until everything is combined. Overmixing can make things tough, and nobody wants a tough brownie or cookie! Also, use good quality butter for those baked goods; it really does make a difference in the flavor and texture.
Variations for Your 4 Easy and Delicious Recipes with Nesquik
Okay, now that you’ve got the basics down, let’s talk about playing around a little! These recipes are super forgiving, so feel free to get creative. For the brownies or cookies, try tossing in some chocolate chips, chopped nuts, or even white chocolate chunks before baking. With the milkshake and hot chocolate, the sky’s the limit for toppings! Think whipped cream, mini marshmallows, a drizzle of chocolate syrup (more chocolate, yes!), or even a sprinkle of cinnamon on the hot chocolate. And remember, you can always adjust the amount of Nesquik powder in any of these recipes to make them as subtly or intensely chocolatey as you like. Have fun with it!
Storage and Reheating
So you have leftovers? Amazing! (Or maybe you’re just planning ahead, smart you!) For the brownies and cookies, the best way to keep them fresh is in an airtight container at room temperature. They should stay lovely and moist for a few days. Honestly, I rarely have leftovers of the brownies or cookies long enough to need to worry about reheating! But if you wanted to warm up a brownie, a few seconds in the microwave does the trick. The drinks are really best enjoyed right away, though – milkshakes lose their frosty magic, and hot chocolate cools down pretty quickly.
Frequently Asked Questions About These 4 Easy and Delicious Recipes
Got questions? Totally understandable! Here are a few things people often ask about these simple Nesquik recipes:
Q: Can I substitute the milk?
A: Yes! For the milkshake and hot chocolate, you can absolutely use non-dairy milk alternatives like almond milk or oat milk. The flavor might change a tiny bit, but they’ll still be delicious Nesquik treats! For the baked goods, I recommend sticking to dairy milk for the best texture.
Q: Can I make the brownie or cookie dough ahead of time?
A: You can definitely make the cookie dough ahead! Just cover it and pop it in the fridge for a day or two, then scoop and bake as usual. The brownie batter is best baked right after mixing for the best results.
Q: How can I make these recipes less sweet?
A: Nesquik has sugar in it already, but you can try reducing the added sugar in the brownie and cookie recipes by a tablespoon or two if you prefer them less sweet. For the drinks, just use less Nesquik powder or skip any extra sugar if the milk isn’t sweetened.
Nutritional Information Disclaimer
Okay, so listen, I’m sharing these recipes because they’re easy and delicious, not because I’m a nutritionist! The nutritional information for these Nesquik recipes is honestly just an estimate. It can change a *lot* depending on the specific brands you use for things like milk, butter, and even the Nesquik itself, plus how much of each ingredient you actually end up using. I haven’t calculated the precise values, and frankly, I’m more focused on the smiles they bring to faces! So, please keep in mind that any nutritional details aren’t exact and can vary.
Enjoy Your Nesquik Creations
Alright, my friend, there you have it! Four super easy, seriously delicious ways to use that classic Nesquik powder. I really hope you give these a whirl! They’re just perfect for bringing a little bit of simple, chocolatey joy into your day, whether you’re making them for yourself or sharing with your favorite people.
Seriously, go grab that yellow can and get baking (or blending!). I’d absolutely LOVE to hear which one you try first and how it turns out. Did you add extra chocolate chips to the brownies? Did you top your hot chocolate with a mountain of marshmallows? Let me know in the comments below! And if you feel like it, leaving a rating helps other folks find these yummy recipes too. Happy Nesquik-ing!
Print
4 Easy and Delicious Recipes with Nesquik Delights
- Total Time: 50 minutes
- Yield: Varies by recipe
- Diet: Vegetarian
Description
Discover four simple and tasty recipes using Nesquik for sweet treats.
Ingredients
- 1 cup Nesquik powder
- 2 cups milk
- 1/2 cup sugar
- 1/4 cup butter, melted
- 1 teaspoon vanilla extract
- 1 cup all-purpose flour
- 1/2 teaspoon baking powder
- 1/4 teaspoon salt
- 1 large egg
- Powdered sugar for dusting (optional)
Instructions
- For Nesquik Milkshake: Combine 2 cups cold milk and 4 tablespoons Nesquik powder in a blender. Blend until smooth.
- For Nesquik Hot Chocolate: Heat 2 cups milk in a saucepan. Stir in 4 tablespoons Nesquik powder until dissolved.
- For Nesquik Brownies: Preheat oven to 350°F (175°C). Whisk together melted butter, sugar, egg, and vanilla extract. In a separate bowl, whisk together flour, Nesquik powder, baking powder, and salt. Gradually add dry ingredients to wet ingredients, mixing until just combined. Pour into a greased 8×8 inch baking pan. Bake for 20-25 minutes, or until a toothpick inserted into the center comes out with moist crumbs. Let cool before cutting.
- For Nesquik Cookies: Preheat oven to 375°F (190°C). Cream together 1/2 cup softened butter and 1/2 cup sugar. Beat in 1 egg and 1 teaspoon vanilla extract. In a separate bowl, whisk together 1 1/2 cups all-purpose flour, 1/4 cup Nesquik powder, 1/2 teaspoon baking soda, and 1/4 teaspoon salt. Gradually add dry ingredients to wet ingredients, mixing until combined. Drop spoonfuls onto a baking sheet. Bake for 8-10 minutes, or until edges are golden brown. Let cool on the baking sheet for a few minutes before transferring to a wire rack.
Notes
- Adjust the amount of Nesquik to your taste.
- Get creative with toppings for the milkshake and hot chocolate, like whipped cream or marshmallows.
- Do not overmix the brownie or cookie batter.
- Prep Time: 15 minutes
- Cook Time: 35 minutes
- Category: Dessert
- Method: Baking and Blending
- Cuisine: American
Nutrition
- Serving Size: Varies by recipe
- Calories: Varies by recipe
- Sugar: Varies by recipe
- Sodium: Varies by recipe
- Fat: Varies by recipe
- Saturated Fat: Varies by recipe
- Unsaturated Fat: Varies by recipe
- Trans Fat: Varies by recipe
- Carbohydrates: Varies by recipe
- Fiber: Varies by recipe
- Protein: Varies by recipe
- Cholesterol: Varies by recipe
Keywords: Nesquik, recipes, dessert, milkshake, hot chocolate, brownies, cookies, chocolate