
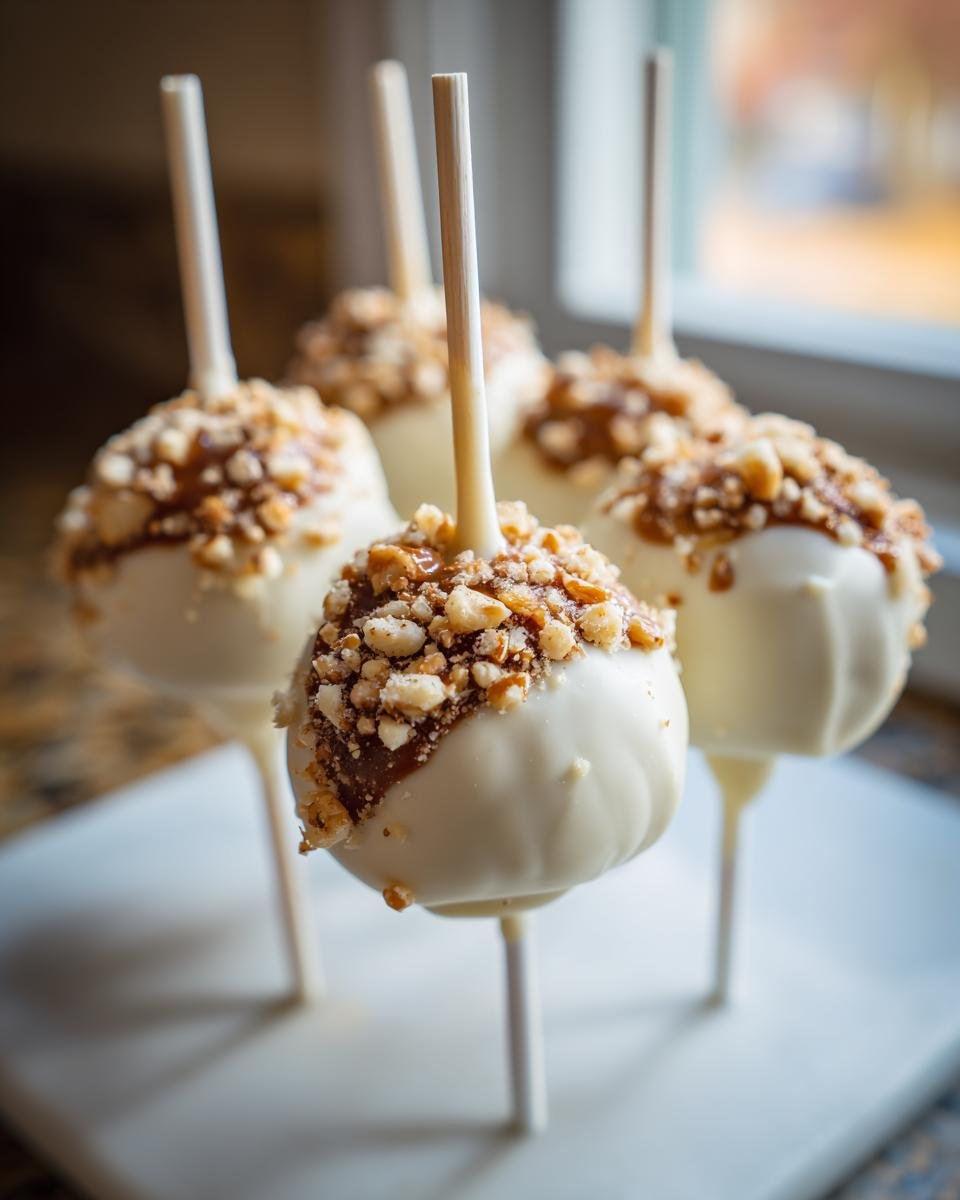
If there’s one thing I know about throwing a party—or just having a Tuesday—it’s that desserts are always better when they come on a stick and are perfectly bite-sized. Forget messy slices! We are diving into something truly special today: Caramel Apple Cake Pops. These little gems take the cozy, comforting flavors of fall and shrink them down into an adorable package.
I’m not kidding when I say these are my secret weapon for potlucks; they disappear before anything else. They’re super easy because we start with a standard yellow cake, but the magic happens when we fold in thick caramel sauce and cream cheese to create a dense, flavorful base. Trust me, you need the stability of this mixture for dipping. We cover that sweet interior in creamy white chocolate, and we’re done! If you want a foolproof guide to making decadent, no-fuss desserts, check out my tips on four exquisite no-bake cake recipes, because these pops definitely fall into that category!
Why You Will Love These Caramel Apple Cake Pops
Honestly, I make massive batches of these anytime I have leftover cake mix components lying around, and here’s exactly why I think you’ll become obsessed too:
- Maximum Flavor, Minimum Effort: We’re using a box cake mix as a starting point, which cuts out half the measuring chaos. But by adding real caramel and sharp spices (implied by the apple flavor!), you get a rich, spiced-apple taste that screams homemade. It’s a flavor payoff that feels seriously sophisticated for how easy it is.
- Portability Perfection: These are the ultimate grab-and-go treat. No worries about plates or forks! They travel beautifully to bake sales, school functions, or just hiding in the fridge for an afternoon snack. Plus, they look so polished once they’re dipped.
- The Perfect Texture Combination: You get that satisfying soft, dense interior from the cream cheese binding, followed instantly by that snappy, crisp shell of white chocolate. The optional pretzel topping adds the necessary crunch factor. It’s a textural rollercoaster!
- Great for Anytime Gifting: Whether you stack them in a little mason jar or wrap them individually, these Caramel Apple Cake Pops make lovely, thoughtful little presents. People never guess how simple they are to put together. You can see how I manage similar no-bake treats in my guide to making decadent desserts!

Essential Ingredients for Perfect Caramel Apple Cake Pops
Gathering your ingredients is half the battle, and honestly, I love how streamlined this list is. We are working with a few components here: the cake base itself, the creamy binding agents, and that lovely chocolate shell. Don’t let the list intimidate you; it’s mostly standard pantry stuff!
Here is the exact list I use for about two dozen glorious Caramel Apple Cake Pops:
- 1 box yellow cake mix (Don’t skip this simplified base!)
- The items the cake box requires: eggs, oil, and water
- 1 cup thick caramel sauce
- 8 ounces cream cheese, softened completely—this is super important!
- 2 cups powdered sugar
- 1 teaspoon vanilla extract
- 1 pound white chocolate melting wafers (the good kind!)
- 1 tablespoon vegetable oil (for thinning the chocolate)
- 1/2 cup crushed pretzels (optional, only if you like that sweet and salty crunch on top)
Before we move on, let’s talk specifics about these items, because attention to detail here separates a good cake pop from a legendary one. If you want to deep-dive into other delicious uses for cream cheese, I have a great recipe collection about four cream recipes ideal for fillings!
Ingredient Notes and Substitutions for Caramel Apple Cake Pops
Listen up, because this is where people usually trip up, especially when making no-bake stuff like this! First, when you bake the cake, make sure you follow the box directions exactly for the oil, water, and eggs. You need that structure, even though we are crumbling it later.
The caramel sauce has to be thick, friends. If you use a super runny caramel, your cake balls will be too mushy to handle later—we need it thick enough to bind everything together until it feels like playdough. If your sauce is thin, you might need to add an extra tablespoon or two of powdered sugar when we bind the mixture later.
Now for the chocolate coating. You simply cannot skimp here! I highly recommend using high-quality white chocolate melting wafers over standard chips. Wafers contain stabilizers that make your final shell glossy and smooth. If you grab cheaper chips, you might end up fighting with lumpiness. The vegetable oil addition is non-negotiable; it keeps the chocolate fluid for dipping.
Finally, the crushed pretzels—these are purely for fun, so if you have allergies or just aren’t feeling the salt, leave ’em off! But I think the salty crunch against the sweet caramel apple flavor is just divine.
Equipment Needed for Making Caramel Apple Cake Pops
Okay, while this recipe is mostly assembly once the cake is baked, having the right tools makes the process so much less likely to end in frustration. Think of this as gathering your baking arsenal before you start mixing the fun stuff! You’ll be surprised at how simple the cleanup is since we aren’t using fancy mixers for the sticky dough.
To make sure your Caramel Apple Cake Pops turn out perfectly coated and ready for their moment in the spotlight, here’s what you need to grab from the cabinet:
- 9×13 Inch Baking Pan: This is for baking that initial yellow cake. Remember, we need a flat surface so the cake has a good texture for crumbling later on.
- Large Mixing Bowl: You need space to really get in there and incorporate the cream cheese and caramel into those dry cake crumbs. Don’t use your smallest bowl, or you’ll end up wearing half the mixture!
- Parchment Paper or Wax Paper: This is essential for two stages! First, line your baking sheet after the cake comes out to cool (keeps things from sticking). Second, you’ll need a fresh sheet to place the finished, chocolate-dipped pops onto while they set up.
- Lollipop Sticks: Duh! Make sure you have enough for every single ball you plan to roll. I always grab about 30, just in case a couple break during the dipping process.
- Microwave-Safe Bowl: We aren’t using a double boiler here—we are keeping it simple! You need a bowl that can handle those quick bursts of energy to melt the white chocolate wafers down smoothly.
- Cookie Scoop (Optional but highly recommended): I use a small one, like a tablespoon or slightly smaller, to ensure every single cake ball is the exact same size. Uniformity matters when you’re dipping!
That’s really it! No fancy stand mixers or pastry bags required for this one. Preparation is key, and having these items ready means you can move smoothly from the chilling phase right into the dipping phase when your chocolate is perfectly tempered and ready to go.
Step-by-Step Instructions to Create Caramel Apple Cake Pops
Alright, now for the fun part! We’re taking that baked cake and turning it into little spheres of happiness. The process moves quickly once you get past the baking and chilling parts, so make sure you have your chocolate ready when the cake balls come out of the fridge. It’s all about timing once you start dipping your Caramel Apple Cake Pops. If you’re looking for other quick assembly treats, you might enjoy my guide on the no-bake eclair cake!
Baking and Crumbing the Cake Base
First things first, bake that yellow cake according to the box directions in your 9×13 pan, using whatever eggs, oil, and water it calls for. Once it’s baked, you have to let it cool down completely. I mean it—if it’s even slightly warm, the cream cheese just melts into soup, and you won’t be able to roll anything! Once it’s stone cold, grab your hands and crumble that cake right into your big mixing bowl. We’re looking for fine crumbs, almost like coarse sand, so take your time wrestling it apart.
Mixing and Rolling the Caramel Apple Cake Pop Dough
Now, we introduce the binding agents! Add that softened cream cheese and the cup of thick caramel sauce right over those crumbs. Start mixing. It’s going to mix messy at first, but keep going until everything is evenly incorporated. The mixture is ready when you can grab a handful and squeeze it, and it holds its shape perfectly without crumbling or oozing out between your fingers. Use a small scoop to roll the dough into uniform balls, about one inch across. Place them carefully onto that parchment-lined baking sheet. Time to chill them for at least 30 minutes—this step locks in their shape!
Chilling and Dipping the Caramel Apple Cake Pops
While those little guys are firms up in the fridge, get your chocolate ready. Melt those white chocolate wafers with the tablespoon of vegetable oil in your microwave-safe bowl. We do this in 30-second bursts, stirring really well in between each one. This is crucial so you don’t scorch the chocolate! You want it completely smooth and liquidy before you attempt to dip anything. Once your cake balls are stiff, insert your lollipop stick gently into the center of each ball, going about halfway in for support. Then, dip quickly!
Finishing and Setting the Chocolate Coating
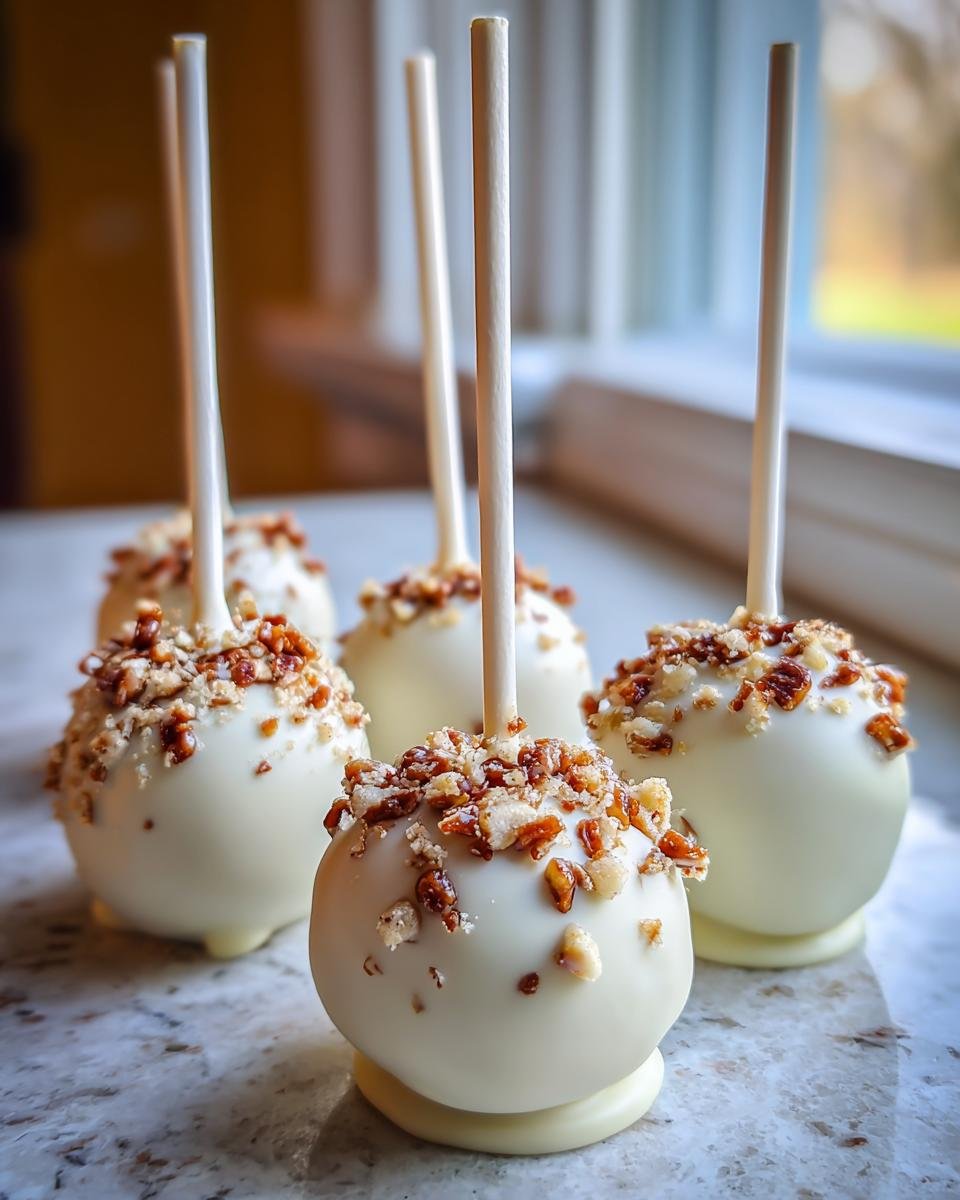
Hold the stick and lower the chilled cake ball into the warm chocolate. Rotate it slowly to get full coverage. Once it’s totally submerged, gently lift it out and tap the stick lightly against the side of your bowl to let any big drips fall off. This is your moment for flair: if you decided to use the crushed pretzels, sprinkle them right over the wet chocolate immediately! You have about five seconds before the chocolate skin sets. Pop them back onto the clean parchment sheet to finish setting. Let them sit at room temperature until the chocolate is fully hard and shiny—no touching!
Tips for Success When Making Caramel Apple Cake Pops
Okay, we’ve mixed, chilled, and dipped, but sometimes little things go wrong during that last stage, especially when dealing with melted chocolate. I want to share the wisdom from my own messy kitchen disasters so your Caramel Apple Cake Pops look picture-perfect. These tips come straight from troubleshooting when my dough was too sticky or my chocolate seized up!
First, remember that hint from the official notes: for an absolutely flawless shell, sometimes you need a little extra insurance against lumps. If you find your white chocolate is cooling a bit too fast or looking slightly thick during dipping, just stir in a tiny bit more vegetable oil, or even a half-teaspoon of shortening. That little bit of extra fat helps keep everything flowing so you get that perfect, thin, shiny coating. It’s a lifesaver!
If your cake mixture feels too soft or sticky *before* you’ve rolled the balls—maybe your caramel was runnier than you thought—don’t panic! You don’t have to dump it. Just mix in a little extra powdered sugar, about a tablespoon at a time, until the dough firms up enough to roll cleanly. It takes a moment, but it saves you from having to bake a whole new cake!
When it comes to the caramel sauce itself, feel free to use your favorite store-bought brand, but remember what I said about thickness. If you are feeling ambitious and want to make your own, I highly recommend it, but just make sure it cools down almost completely before stirring it into the cake crumbs. A warm caramel turns this whole thing into a sticky mess!
Now, here is my biggest expert tip that they never put in the actual recipe card, but it’s vital for dipping chocolate: Watch the weather! If you are making these on a rainy or super humid day, the moisture in the air makes white chocolate *hate* you. It seizes up almost instantly. If it’s humid, you might need to work faster, or maybe even dip everything in a cooler room. Humidity makes the chocolate absorb moisture and turn grainy right before your eyes. Been there, cleaned that mess up!
For more ideas on keeping chocolate dips smooth, you can always check out my post on the chocolate chip cookie dough dip—the principles for melting are exactly the same!
Storage and Reheating Instructions for Caramel Apple Cake Pops
So, you made two dozen beautiful Caramel Apple Cake Pops, and now you have to stop eating them all in one sitting—that’s the hard part! Knowing the right way to store these gems is crucial so that the cake stays moist and, more importantly, the white chocolate coating stays crisp and doesn’t sweat.
The short answer is: these need to live in the fridge. Because we used cream cheese and caramel sauce inside as the binder, they are much more perishable than, say, a standard cookie. If you leave them out on the counter in a warm house, two things will happen: the cake interior gets soft again, and the chocolate coating might start getting that terrible, foggy ‘bloom’ effect when it warms up.
Here is my go-to method. Once the chocolate has fully set (give them a good hour at room temperature, or speed it up with 15 minutes in the fridge), transfer them to an airtight container. You need to be gentle when popping them in! I line the bottom container with a paper towel, place the first layer of pops in single file, then put another piece of parchment paper down before starting the second layer, just so they don’t touch and smudge that perfect white chocolate shell.
They will last beautifully in the refrigerator for up to a week. If you are planning ahead for a party, you can actually make these up to three days ahead of time without any issue at all. That’s why I love them so much!
Now, what if you want to serve them right now but they’ve been chilling for five days? Don’t worry about ‘reheating’ them—that would melt the chocolate! You just need to let them warm up just a little bit so they aren’t rock hard coming straight out of the cold. Pull the container out of the fridge about 30 to 45 minutes before you plan to serve them. This allows the cake interior to soften up just enough so you get that lovely, soft bite when you sink your teeth into that crisp apple-caramel core!
Serving Suggestions for Your Caramel Apple Cake Pops
The beautiful thing about Caramel Apple Cake Pops is that they are perfectly capable of standing alone as the star dessert! They are already so rich with caramel, cake, and chocolate that they don’t *need* much else. However, since they have such a beautiful, cozy fall flavor profile, presentation is where you can really make them shine!
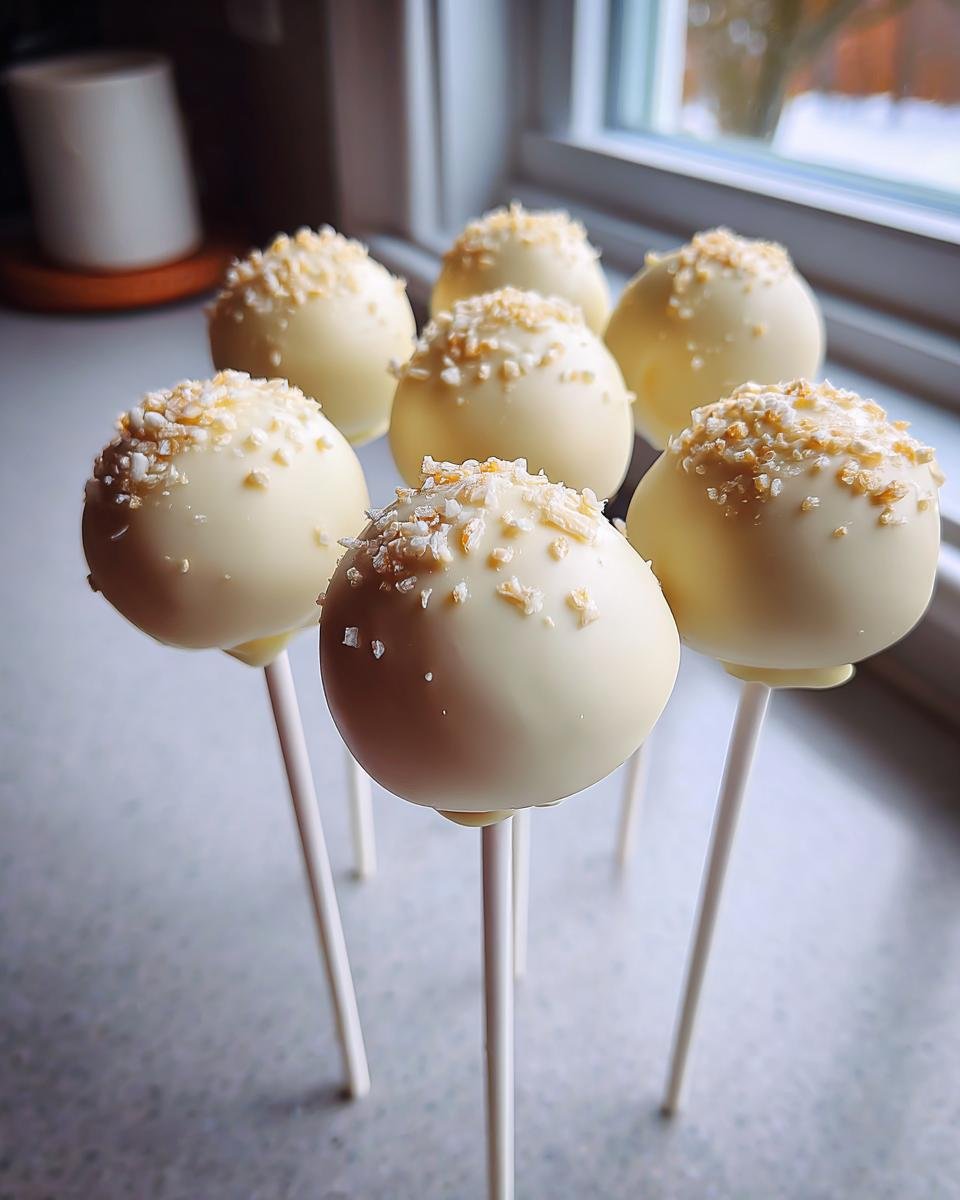
When I set these out for gatherings, I try to lean into that autumn feeling. Forget tossing them on a sad napkin; we’re going for impact! Try arranging them vertically in a small vase or rustic container filled with decorative dry beans, coarse brown sugar, or even small ornamental Indian corn. They look phenomenal standing up like little edible flowers.
Of course, pairing them with a beverage is a total must. These are just too autumnal to pass up with a hot drink. They are absolutely heavenly alongside a strong, hot coffee—the bitterness plays perfectly against the sweetness of the caramel and white chocolate coating. If you’re serving them around Thanksgiving or Halloween, they go perfectly next to hot spiced cider or even just a nice glass of milk for the kids.
Presentation-wise, if you used the optional pretzel topping, I highly recommend setting up a small dip station right next to them with a small bowl of extra crushed pretzels or some chopped pecans. That way, guests can top their pops right before eating if they want extra crunch or saltiness. It adds an interactive element that everyone loves!
For a truly stunning dessert table, try grouping them next to something completely different in texture, like maybe some crisp apple slices dusted lightly with cinnamon sugar, or even some of those fun savory items you might be making. If you ever try making something delightfully sweet and unexpected like candied carrots (I have a great recipe for candied carrots elsewhere!), these pops make a great sweet counterpoint on the platter!
Frequently Asked Questions About Caramel Apple Cake Pops
I get so many messages asking for clarity on the tricky parts of cake pops, which is totally understandable! Even the easiest recipes have little quirks. Don’t worry if you have questions about achieving that perfect, smooth white chocolate coating or getting the right consistency for this fantastic apple dessert. I’ve pulled together the most common things folks ask me about these Caramel Apple Cake Pops!
Can I skip baking the cake and use store-bought cake?
Absolutely, you can! If you have leftover yellow birthday cake or you just want to cheat a little more, go for it. Just make sure the cake is plain and unfrosted, obviously! However, I have to give you the real talk here: The final flavor of the Caramel Apple Cake Pops is definitely richer when you bake the yellow cake mix fresh. The homemade crumb just seems to absorb the caramel and cream cheese binder better. But look, if you’re in a rush, store-bought works just fine in a pinch.
What is the best way to keep the chocolate coating smooth?
This is the number one source of frustration for people dipping things! The key to keeping your coating smooth, glossy, and thin enough to dip without glopping up that gorgeous cake ball is controlling the fat content. You absolutely must add that tablespoon of vegetable oil (or a little shortening, as I mentioned in my main tips) to the melting wafers. If you just melt the wafers plain, they inevitably seize up and become thick lumps, and then you end up fighting the coating instead of dipping easily. Melt low and slow, stirring frequently in those 30-second intervals!
How far in advance can I prepare these Caramel Apple Cake Pops?
This is what makes them so great for parties! Because the interior dough is bound so tightly with the cream cheese and caramel, these hold up so much better than standard cake balls. If you complete the entire process—baking, mixing, rolling, dipping, and setting—you can store the finished Caramel Apple Cake Pops in the airtight container (remember to layer with parchment!) in the fridge for a solid week. Seriously, a full week! They taste fantastic on day one, day three, and even day seven. If you are making ahead, I suggest waiting until the day before the party to dip them, just so the chocolate shell is at its absolute freshest and snappiest.
For any other sticky situations or dips, you can always check out my thoughts on making blueberry cookies—sometimes the binding tips are surprisingly similar!
Nutritional Information Estimate for Caramel Apple Cake Pops
I always like to include a little idea of what’s inside these treats because they are so addicting! Now, listen, you have to take this with a grain of salt, because we used a box mix as our starting point, and everyone uses different brands of white chocolate and caramel sauce. These figures are based on estimates for one standard-sized cake pop using all the recipe ingredients listed.
This isn’t health food, obviously, but knowing the rough breakdown is helpful when you’re planning out desserts for a crowd. Here is the estimate for a single, glorious bite:
| Component | Amount Per Pop (Estimate) |
|---|---|
| Serving Size | 1 pop |
| Calories | 250 |
| Total Fat | 15g |
| Saturated Fat | 8g |
| Trans Fat | 0g |
| Unsaturated Fat | 7g |
| Total Carbohydrates | 28g |
| Sugar | 25g |
| Fiber | 0g |
| Protein | 3g |
| Cholesterol | 25mg |
| Sodium | 150mg |
See? Lots of sugar and fat because… well, it’s cake wrapped in chocolate and caramel! That’s the joy of it! Just remember that if you skip the pretzel topping, you’ll shave off a little bit of sodium. Enjoy them responsibly!
Print
Caramel Apple Cake Pops
- Total Time: 75 min
- Yield: 24 pops 1x
- Diet: Vegetarian
Description
Small, bite-sized cake pops featuring apple and caramel flavors.
Ingredients
- 1 box yellow cake mix
- Ingredients required by cake mix box (eggs, oil, water)
- 1 cup caramel sauce
- 8 ounces cream cheese, softened
- 2 cups powdered sugar
- 1 teaspoon vanilla extract
- 1 pound white chocolate melting wafers
- 1 tablespoon vegetable oil
- 1/2 cup crushed pretzels (optional, for topping)
Instructions
- Prepare the cake according to the box directions using the required ingredients. Bake in a 9×13 inch pan. Let the cake cool completely.
- Crumble the cooled cake into a large bowl.
- Add the softened cream cheese and caramel sauce to the cake crumbs. Mix until fully combined and the mixture holds together when squeezed.
- Roll the mixture into small, one-inch balls. Place the balls on a parchment-lined baking sheet.
- Chill the cake balls in the refrigerator for at least 30 minutes.
- While the balls chill, prepare the dipping chocolate. Melt the white chocolate wafers with the vegetable oil in a microwave-safe bowl in 30-second intervals, stirring well after each interval, until smooth.
- Insert lollipop sticks into the chilled cake balls.
- Dip each cake ball into the melted chocolate, rotating to coat completely. Tap the stick gently against the side of the bowl to remove excess chocolate.
- If using, immediately sprinkle crushed pretzels over the wet chocolate.
- Place the finished cake pops back onto the parchment-lined sheet.
- Allow the chocolate coating to set completely at room temperature or briefly in the refrigerator.
Notes
- For a smoother dip, add a small amount of shortening to the melting chocolate.
- If the cake mixture seems too sticky, add a small amount of powdered sugar until it is manageable.
- You can use store-bought caramel sauce or homemade.
- Prep Time: 45 min
- Cook Time: 30 min
- Category: Dessert
- Method: No-Bake Assembly
- Cuisine: American
Nutrition
- Serving Size: 1 pop
- Calories: 250
- Sugar: 25
- Sodium: 150
- Fat: 15
- Saturated Fat: 8
- Unsaturated Fat: 7
- Trans Fat: 0
- Carbohydrates: 28
- Fiber: 0
- Protein: 3
- Cholesterol: 25
Keywords: Caramel Apple Cake Pops, cake pops, apple dessert, caramel, white chocolate