
Listen, if you’re like me, sometimes you need a showstopper dessert that looks like it took all day but honestly only took about fifteen minutes of active effort. This Reeses Peanut Butter Earthquake cake is my absolute go-to when company shows up unexpectedly! It combines that intensely rich, deep chocolate flavor we all crave with creamy, salty peanut butter tucked right inside. Seriously, the payoff versus the work is criminal. I’ve made this for everything from neighborhood cookouts to my nephew’s birthday party last month, and it’s guaranteed to vanish first every single time. It’s the easiest way to get that triple-threat flavor combination. Trust me, you’re going to want to check out my other decadent dessert recipes after you nail this one!
Why This Reeses Peanut Butter Earthquake Cake Is a Must-Bake
There are a handful of recipes I keep solely because they are idiot-proof, and this is certainly one of them. You’re going to love this cake because it’s truly one of the simplest things you can tackle on a busy weeknight.
- It relies heavily on a box mix, knocking out the need for complicated dry ingredient measuring.
- The flavor profile is unbeatable—that salty-sweet peanut butter hiding inside rich chocolate? Perfection!
- The texture is wild! That’s the ‘earthquake’ part—the chips melt and the creamy frosting sinks in, creating glorious, fudgy pockets. It’s why everyone asks for the recipe.
Honestly, if you’re looking for something fast, check out my guide to simple dump cakes too, but this one takes top prize for decadence.
Essential Ingredients for Your Reeses Peanut Butter Earthquake
Okay, let’s talk supplies. Because we are making this cake fast and fabulous, we aren’t starting from scratch with the flour and cocoa, but that doesn’t mean we skimp on quality where it counts. Trust me, having your cream cheese and butter perfectly softened before you start is the difference between smooth frosting and a lumpy mess. Don’t rush that step!
We need everything measured out, and I always like to have my peanut butter chips ready to go because there is zero time to waste once that batter hits the pan. If you want some other peanut-butter-focused tips, I share a ton over in my cookie post!
For the Cake Base
This is the easy foundation. Grab yourself one standard box of chocolate cake mix—I prefer a dark fudge flavor if I can find it, but any brand works just fine. Then, you need to make sure you have the liquids required on the back of the box. Usually, that’s eggs, oil, and water. Stick to whatever the box tells you; don’t try to get clever here! That combination is calibrated for the bake time we need.
For the Peanut Butter Frosting
This is where the magic really sinks into the chocolate. You need full-fat cream cheese and real butter, and both have to be good and soft—like room temperature soft. You’ll need a full cup of creamy peanut butter—no crunchy for this frosting, we want it silky smooth!
- 8 ounces of cream cheese (softened, please!)
- 1/2 cup of butter (also softened)
- 1 cup of powdered sugar
- 1/4 cup of milk
- 1 cup of creamy peanut butter
And don’t forget the finishing touch: we need 1 cup of semi-sweet chocolate chips to sprinkle on top after the frosting goes on. Those melt slightly when they hit the warm cake, giving it that great messy finish!
Step-by-Step Instructions to Make the Reeses Peanut Butter Earthquake
This is where we turn ingredients into pure happiness! Honestly, the instruction manual that comes with your cake mix is going to be your best friend here, but I’ll walk you through my special sequence. Make sure your oven is preheated before you even think about mixing, usually around 350°F, or whatever your box suggests for a 9×13 pan.
Preparing and Baking the Reeses Peanut Butter Earthquake Cake Layers
First, mix up your chocolate cake batter exactly as the box instructs—no adding extra milk or anything wild yet! We want that standard structure because we are going to interrupt it in the best way possible. Take that full batter volume and pour just half of it into your prepared 9×13 pan. It’s going to look thin, but don’t fret!
Now for the fun part: evenly scatter the entire bag of peanut butter baking chips over that first layer of batter. Once the chips are spread out, gently pour the second half of the remaining cake batter right over the top, trying to cover as many chips as possible. Bake this according to the box directions for that pan size. It usually takes about 30 to 35 minutes for mine. When you check it, the toothpick should come out clean or with just a few moist crumbs clinging to it.

Creating the Creamy Frosting
While that chocolate paradise is baking, hop right to the frosting, because that needs to be ready to fall on top while the cake is still warm. In a big bowl, start by beating the softened cream cheese until it’s absolutely smooth and lump-free. Seriously, no lumps allowed!
Next, add in your softened butter, the powdered sugar, and the milk. Beat this until it gets creamy and light. The last thing you do is mix in that whole cup of creamy peanut butter until everything is perfectly blended into a luscious, pale peanut butter cloud. Set this aside.
Assembling and Setting the Reeses Peanut Butter Earthquake
The key here is timing! Once the cake comes out of the oven, let it cool down for just 10 or 15 minutes. It needs to be warm enough for the frosting to melt slightly and sink in—that’s the ‘earthquake’ effect—but not so hot that the frosting turns into soup. Spread that glorious peanut butter frosting evenly over the top of the warm cake.
Immediately sprinkle those final semi-sweet chocolate chips all over the top of the frosting. They’ll barely start to melt, which is heavenly. Then, you have to be patient! Let the whole thing sit out at room temperature for at least an hour so the frosting can set up nicely before you slice into it. If you cut it too fast, it’s just a gooey mess, and while that’s delicious, it doesn’t present well! You can see some other great assembly tips for my no-bake creations as well!
Expert Tips for the Perfect Reeses Peanut Butter Earthquake
Look, even though this is super easy, there are definitely a few things I learned early on that make this Reeses Peanut Butter Earthquake go from great to legend status. The biggest pro move you can make is to follow the recipe note about the chips versus the cups. If you happen to have those cute little miniature Reese’s cups lying around, swap them out for the baking chips! They give you a more defined pocket of peanut butter when you slice into it, instead of just melting completely.

Also, when you check for doneness—don’t rely only on the toothpick test if you think it’s done. Give the pan a *very* gentle shake. If the center jiggles like actual liquid Jell-O, give it five more minutes. If it only has a slight wobble, you’re good to pull it! Trust me, you want it fully set before you try to frost it. If you love dealing with peanut butter variations, I’ve got another deep dive on texture in my peanut butter cookie guide!
Ingredient Notes and Substitutions for Your Reeses Peanut Butter Earthquake
Since this super-easy cake relies on a mix, we have a little wiggle room to customize, which I absolutely love! Remember I mentioned swapping out those peanut butter baking chips for the miniature Reese’s Cups? That’s probably the best substitution you can make because those little cups hold their shape a little better and give you that truly recognizable peanut butter burst inside the chocolate. It really elevates the whole experience!
Also, if you really want this chocolate and cream filling to sing, try a dark fudge cake mix instead of standard milk chocolate. The slightly bitter dark chocolate hits the sweetness of the peanut butter frosting and the chips perfectly. It makes the final product taste richer, almost like you used fancy imported cocoa!
Don’t feel bad if you can only find crunchy peanut butter; just know it will give your frosting a little texture. For me, creamy is the way to go for that smooth sink-in frosting layer, but either one gets the job done for this fun dessert.
Storage and Reheating Instructions for Reeses Peanut Butter Earthquake
This cake is definitely best eaten the day you make it, I won’t lie. Because we use that glorious cream cheese frosting, you absolutely have to store leftovers in an airtight container right in the refrigerator. If you leave it on the counter, that frosting gets a little sad and runny quickly!
It keeps beautifully in the fridge for about three or four days. Don’t even think about trying to microwave slices to reheat them, because the textures will just melt weirdly. Just pull a slice out about 20 minutes before you want to eat it. That little bit of time on the counter takes the chill off the frosting without making it fall apart!
Serving Suggestions for Your Reeses Peanut Butter Earthquake
You know this cake is rich, right? It’s a chocolate and peanut butter powerhouse! Because it’s so decadent, you want something simple alongside it. A big glass of ice-cold milk is mandatory, truly. My kids drink milk with theirs, and I usually sneak a cup of strong, black coffee alongside a slice because the bitterness just cuts through the sweetness perfectly.
If you’re feeling fancy and want to turn it into a real plated dessert, you cannot go wrong with a scoop of vanilla bean ice cream. The contrast between the cold, creamy ice cream and the slightly room-temperature, gooey cake is amazing. If you want something bubbly, check out my recipe for a floating ice cream drink—it’s fun and festive!

Frequently Asked Questions About Reeses Peanut Butter Earthquake
Whenever I post this amazing chocolate dessert, I get tons of questions, which is great! It shows people are excited to make it, and I want to make sure you get the absolute best results possible on your first try. Here are the things I get asked about the most regarding this super easy peanut butter cake.
Can I use crunchy peanut butter in the frosting?
You absolutely can! And honestly, some people swear by it! For me, I prefer the creamy version because I love that smooth texture filling up all those little cracks when it sinks into the warm cake—that’s the earthquake part I crave. But if you love those little nutty bites throughout your frosting, go for crunchy. It just changes the mouthfeel a little bit.
How long does the Reeses Peanut Butter Earthquake cake need to set?
This is crucial for clean slices! You need to let the cake sit on the counter after you frost it for at least one hour. I know, waiting is the hardest part! But this gives the cream cheese frosting time to firm up enough so that when you cut into it, you get defined layers instead of just a big gooey puddle. You want that gorgeous contrast of textures.
Can I make this peanut butter cake in cupcakes?
Yes, you totally can! It makes a ton of cupcakes, probably two full dozen, depending on how big you fill them. Since the cupcake shape is much smaller than a 9×13 pan, they bake way faster. I’d start checking them around 18 to 20 minutes, and you should be good to go. You can totally frost the mini peanut butter cups on top just like the big cake!
If you’re looking for more fun, fast recipes, you might enjoy my Boston Cream Poke Cake as well!
Nutritional Estimate for This Decadent Reeses Peanut Butter Earthquake
Now, let’s talk about the fuel for this delicious monster. Because this Reeses Peanut Butter Earthquake cake loaded with chocolate chips and a rich frosting, I won’t pretend it’s health food! But that doesn’t mean we can’t be informed about what we’re diving into, right? It’s important to know roughly what you are getting when you serve up a big slice of pure happiness.
Keep in mind these numbers are just an estimate based on how the recipe usually turns out and the standard ingredients used, especially that box mix. If you use different brands or add more frosting, the numbers will shift a bit! For a deeper look at sugar content in general, you should definitely peek at my recent post on fruit sugars!
Here is what we are generally looking at for one slice:
- Serving Size: 1 slice
- Calories: 450
- Sugar: 45g (Yes, a bit high, but that’s the fun part!)
- Sodium: 300mg
- Fat: 28g
- Saturated Fat: 10g
- Unsaturated Fat: 18g
- Trans Fat: 0g (That’s a win!)
- Carbohydrates: 50g
- Fiber: 2g
- Protein: 7g
- Cholesterol: 35mg
See? A perfect slice of indulgence ready for your next gathering!
Print
Reese’s Peanut Butter Earthquake Cake
- Total Time: 50 min
- Yield: 12 servings 1x
- Diet: Vegetarian
Description
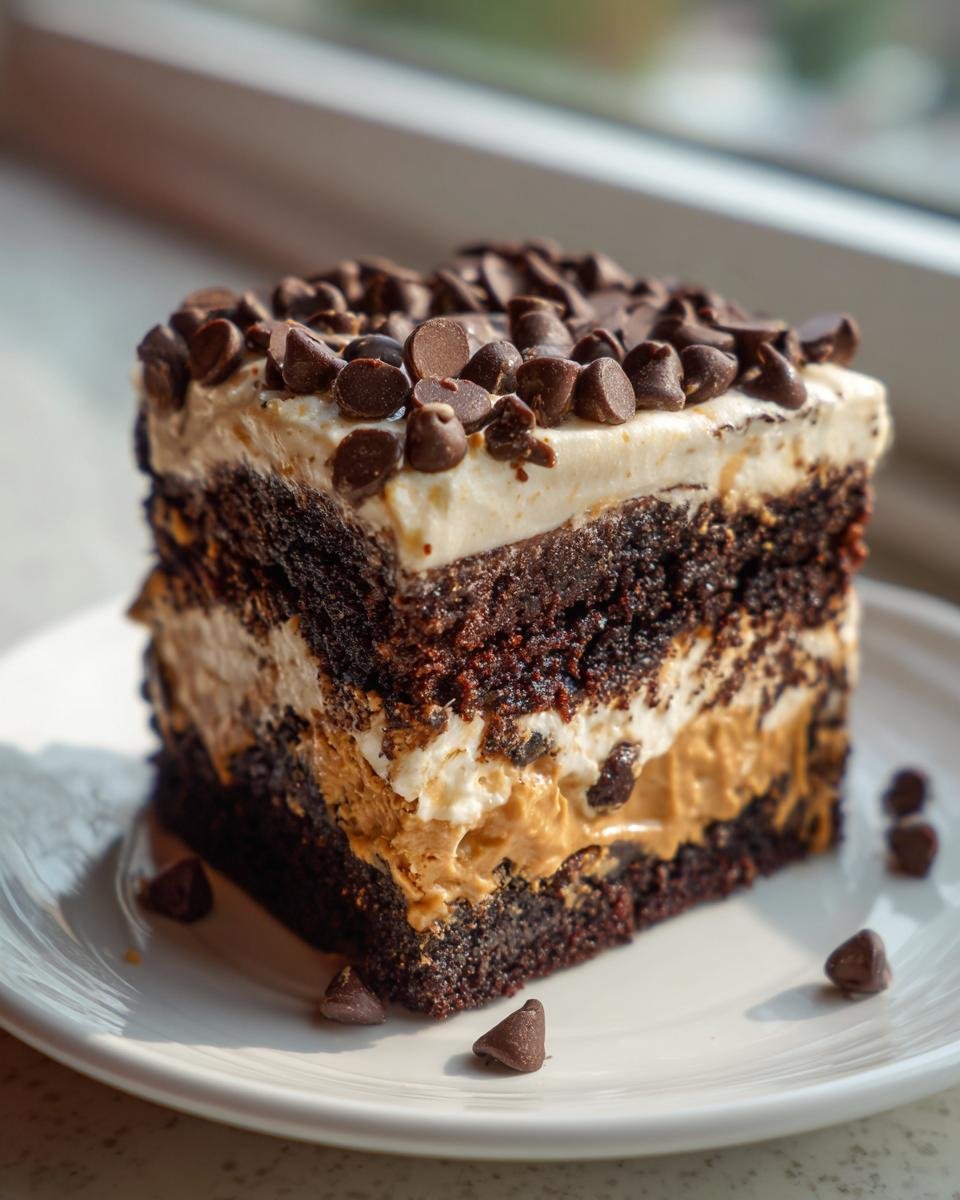
A rich chocolate cake with peanut butter cups and a creamy peanut butter topping.
Ingredients
- 1 box chocolate cake mix
- Ingredients listed on cake mix box (eggs, oil, water)
- 1 package (12 oz) peanut butter baking chips
- 1 cup creamy peanut butter
- 1 cup powdered sugar
- 1/2 cup butter, softened
- 1/4 cup milk
- 1 package (8 oz) cream cheese, softened
- 1 cup semi-sweet chocolate chips
Instructions
- Prepare the cake mix according to package directions.
- Pour half of the batter into a greased and floured 9×13 inch baking pan.
- Sprinkle the peanut butter baking chips evenly over the batter.
- Pour the remaining batter over the chips.
- Bake according to cake mix directions for a 9×13 pan.
- While the cake bakes, prepare the frosting: Beat the cream cheese until smooth. Add the powdered sugar, softened butter, and milk. Beat until creamy. Stir in the creamy peanut butter.
- Once the cake is done, let it cool slightly.
- Spread the cream cheese frosting over the warm cake.
- Sprinkle the semi-sweet chocolate chips over the frosting.
- Let the cake set before slicing and serving.
Notes
- You can use miniature peanut butter cups instead of baking chips for a different texture.
- For a richer flavor, use a dark chocolate cake mix.
- Prep Time: 15 min
- Cook Time: 35 min
- Category: Dessert
- Method: Baking
- Cuisine: American
Nutrition
- Serving Size: 1 slice
- Calories: 450
- Sugar: 45g
- Sodium: 300mg
- Fat: 28g
- Saturated Fat: 10g
- Unsaturated Fat: 18g
- Trans Fat: 0g
- Carbohydrates: 50g
- Fiber: 2g
- Protein: 7g
- Cholesterol: 35mg
Keywords: Reese's, peanut butter, chocolate cake, earthquake cake, dessert, sweet