
Okay, sometimes you just need an appetizer that is ridiculously fun and requires zero actual cutlery. Forget fussy dips or complicated layered things! We all love pizza, right? Well, I took that gooey, cheesy, pepperoni-loaded goodness and turned it into the ultimate tear-and-share experience.
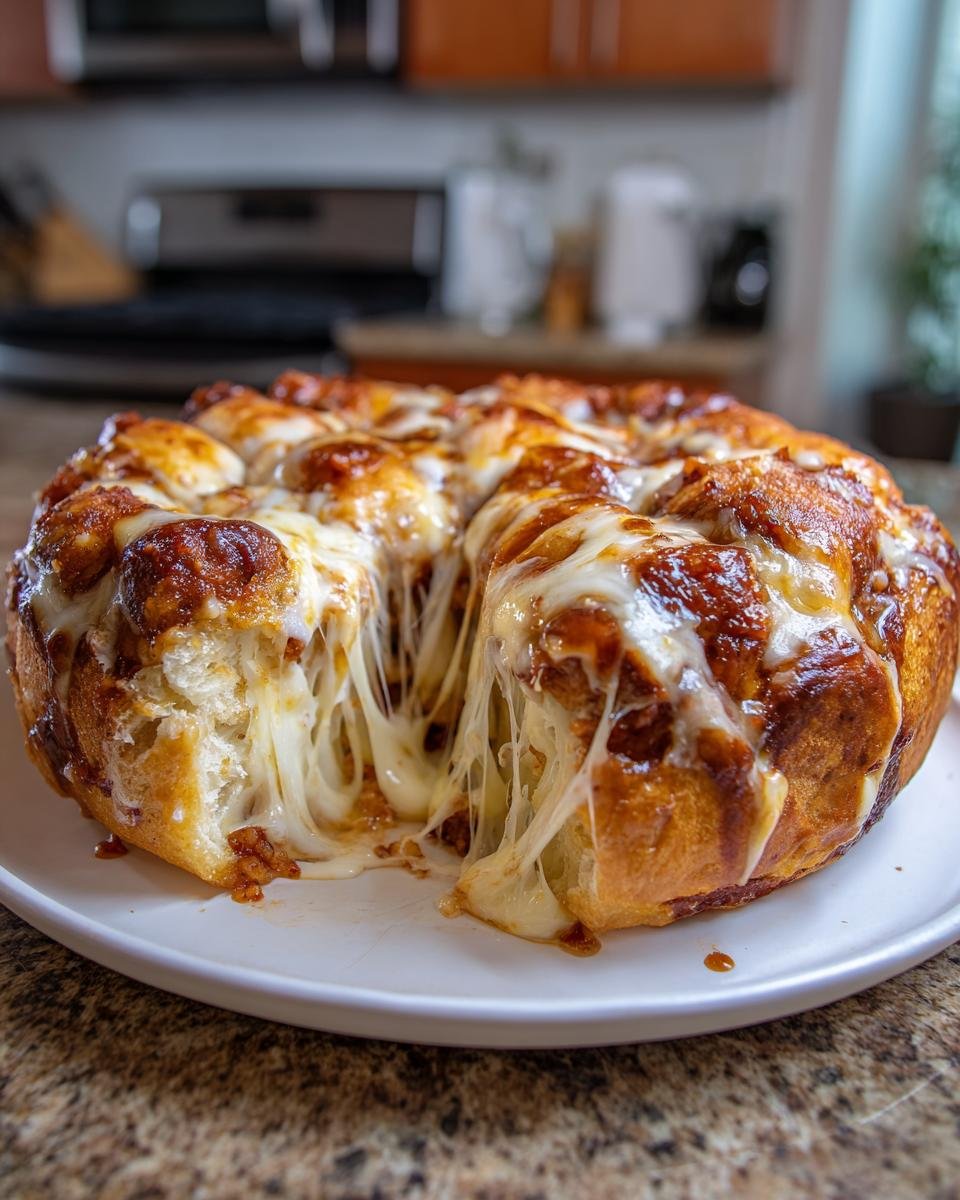
Seriously, this **Pizza Monkey Bread** is what your next game night is missing. It’s soft, it’s savory, it’s messy in the best way possible, and it’s shockingly fast to throw together. One can of dough, a little melted butter, and all your favorite pizza toppings layered inside a Bundt pan. Trust me, watching people fight over the last cheesy strand is half the enjoyment!
Why This Pizza Monkey Bread is Your New Favorite Appetizer
I’m telling you, this savory treat is going straight to the top of your party rotation. It delivers all the satisfying flavors of your favorite slice but in a format that just begs to be shared. It’s the perfect blend of simple assembly and huge payoff. You want easy appetizers that disappear fast? This is it.
- It’s incredibly quick to assemble, meaning less time stressing in the kitchen and more time hanging out with everyone!
- It looks impressive coming out of that Bundt pan, but honestly, it took almost no effort.
- The cheese-to-dough ratio is basically perfection.
Quick Prep Time for Easy Entertaining
Seriously, 15 minutes. That’s my biggest selling point right there! While others are chopping veggies or making complicated dips, you’ll already be tossing the dough in that glorious butter mixture. I usually start assembling this while the oven is preheating. It means I can spend more time talking about my other game day snacks instead of scrubbing pans.
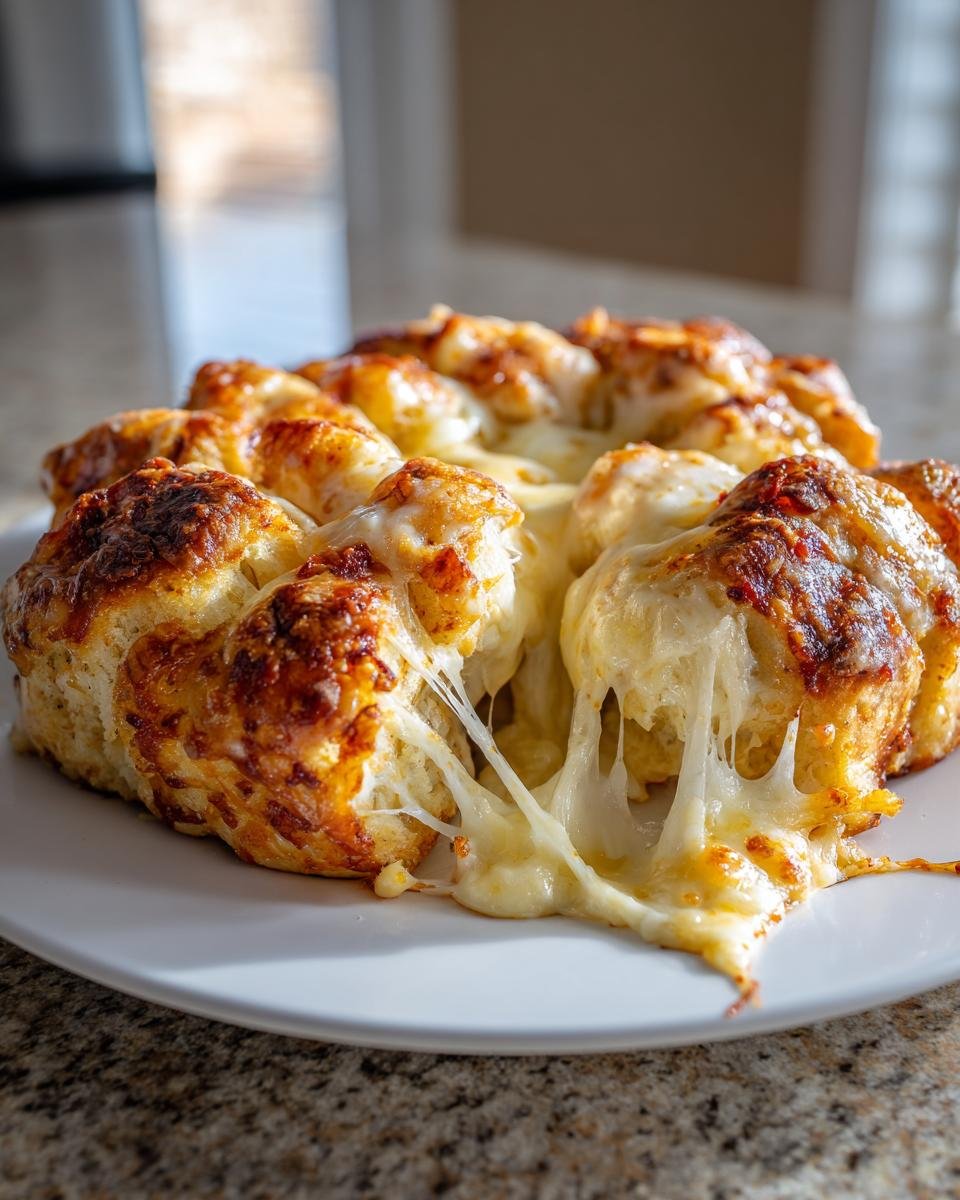
The Ultimate Pull-Apart Experience
Don’t even bother with serving tongs! This bread is designed to be torn apart by hand. You get that satisfying stretch when you pull a piece away, and it’s always loaded with gooey mozzarella and a little bit of pepperoni hiding inside. It’s tactile, it’s warm, and it’s just plain fun to eat. You just can’t get that with a slice on a plate!

Gathering Ingredients for the Best Pizza Monkey Bread
Okay, getting the ingredients together for this savory treat is almost as easy as the assembly. You really don’t need a massive grocery list, which is fantastic when you’re hosting. I always keep an eye out for good deals on the dough, but the seasonings are what really give this its signature flavor punch.
Since this recipe uses ready-made dough, most of the hard work is already done for you! This is one of those recipes where having the right versions of the toppings makes all the difference, especially the cheese. Check out the list below—you might have everything on hand already. If you’re looking for other easy cheesy bakes, you should check out my favorite homemade cheese pie recipe!
Dough and Coating Components
This is where we build the base flavor that soaks into every single dough piece. Don’t skimp on the butter here; it’s what turns those dry pieces into moist, flavorful pockets!
- One 13.8 ounce can of your go-to refrigerated product. You can use pizza dough or biscuit dough—whatever you prefer for texture!
- A half cup of lovely, fully melted butter. That’s right, butter! None of that oil substitute nonsense for this recipe.
- One teaspoon of garlic powder. This is crucial for that recognizable pizza joint flavor.
- One teaspoon of dried Italian seasoning. Make sure it smells fresh! It adds depth.
Pizza Toppings for Your Pizza Monkey Bread
Now for the fun part—the fillings that make this absolutely irresistible. Make sure you’re using good quality sauce because you’ll be tasting it in every single bite of your wonderful Pizza Monkey Bread.
- A half cup of standard pizza sauce.
- One full cup of shredded mozzarella cheese. You want that stretch, so use the good stuff!
- A quarter cup of mini pepperoni slices. These little guys curl up perfectly when baking.
Essential Equipment for Making Pizza Monkey Bread
You don’t need a full arsenal of fancy gadgets for this one, which is another reason I love it for last-minute gatherings. We are keeping this super simple, but a few key items ensure everything goes smoothly once that dough comes out of the fridge. Proper equipment makes even quick recipes look professional!
If you’re curious about maximizing cooking in small spaces, I sometimes use my air fryer for things like potatoes—you can check out my tips for air fryer baked potatoes—but for this bread, we need the oven for that even bake.
Here is the short list of things you absolutely need before you start cutting up that dough:
- A Standard Bundt Pan: This is the star! It gives the bread that classic, beautiful shape and ensures the pieces stack nicely for even cooking. Make sure you grease this pan really well, trust me on this one.
- A Medium Mixing Bowl: You need a bowl large enough to toss all those little dough nuggets in the seasoned butter without everything flying out onto the counter.
- Measuring Utensils: Cups and spoons, obviously, to make sure that garlic butter ratio is just right. We need the coating to be generous but not swimming in residue.
- A Sharp Knife or Kitchen Shears: You’ll need something reliable for cutting that canned dough quickly into uniform, bite-sized pieces. Shears work really well if you’re worried about squishing the dough!
Step-by-Step Instructions for Perfect Pizza Monkey Bread
Alright, this is where the magic happens! Don’t rush the prep, because making sure every single dough piece is coated in that savory butter mixture is the secret weapon for incredible flavor here. We are building this delicious cheesy pull apart bread layer by layer until it’s ready for the oven. It moves fast, so have your pan greased before you even start cutting! If you want to see exactly how cheesy this turns out, check out my dedicated post on the cheesy experience.
Preparation and Butter Coating for Pizza Monkey Bread
First things first: get that oven hot! We need 375 degrees Fahrenheit (190 Celsius) ready to go. While it preheats, take your time greasing that Bundt pan exceptionally well—I mean, really get into those nooks and crannies. Now, take your pizza dough and slice it into bite-sized pieces. Think maybe an inch or so across.
In your medium bowl, whisk together that melted butter, the garlic powder, and the Italian seasoning until combined. Toss those cut dough pieces in gently until every single nugget is shiny and coated. You want zero dry edges peeking out when you drop them in the pan!
Layering the Pizza Monkey Bread Components
This layering is what sets us up for success. Start by dropping about half of your buttered dough into the bottom of that prepared Bundt pan. Now, go ahead and spoon half of your pizza sauce right over that dough layer. Sprinkle half of your mozzarella and half of those tiny pepperoni slices on top.
Now, repeat the entire sequence! Drop the remaining dough pieces over the first layer. Then, spread the rest of the sauce evenly, and top it all off with the remaining cheese and pepperoni. Try to spread the toppings out right to the edges so you get cheese pull in every single piece!
Baking and Serving Your Pizza Monkey Bread
Pop that pan into the hot oven. It needs about 25 to 30 minutes to bake. You are looking for it to be beautifully golden brown on top and cooked all the way through the middle. If you wiggle the pan gently, it should feel firm. Once it’s done, pull it out, but here’s a crucial step, don’t flip it yet!
Let your **Pizza Monkey Bread** rest right there in the pan for a solid 5 minutes. This little break helps the structure set! After that, place your serving plate on top of the pan and, using oven mitts (it will be scorching!), flip it all over quickly. Give it a second to settle, and then gently lift the pan off. Perfection!
Tips for Success with Your Pizza Monkey Bread
Listen, even though this recipe is super forgiving, there are always little tricks I use to make sure it comes out looking like I spent hours on it instead of just minutes. Since we’re relying on canned dough, managing moisture and adding texture is key to boosting that E-E-A-T factor in your snack presentation! I always keep a few ideas in my back pocket for when I need to customize it based on what I have staring back at me from the fridge.
If you ever need other simple, satisfying recipes, exploring how to make things like homemade wonton soup often comes down to balancing simple, fresh components, just like we do here!
Topping Variations for Next Time
The basic recipe is amazing, but this bread format is just begging for personalization! If you’re making this for a crowd that loves meatier options, don’t hesitate to throw in some extras when you’re doing your layering in the Bundt pan. You definitely don’t have to stick just to pepperoni!
- Cooked ground sausage crumbles melt right in with the cheese. Make sure it’s fully cooked and drained well first, though! We don’t want greasy pools at the bottom of the pan.
- Tiny chopped veggies work great too! I love adding small bits of green bell pepper or even thinly sliced black olives if I have them. The little bursts of color are lovely when you pull a piece out.
- A sprinkle of dried oregano over the top layer of cheese before baking really enhances that authentic Italian aroma while it bakes up.
Just remember, whatever you add, make sure it’s small! We need those dough pieces to stay light and fluffy, not weighed down by huge chunks of topping.
Serving Suggestions for Your Cheesy Pizza Monkey Bread
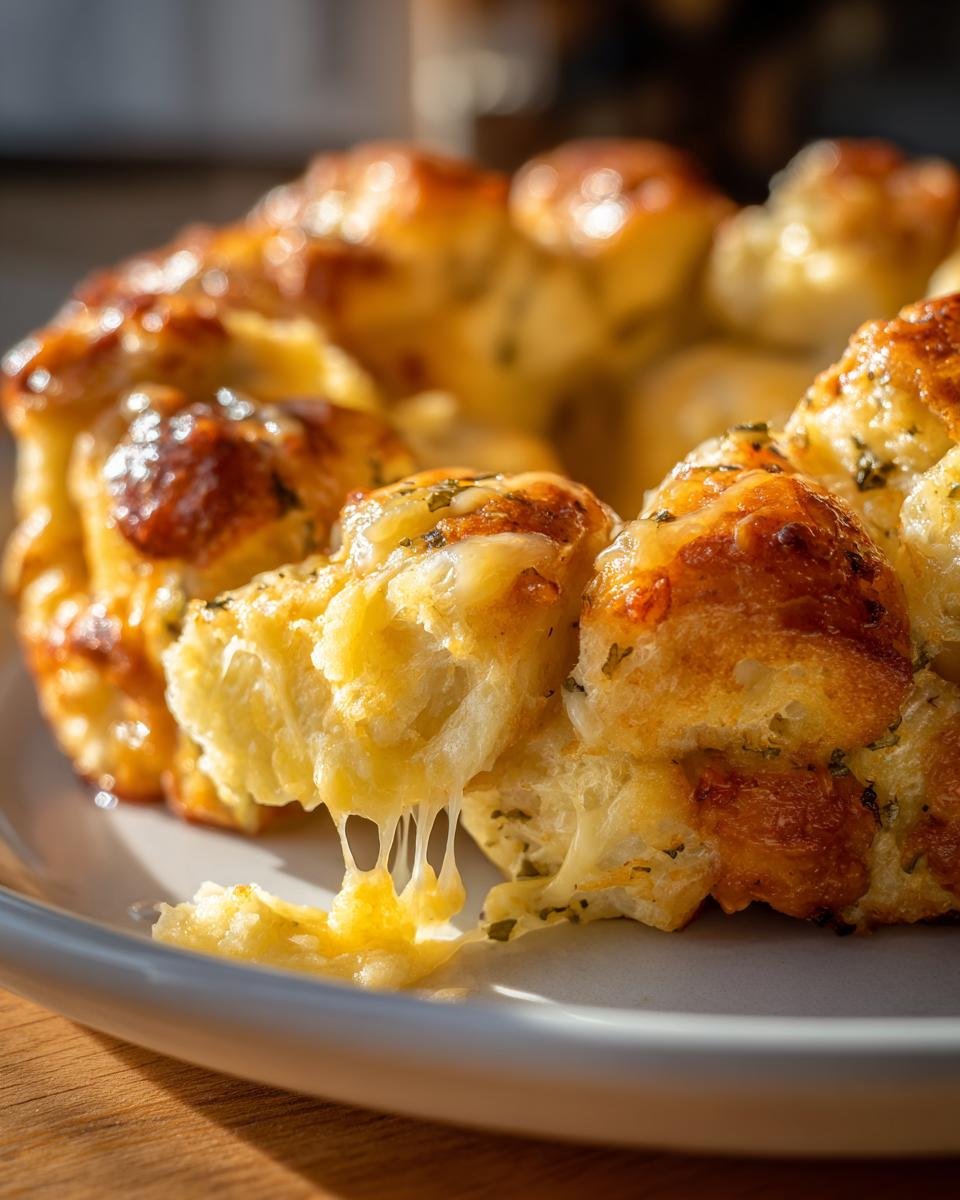
When this glorious, cheesy, savory **Pizza Monkey Bread** comes out of the oven, the aroma is just incredible—it smells exactly like a fresh pizza joint exploded in your kitchen! Because it’s already so rich and loaded with sauce and cheese, you might think it doesn’t need anything extra, but trust me, a little extra dipping sauce takes this pull apart bread straight to legendary status.
Presentation is key, even for something this casual! Since it bakes up looking like a golden brown wreath, the easiest way to serve it is right on a nice wooden cutting board or a simple white platter. Let people gather around and start tearing pieces off right there. It just feels communal and fun, which is the whole point of monkey bread, right?
The absolute best way to serve this is warm, preferably within 10 minutes of pulling it out of the oven so the cheese is maximally stretchy. And that extra dipping sauce? Oh my goodness. Having a small ramekin of warm pizza sauce right in the middle makes dipping so much easier than trying to scoop sauce onto individual pieces. If you want a really addicting, simple dip to pair with things like this, I highly recommend checking out my recipe for an addicting dip recipe—it works perfectly here too, even though it’s not Italian flavored!
You can also sprinkle a tiny bit of fresh basil or parsley over the top right before serving if you want a little pop of green color before everyone dives in. But honestly, the main suggestion is just to have a stack of napkins ready because hands are going to be covered in sauce and melted mozzarella!
Storage and Reheating Instructions for Leftover Pizza Monkey Bread
Okay, let’s be real—if you made this for a party, chances are you won’t have much left! But if you do manage to save a few glorious pieces, we need to talk about keeping that dough and cheese in shape until you want a second round. It’s cheesy bread, so it needs a little care to keep it from drying out too much.
The key here is controlling the air exposure. Nobody wants stale, chewy leftovers. If you’re storing it for just a day or two, covering it up tightly is super important. If you’re looking for ways to store other baked goods, sometimes learning about the science behind how things spoil helps, but for this, we just need an airtight seal.
Here is exactly how I handle the leftovers so they taste almost as good the next day:
- Storage: Let it cool down completely first—this is vital! Once cool, place the pieces in a genuinely airtight container. A sturdy zip-top bag works in a pinch too, but a rigid container protects those beautiful corners better. Always store these at room temperature, not in the fridge.
- Fridge Alert: Do not be tempted to stick this in the refrigerator for longer than 2 days, if you can help it. The fridge dries out bread products fast, even with the sauce and cheese in there.
The Best Way to Reheat Your Leftovers
I know your first instinct is probably the microwave because it’s fast, but trust me, microwaving this cheesy bread will turn it tough and sad almost instantly. We need to bring back that soft interior and slightly crispy exterior. This means breaking out the oven one last time!
Preheat your oven again, maybe 325 degrees Fahrenheit this time—we don’t need it screaming hot. Lay the leftover pieces out in a single layer on a baking sheet. If you want to be super fancy, you can line it with foil, but I usually just place them directly on the sheet.
Bake them for about 8 to 10 minutes. You’ll know it’s ready when the cheese at the edges starts to look gooey again and the dough feels soft when you poke it. The heat works to re-steam the dough inside while crisping up that butter coating on the outside. It’s a total game-changer!
Frequently Asked Questions About Pizza Monkey Bread
It’s so popular that I keep getting DMs and emails asking for clarification on a few sticking points! I totally get it—when you’re making something this fun, you want to make sure you hit all the right notes, especially around the dough and equipment. Let’s clear up a few things so your **Pizza Monkey Bread** comes out perfect every single time!
If you’re wrestling with the dough choice, sometimes looking at recipes that rely on basic doughs helps. I have a great guide on 2-ingredient biscuits that shows how sensitive dough can be to handling! But for this cheesy pull apart bread, here are the answers to the most common things I hear.
Can I use homemade pizza dough instead of refrigerated dough for this Pizza Monkey Bread?
Yes, you absolutely can! That’s the great thing about adapting recipes. If you have fantastic homemade dough, go for it. The main thing you need to watch out for is thickness and moisture. Homemade dough might be chewier, and if you’re using a recipe that requires a long rise, just make sure you cut the pieces evenly.
When you cut it, try to keep the pieces roughly the same size as those chopped refrigerated bits—maybe just slightly bigger. If your homemade dough is wetter than the canned stuff, you might want to slightly reduce the amount of melted butter in the tossing step, or risk a puddle forming at the bottom of your pan. I usually toss the homemade pieces and then let them sit in the bowl for five minutes before layering; this slightly absorbs the excess fat.
What if I don’t have a Bundt pan for the pull apart bread?
Don’t panic if your Bundt pan is hiding out in the attic or if you just don’t own one! This recipe is incredibly versatile, and the structure of the dough handles different vessels pretty well. We are aiming for an even bake, so a deep dish works just as well as the classic ring shape.
Your best bet is probably a 9×5 inch loaf pan. Line it really well with parchment paper, making sure there’s an overhang on both long sides—this is your handle for getting the heavy, cheesy bread out later! If you use a loaf pan, remember it’s deeper than the Bundt pan, so you’ll need to add about 5 to 10 minutes to your baking time. Check for doneness carefully with a toothpick inserted near the center. A standard 9-inch pie dish works too, but you’ll have a flatter bread, so check that bake time sooner!
Nutritional Estimates for Pizza Monkey Bread
Okay, so while this is pure comfort food heaven, I always feel a little better when I have a general idea of what’s in it! Since we are dealing with refrigerated dough, canned sauce, and an army of mozzarella cheese, these numbers are definitely going to swing towards the savory side. I always tell folks not to sweat the exact details when eating something this fun, but it’s good to know the basics!
For easy reference, I’ve compiled the estimates based on using all the standard ingredients listed above. If you decide to bulk it up with extra sausage or different cheeses, you know those numbers are going to shift! I always have to remind myself that this is an appetizer, meant for sharing, so dividing it into 6 decent servings keeps things reasonable. If you’re interested in the sugar content of other recipes, like how fruits stack up, you can peek at my notes on the surprising sugar content of fruits.
Here is what you can generally expect for one portion of this glorious, cheesy **Pizza Monkey Bread**:
- Calories: Around 350 calories, which is pretty substantial for an appetizer!
- Fat: Expect about 18 grams total fat. Remember, a good chunk of that is the delicious, melted mozzarella and butter coating.
- Carbohydrates: Roughly 35 grams, coming mainly from the dough.
- Protein: We get about 14 grams here, thanks to all that cheese and pepperoni!
One tiny disclaimer, because I’m a careful cook: These numbers are just estimates! If you use premium mozzarella or load up on extra savory pepperoni slices (which, good for you!), these figures will go up. They hold true if you stick closely to the recipe notes, though. Enjoy it warm!
Print
Pizza Monkey Bread
- Total Time: 45 min
- Yield: 6 servings 1x
- Diet: Vegetarian
Description
A fun, pull-apart bread recipe combining pizza flavors with a monkey bread format.
Ingredients
- 1 (13.8 ounce) can refrigerated pizza dough or biscuit dough
- 1/2 cup melted butter
- 1 teaspoon garlic powder
- 1 teaspoon dried Italian seasoning
- 1/2 cup pizza sauce
- 1 cup shredded mozzarella cheese
- 1/4 cup mini pepperoni slices
Instructions
- Preheat your oven to 375 degrees Fahrenheit (190 degrees Celsius). Grease a standard Bundt pan.
- Cut the pizza dough into small, bite-sized pieces.
- In a medium bowl, mix the melted butter, garlic powder, and Italian seasoning.
- Toss the dough pieces in the seasoned butter mixture until coated.
- Place half of the buttered dough pieces into the prepared Bundt pan.
- Spoon half of the pizza sauce over the dough layer. Sprinkle with half of the mozzarella cheese and half of the pepperoni.
- Top with the remaining dough pieces, then the rest of the sauce, cheese, and pepperoni.
- Bake for 25 to 30 minutes, or until the bread is golden brown and cooked through.
- Let the bread cool in the pan for 5 minutes before inverting onto a serving plate.
Notes
- You can add other small pizza toppings like cooked sausage or chopped bell peppers.
- Serve warm with extra pizza sauce for dipping.
- Prep Time: 15 min
- Cook Time: 30 min
- Category: Appetizer
- Method: Baking
- Cuisine: American
Nutrition
- Serving Size: 1 slice
- Calories: 350
- Sugar: 4
- Sodium: 750
- Fat: 18
- Saturated Fat: 9
- Unsaturated Fat: 9
- Trans Fat: 0
- Carbohydrates: 35
- Fiber: 1
- Protein: 14
- Cholesterol: 40
Keywords: pizza monkey bread, pull apart bread, pizza dough recipe, cheesy bread, appetizer