
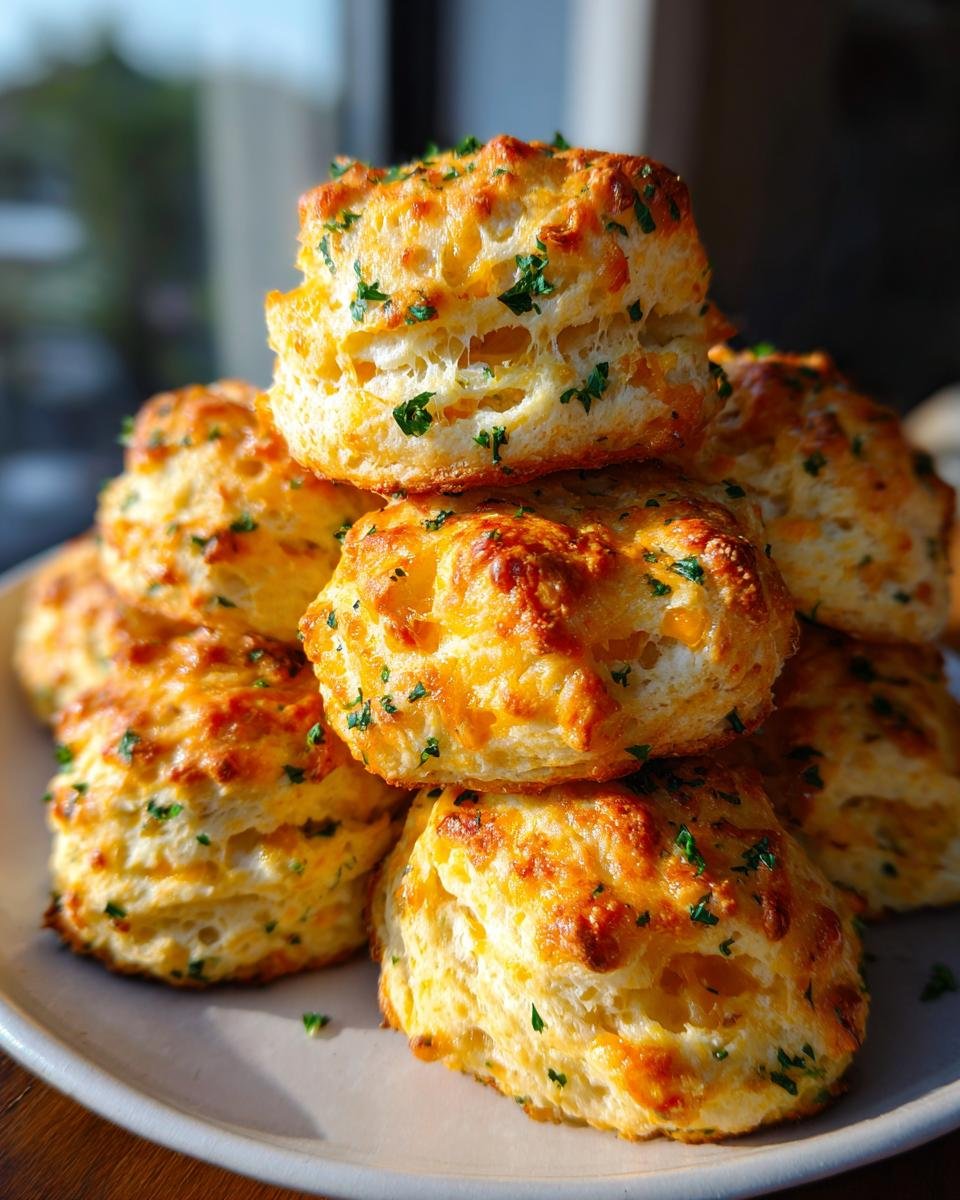
Oh, you know the drill. You’re settling in for dinner, maybe you’re making a simple soup or some chili, and you just get that undeniable craving. You need those magical, garlicky, cheesy pillows that *that one restaurant* seems to master, right? Well, stop dreaming and start mixing, because I finally cracked the code for the ultimate copycat Cheddar Bay Biscuits! These aren’t just good; they are show-stoppers. They are impossibly cheesy, drenched in that signature garlic butter, and fall apart soft on the inside. I remember the first time I made them; I kept pulling them straight from the oven until the whole batch was gone. Trust me, once you try my method, you won’t need that chain restaurant ever again!
Why You Will Love These Copycat Cheddar Bay Biscuits
Honestly, there are so many reasons these homemade Cheddar Bay Biscuits beat the restaurant version, and I’m thrilled to share them! I ran through so many failed batches trying to get the texture right—too dry, too dense, not enough cheese—but I finally landed on the perfect formula. You’re going to love how simple they are.

- They taste exactly like the ones you crave—that burst of sharp cheddar married perfectly with heavy garlic butter? Nailed it.
- Seriously fast! From grabbing the ingredients to pulling them out of the oven, you’re looking at about 30 minutes total. Perfect for last-minute dinner additions.
- The texture is unbeatable: tender and slightly dense, thanks to keeping the ingredients super cold and not overworking the dough. They just melt in your mouth.
- This recipe is incredibly reliable. After a few batches, I learned exactly how the dough should feel, so you can trust that these will come out perfect every single time you try them.
- If you’re looking for an amazing, quick side bread, this is it. These simple, soft biscuits are a guaranteed crowd-pleaser alongside almost any meal.
Trust me on this: the payoff is huge for very little work. You just follow the cold-ingredient rule, and boom, you have magic.
Essential Ingredients for Perfect Cheddar Bay Biscuits
Getting these Cheddar Bay Biscuits right comes down to one thing: temperature! Please, please, please pay attention to the cold requirements here. If your butter is even slightly soft, you’re going to end up with something closer to a scone than a velvety biscuit. We are aiming for flaky layers, which means our fat needs to stay frozen! It’s worth a little extra time in the fridge for these beauties.
When you’re ready, grab your ingredients. I often think about that amazing savory cheese pie my aunt makes—it’s the quality of the cheese that makes the difference! Make sure you have sharp cheddar here for that signature bite.
For the Cheddar Bay Biscuits Dough
These go into the bowl in a specific order:
- 2 cups all-purpose flour
- 1 tablespoon baking powder (This is what gives them their lift!)
- 1 teaspoon salt
- 1 teaspoon sugar (Just a hint, honestly!)
- 1/2 cup cold unsalted butter, neatly cut into small pieces (Keep this cold, I mean frostbite cold!)
- 1 cup cold buttermilk (This reacts wonderfully with the baking powder.)
- 1 cup shredded sharp cheddar cheese (Use the good, sharp stuff!)
For the Garlic Butter Topping
This is where the magic really happens. Don’t skimp on the garlic powder!
- 1/4 cup melted butter (I use unsalted butter for everything, just to control the salt myself.)
- 1 teaspoon garlic powder
- 1/2 teaspoon dried parsley
If you want to get fancy with infusing that garlic butter, check out my tips on how to properly infuse that garlic; it makes a world of difference before you drizzle it on!
Step-by-Step Instructions to Make Cheddar Bay Biscuits
Okay, now that we have our perfect cold ingredients lined up, we move fast! Speed is our friend here so that butter doesn’t warm up. Don’t worry if you’re new to making biscuits from scratch; these are more forgiving than you might think. We’re using a standard technique, but we’re keeping everything cool until it hits the oven. It’s this quick method that keeps every biscuit tender inside, which is exactly what we want for those famous savory dinner rolls!
Preparing the Dough for Cheddar Bay Biscuits
First up, let’s get the kitchen prepped. You absolutely must preheat your oven to 400 degrees Fahrenheit—no cheating! Line up a baking sheet with parchment paper so cleanup is a dream later.
In a big bowl, whisk together the flour, baking powder, salt, and sugar until they are totally combined. Next comes the cold butter. You need to cut that in. Don’t use your hands too much until you absolutely have to! I grab a pastry blender, or even two forks, and work that butter in until the mixture looks like nice coarse crumbs. This means the butter pieces are still visible, maybe like tiny peas. Then, stir in your shredded cheddar cheese.
Pour in the cold buttermilk all at once. This is the most important mixing tip: Mix until it *just* comes together, and I mean *just*! If you keep stirring once the flour disappears, you’ll overwork the gluten, and your lovely cheese biscuits will turn tough. Stop mixing when you still see a little flour streak! That slight over-mixing will happen in the oven.
Baking and Finishing Your Cheddar Bay Biscuits
Now that we have a shaggy, slightly messy dough, use rounded tablespoons to drop little mounds onto your prepared baking sheet. Make sure they aren’t touching too much; they puff up nicely! Pop that sheet into the hot 400°F oven for about 12 to 15 minutes. You’re looking for them to be puffed up and just lightly golden on the tops.
While those are baking away, it’s time for the best part. In a small bowl, mix your 1/4 cup of melted butter with the garlic powder and dried parsley. Make sure that garlic powder is stirred right in so you get an even coating.
The critical moment! As soon as the biscuits come out of the oven, you need to immediately brush that glorious garlic butter mixture generously over the tops before they even have a chance to cool down. That hot biscuit surface soaks up all that wonderful garlicky goodness. Serve them right away while they are piping hot!
Tips for Achieving Restaurant-Quality Cheddar Bay Biscuits
We’ve mastered the basics for these super satisfying biscuits, but if you want to take them from “really good” to “I can’t believe I didn’t buy these,” we need to talk details. It’s all in the nuances, isn’t it? I spent way too long figuring out that the secret isn’t just the butter; it’s how cold that butter is when it hits the flour.
First off, let’s talk about our leavening agent. You’ll notice I listed baking powder and not baking soda. That’s intentional! Baking soda needs an acid to activate quickly, like buttermilk provides, but using *only* baking soda can sometimes leave a slightly metallic or soapy aftertaste, especially in savory breads like these. Baking powder gives us that reliable, gentle lift we need for the perfect puff without interfering with the sharp cheddar flavor. That’s my little expert tip for you!
Keeping things freezing cold is paramount. Don’t just use cold butter; if you have time, throw your cubed butter into the freezer for 15 minutes right before you start mixing the dry ingredients. The colder the fat, the better the steam pockets it creates in the oven, which equals flakier, dreamier cheese biscuits.
Now, the flavor infusion for the garlic butter—this is a game-changer. Instead of just mixing the parsley and garlic powder into the melted butter right before brushing, try this: melt your butter, turn the heat *off*, and stir in the garlic powder and parsley. Let it sit for about 10 minutes while the biscuits bake. This lets the fat absorb the flavor compounds from the herbs and garlic much more deeply! You’ll get this incredible, aromatic coating.
One last thing: If you find your dough is way too sticky to handle—which can happen if your buttermilk was slightly warmer than expected—don’t panic or add more flour! Flour is the enemy of tenderness here. Instead, wrap the whole shaggy dough ball in plastic wrap and pop it in the fridge for 20 minutes. It firms up beautifully, and then you can scoop those lovely mounds onto the sheet without them melting into puddles.
Ingredient Substitutions for Cheddar Bay Biscuits
We all have those days, right? You’re ready to bake these amazing Cheddar Bay Biscuits, and you look in the fridge, and—ugh—you are missing one key item. Don’t let that stop you! While I swear by the listed ingredients for the absolute best result, I’ve worked around gaps in my pantry many times. These adaptations keep the integrity of the biscuit mostly intact.
The recipe notes mentioned swapping out some of the cheddar for Monterey Jack, and that’s a great idea if you want a milder, extra melty chew. If you’re doing that, keep the sharp cheddar as your dominant cheese for flavor, maybe a 75/25 split works well.
The big one people usually ask about is the buttermilk. If you don’t have buttermilk, don’t worry about running to the store! You can make a fantastic substitute right now. This is my go-to fix for almost any recipe calling for buttermilk. Just take a liquid measuring cup and fill it up with regular milk—whole milk works best, but 2% is fine—until you hit the 1-cup line. Then, stir in one tablespoon of white vinegar or fresh lemon juice. Give it a little swirl, let it sit on the counter for about five minutes, and watch it curdle slightly. Boom! You’ve got buttermilk for your dough!
What about the butter? If you are truly out of unsalted butter, you can use salted, but you *must* reduce the amount of added salt in the dry ingredients by about half a teaspoon. Taste your dough before you add the buttermilk if you use salted butter!
And if you’re in a pinch and totally out of cheese? Well, these won’t be quite the famous savory biscuits we are aiming for, but you can swap the cheese out for finely chopped scallions or a tablespoon or two of grated Parmesan cheese just to add some savory depth instead of the heavy cheddar pull. It changes the texture, sure, but at least you still get warm, garlicky bread!
Serving Suggestions for Your Cheddar Bay Biscuits
Honestly, once you pull these hot, gorgeous, cheesy biscuits out of the oven, sometimes you feel like you should just eat them standing over the sink, right? I totally get it. But if you’re managing to save a few (which I doubt you will!), these savory gems are fantastic alongside so many main courses.
These aren’t just for dinner rolls; they are a meal anchor! They soak up flavor like crazy. Here are a few of my favorite ways to serve these **Cheddar Bay Biscuits** when I manage to have leftovers (or when I deliberately bake a double batch).
- Seafood Boil or Steamed Shrimp: This is the classic pairing, and for good reason! The garlicky butter melts right into the warm shrimp juices or the broth of a low-country boil. You dip that biscuit right in, and I promise you won’t need any extra melted butter for dipping.
- Hearty Chili or Stew: Forget plain cornbread sometimes! These are sturdier and richer. When I make my favorite big pot of beef chili, having one of these warm, cheesy biscuits on the side is just heaven. They hold up beautifully against the thick broth. If you’re looking for a cozy match, you absolutely have to try them with something rich like a good Italian sausage soup.
- Thick, Creamy Soups: Think creamy tomato or broccoli cheddar soup. These biscuits are fantastic for scooping up every last drop, and since they are already cheesy, it elevates the entire bowl. Plus, they act as a wonderful contrast to the smooth texture of the soup.
Whatever you choose, just make sure you pile them high on a basket because they disappear terrifyingly fast when they come out of the oven smelling like that!
Storage and Reheating Instructions for Cheddar Bay Biscuits
We made such amazing, tender Cheddar Bay Biscuits, and hopefully, you managed to save at least one or two for later! These cheddar and garlic treasures are definitely best eaten within minutes of coming out of the oven, but they store surprisingly well for leftovers because of the fat content. You want to treat them gently so that garlic butter doesn’t just soak in and make them soggy overnight.
If you have a few left, don’t even think about wrapping them up tight while they are still warm. That’s how they steam themselves into gummy little pucks! Let them cool completely on a wire rack—this is crucial—before you put them away so that the steam escapes.
For short-term storage, just place them in an airtight container and leave them on the counter at room temperature. They should stay perfectly fine for about two days this way. If you need to keep them longer than that, pop that airtight container right into the refrigerator. Try not to leave them longer than four or five days in the fridge, though; the texture starts to suffer then.
The Best Way to Reheat Cheddar Bay Biscuits
Reheating is where we bring the magic back, but we need a two-step process for the *best* texture. If you just pop them in the microwave, you’ll get that soft interior, but they’ll be pale and floppy on top. We want crunchy edges and gooey centers!
Here is what I always do to revive those leftover savory rolls:
- Quick Microwave Kiss: If they are refrigerator cold, give the biscuit a quick 10 to 15-second zap in the microwave. Just enough heat to relax the dough and warm the cheese slightly. Be super careful not to go over thirty seconds, or they get tough fast.
- Oven Finish: Immediately transfer the slightly warmed biscuit onto a baking sheet. Pop it into a moderately hot oven—say, 350°F—for 3 to 5 minutes. This crisps the outside edges just a touch and warms everything through completely without drying them out.
If you saved any of that extra garlic butter (and I hope you did!), brush a tiny bit more on top right before they go into the oven for that second round of flavor revival. They come out tasting almost factory-fresh, ready to dip in your next bowl of soup!
Frequently Asked Questions About Making Cheddar Bay Biscuits
When I first started experimenting with making these wonderful savory biscuits at home, I had a million questions too! Readers often ask me about how to troubleshoot a few common issues, especially when it comes to achieving that perfect, fluffy interior. I’ve gathered the top three worries I hear most often about getting these copycat Cheddar Bay Biscuits just right. Don’t sweat the small stuff; we’ll fix it!
Can I use room temperature butter instead of cold butter for these cheese biscuits?
Oh, please don’t! I know it seems easier, especially if you forgot to take the butter out earlier, but using room temperature butter is the quickest way to ruin the texture of these Cheddar Bay Biscuits. When the butter is cold—and I mean *cold*, almost hard straight from the fridge—it stays in little distinct pieces when you cut it into the flour. When those cold butter pieces hit the hot oven, they melt quickly and create steam pockets. That steam is literally what pushes the dough up, giving you that light, flaky, layered crumb we adore!
If your butter is soft, it mixes right into the flour instead of staying separate. You end up with a denser, flatter biscuit that’s more crumbly than flaky. It’s one of the few non-negotiable rules for amazing quick breads like this!
How can I make my Cheddar Bay Biscuits taste more garlicky?
That is such a great question because while the garlic butter brush-on is fantastic, sometimes you want that roasted, deep garlic flavor infused throughout the whole biscuit, not just sitting on top! I’ve got two easy ways to boost that flavor profile:
- Double Down on the Butter: The easiest fix is simply increasing the amount of garlic powder you use in the finishing butter—go up to 1.5 teaspoons if you really love garlic. Also, after brushing the biscuits, put them back in the warm oven for just one minute. The residual heat helps the garlic permeate the surface better.
- A Little Garlic in the Mix: For a more subtle, internal boost, add about 1/4 teaspoon of garlic powder right into your dry ingredients (the flour mixture) before you cut in the butter. This seasons the whole dough, so every bite has that savory background note. Be careful not to add too much, as raw garlic powder can sometimes taste a little sharp if not diluted by fat and liquid.
If you’re making these as part of a feast, you can always look up how to make a great homemade wonton soup to pair them with, and use a little extra garlic in the soup base as well!
What is the best cheese to use in Cheddar Bay Biscuits?
For that strong, tangy flavor that cuts through the richness of the garlic butter, you absolutely need a sharp cheddar cheese. Full fat, highly aged cheddar gives you the best flavor payoff. When it melts, it turns gooey without becoming oily, giving you that amazing stringy cheese pull when split open.
Now, if you’ve only got medium or mild cheddar, they will still be delicious—don’t panic! They will just be milder since the seasoning is already quite strong. The recipe notes suggest swapping some of the cheddar for Monterey Jack, and honestly, that’s my favorite move for truly gooey texture. If you do a 50/50 split of sharp cheddar and Monterey Jack, you get the tang from the sharp and the superior melt quality from the Jack. Feel free to experiment!
Nutritional Estimates for Homemade Cheddar Bay Biscuits
Now, I know sometimes we just want to enjoy these gorgeous, cheesy, garlicky bombs without thinking too much about the details, but for those of you keeping track, it’s good to have a general idea of what you’re diving into. Remember, these estimates are based *exactly* on the recipe quantities provided, assuming you make 12 biscuits. If you eat three in one sitting (which I definitely don’t recommend doing unless you are serving them alongside that amazing wonton soup), your numbers will obviously go up!
It’s important to remember that these are homemade, and because we are using real butter and sharp cheddar, they are wonderfully rich. Think of these as a special treat, not an everyday bread! This is just an estimate, so if you are counting seriously, you might want to weigh your ingredients, but this gives you a great snapshot for your savory cheese biscuits.
- Serving Size: 1 biscuit (This is how the percentages below are calculated!)
- Calories: 220 (A solid number for something this decadent!)
- Total Fat: 14g (This fat is where all that buttery flavor comes from, naturally.)
- Saturated Fat: 9g (That’s the butter and the cheese working hard!)
- Trans Fat: 0g (Thank goodness for that—we are avoiding those substitutes, remember?)
- Unsaturated Fat: 5g
- Carbohydrates: 19g (Mostly coming from that flour base.)
- Fiber: 1g
- Sugar: 2g (Barely any—it’s all savory goodness here!)
- Protein: 6g (Thanks to that cheddar cheese!)
- Cholesterol: 35mg
- Sodium: 350mg (This is why controlling your own added salt is so important!)
See? Not too bad for something that tastes like pure happiness! Enjoy every cheesy bite!
Print
Cheddar Bay Biscuits Copycat Recipe
- Total Time: 30 min
- Yield: 12 biscuits 1x
- Diet: Vegetarian
Description
A simple recipe for making savory, cheesy biscuits similar to the popular restaurant version.
Ingredients
- 2 cups all-purpose flour
- 1 tablespoon baking powder
- 1 teaspoon salt
- 1 teaspoon sugar
- 1/2 cup cold unsalted butter, cut into small pieces
- 1 cup cold buttermilk
- 1 cup shredded sharp cheddar cheese
- 1/4 cup melted butter, for brushing
- 1 teaspoon garlic powder
- 1/2 teaspoon dried parsley
Instructions
- Preheat your oven to 400 degrees Fahrenheit. Line a baking sheet with parchment paper.
- In a large bowl, whisk together the flour, baking powder, salt, and sugar.
- Cut in the cold butter using a pastry blender or your fingers until the mixture resembles coarse crumbs.
- Stir in the shredded cheddar cheese.
- Pour in the buttermilk and mix until just combined. Do not overmix the dough.
- Drop rounded tablespoons of dough onto the prepared baking sheet, leaving space between them.
- Bake for 12 to 15 minutes, or until the tops are lightly golden brown.
- While the biscuits bake, mix the melted butter with the garlic powder and parsley in a small bowl.
- Remove the biscuits from the oven and immediately brush the tops generously with the garlic butter mixture.
- Serve warm.
Notes
- For best results, use cold butter and cold buttermilk.
- You can substitute Monterey Jack cheese for some of the cheddar if you prefer a milder flavor.
- Prep Time: 15 min
- Cook Time: 15 min
- Category: Side Dish
- Method: Baking
- Cuisine: American
Nutrition
- Serving Size: 1 biscuit
- Calories: 220
- Sugar: 2
- Sodium: 350
- Fat: 14
- Saturated Fat: 9
- Unsaturated Fat: 5
- Trans Fat: 0
- Carbohydrates: 19
- Fiber: 1
- Protein: 6
- Cholesterol: 35
Keywords: Cheddar Bay Biscuits, cheese biscuits, garlic butter biscuits, copycat recipe, quick bread