
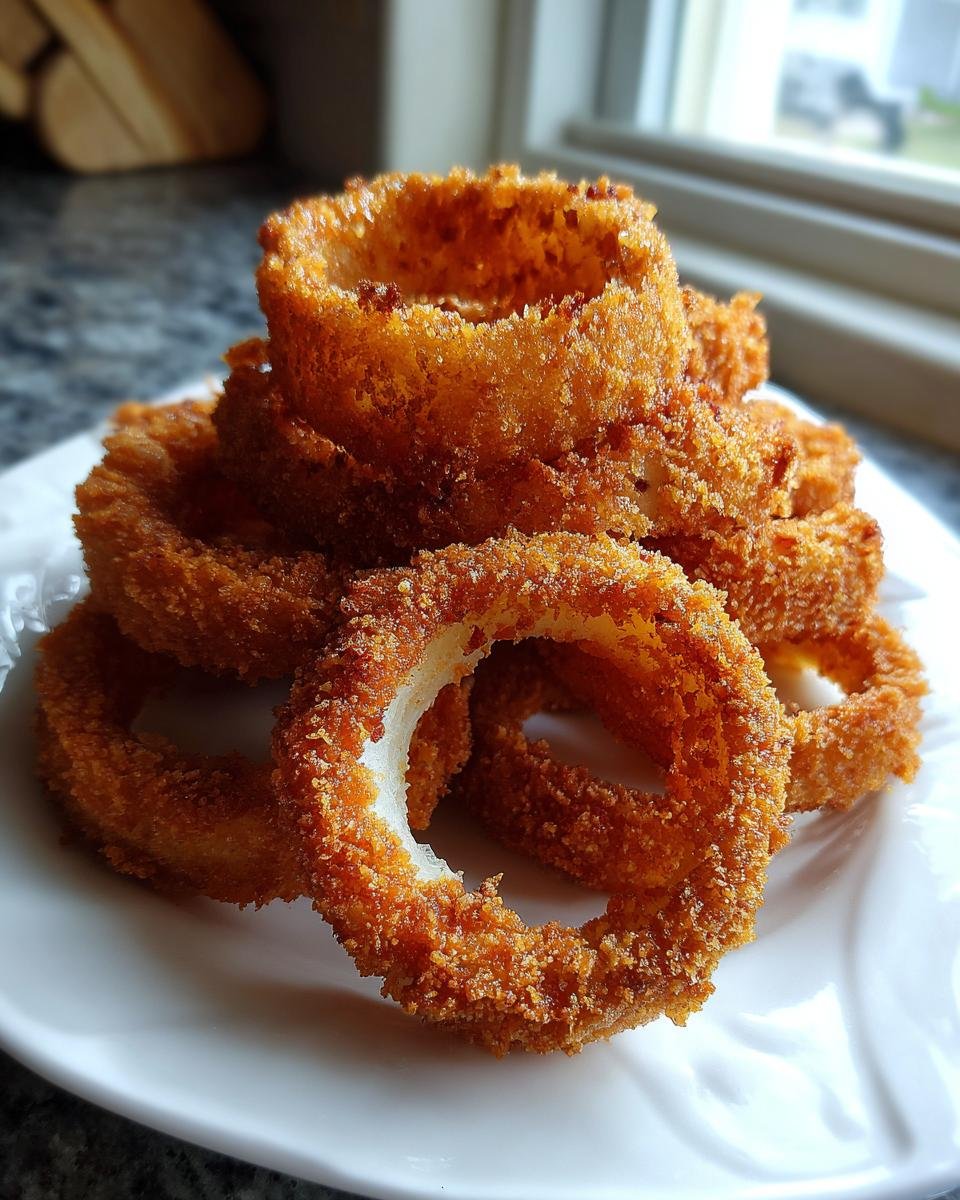
Listen up, friends, because I’m about to let you in on the secret to the crunchiest, most satisfying snack imaginable. Forget those pale, sad rings you get sometimes—we are talking about true, restaurant-quality shattering crispiness right here at home! Mastering the fry taught me patience, honestly. My first attempt at deep-frying anything resulted in a lot of smoke and slightly greasy disappointment. But now? I nail these Crispy Homemade Onion Rings every single time. The magic isn’t just the oil temperature; it’s all about this super simple three-step dredging process we’re about to dive into. Trust me, once you see how easy it is to get this perfect golden exterior, you’ll never go back to frozen!
Why You Will Love These Crispy Homemade Onion Rings
I know there are tons of onion ring recipes out there, but you absolutely have to try mine. They deliver that satisfying crunch that lasts way longer than most recipes. Plus, they’re totally doable on a weeknight because the prep isn’t messy or complicated at all. You get amazing flavor, unbelievable crisp, and you don’t stand over the fryer all night. I think that’s a win-win-win!

Perfect Texture: The Secret to Crispy Homemade Onion Rings
The texture is unmatched because we use panko breadcrumbs—those flaky Japanese breadcrumbs are game-changers! Coating them twice, once in flour and then again in the wet mix before the panko, locks in the moisture and creates a super sturdy, unbelievably crispy shell when they hit the hot oil. They just don’t get soggy fast!
Quick Preparation for Your Crispy Homemade Onion Rings
Seriously, you can have these rings ready for the fryer in about 20 minutes of active work. The dredging is fast once you set up your three stations. This means that craving for Crispy Homemade Onion Rings that hits you at 7 PM is totally achievable before bedtime. No fuss, minimal cleanup!
Essential Ingredients for Crispy Homemade Onion Rings
Okay, let’s talk about what you need to get that perfect coating. You only need a few simple things, but the quality really matters when you are frying something like this. Don’t forget, if you need a dipping sauce suggestion later on, I have the best recipe for homemade ketchup that complements these perfectly!
- 2 large yellow onions – these are the absolute best for rings!
- 1 cup all-purpose flour
- 1 teaspoon salt
- 1/2 teaspoon black pepper
- 1/2 teaspoon paprika (adds just a little color and warmth)
- 1 cup milk
- 2 large eggs
- 1 cup panko breadcrumbs – this is mandatory for the crunch!
- Vegetable oil for frying (you’ll need about 2 inches deep in your pot)
Ingredient Notes and Substitutions for Crispy Homemade Onion Rings
Yellow onions are my favorite mix of sweet and sharp, and they hold their rings beautifully. When you grab oil, make sure it has a high smoke point, like vegetable or canola. Don’t skimp on the panko; Italian breadcrumbs just don’t give you that same airy crackle. Also, I’m going to whisper this pro tip here: chilling those coated rings for 30 minutes before frying is optional, but it locks that coating on tighter. Don’t skip it if you have patience for 30 more minutes!
Step-by-Step Instructions for Making Crispy Homemade Onion Rings
This is where the magic happens! Setting up your three dishes—your dry flour mix, your wet egg/milk wash, and your panko—side-by-side really makes this process smooth. When you get the technique down, frying these feels like an absolute breeze. If you want to read a bit more about my favorite frying hacks, I wrote a whole guide for you over here on deep-fried onion rings tips.
- Peel those gorgeous yellow onions, and the most important part is getting them just right: slice them into rings that are exactly 1/4-inch thick. They can’t be too skinny or they’ll crisp up to nothing! Once sliced, gently separate all those beautiful rings.
- Set up your first station. In one shallow dish, whisk together your flour, salt, pepper, and paprika. This is the foundation layer.
- Next up, your wet station. Whisk the milk and eggs together in the second shallow dish until they are totally combined.
- Your crispy finish line is the third shallow dish, holding all those lovely panko breadcrumbs.
- Now, we coat! Take one onion ring and dip it first into that dry flour all over. You absolutely must shake off *all* the excess flour. Seriously, bang it gently against the side of the dish. Too much flour makes it heavy, not crispy!
- Gently move the floured ring into the milk and egg mixture. Let any extra wetness drip off—we want it coated, not swimming.
- Finally, the panko! Dredge that ring completely in the breadcrumbs, pressing lightly with your fingers to make sure every piece of panko sticks on tight. Lay these coated beauties on a wire rack while you get the oil ready.
- Time to heat the oil! Since we want maximum crunch, you need about 2 inches of oil in a deep pot—my Dutch oven usually works best—heated precisely to 375°F (190°C). Use a thermometer!
- Fry them in small batches only! If you dump too many in, the oil temperature drops fast, and you end up with soggy rings—no thanks! Turn them every so often until they are a perfect, deep golden brown, which usually takes just 3 to 4 minutes max.
- Pull them out carefully with a slotted spoon and drain the excess oil quickly on a plate lined with paper towels. A wire rack is even better if you have one!
- Serve immediately! These are best when they are piping hot and crunchy.
Preparing the Onion Rings for Crispy Homemade Onion Rings
The slicing is really key here. Aim for 1/4-inch thickness; any thinner and they burn before they get that nice cooked, tender center, and any thicker makes the coating struggle to stick evenly. Once they are separated, I like to very lightly blot them with a paper towel. They don’t need to be bone-dry, but taking off that initial slickness from the onion helps the flour stick so much better on the first go-around.

The Three-Step Breading Process for Crispy Homemade Onion Rings
This three-step process—flour, wet, panko—is non-negotiable for that professional crunch. When you dip into the flour, remember to shake off every single clump. If you leave clumps of dry flour, they burn in the oil before the coating sets right. Then, when you press them into the panko, be gentle but firm; we need that panko to adhere well so it doesn’t just fall off into the pot. That’s the secret to keeping the oil clean, too!
Frying Technique for Golden Crispy Homemade Onion Rings
Listen, frying is all about temperature management. You are aiming for 375°F, but honestly, the sweet spot is often between 360°F and 380°F. If it dips below 360°F, they soak up oil and turn greasy. If it’s too high, they burn instantly. Always only fry a few rings at a time—like five or six max, depending on your pot size—so the oil temperature doesn’t crash. Once they are beautifully golden, they come right out onto paper towels or a wire rack to drain off that extra oil before you serve them steaming hot!
Tips for Achieving Maximum Crispiness in Your Crispy Homemade Onion Rings
Okay, we’ve made it through the basic steps, but if you want these to taste like you bought them from the best carnival stand in the state, you need to talk about technique. Frying isn’t just dropping food in oil; it’s a science, I swear! If you’re looking for other crunchy ideas, you know I’ve perfected crunchy things like making homemade potato chips. The same rules apply here for that unbeatable crunch!
Oil Temperature Control for Crispy Homemade Onion Rings
This is probably the number one reason people end up with sad, greasy onion rings. If your oil is too cool—say, under 350°F when you drop them in—the breading soaks up all that liquid fat before the heat has a chance to cook the coating solid. That’s instant sogginess! On the flip side, if it’s scorching hot, 400°F or higher, the panko burns to a dark brown instantly, but the onion inside is still raw. We need that happy medium where the crust crisps up fast while the heat slowly penetrates to cook the onion through. Keep that thermometer handy!
The Importance of Resting Crispy Homemade Onion Rings Before Frying
Remember I mentioned chilling the rings for 30 minutes? That’s not just a random suggestion; it’s vital prep work! When the coated rings rest in the fridge, it gives the flour and the panko a chance to hydrate just a tiny bit. This bonding process makes the coating stick like glue to that slippery onion surface. If you fry them immediately, that wet coating hasn’t set up, and half your hard work ends up floating to the top of your oil as sad little crumbs. A quick chill is the key to keeping every single crumb right where it belongs: stuck to your onion!
Serving Suggestions for Your Crispy Homemade Onion Rings
You made these perfectly crispy onion rings—don’t you dare eat them plain! While they are fantastic all by themselves, dipping them into something creamy or tangy just takes them to the next level. They are the star appetizer, but they need a supporting cast, you know?
The absolute classic pairing is, of course, ketchup, but honestly, a store-bought version just doesn’t do justice to these homemade beauties. If you want the full experience, you should really try making my recipe for addicting dip. It’s savory, a little sharp, and totally addictive. Slathering those hot rings in that cool, flavorful dip? Perfection.
If you’re planning a full burger night, these are the natural side dish. Skip the fries and put these on the plate! They cut through the richness of a big beef patty so nicely because they’re so light and crunchy. For a slightly more grown-up feel, try serving them with a side of horseradish cream sauce. The sharp heat from the horseradish really wakes up the sweetness of the yellow onion inside the savory crunch of the panko coating. And hey, if you happen to have some leftover fried chicken from last night, these make an incredible side dish for that too!
Storage and Reheating Instructions for Crispy Homemade Onion Rings
If, by some miracle, you have any of these beauties left over—and I mean *any*—you need to treat them right, or you’ll destroy all that hard, crispy work we did! The biggest mistake anyone can make is trying to reheat onion rings in the microwave. Don’t do it! Trust me, the microwave turns that glorious panko crust into damp, chewy cardboard. We worked too hard for soggy rings; they deserve better!
The best way to save leftovers is to actually let them cool completely on a wire rack (not piled up on a plate!) so no steam gets trapped underneath. Once they are fully cooled, pop them into an airtight container. They should last okay in the fridge for about two days, tops. They really are best eaten the day you make them, obviously, but we can work with leftovers!
To bring back that amazing crunch, you *need* dry heat. Skip the microwave completely. I find the oven works great, especially if you preheat it to about 400°F (200°C). Lay the rings out in a single layer on a baking sheet—even better if you put them on a wire rack *on* the baking sheet so air can hit the bottom too. You’re looking for about 5 to 8 minutes, just until they are hot all the way through and that crunch is back. If you’re trying to save time and energy, an air fryer is fantastic for reviving them. Just check out my tips for air fryer baked potatoes; the principles for getting things crispy are the same! Pop those rings in there for maybe 4 minutes at 375°F, shaking the basket halfway through, and they’ll be almost as good as fresh.
Frequently Asked Questions About Crispy Homemade Onion Rings
I get asked these questions all the time whenever I bring a batch of these crispy gems to a party. Frying is fun, but it can be nerve-wracking if you’re new to it! Don’t worry, we’ll sort out any hesitation you have before you even heat up the oil.
Can I make Crispy Homemade Onion Rings in an Air Fryer?
Oh, the air fryer question! Look, you certainly *can* make them in an air fryer, and they will be way better than frozen ones, I’ll give you that. But I have to be honest—they won’t achieve that deep, shatteringly perfect crunch that you get from deep-frying them in hot oil. If you must air fry, make sure you lightly spray those breaded rings all over with oil before you pop them in. It helps that panko crisp up nicely, but I still think the deep-fried version is worth the small extra effort for maximum crispiness!
What is the best oil to use for frying Crispy Homemade Onion Rings?
This is all about smoke point and flavor neutrality! You need an oil that can handle the heat of 375°F without breaking down or smoking excessively. I lean heavily on standard vegetable oil because it’s affordable and completely neutral in flavor. Canola oil works just as wonderfully. Peanut oil is another fantastic choice if you don’t have guests with allergies—it adds a little richness. Just make sure whatever you pick is fresh and has a high smoke point. Avoid olive oil, please; it’ll burn before the rings are cooked!
Why are my Crispy Homemade Onion Rings coming out soggy?
Ugh, the soggy tragedy! There are two main culprits here, and nine times out of ten, it’s one of these two things. First, your oil temperature was too low when you added the rings. If it drops below, say, 350°F, the coating starts drinking the oil instead of crisping up. Second, and this happens to everyone, you overheated the pot! You absolutely cannot crowd the pan. If you put too many rings in at once, the oil temperature plummets instantly, and you get greasy, pale rings. Fry in small batches, let the oil recover its heat between batches, and you’ll solve the sogginess problem right away!
Estimated Nutritional Information for Crispy Homemade Onion Rings
Okay, let’s talk about the numbers, because while these are pure joy, they are deep-fried, so we gotta keep it real! These figures are just estimates based on the ingredients we used, especially the vegetable oil for frying. Remember, if you eat three rings versus ten rings, your totals will obviously change, so use this as a good guideline for planning!
This breakdown assumes a serving size of about five nice, fat onion rings, which sounds about right, but I always end up eating more! Here’s what the label looks like:
- Serving Size: 5 rings
- Calories: 350
- Fat: 20g (of which 4g is Saturated Fat)
- Carbohydrates: 38g (with 2g Fiber)
- Protein: 7g
- Sodium: 350mg
- Cholesterol: 55mg
See? They aren’t too bad when you stick to a reasonable serving size! The fat content is what you’d expect from anything fried this deliciously. I always feel better knowing exactly what goes into my food, even when that food is pure, unadulterated, crispy comfort. If you’re watching your sodium, you can always cut back a little on the salt you add to the flour station!
Share Your Perfect Crispy Homemade Onion Rings
Now that you have the secrets to true, shatteringly crispy homemade onion rings, the only thing left is for you to try making them! I want to hear all about it—did your oil hold the temperature perfectly? Did the panko stick without any little breadcrumb suicides in the fryer? Tell me everything!
Please take a moment after you’ve devoured these beauties to drop a rating down below. Five stars? Three stars because you accidentally dropped a whole onion in at once before you got the hang of it? Let me know! Your feedback helps other cooks feel confident tackling deep-frying at home. If you post a picture of your perfectly golden rings on social media, tag me! I love seeing your creations.
If you enjoyed how light and crisp these turned out, you might also want to check out my recipe for Amish Onion Fritters next time you’re looking for a different take on the humble onion fried up perfectly. Happy frying, everyone!
Print
Crispy Homemade Onion Rings
- Total Time: 35 min
- Yield: 4 servings 1x
- Diet: Vegetarian
Description
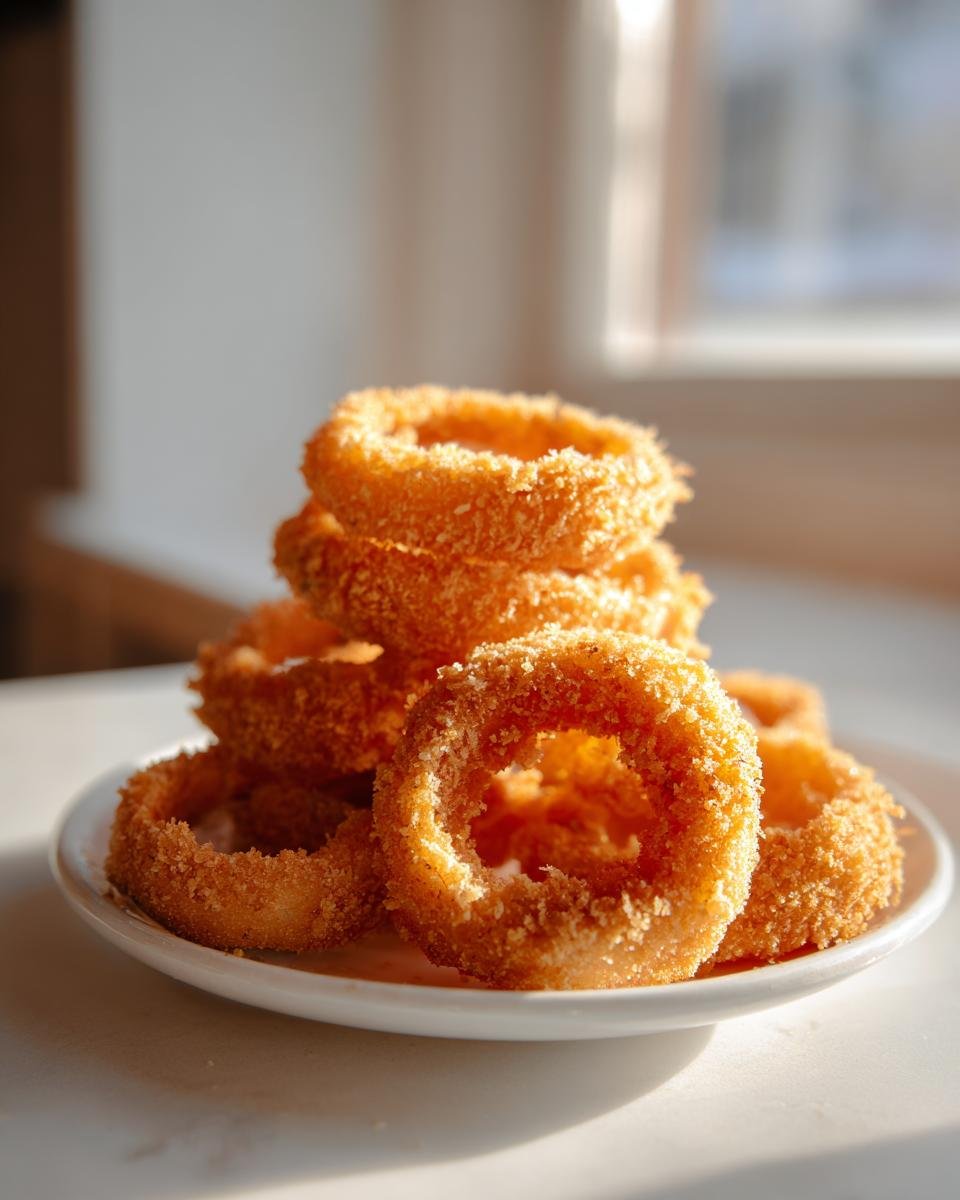
A recipe for making onion rings that are crispy on the outside and tender inside.
Ingredients
- 2 large yellow onions
- 1 cup all-purpose flour
- 1 teaspoon salt
- 1/2 teaspoon black pepper
- 1/2 teaspoon paprika
- 1 cup milk
- 2 large eggs
- 1 cup panko breadcrumbs
- Vegetable oil for frying
Instructions
- Peel and slice the onions into 1/4-inch thick rings. Separate the rings.
- In a shallow dish, whisk together the flour, salt, pepper, and paprika.
- In a second shallow dish, whisk together the milk and eggs.
- In a third shallow dish, place the panko breadcrumbs.
- Dip each onion ring first into the flour mixture, shaking off excess.
- Next, dip the floured ring into the milk and egg mixture, letting excess drip off.
- Finally, coat the ring thoroughly in the panko breadcrumbs, pressing lightly to adhere. Place coated rings on a wire rack.
- Heat about 2 inches of vegetable oil in a deep pot or Dutch oven to 375°F (190°C).
- Fry the onion rings in small batches, turning occasionally, until golden brown and crispy, about 3 to 4 minutes per batch. Do not overcrowd the pot.
- Remove the cooked rings with a slotted spoon and place them on a paper towel-lined plate to drain excess oil.
- Serve immediately.
Notes
- For extra crispiness, chill the coated onion rings in the refrigerator for 30 minutes before frying.
- Maintain the oil temperature between 360°F and 380°F for best results.
- Prep Time: 20 min
- Cook Time: 15 min
- Category: Appetizer
- Method: Deep Frying
- Cuisine: American
Nutrition
- Serving Size: 5 rings
- Calories: 350
- Sugar: 7
- Sodium: 350
- Fat: 20
- Saturated Fat: 4
- Unsaturated Fat: 16
- Trans Fat: 0
- Carbohydrates: 38
- Fiber: 2
- Protein: 7
- Cholesterol: 55
Keywords: onion rings, crispy, homemade, fried, appetizer, panko