
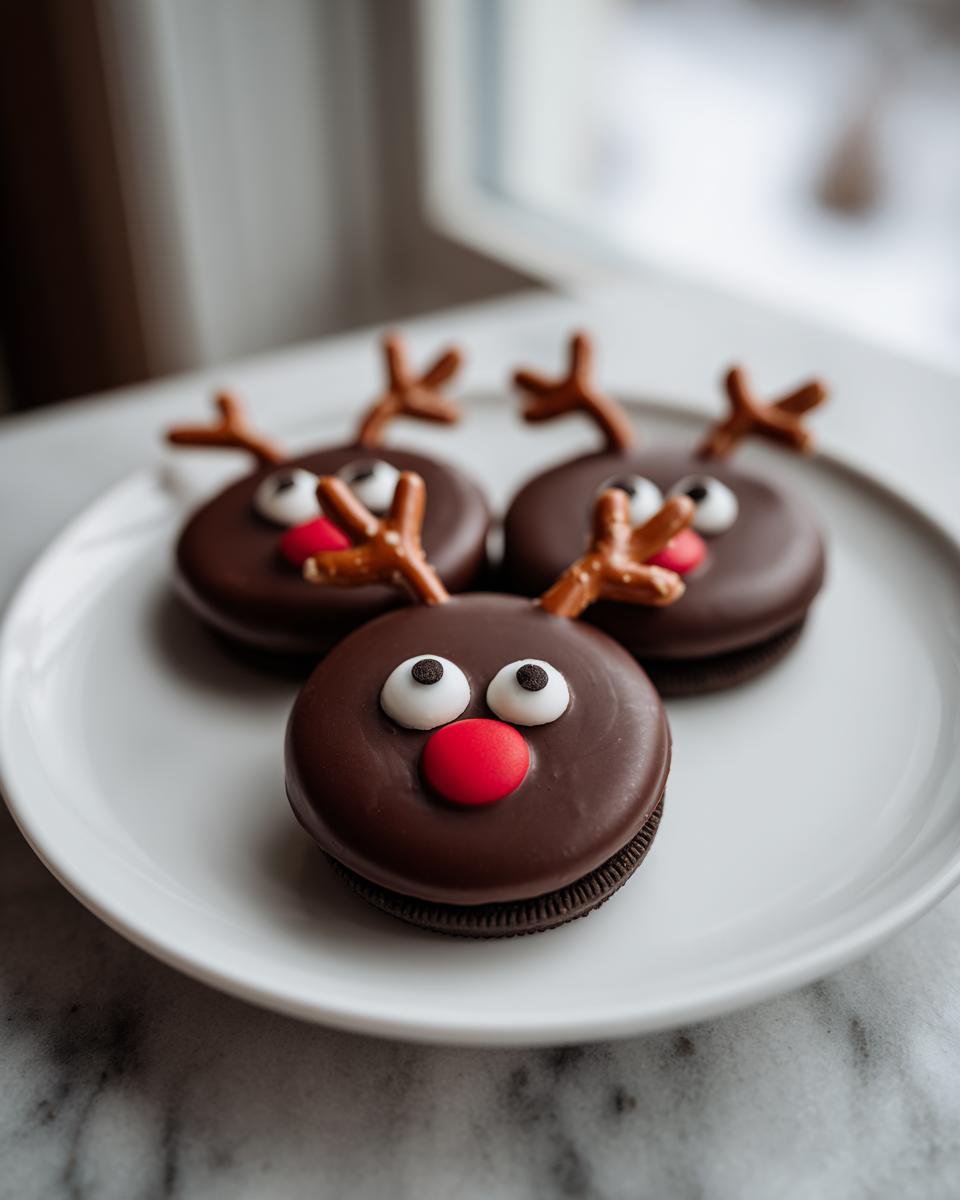
Oh my gosh, are you swimming in holiday baking yet? Because if you are, I have the absolute lifesaver you need when you just can’t face making another batch of traditional cookies that requires an oven and thirty different bowls. Seriously, these Oreo Reindeer Cookies are my secret weapon for last-minute party trays or just when the kids demand a festive treat *right now*.
We make these every single year—I remember the first time I tried them; I thought they were too cute to be this easy! They are the ultimate no-bake holiday dessert, marrying that classic, crunchy Oreo center with fun, edible decorations. You only need five things, and trust me, they come together in minutes. If you need something fast, cute, and guaranteed to make everyone smile, these simple reindeer are the ticket. For other super-quick wins, you have to check out my guide for the no-bake eclair cake too!
Why You Will Love These Oreo Reindeer Cookies
- Seriously, they are lightning fast! Prep time is barely 15 minutes because there’s zero baking involved. You just melt stuff and stick things on.
- They look incredibly impressive for how little effort you put in. Kids absolutely lose it over the little pretzel antlers and the bright red M&M nose. They scream Christmas magic!
- You use Oreos, which means you are starting with a perfectly structured, delicious base. Who doesn’t love Oreos? It’s a guaranteed win with the crowd.
- Perfect for last-minute contributions to school parties, cookie swaps, or just emergency dessert missions. If you need cookies now, these are it. For more speedy desserts, take a peek at my no-bake eclair cake recipe—also a lifesaver!
- Clean-up is minimal! That’s right, almost no dishes besides the bowl you melt the chocolate in. Compared to my usual chocolate chip cookie marathon which uses dozens of bowls, this is a dream.
Honestly, if you can separate an Oreo and stir some chocolate, you can nail these tasty reindeer faces. They are my go-to when I need holiday cheer without the holiday fuss!

Essential Ingredients for Your Oreo Reindeer Cookies
Okay, this section is the quick inventory check! Since these are no-bake, the quality of what you *do* use really shines through. We aren’t hiding anything under layers of flour or complicated spice blends here. Trust me, stick to these basics and you’ll have the cutest little reindeer faces ready in no time. I always use regular size Oreos—the mini ones just don’t give you enough real estate for the face details!
If you’re looking for other amazing filling components, you should check out my list of great ideas for cream fillings, though for this recipe, the standard Oreo cream is perfect.
For the Oreo Reindeer Cookies Assembly
- One whole package of standard Oreo cookies. Yes, you need all of them!
- About half a cup of melted chocolate or candy coating. I prefer candy coating because it sets up harder and faster, which you need for tricky assembly.
- Pretzel twists—and listen carefully—you need to break these into small, manageable pieces so they look like actual pointy little antlers, not big jagged shards.
- Those tiny, adorable candy eyes. They make all the difference in bringing these guys to life.
- Small red candies, like M&M’s or similar round gems, exactly one per reindeer for that iconic Rudolph nose.
See? That’s it! When you work fast, you keep that delicious Oreo cream intact and ready for its close-up.
Ingredient Notes and Substitution Tips for Oreo Reindeer Cookies
So, the base recipe is super firm, but that doesn’t mean we can’t have a little fun with the chocolate coating! Grandma always said a good cook knows when to stick to the plan and when to switch things up based on what looks best on the table. For these reindeer, the chocolate is the glue holding the whole face scene together, so pay attention!
One of the biggest questions I always get is about the coating. If you want a slightly different look—maybe a lighter brown or a deeper, richer cocoa flavor—you can absolutely swap out the standard milk chocolate for something else. Try using white chocolate! It gives you a totally different vibe, where maybe you can use brown M&M’s for eyes instead of black ones, or even pipe on a little face detail using royal icing if you’re feeling fancy.
Dark chocolate chips work fine too, but remember they melt slightly differently than pure candy coating. You can also swap the standard chocolate for peanut butter chips if you have PB lovers around. Just give them a test run first, because sometimes peanut butter flavors behave a little differently when they cool down.
Now, here’s my big expert tip, especially if you live somewhere that’s warm, or maybe your kitchen is just way too cozy even in December. If you dip your Oreo and the chocolate starts setting up on you before you can get those tiny pretzels in for antlers, all is not lost! Don’t panic and throw it back in the microwave for just five seconds—literally five! That little burst of heat will revive the chocolate just enough so you can quickly press in your antlers and eyes without it turning into a rock.
Remember, the faster you work once the face is dipped, the better everything adheres nicely to that creamy center without sliding off!
Step-by-Step Instructions to Make Oreo Reindeer Cookies
Okay, let’s get down to the fun part! Don’t let the separation of the Oreos intimidate you; it’s actually super easy once you get the hang of it. This process is all about timing those decorations perfectly so they stick exactly where they are supposed to be. Follow my steps, and you’ll have a whole herd ready faster than you can say “Rudolph!”
If you’re melting a big batch of chocolate, maybe for dipping some cookies after these, I highly recommend checking out this no-bake cookie dough dip recipe; it uses melted chocolate in a similar way!
Preparing the Base and Melting the Coating
First things first, we need a surface to work on, so grab a sheet of parchment paper. Now, gently separate those Oreos—and I mean gently! You need to keep that lovely white cream filling right on one cookie half, that’s going to be the main part of the reindeer face later. You’ll set the plain halves aside for now.
Next, melt your chocolate or coating. I usually just pop mine in the microwave for 30-second intervals, stirring in between until it’s totally smooth. Pro tip alert: If you’re melting a larger quantity and worry about scorching the bottom, try using a double boiler instead. It’s slower, but you get ultra-silky, perfect-for-dipping chocolate every time. Just make sure the water isn’t boiling too furiously underneath!
Assembling the Reindeer Face Details on the Oreo Reindeer Cookies
This is where you gotta move! Take one of those cream-filled halves and dip just the chocolate cookie part—or maybe just slightly over onto the edge of the cream—into the melted chocolate. You want enough chocolate coating to hold your features securely. Lay that dipped piece onto your parchment paper right away.
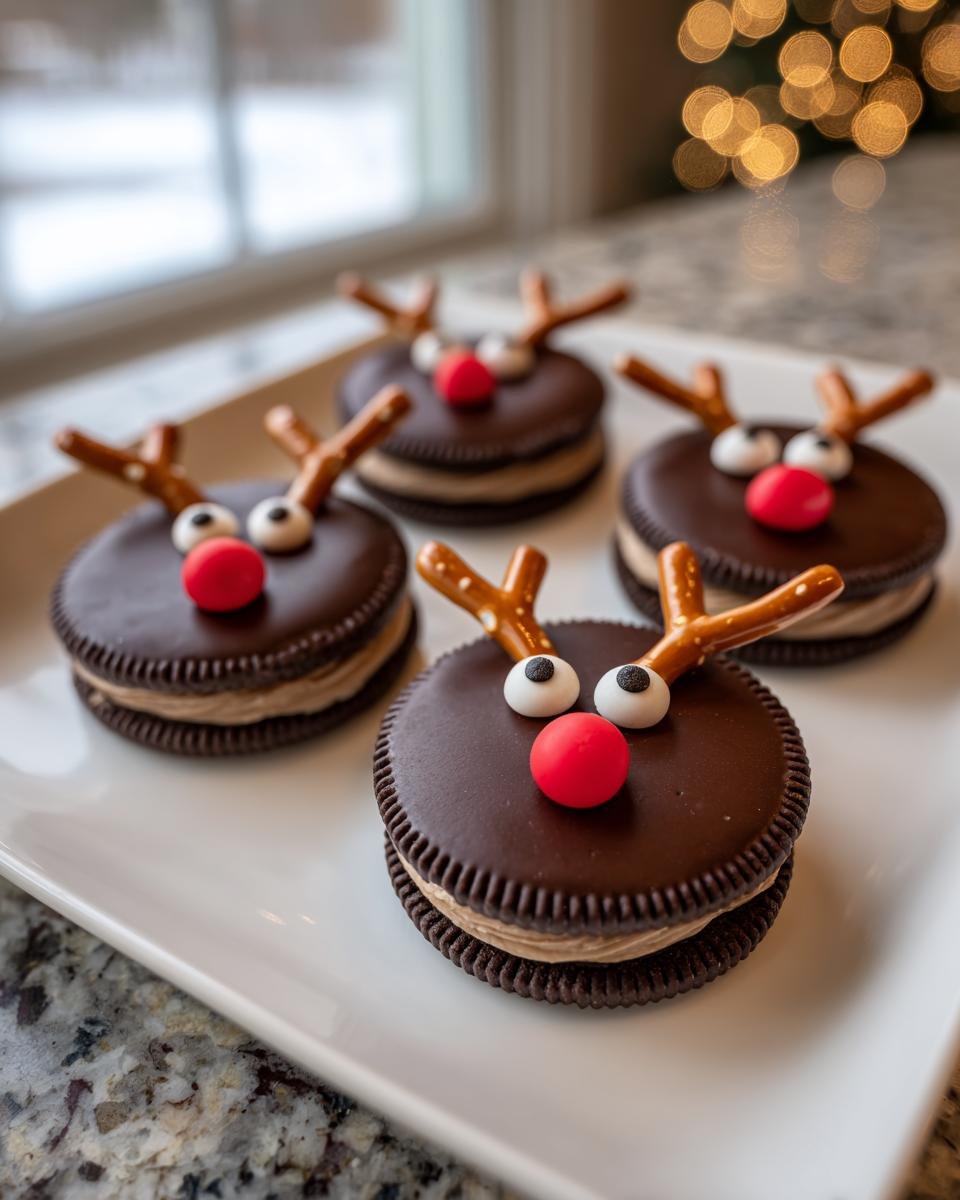
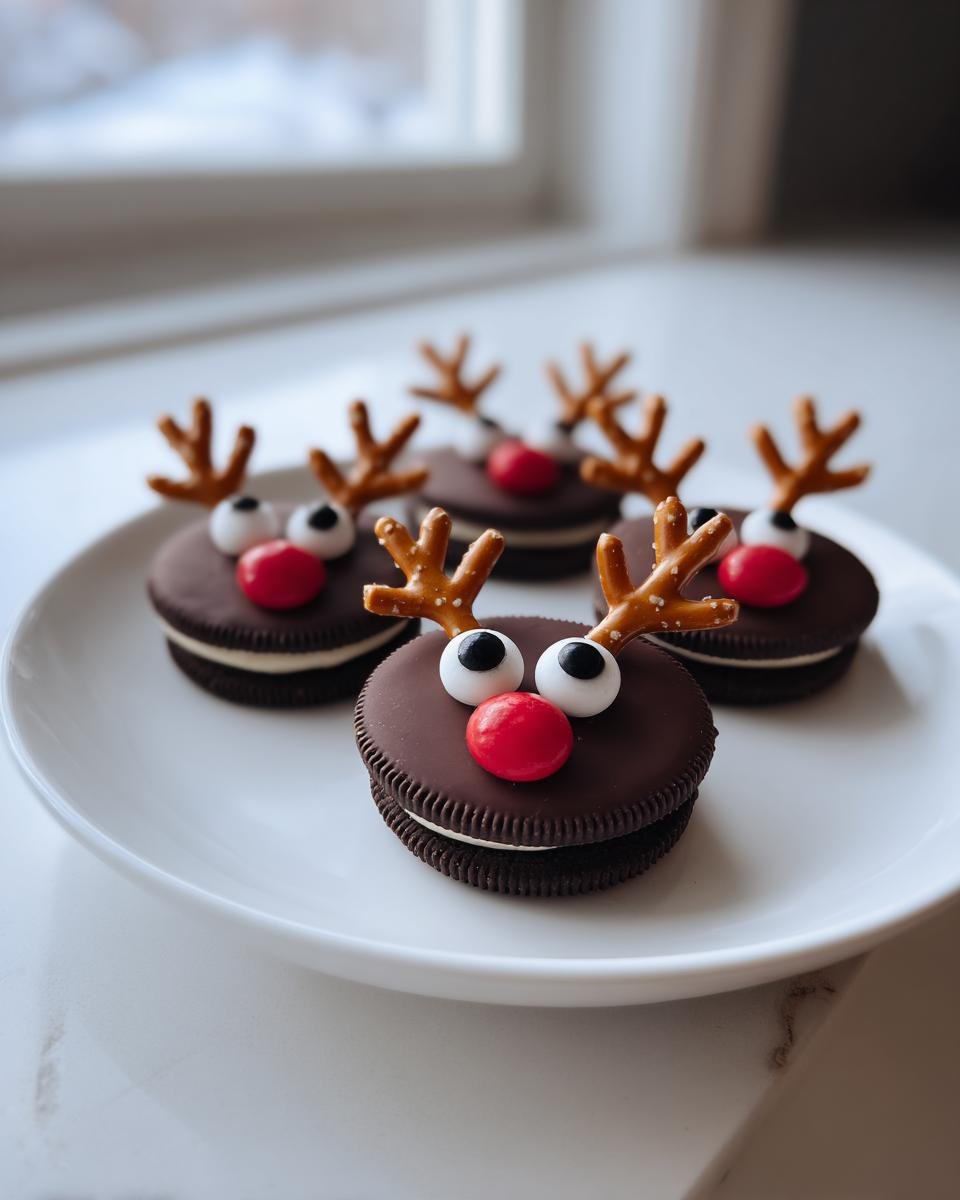
While that chocolate is still wet and gooey, take two of your broken pretzel pieces and press one into each side of the chocolate coating near the top—these are the antlers! Seriously, don’t wait a second. Then, place two tiny candy eyes onto the chocolate above where the cream filling starts. Finally, right in the center of that white cream filling, plop down your bright red M&M for the nose. You have to work fast here so everything adheres before the chocolate hardens!
Setting and Finishing Your Oreo Reindeer Cookies
Now we wait! Let these little guys sit at room temperature for about 15 minutes, or if you are in a rush (I always am!), pop them into the fridge for about 5 minutes to speed up the setting process. You’re done with the messy part now!
Once the chocolate tops are firm to the touch, you can finish them off. Take the plain Oreo half you set aside earlier and snap it back onto the filled half, sandwiching everything back together. The chocolate top just sits there like a cute hat! The first time I made these, I didn’t let the chocolate set quite long enough, and all the eyes slid down into a single melting pile. Lesson learned! But they disappeared so fast anyway, even the messed-up ones, that I just made a second batch immediately. They are seriously addictive!
Tips for Perfect Oreo Reindeer Cookies Every Time
These cookies are foolproof, I promise, but because you are assembling decorations onto a melting surface, a few little nudges can make the process totally seamless. I learned these little tricks the hard way after one disastrous batch where all the antlers slid off during transport! You want cute reindeer, not sad, droopy-antler reindeer, right?
If you need other super simple recipes that use minimal ingredients, you have to see how easy my three-ingredient butter cookies are. They are purely baked, but they share that ‘minimal effort, maximum result’ philosophy!
Here are the secrets I swear by to make sure your herd looks festive:
- Control Your Chocolate Heat: This is the big one. If your chocolate isn’t the right consistency—too thick and the pretzels won’t sink in, too thin and everything slides off—you’re going to have a mess. If it cools down while you’re working, pop that immersion bowl back over the warm water (or microwave for 3 seconds!) until it drips nicely off a spoon.
- Antlers Before Eyes: Always put the pretzel antlers in right after dipping, but *before* you set the eyes and nose. The antlers need the chocolate to be slightly more liquid so they can grip the sides without needing you to hold them steady until they cure. You want them firmly pressed into the chocolate border.
- Melted Melted Nose Placement: When placing the red candy nose, I find it helps to dip the bottom of the M&M or red candy into the chocolate first, almost like gluing it down, before placing it onto the white cream filling. It gives the nose a little better anchor so it doesn’t just roll off the side of the Oreo cream.
- Don’t Over-Dip: When coating the Oreos, only dip the flat side and come up just slightly over the edge onto the cream. If you cover too much of the white cream, you lose that white “face” area, and your reindeer will look like they are wearing a chocolate helmet instead of just a nice dipped hat!
Follow those steps, and your Oreo Reindeer Cookies will be sturdy enough to survive a bumpy trip to Grandma’s house, I guarantee it!
Serving Suggestions for Your Oreo Reindeer Cookies
Since these Oreo Reindeer Cookies are so speedy to whip up, they often end up being the star of a last-minute platter! Because they are super rich and sweet, you don’t want to overwhelm them with an equally heavy dessert sitting right next to them. They really shine when paired with something light, creamy, or maybe even a little fruity!
When I bring these to a gathering, I always make sure to have a fun, simple drink ready that everyone can enjoy. The kids absolutely flip out for non-alcoholic punch options. You could try making a big batch of my favorite Shirley Temple Ice Cream Floats. Those bright red and yellow garnishes just tie right into the holiday color scheme, and the fizzy soda cuts right through the richness of the chocolate and the Oreo cream.
If you’re having an adult party and want to offer something a little more festive (but still easy!), you have options too, though maybe keep the ones that are too citrusy on the side, just to be safe with the chocolate flavor profile. If you’re looking for a different kind of cocktail vibe, I have an amazing Coconut Lime Daiquiri recipe, but for pairing with these cookies, maybe stick to something classic like hot cocoa or a nice chilled peppermint milk!
Presentation-wise, try serving the reindeer on a white platter—it makes that red nose really pop! Scatter some crushed candy canes or maybe some festive green sprinkles around the base of the platter. They look so complete just sitting there on their own, but a little holiday greenery around them really elevates them from “easy snack” to “gorgeous holiday centerpiece.” They disappear the fastest when they look that good!
Storage and Make-Ahead Tips for Oreo Reindeer Cookies
You know, one of the best parts about using Oreos as a base is how long they hold up, but because we are adding *wet* chocolate coatings and little candy faces, we have to be a bit smarter about storage than if we just left them in the package.
Since these are totally no-bake, they are fantastic to make ahead of time! I usually plan to make a massive batch the night before a big event. If you leave them plain, they’re basically immortal, but once you add the chocolate and decorations, you want to treat them a little better to keep that chocolate crisp.
The best way to keep these Oreo Reindeer Cookies perfect is in an airtight container. Keep them at cool room temperature if possible. If your house is super warm—maybe you’re running the oven nonstop next to the cookie platter—then storing them in the fridge is okay. However, if you chill them, you need to be prepared for the chocolate coating to firm up noticeably, and when you take them out, you might get a little condensation. That condensation can soften the pretzel antlers or make the chocolate look spotted.
If you decide to refrigerate them, let them sit on the counter for about 10 or 15 minutes before serving so they can warm up just a tiny bit. They’re still perfectly fine to eat cold, of course, but they taste much better texture-wise when they aren’t fridge-hard.
Now, can you freeze them? Honestly, I wouldn’t recommend it. While the plain Oreo cookie itself freezes fine, the melted coating we use tends to get a little crumbly or streaky once it thaws out, and the pretzels might get soft. These are truly at their peak perfection the day you make them or the day after. If you need a make-ahead snack that freezes better than this, you should check out my recipe for oatmeal energy bites—those are freezer champions!
For these reindeer, aim to assemble them no more than three days before you plan to serve them, stored snugly in a container away from anything smelly. They never last that long anyway, but it’s good to know you have some wiggle room!
Frequently Asked Questions About Oreo Reindeer Cookies
I always get questions when I share these because people can’t believe how simple they are! The holidays are crazy, so if you have any last-minute doubts about how to make sure your reindeer look perfect, check out these little bits of added wisdom. If I missed anything, feel free to drop a comment below—happy to help you troubleshoot your herd!
If you’re planning a baking sale soon, these are usually the first things to go, but you might want to bookmark my guide on other top cookies for bake sales too, just to have options!
Can I use different types of chocolate for the Oreo Reindeer Cookies?
Absolutely! Chocolate is personal, right? Milk chocolate melts beautifully and gives you that classic, familiar coating. Dark chocolate works if you prefer something a little less sweet to balance the Oreo filling. But honestly, the look that completely changes the game is using white chocolate coating. It gives you this bright, pale canvas, and you can use brown or green candies for the eyes and nose instead of the traditional black and red if you want a different character! Just make sure whatever you choose melts smoothly.
What is the best way to make the pretzel antlers stick firmly?
This is all about quick action! You have to press those pretzel pieces into the chocolate coating the absolute second you lay the dipped Oreo half down on the parchment paper. Don’t dip it, set it down, and then try to stick them in five seconds later—that chocolate will be too firm, and when you try to press them in, you’ll just crack the coating.
You need to press them in gently but firmly so they sink just past the surface of the melted chocolate. They’ll grip onto the sides as the chocolate cools and hardens. If the chocolate is too thin, they’ll just slide right off the edge, so make sure you don’t dip them too deep into the coating!
How long does it take for the chocolate coating to set?
When I’m in a rush (which is usually!), I pop these little guys into the refrigerator. In the fridge, the coating should set up nice and firm in about 5 to 8 minutes. If you leave them out on the counter, especially if your kitchen isn’t freezing, give them a good 15 to 20 minutes because you want that chocolate hard enough that you can handle it when you put the two halves back together again without leaving fingerprint smudges everywhere!
Estimated Nutritional Snapshot for Oreo Reindeer Cookies
Now, I know we aren’t making these for a low-sugar health kick—they are Christmas cookies starring a classic chocolate sandwich cookie, after all! But I always like to give a ballpark idea of what you’re working with, just in case you need to know for school events or if you’re trying to balance out the holiday treats. Transparency is key, even when dealing with delicious, fast, no-bake reindeer!
Remember, these numbers are just an estimate based on the standard ingredients I use. If you use a different brand of Oreo, or decide to swap the chocolate for something richer, these numbers might shift a bit. If you’re curious about how different sugars stack up, I found this great breakdown on the surprising sugar content of fruits that I read recently—it’s eye-opening!
Here’s a rough look at what one of these adorable Oreo Reindeer Cookies brings to the table:
- Serving Size: 1 cookie
- Calories: Around 150
- Sugar: Roughly 15 grams—yep, that’s where the holiday joy comes from!
- Fat: About 8 grams total.
- Protein: A small boost at 2 grams.
- Carbohydrates: Around 18 grams.
Since we aren’t really baking, there’s basically no fiber, and the majority of the fat comes from the Oreo’s filling and the chocolate coating. They are wonderfully self-contained treats, though! Just enjoy them along with a nice cold glass of milk!

Oreo Reindeer Cookies
- Total Time: 20 min
- Yield: About 12 cookies 1x
- Diet: Vegetarian
Description
Simple cookies made with Oreos to look like reindeer faces.
Ingredients
- 1 package Oreo cookies
- 1/2 cup melted chocolate or candy coating
- 1/4 cup pretzel twists, broken into small pieces for antlers
- Small candy eyes
- Red M&M’s or similar small red candies for the nose
Instructions
- Separate the Oreo cookies, keeping the cream filling intact on one half.
- Melt the chocolate or candy coating according to package directions.
- Dip the cream side of one Oreo half into the melted chocolate, coating it partially to form the top of the reindeer head.
- Before the chocolate sets, press two small pretzel pieces into the chocolate coating on the top sides to resemble antlers.
- Place the chocolate-coated Oreo half onto a sheet of parchment paper.
- Immediately press two candy eyes onto the chocolate coating above the cream filling.
- Place one red candy onto the center of the cream filling to act as the nose.
- Allow the chocolate to set completely at room temperature or in the refrigerator.
- Reassemble the cookies by placing the plain Oreo half back onto the filled half.
Notes
- Use white chocolate for a different look.
- If the chocolate sets too fast, reheat it briefly.
- You can use peanut butter chips instead of regular chocolate.
- Prep Time: 15 min
- Cook Time: 5 min
- Category: Dessert
- Method: No Bake Assembly
- Cuisine: American
Nutrition
- Serving Size: 1 cookie
- Calories: 150
- Sugar: 15
- Sodium: 100
- Fat: 8
- Saturated Fat: 3
- Unsaturated Fat: 5
- Trans Fat: 0
- Carbohydrates: 18
- Fiber: 0
- Protein: 2
- Cholesterol: 5
Keywords: Oreo, Reindeer, Cookies, Christmas, Holiday, No Bake, Easy