
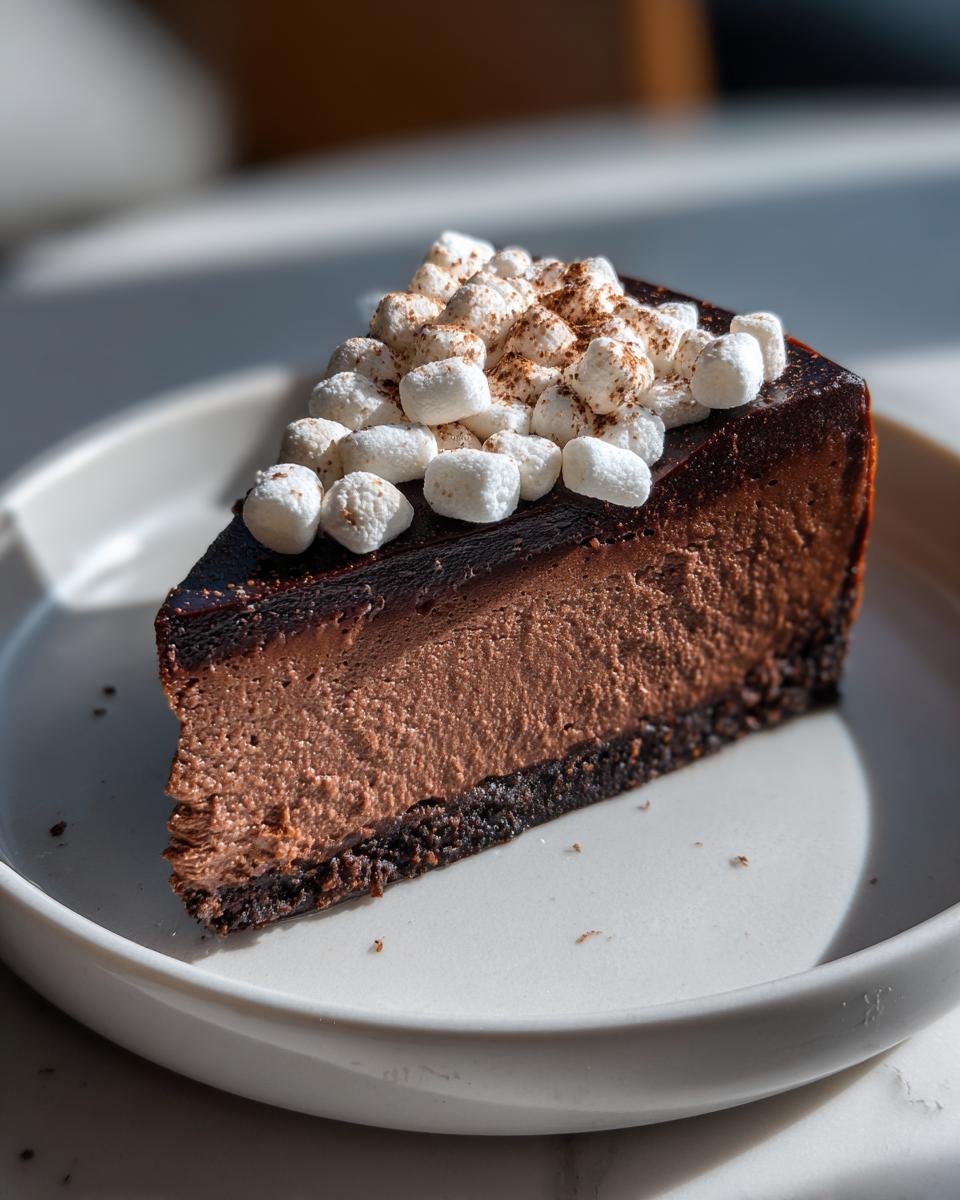
Every now and then, you just need a dessert that wraps you up in a blanket, you know what I mean? Forget those light, airy treats for a minute. When the weather outside is just miserable and you need something truly decadent, nothing beats the soul-soothing creaminess of cheesecake—but better. This Hot Cocoa Cheesecake is the result of me trying to combine my two great loves: that rich, melted chocolate feeling of drinking hot cocoa, and the pure, dense luxury of a perfectly baked cheesecake. Trust me, this isn’t just chocolate cake; this recipe delivers that authentic, slightly dark, satisfyingly rich hot cocoa flavor you crave, all wrapped up in a perfect, velvety crust.
Why This Hot Cocoa Cheesecake Recipe Works So Well
Honestly, this isn’t just another chocolate cheesecake recipe. What makes this the one you’ll keep coming back to is how simple it is to get that picture-perfect result every time. If you’ve ever been scared of baked cheesecakes, fear not! You’ll want to keep this on file when you need a real showstopper.
- The texture is just unparalleled—so unbelievably creamy, thanks to that careful water bath technique.
- It nails the flavor profile; it really tastes like a rich cup of hot cocoa, not just plain chocolate. It’s the perfect richness.
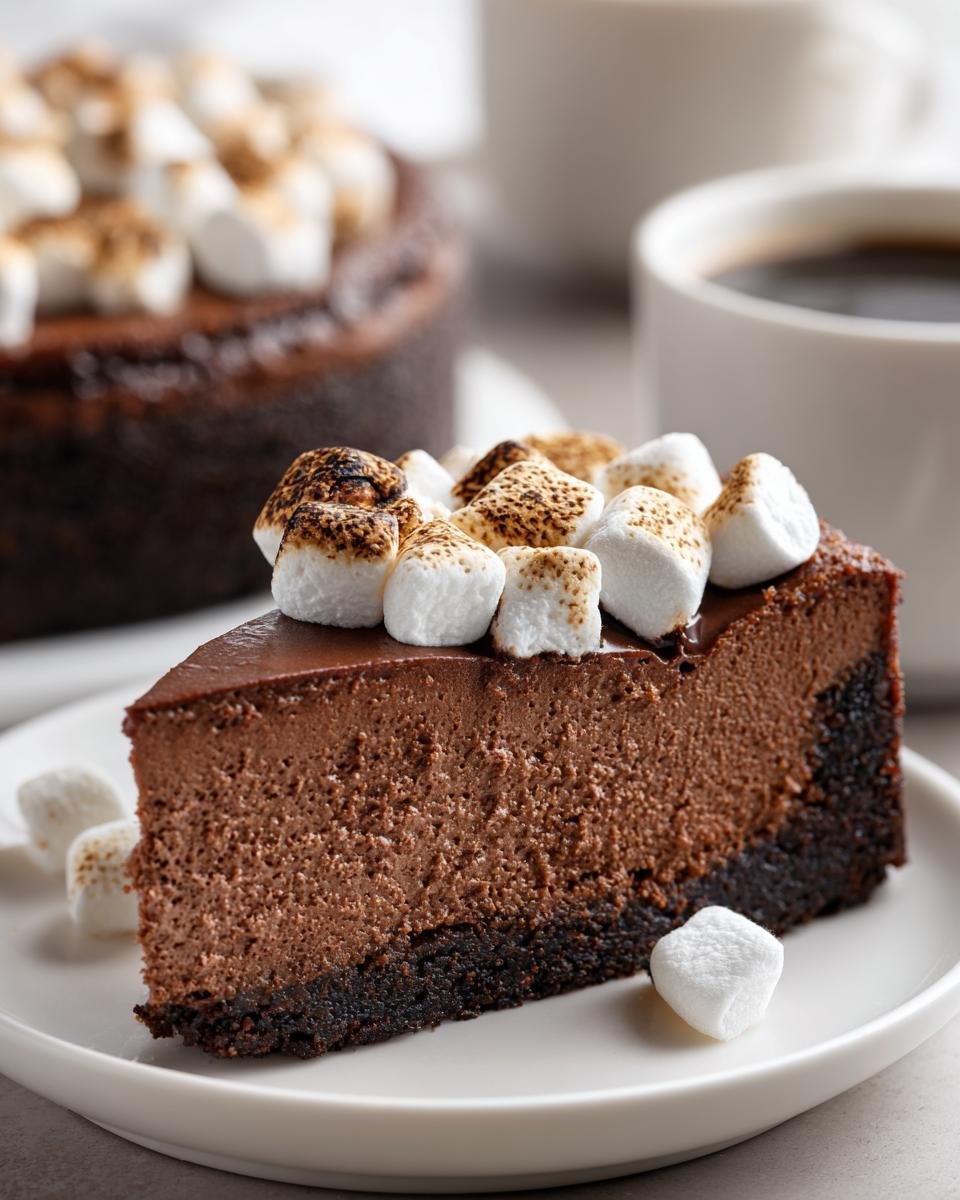
- And the presentation? That toasted marshmallow topping turns it into something special for any gathering.

Ingredients for the Perfect Hot Cocoa Cheesecake
Okay, so gathering your supplies is half the battle, right? I write this list out every time, even though I’ve made this a hundred times. Why? Because attention to detail right here makes sure we get that melt-in-your-mouth texture we’re looking for. We need quality ingredients, especially for the chocolate components. This recipe really shines when you follow the prep notes—things like making sure your cream cheese isn’t fridge-cold! If you want a truly great result, follow these specific demands for your items.
For the Chocolate Crust
- 1 1/2 cups chocolate wafer crumbs (Don’t skimp here, the dark ones are best!)
- 1/4 cup granulated sugar
- 6 tablespoons unsalted butter, melted
For the Hot Cocoa Cheesecake Filling
- Two (8 ounce) packages cream cheese, make sure this is completely softened—this is critical!
- 1 cup granulated sugar
- 1/4 cup unsweetened cocoa powder (Good quality makes a huge difference)
- 1 teaspoon vanilla extract
- 1/4 teaspoon salt
- 2 large eggs (Remember: room temperature eggs mix in smoother)
- 1/2 cup heavy cream
For the Marshmallow Topping
- 1/2 cup mini marshmallows (The tiny ones toast up so much quicker and prettier!)
Expert Steps to Make Your Hot Cocoa Cheesecake
Okay, getting this Hot Cocoa Cheesecake right is all about respecting the process, especially when it comes to preventing that awful cracking. We aren’t just throwing things together here; we’re building something luxurious! Follow these steps, and I promise your cheesecake will look as gorgeous as it tastes. Make sure you have a 9-inch springform pan ready to go before you even touch the mixer!
Preparing the Crust and Oven Setup
First things first, let’s get the oven humming at 350 degrees F (175 degrees C). You absolutely have to wrap the bottom of that springform pan—and I mean really wrap it—with heavy-duty aluminum foil. We need lots of layers so no water sneaks into our beautiful chocolate crust later. Mix your wafer crumbs, that first 1/4 cup of sugar, and the melted butter until it looks like wet sand. Press it down really firmly in the bottom of the pan. Give that crust a 10-minute head start by baking it first. Once it’s done, take it out and lower that oven temp down to 325 degrees F (160 degrees C). It’s important that the crust cools down a touch before the filling goes on!
Mixing the Hot Cocoa Cheesecake Filling
This is where the creaminess happens. In a big bowl, beat that softened cream cheese until it looks absolutely smooth—no lumps allowed! That takes a minute or two of dedicated beating. Now, slowly add the rest of your sugar, the cocoa powder, vanilla, and salt. Mix that just until everything is combined and looks like glorious, thick chocolate frosting. Now, for the eggs: beat them in ONE at a time. Don’t ever dump them all in together! Mix just until you can no longer see streaks of yolk. Over-mixing the eggs is what causes cracks, so be gentle here. Finally, stir in the heavy cream by hand.
Baking the Hot Cocoa Cheesecake with a Water Bath
Pour that amazing batter over your slightly cooled crust. Now, for the secret weapon: the water bath! Place your wrapped springform pan inside a larger, deep baking pan. Carefully pour hot water into the larger pan until it comes about halfway up the sides of the springform. This steam keeps everything regulated. Bake for 45 to 55 minutes. You’re looking for the edges to be firm, but the very center should still have a slight jiggly wobble, kind of like Jell-O. As soon as you see that, turn the oven OFF. Here’s the trick: crack the door open slightly and leave the cheesecake inside that warm oven for a full hour. Don’t rush this part; it’s the key to avoiding a massive dip in the middle. It feels slow, but it’s worth the patience!
Chilling and Finishing the Hot Cocoa Cheesecake
After that hour in the cooling oven, take the cheesecake out of the water bath and let it finish cooling completely on a wire rack away from drafts. Once it’s room temperature, cover it up and slide it into the fridge. You *must* chill this for at least four hours, but honestly? Overnight is where the magic really happens and the texture sets perfectly. Right before you serve it, sprinkle those mini marshmallows generously across the top. If you want that perfect melted, golden-brown look, pop it under a broiler for just 30 seconds—watch it like a hawk, though, because those marshmallows burn faster than you can say “hot cocoa!”
Tips for a Flawless Hot Cocoa Cheesecake
I know the cheesecake process can feel high-stakes, but honestly, most problems come down to tiny temperature issues. The biggest fear everyone has is cracks, and I have two non-negotiable rules for you to banish them forever. First, make sure your cream cheese and eggs are truly sitting out until they are room temperature. If they are cold, they won’t combine smoothly, and that rough batter cracks when it bakes. It’s just science!
Second, stick with the water bath, please! It’s messy, yes, but that steam is what keeps the heat gentle and even around the whole cake. That one hour of slow cooling inside the turned-off oven is just as important as the actual baking time. If you follow those steps, you’ll end up with the silkiest slice you’ve ever made. If your final texture seems a little soft, just give it more time in the fridge; cheesecake firms up beautifully overnight. A perfectly set cake means you’ve mastered making this velvety dessert!
Ingredient Notes and Substitutions for Hot Cocoa Cheesecake
I get asked all the time about ingredient swaps, especially on the crust. For the ultimate flavor payoff, use dark chocolate wafer crumbs, like Nabisco Famous Wafers, if you can find them. They have a really pure cocoa taste that complements the filling perfectly! Don’t try to use graham crackers here; it just won’t have that deep chocolate base we need for a true hot cocoa experience.
Now, about the heavy cream: If you find yourself in a bind, you *can* use an equal amount of whole milk, but you absolutely must cut back on the final cooling process, or the cheesecake might be a touch softer than the ideal. The cream adds essential richness that milk just can’t match for a baked cheesecake. For any recipe involving cream cheese, remember what I always say: room temperature makes all the difference!
Serving Suggestions for Your Hot Cocoa Cheesecake
Once you finally pull this glorious Hot Cocoa Cheesecake out of the fridge, you might think it can’t get any better. Oh, but it can! While the toasted marshmallows are the classic finish, sometimes you want an extra layer of texture or coolness, especially if you are serving it after a heavy meal.
This rich chocolate flavor pairs amazingly well with anything tart or bright. I love serving a small dollop of fresh, unsweetened whipped cream right next to the slice—it cuts through the richness beautifully. If you’re feeling extra fancy, a scattering of fresh raspberries or a few thin slices of orange zest brightens everything up!
And if you have anyone who pretends they aren’t a huge dessert fan, tempt them with a small scoop of good quality vanilla bean ice cream. That hot/cold contrast with a slice of this dense, cool cheesecake is just heavenly. It’s almost as good as dipping a chocolate chip cookie in it!

Storage and Reheating Instructions for Hot Cocoa Cheesecake
Luckily for us, cheesecake is one of those desserts that actually tastes better the second day! Once your Hot Cocoa Cheesecake is completely chilled—and I mean completely set—you need to protect that creamy top. Make sure you get it into an airtight container before it goes back into the fridge.
It stays perfectly lovely and firm for about five days when covered tightly. Honestly, I’ve rarely had leftovers pass the third day, especially if those marshmallows got toasted! If you do have leftovers when the marshmallows aren’t on top, they store just fine.
If you decide to freeze it, it’s best to do so *before* adding the marshmallows. Slice it first, wrap each slice tightly in plastic wrap, and then foil. It keeps beautifully for about a month. When you’re ready to eat it, just let it thaw slowly overnight in the fridge. It’s one of my favorite make-ahead desserts, far better than trying to frost something last minute. Check out these other great make-ahead ideas, like these easy bites!
Frequently Asked Questions About Hot Cocoa Cheesecake
I know when you look at a recipe this rich, you end up with a million little questions popping up in your head. That’s totally normal! Cheesecakes have a reputation for being fussy, but I promise this Hot Cocoa Cheesecake is much more forgiving than people think. Here are the questions I get asked the most often about getting that perfect, chocolatey slice.
Can I make this Hot Cocoa Cheesecake without a water bath?
Yes, you totally can skip the water bath if you absolutely dread dealing with the foil wrapping, but you have to be super careful. The water bath is what provides gentle, even heat, which keeps the cheesecake from baking too fast on the edges and cracking in the center. If you skip it, you need to bake lower and slower. I’d drop the oven temperature down to 300 degrees F, and watch it like a hawk. Keep checking on it after 40 minutes. If you see the edges setting too fast, you can even lightly tent the top with foil to block some direct heat. It just won’t be quite as velvety as the water-bathed version, but it’ll still be delicious chocolate cheesecake!
How long does the Hot Cocoa Cheesecake need to chill?
This is non-negotiable, my friend. You have to let it chill! The recipe calls for a minimum of four hours, and you should always meet that minimum. That time lets the internal structure firm up so you can get a clean slice that doesn’t slump over the plate. But listen to me: if you can manage it, leave that chocolate cheesecake in the fridge overnight. Seriously. The flavor deepens, the texture firms up to that perfect, dense, dreamy consistency, and it’s just a million times better the next day. It’s worth the wait!
Can I use Oreos instead of chocolate wafers for the crust?
Oh, absolutely! Don’t stress if you can’t find plain chocolate wafers; Oreos (with the cream filling still inside!) work wonderfully for this crust. They add a nice little textural surprise. Because the cream filling in Oreos contains some fat, you might find your crust is a tiny bit softer at first. To adjust, I usually cut back the melted butter by about a tablespoon when I use Oreos. Just mix it up, and if it still seems crumbly, add just enough melted butter until it holds together nicely when you press it into the pan. It makes for a great, super-easy cheesecake crust!
Estimated Nutritional Information for Hot Cocoa Cheesecake
I pulled together the estimated nutrition breakdown so you can plan accordingly, but keep in mind these numbers fluctuate based on exact brands of cream cheese and cocoa powder you use. It is a rich dessert, so enjoy every bite! For one slice, you are generally looking at about 400 calories, about 25 grams of fat to make it wonderfully creamy, and around 40 grams of carbohydrates. It really packs a punch flavor-wise!
Share Your Hot Cocoa Cheesecake Creations
I absolutely love seeing your kitchen adventures! When you make this amazing Hot Cocoa Cheesecake, please snap a picture and tag me. Did you toast those marshmallows perfectly? Did you manage to wait until the next day to slice into it? Let me know how it went down in the comments below! Your feedback honestly helps other bakers feel more confident trying out new recipes. If you loved how easy this was, please give the recipe a rating so everyone knows this is the only chocolate cheesecake they need!
If you have any specific cooking questions I didn’t cover here, don’t hesitate to reach out via the contact page. Happy baking!
Estimated Nutritional Information for Hot Cocoa Cheesecake
I pulled together the estimated nutrition breakdown so you can plan accordingly, but keep in mind these numbers fluctuate based on exact brands of cream cheese and cocoa powder you use. It is a rich dessert, so enjoy every bite! For one slice, you are generally looking at about 400 calories, about 25 grams of fat to make it wonderfully creamy, and around 40 grams of carbohydrates. It really packs a punch flavor-wise! You can find more info on how ingredients like fruit sugar compare to this sweet treat!
Share Your Hot Cocoa Cheesecake Creations
I absolutely love seeing your kitchen adventures! When you make this amazing Hot Cocoa Cheesecake, please snap a picture and tag me. Did you toast those marshmallows perfectly? Did you manage to wait until the next day to slice into it? Let me know how it went down in the comments below! Your feedback honestly helps other bakers feel more confident trying out new recipes. If you loved how easy this was, please give the recipe a rating so everyone knows this is the only chocolate cheesecake they need!
If you have any specific cooking questions I didn’t cover here, don’t hesitate to reach out via the contact page. Happy baking!
Print
Hot Cocoa Cheesecake
- Total Time: 1 hour 20 min
- Yield: 10 servings 1x
- Diet: Vegetarian
Description
A rich, creamy cheesecake with a chocolate crust, flavored like hot cocoa.
Ingredients
- 1 1/2 cups chocolate wafer crumbs
- 1/4 cup granulated sugar
- 6 tablespoons unsalted butter, melted
- 2 (8 ounce) packages cream cheese, softened
- 1 cup granulated sugar
- 1/4 cup unsweetened cocoa powder
- 1 teaspoon vanilla extract
- 1/4 teaspoon salt
- 2 large eggs
- 1/2 cup heavy cream
- 1/2 cup mini marshmallows (for topping)
Instructions
- Preheat your oven to 350 degrees F (175 degrees C). Wrap the bottom of a 9-inch springform pan in heavy-duty aluminum foil.
- Combine chocolate wafer crumbs and 1/4 cup sugar in a bowl. Mix in melted butter until crumbs are moistened. Press the mixture firmly into the bottom of the prepared springform pan.
- Bake the crust for 10 minutes. Remove from the oven and let it cool slightly. Reduce oven temperature to 325 degrees F (160 degrees C).
- In a large bowl, beat the softened cream cheese until smooth. Gradually beat in 1 cup sugar, cocoa powder, vanilla extract, and salt until well combined.
- Beat in the eggs one at a time, mixing just until incorporated after each addition. Stir in the heavy cream.
- Pour the filling over the cooled crust. Place the springform pan in a larger baking pan. Pour hot water into the larger pan to reach halfway up the sides of the springform pan (this is a water bath).
- Bake for 45 to 55 minutes, or until the edges are set and the center is slightly jiggly.
- Turn off the oven, crack the door open, and let the cheesecake cool in the oven for 1 hour.
- Remove the cheesecake from the water bath and cool completely on a wire rack. Refrigerate for at least 4 hours, or preferably overnight.
- Before serving, sprinkle mini marshmallows over the top. You can briefly place it under a broiler for 30 seconds to toast the marshmallows, watching carefully.
Notes
- For a smoother texture, bring the cream cheese and eggs to room temperature before starting.
- If you do not want to use a water bath, bake the cheesecake without it, but watch closely to prevent cracking.
- Prep Time: 20 min
- Cook Time: 60 min
- Category: Dessert
- Method: Baking
- Cuisine: American
Nutrition
- Serving Size: 1 slice
- Calories: 400
- Sugar: 35
- Sodium: 250
- Fat: 25
- Saturated Fat: 15
- Unsaturated Fat: 10
- Trans Fat: 0.5
- Carbohydrates: 40
- Fiber: 2
- Protein: 7
- Cholesterol: 90
Keywords: cheesecake, hot cocoa, chocolate, dessert, baked